
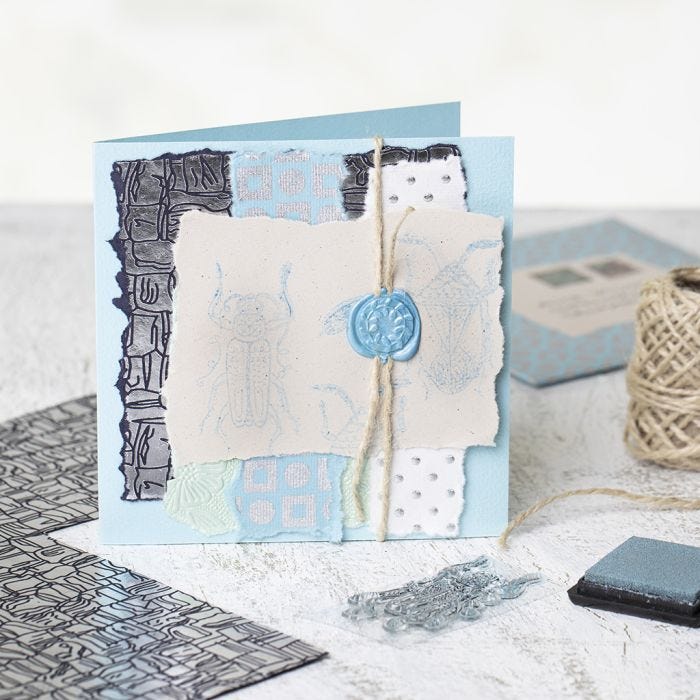
A homemade Greeting Card with handmade Paper, stamped Designs and a waxed Seal
#v15597
This greeting card is made from a piece of card decorated with handmade paper. It is decorated further with stamped designs and a waxed seal.
#v15597
How to do it Download the templates/recipes
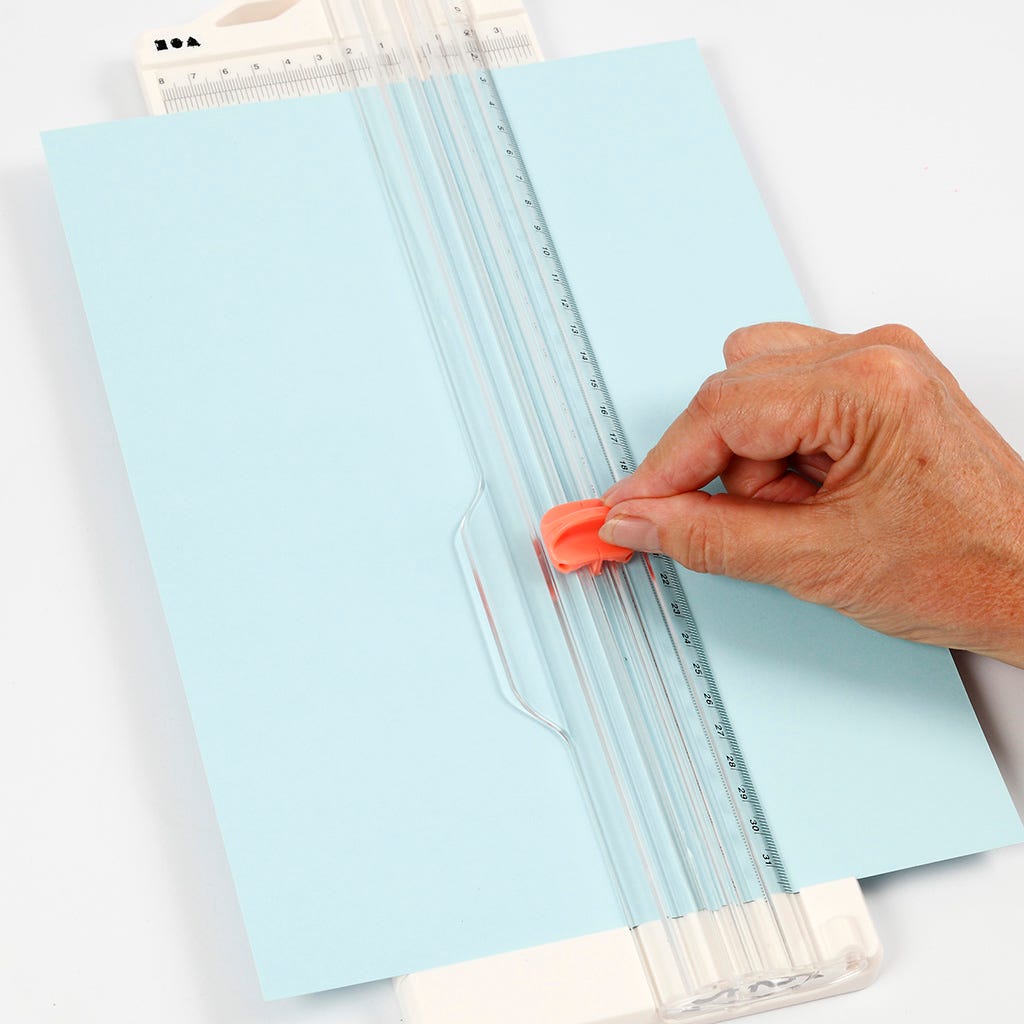
1 Cut a piece of card to make a square when it's folded in the middle. The measurement could be, for example, 12 x 24 cm.
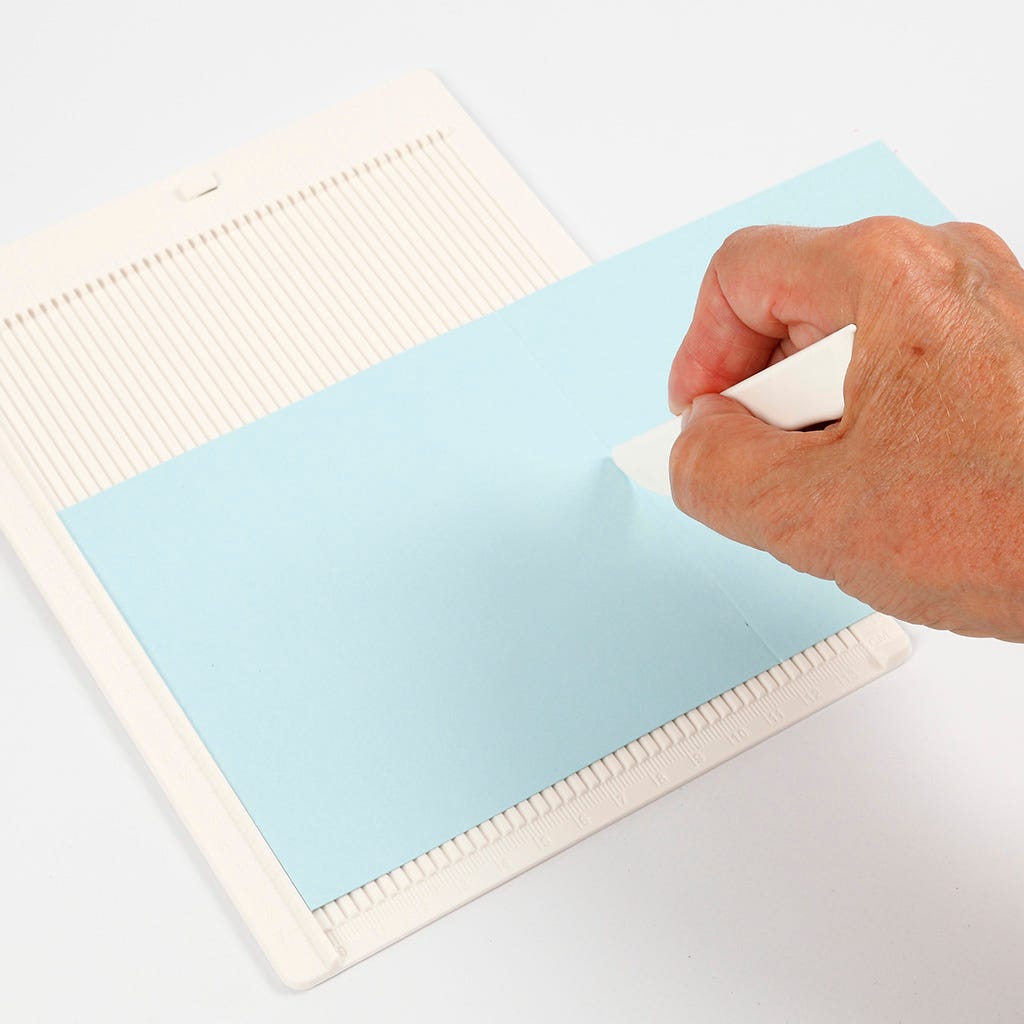
2 Use the grooves on the back of the scoring board and score along the middle of the card for folding.
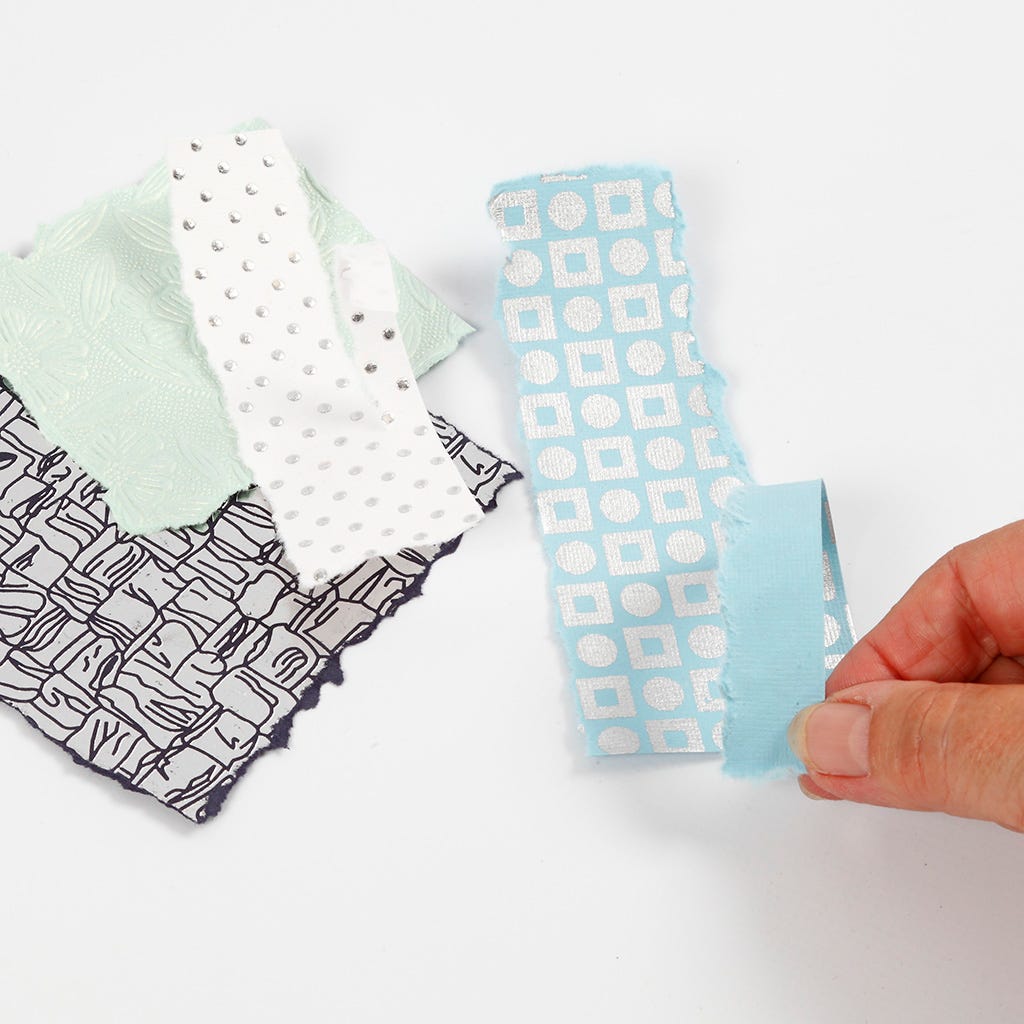
3 Tear small pieces of handmade paper. Tear the right-hand-side towards you, so that the plain back is visible along the edge.
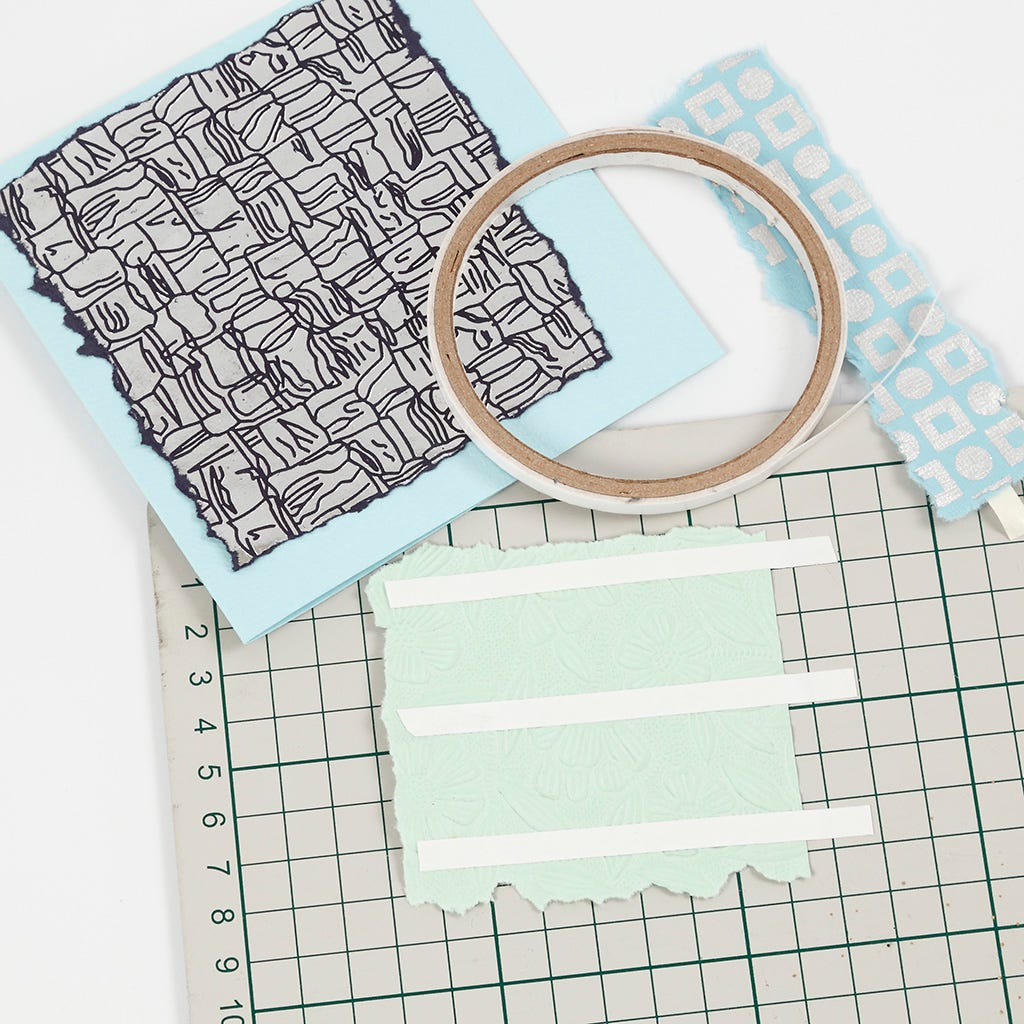
4 Attach the torn pieces of paper onto the front of the greeting card with double-sided adhesive tape.
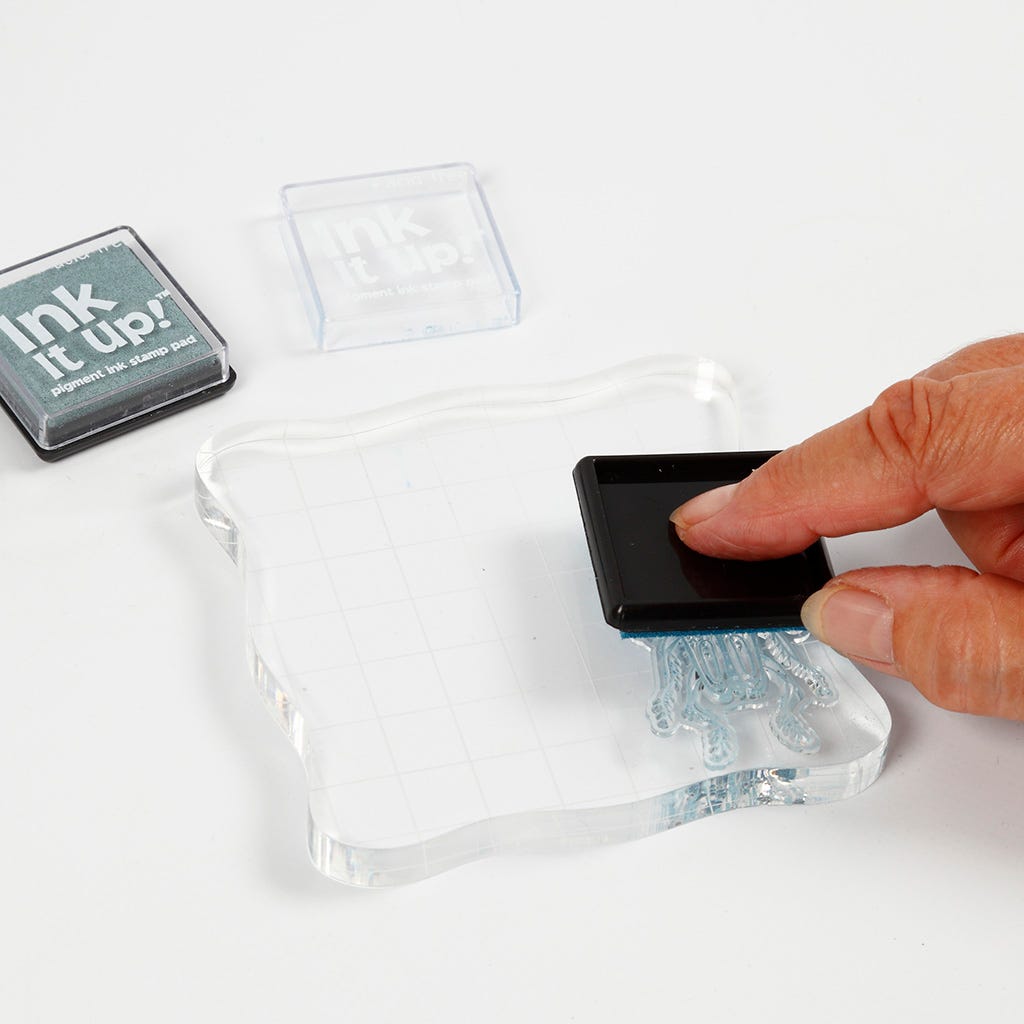
5 Attach a silicone stamp onto the acrylic block and dab an ink pad onto the silicone stamp until the design is completely covered with ink.
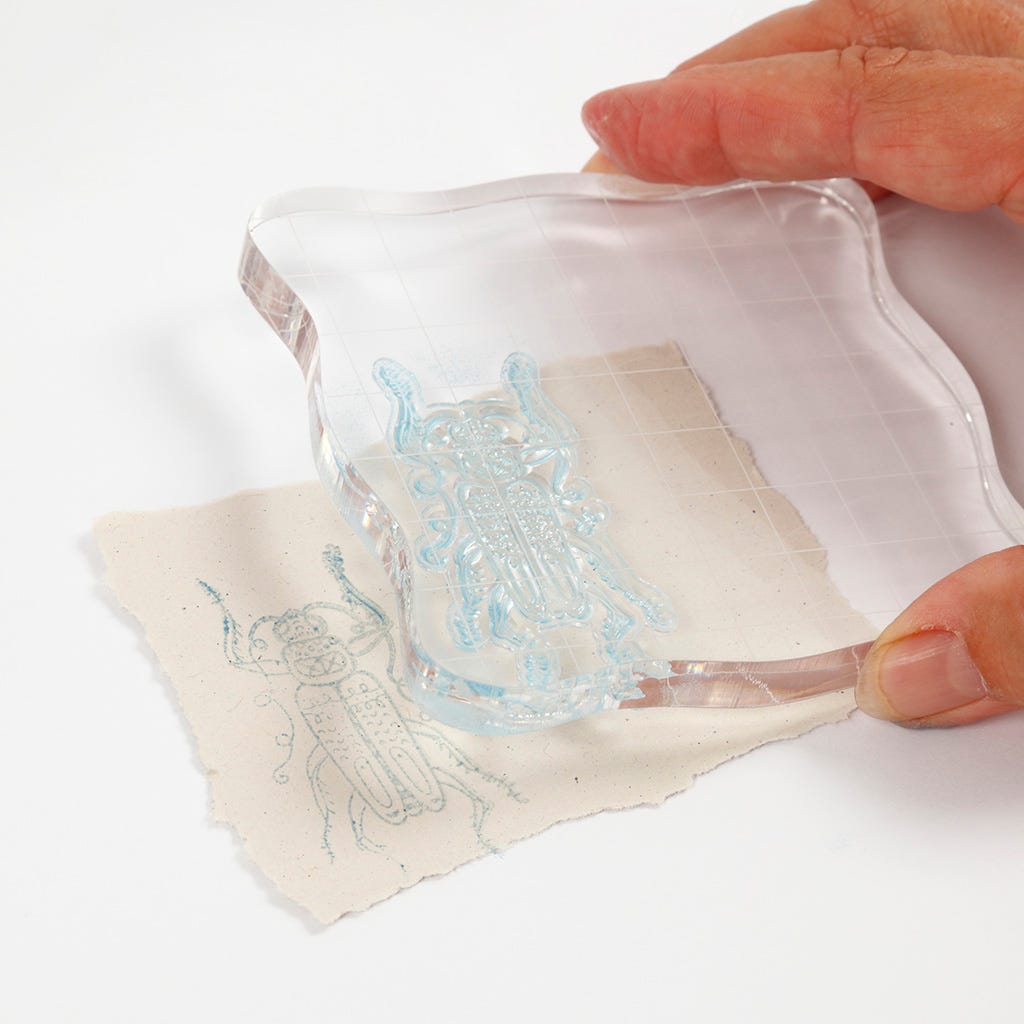
6 Push the stamp onto a torn piece of light kraft paper and attach paper with the stamped design onto the front of the greeting card.
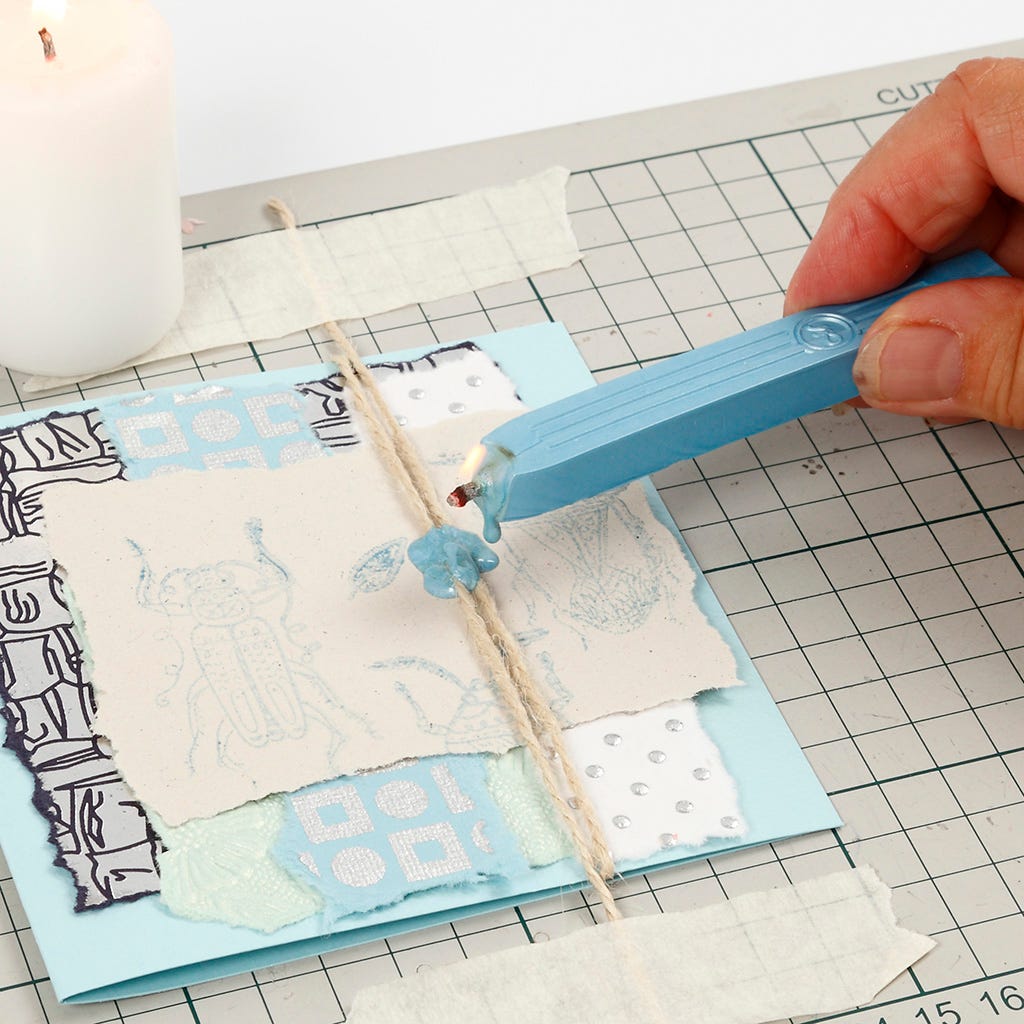
7 Wrap a piece of natural hemp twice around the front of the greeting card and secure the ends onto an underlay as shown in the photo. Drip wax onto the middle of the natural hemp.
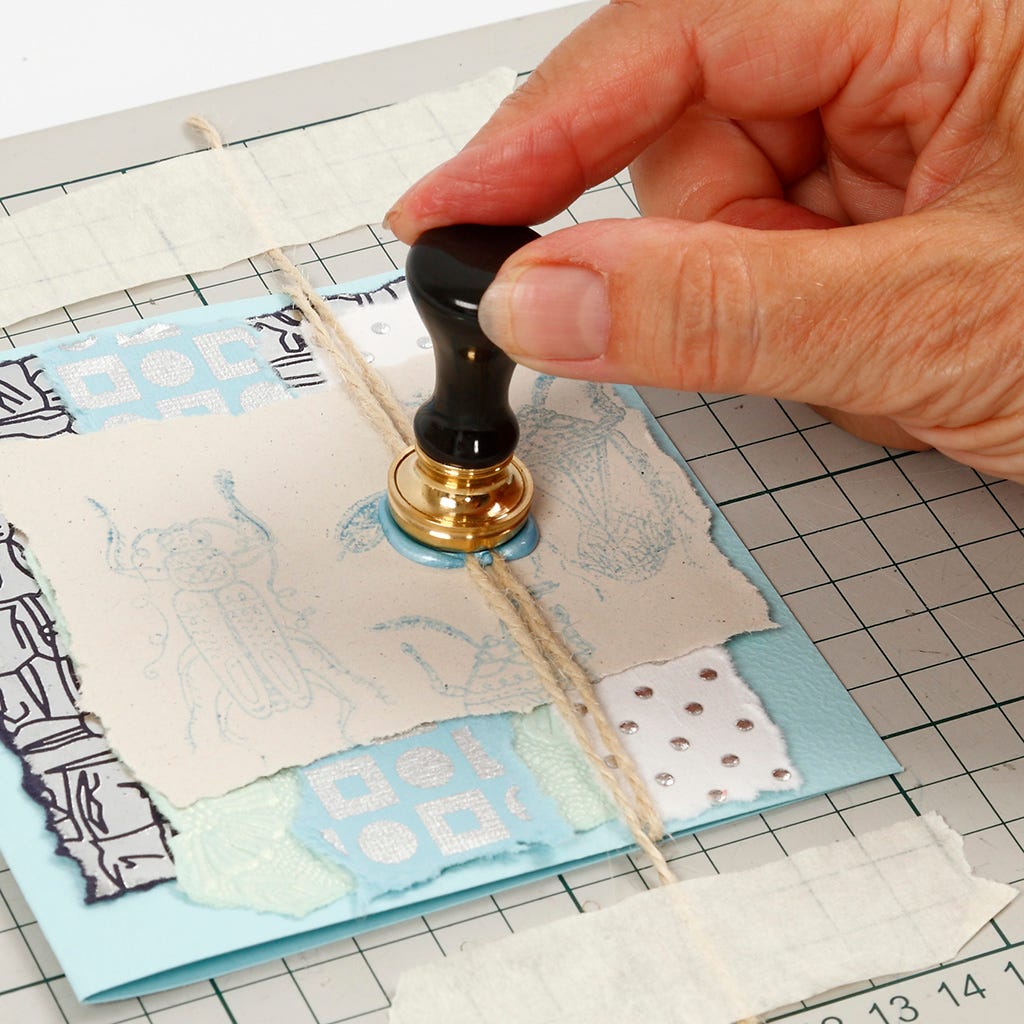
8 Push the seal into the wax. Don't remove the seal until the wax has hardened.
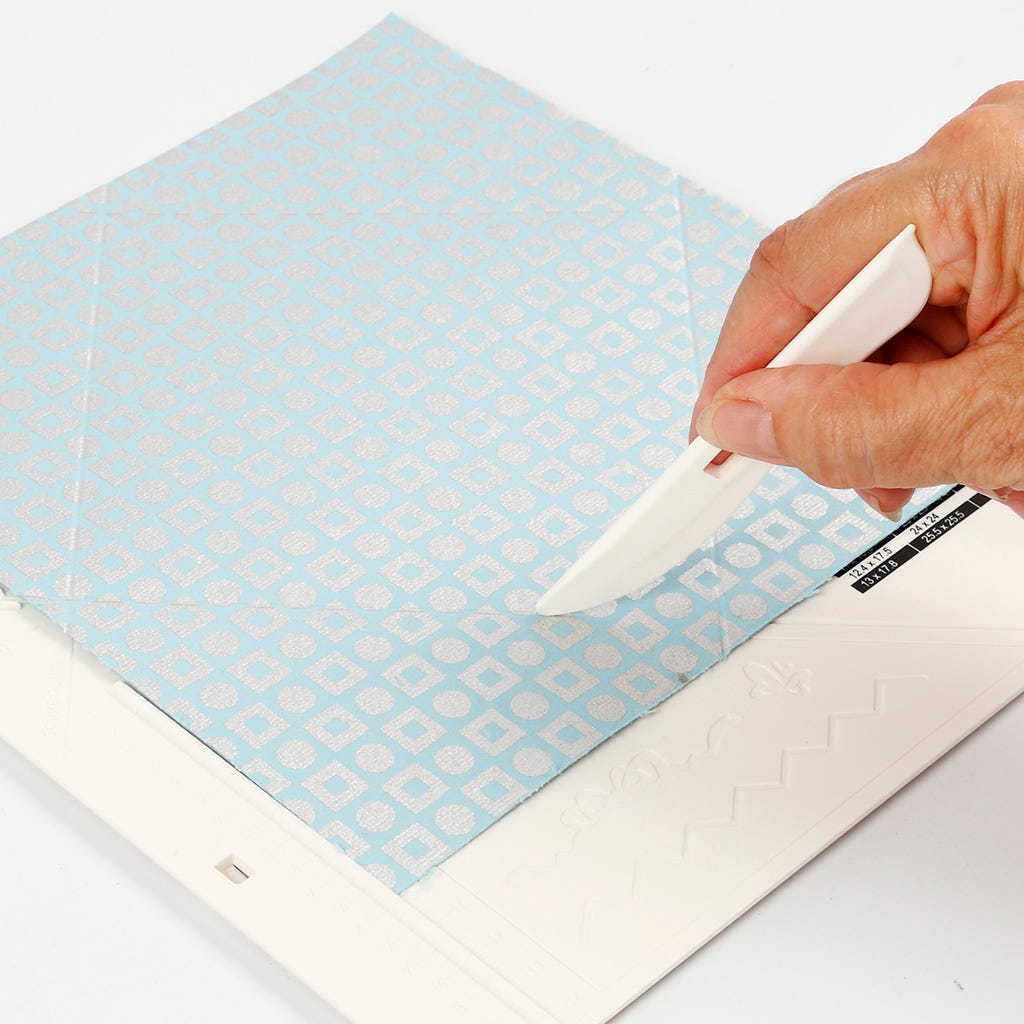
9 Make an envelope from a 20.5 x 20.5 cm piece of handmade paper. Place the paper along the scale on the left at 10.2 cm on the scoring board. Score in the groove diagonally. Repeat on all four sides.
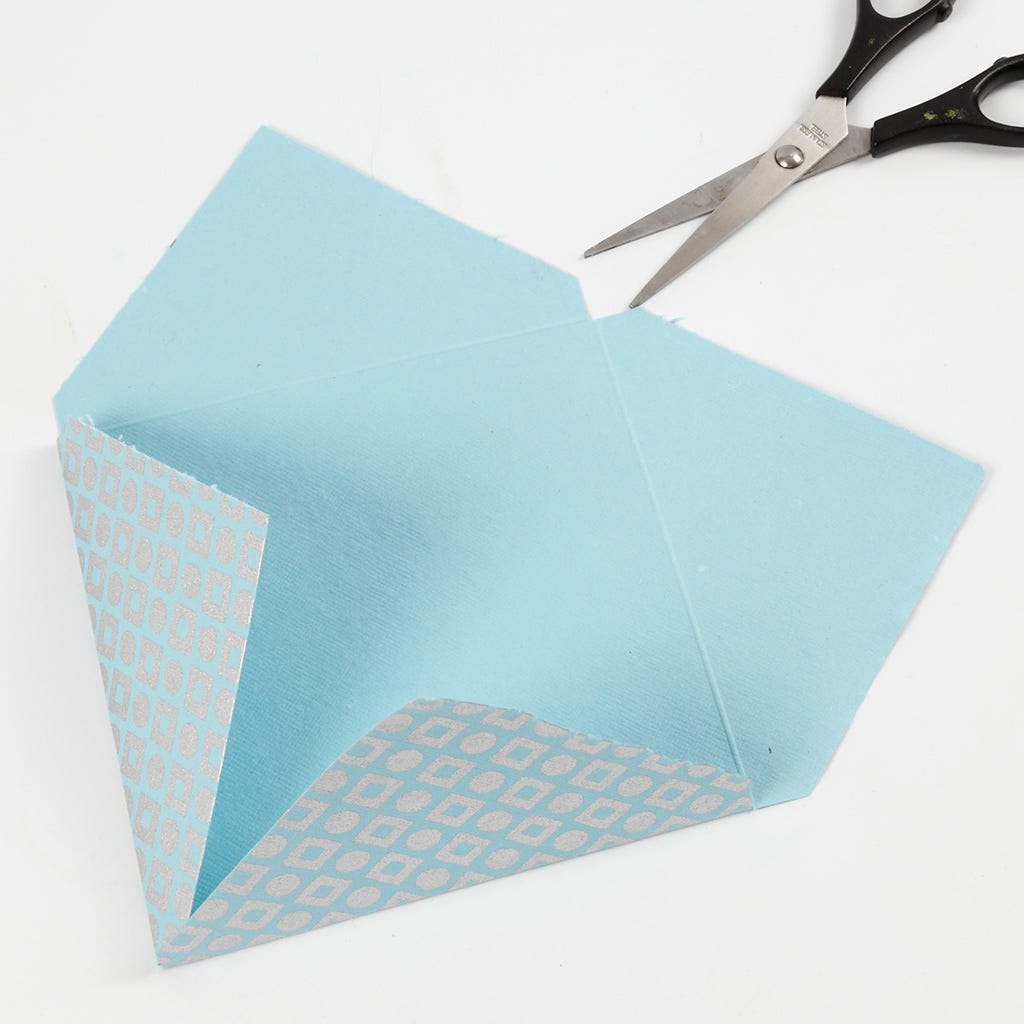
10 Cut notches where the lines cross and fold the envelope. Alternatively, you may use the supplied paper punch for punching the corners.

11 Secure the envelope with a piece of doubled-over natural hemp, wax and seal.
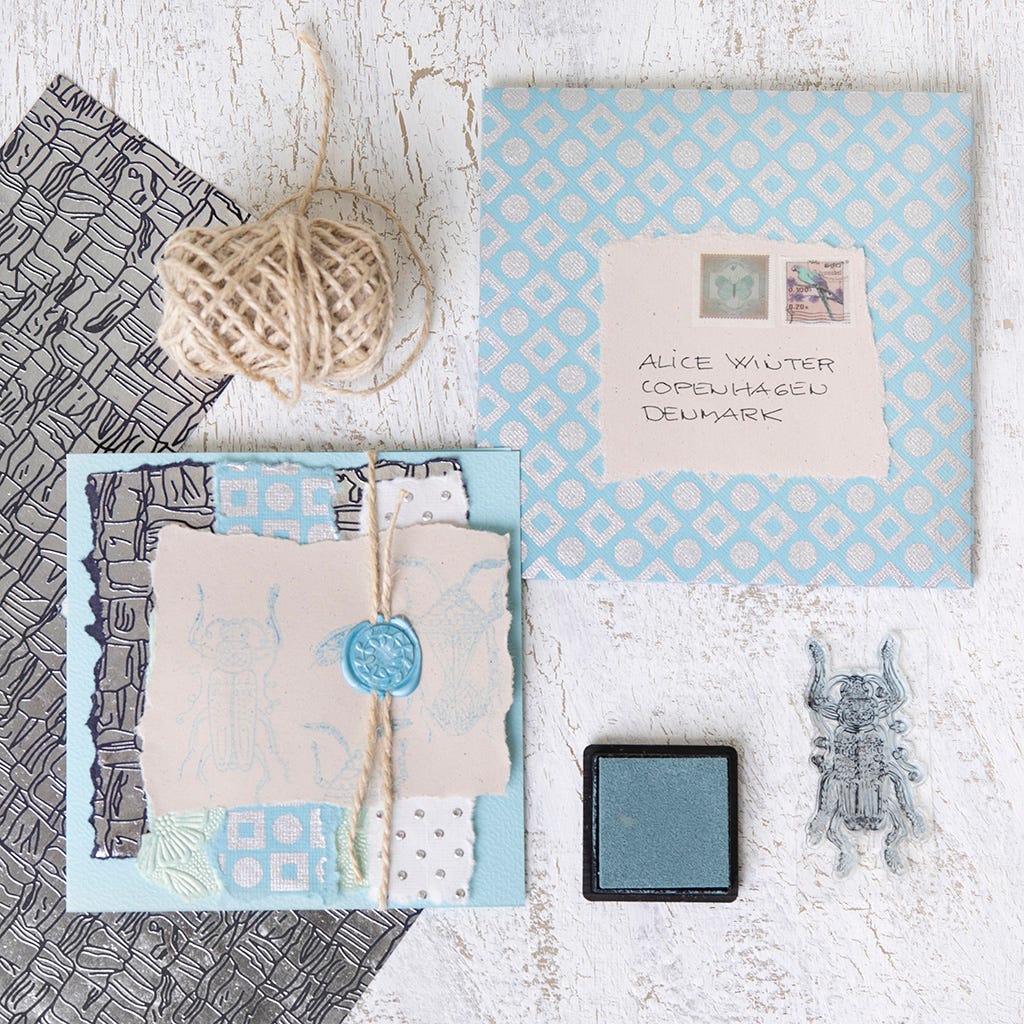
12 Tear a piece of kraft paper for the front of the envelope for writing name and address. You may decorate further with masking tape with a stamp design.
Already signed up? Download the template
Also go exploring in
