
New
Creative idea
Illustrationer farvelagt efter paint by numbers teknik
#v17032
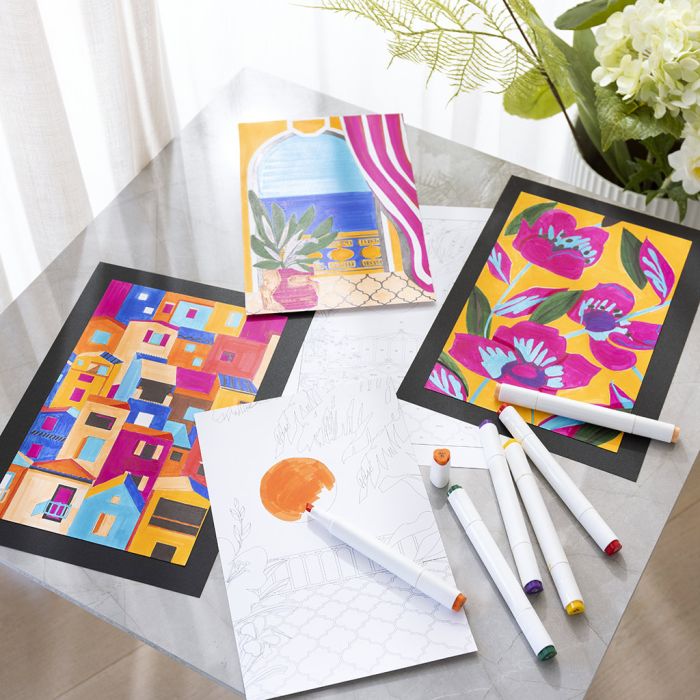
Create these beautiful works of art using the simple paint-by-number technique. Follow the numbers, immerse yourself in the process – and watch your creations come alive. You can create depth, shade and bring the designs to life in a whole new way. To make the colours even more eye-catching, the finished pictures can be mounted on the cardboard provided.
#v17032
How to do it Download the templates/recipes
1  You might want to make a colour chart before you start drawing with the markers. First colour the square with one layer.
You might want to make a colour chart before you start drawing with the markers. First colour the square with one layer.2 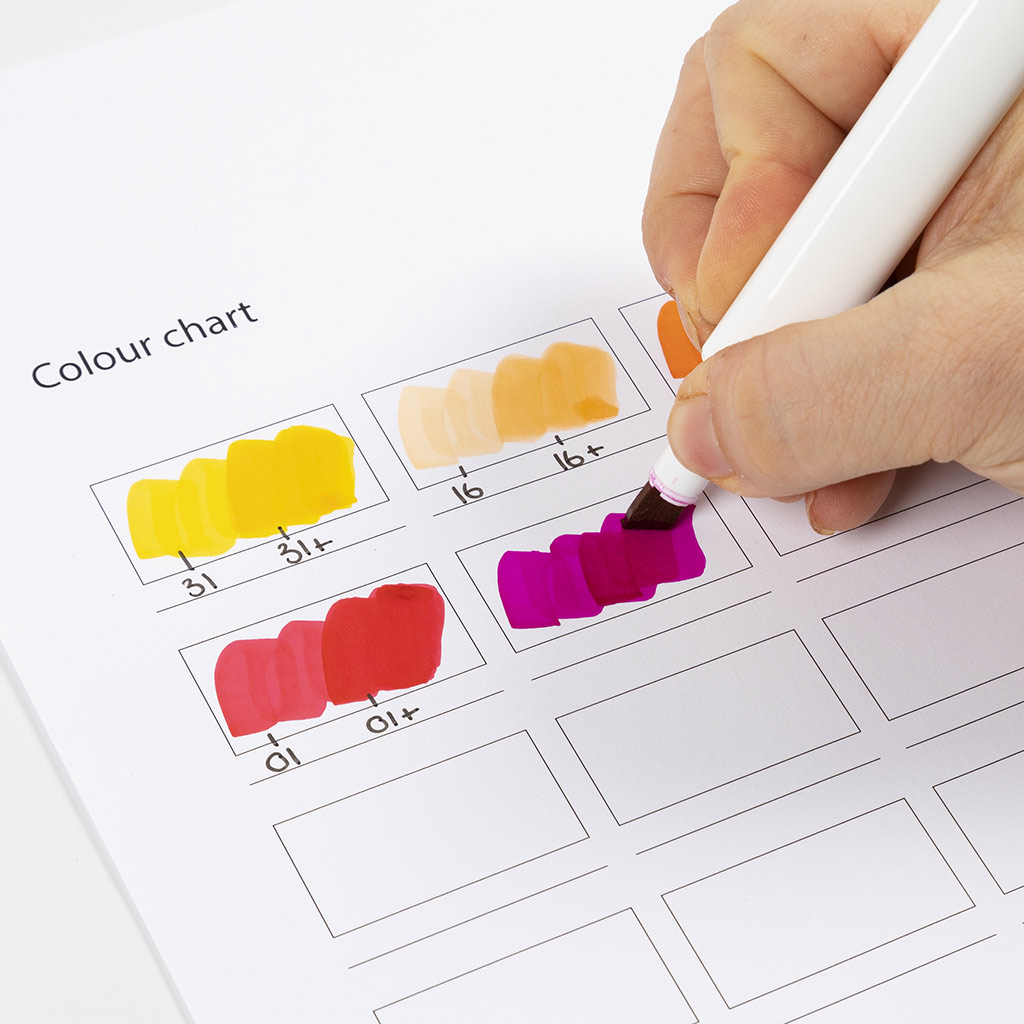 Now colour half the square with two layers.
Now colour half the square with two layers.3 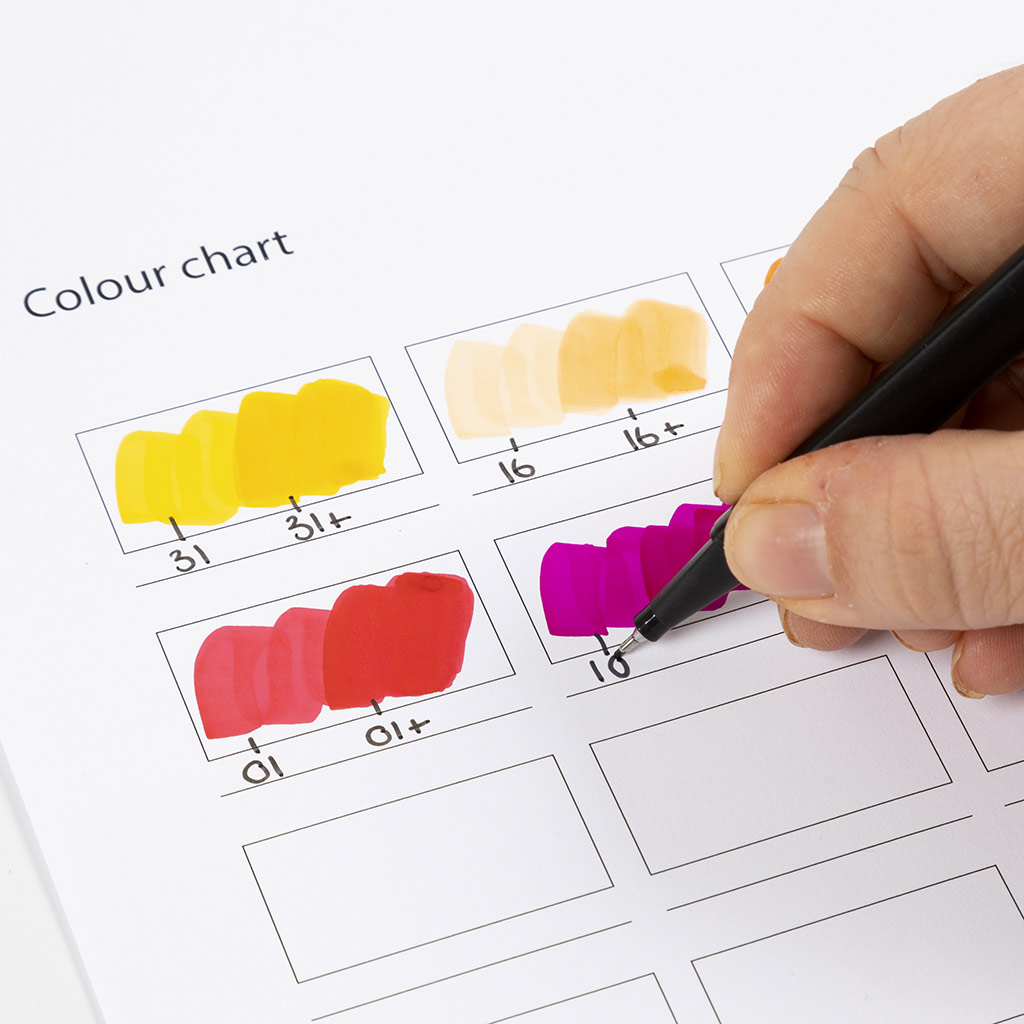 Write the marker number where there is one layer. Write the marker number followed by a plus (+) where there are multiple layers. Do this for all colours.
Write the marker number where there is one layer. Write the marker number followed by a plus (+) where there are multiple layers. Do this for all colours.4 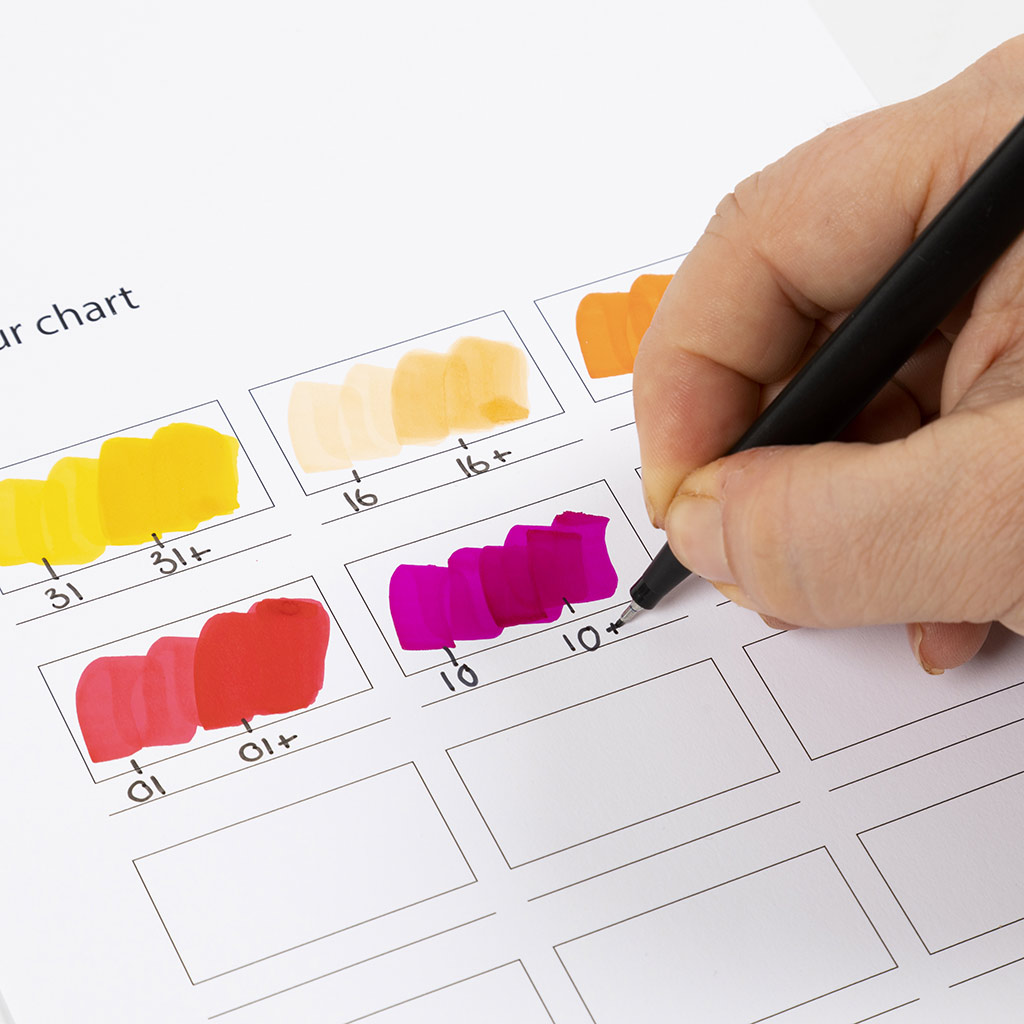 Write 10+ under the one with multiple layers.
Write 10+ under the one with multiple layers.5 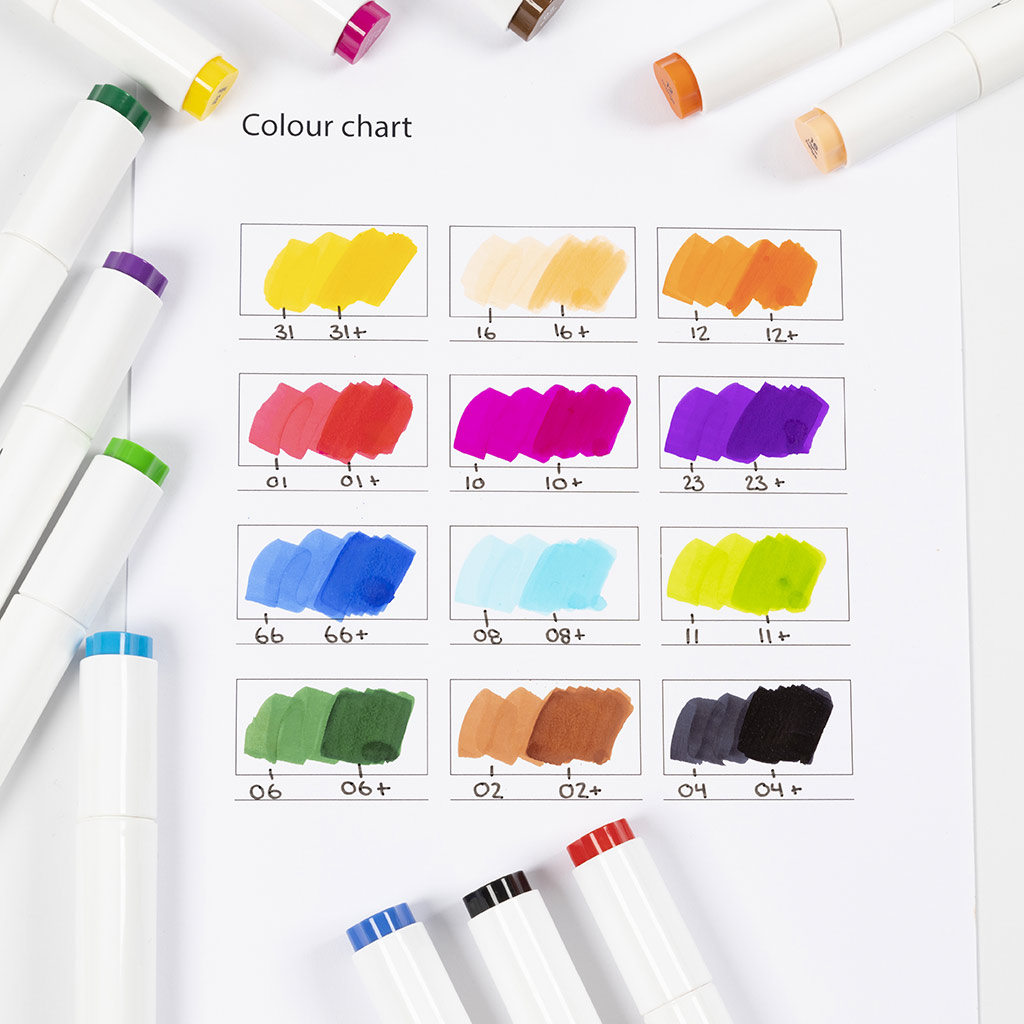 This is what the colour chart looks like when all markers have been used.
This is what the colour chart looks like when all markers have been used.6 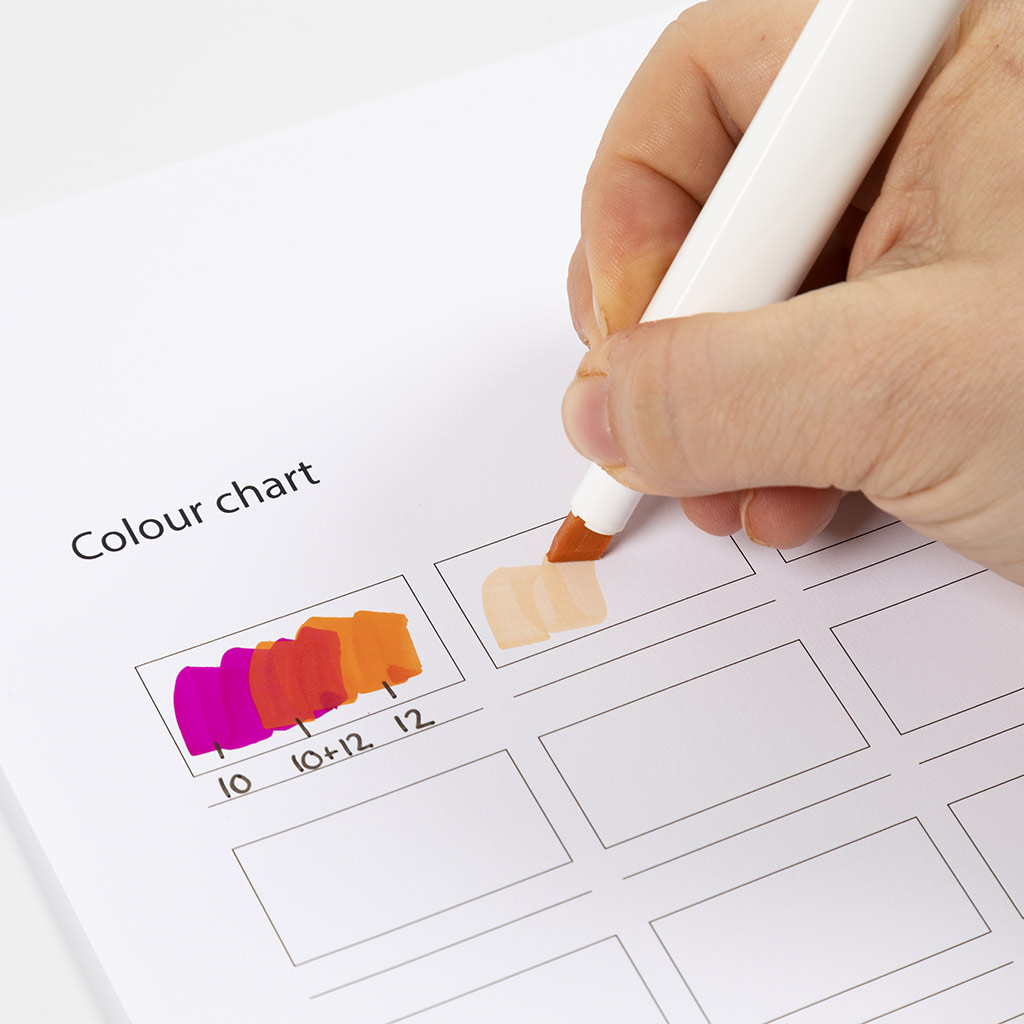 Now make another colour chart with colour combinations. Start by colouring two thirds of the square from left to right (in this example, colour 16 is used).
Now make another colour chart with colour combinations. Start by colouring two thirds of the square from left to right (in this example, colour 16 is used).7 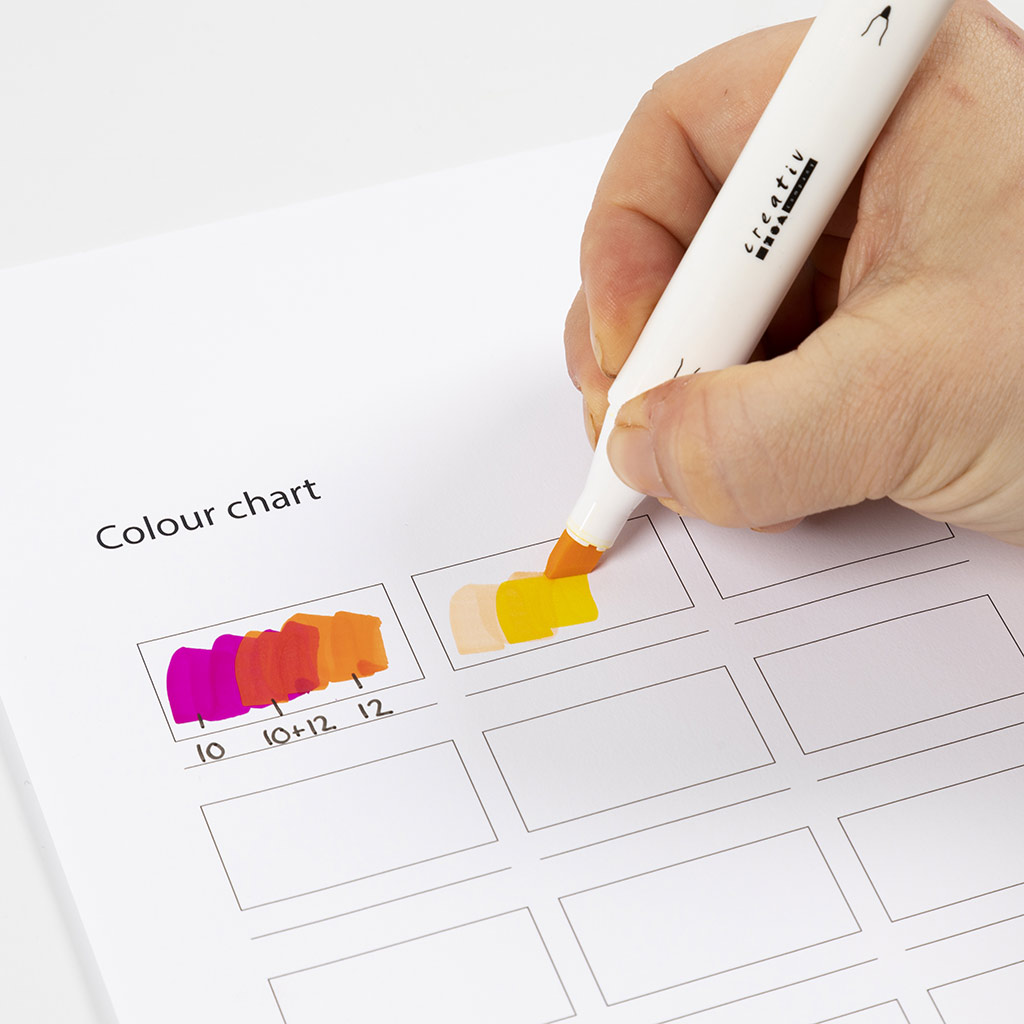 Now take the second colour, which is 31 in this example, and shade two thirds of the square from the middle to the right.
Now take the second colour, which is 31 in this example, and shade two thirds of the square from the middle to the right.8 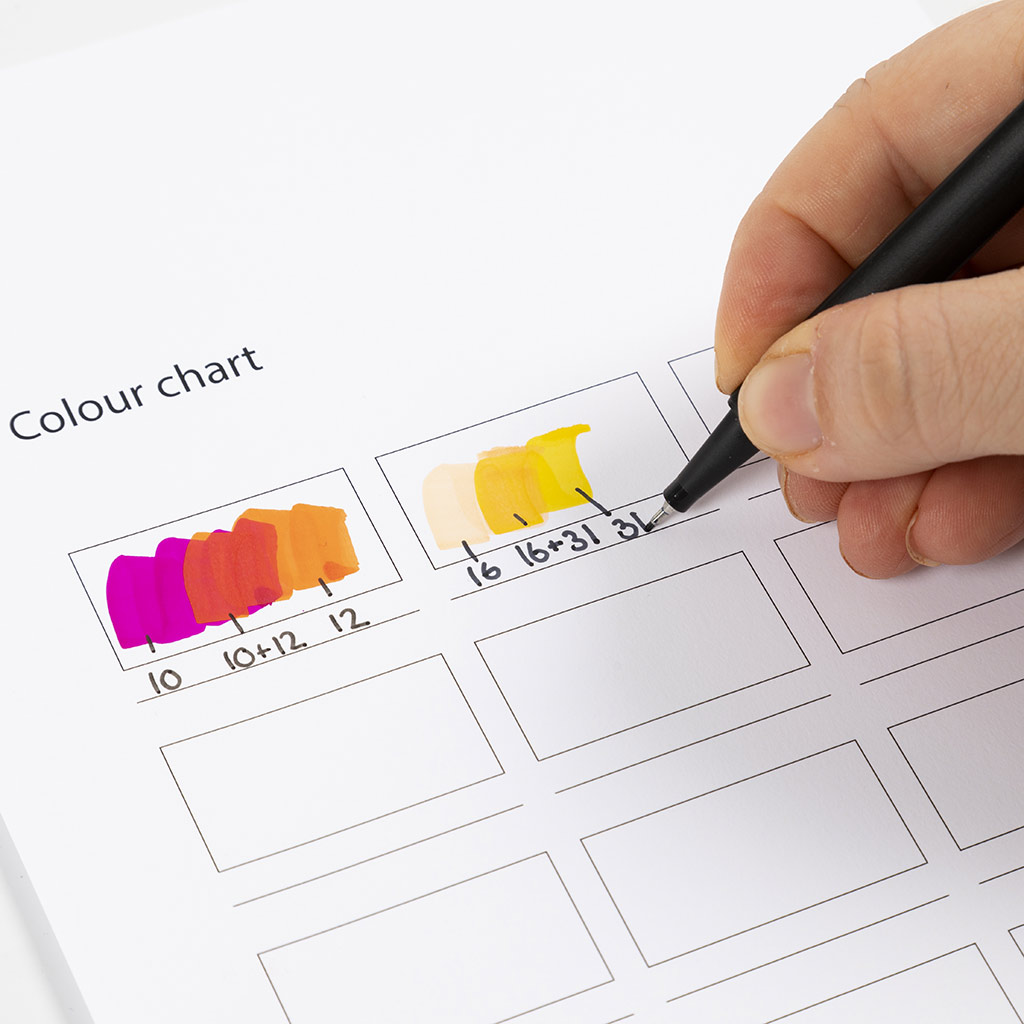 Write the number of each marker according to the colour. In this example, the marker used first was 16 , so 16+31 shows the colour that results when the two colours are mixed. The final colour is 31. The guide contains mixed colours, such as 16-31.
Write the number of each marker according to the colour. In this example, the marker used first was 16 , so 16+31 shows the colour that results when the two colours are mixed. The final colour is 31. The guide contains mixed colours, such as 16-31.9 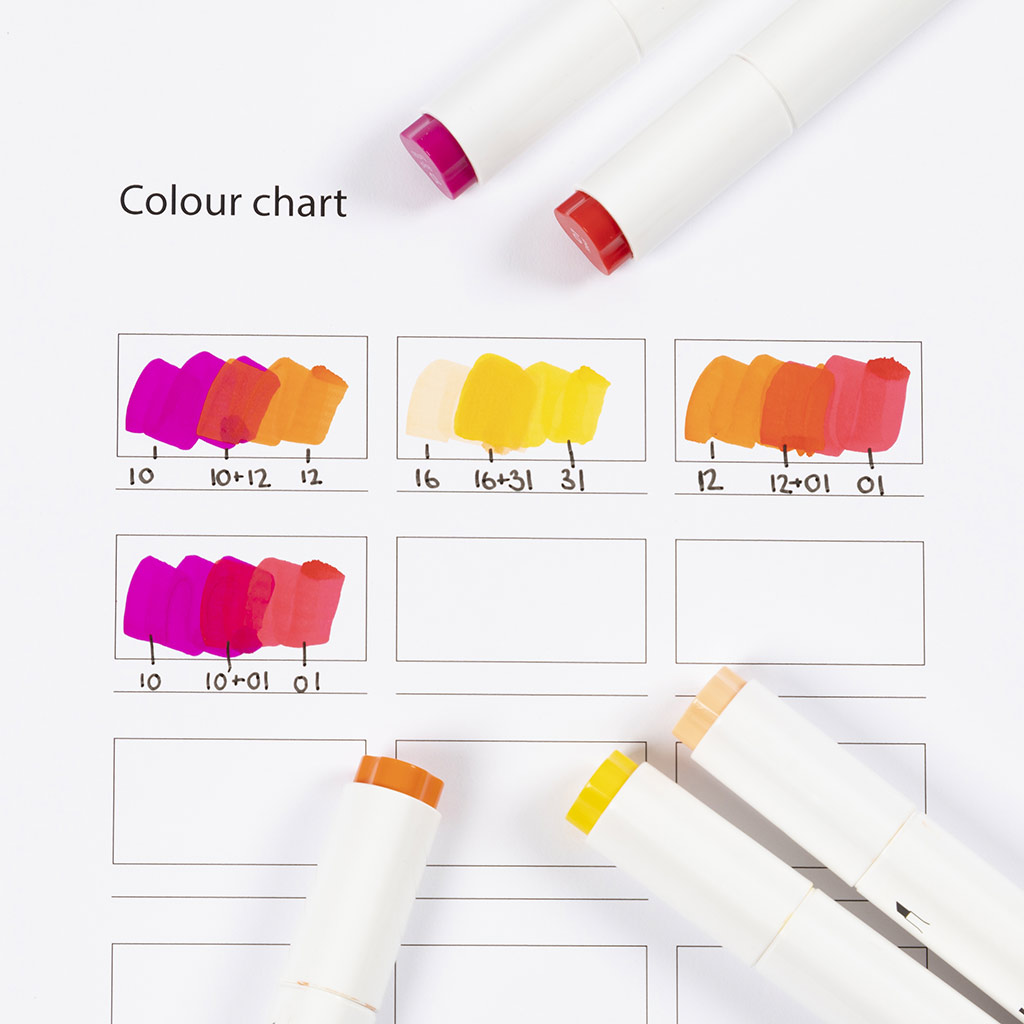 This is what the colour chart looks like with colour combinations used in the guide.
This is what the colour chart looks like with colour combinations used in the guide.10 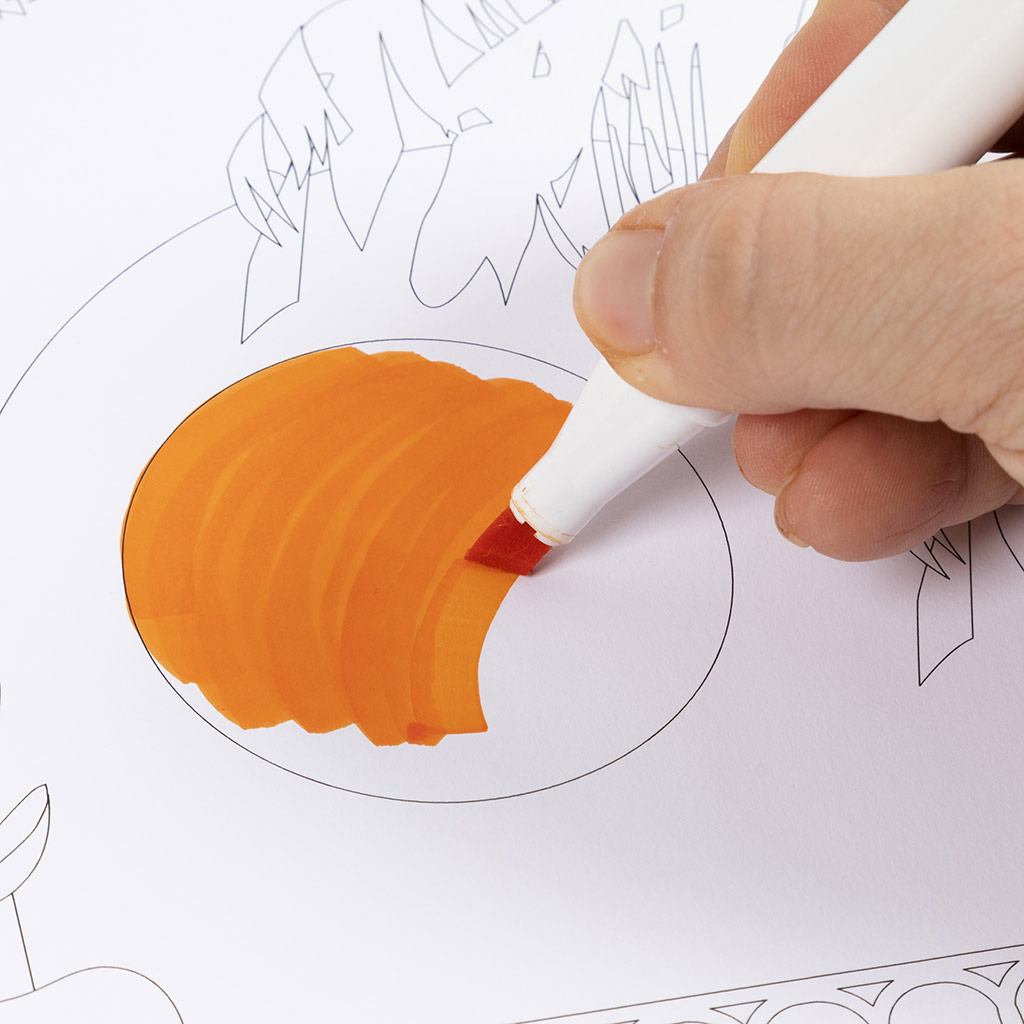 Colour in the large areas with the thick end of the marker.
Colour in the large areas with the thick end of the marker.11  Use the thin end of the marker along the edges and in the smaller areas.
Use the thin end of the marker along the edges and in the smaller areas.12 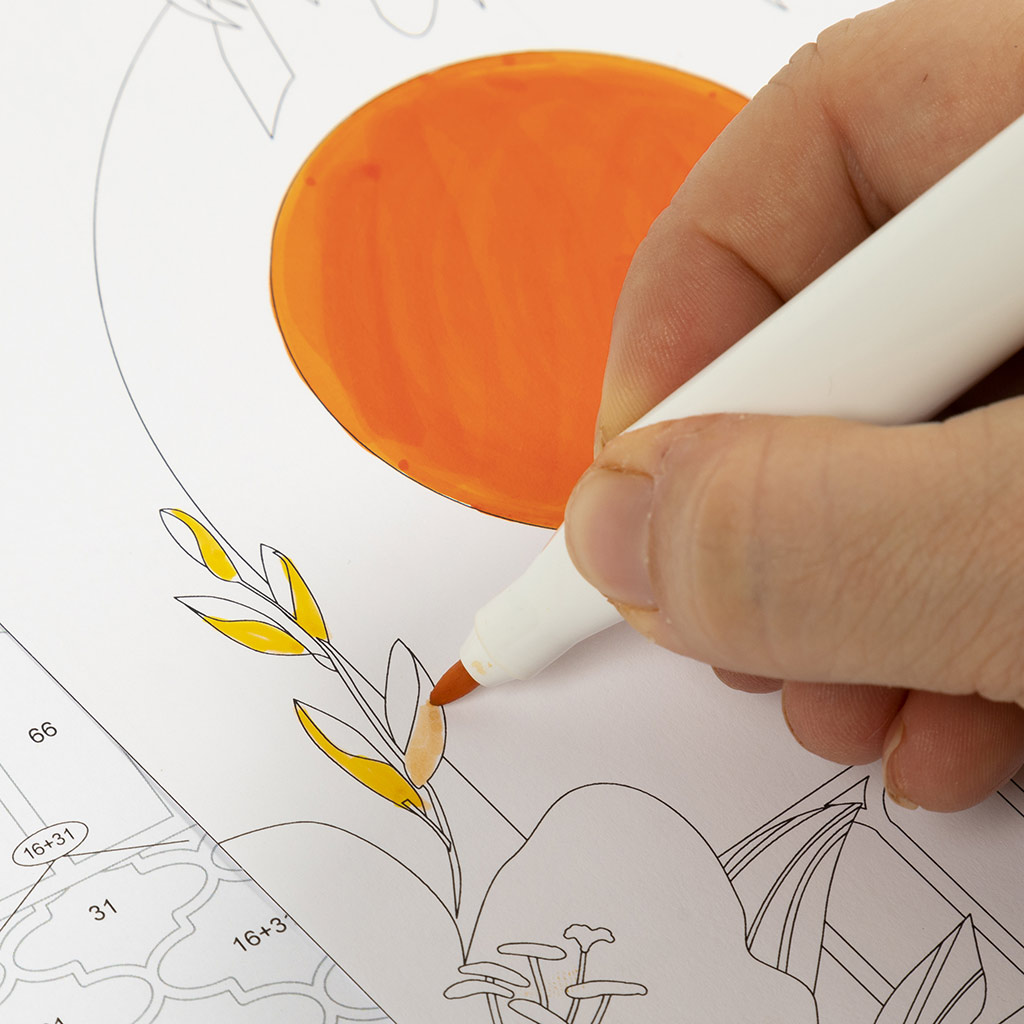 For example, if the instructions say 16+31, this means that you first colour with 16 and then 31.
For example, if the instructions say 16+31, this means that you first colour with 16 and then 31.13 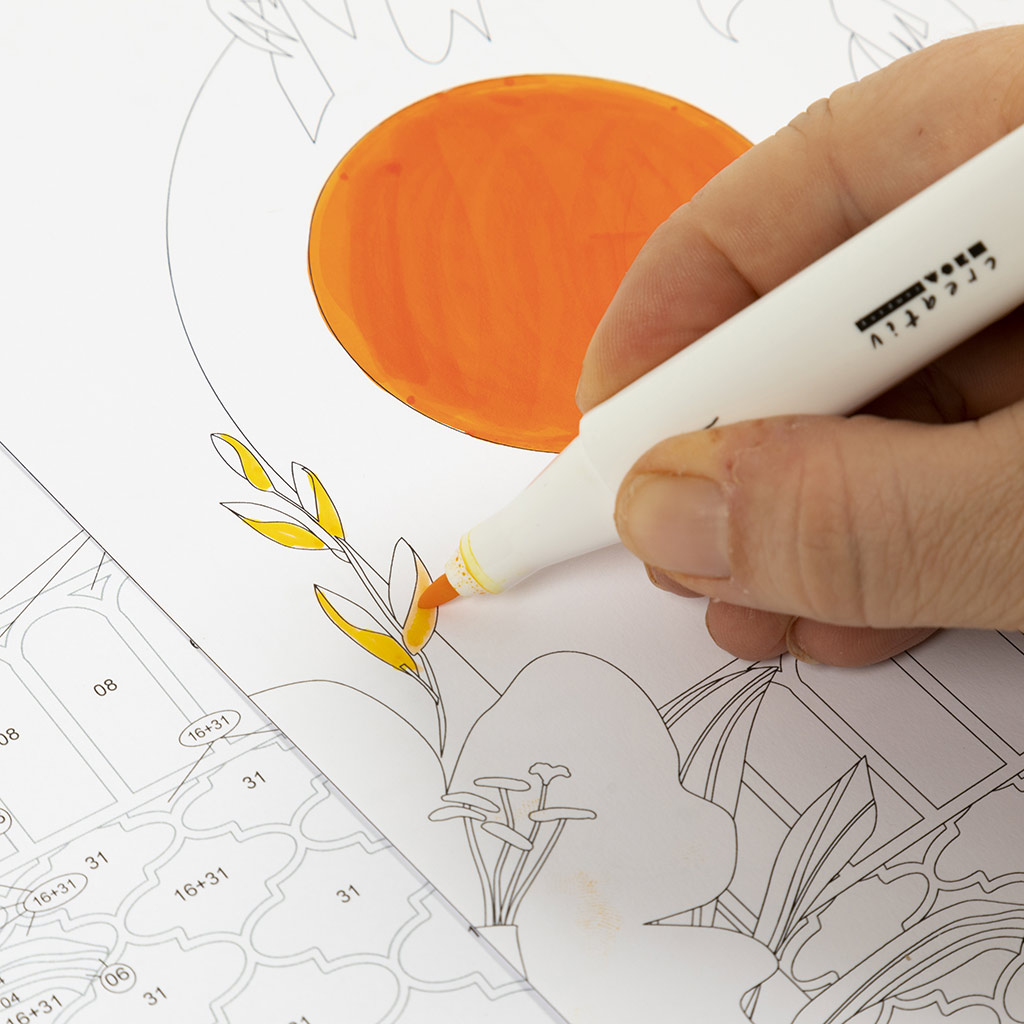 Colour with marker 31 where you have just coloured with marker 16.
Colour with marker 31 where you have just coloured with marker 16.14 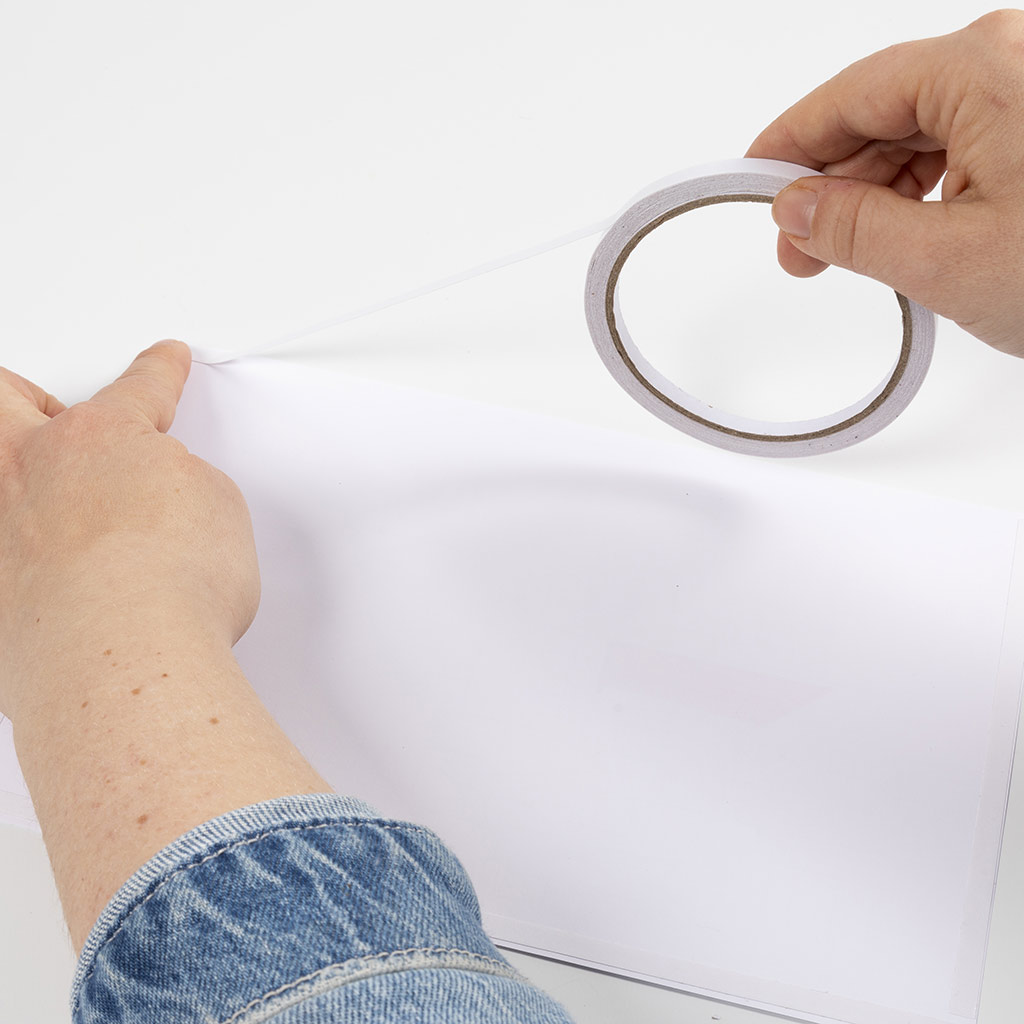 Apply double-sided adhesive tape along the edges on the back of the illustration.
Apply double-sided adhesive tape along the edges on the back of the illustration.15 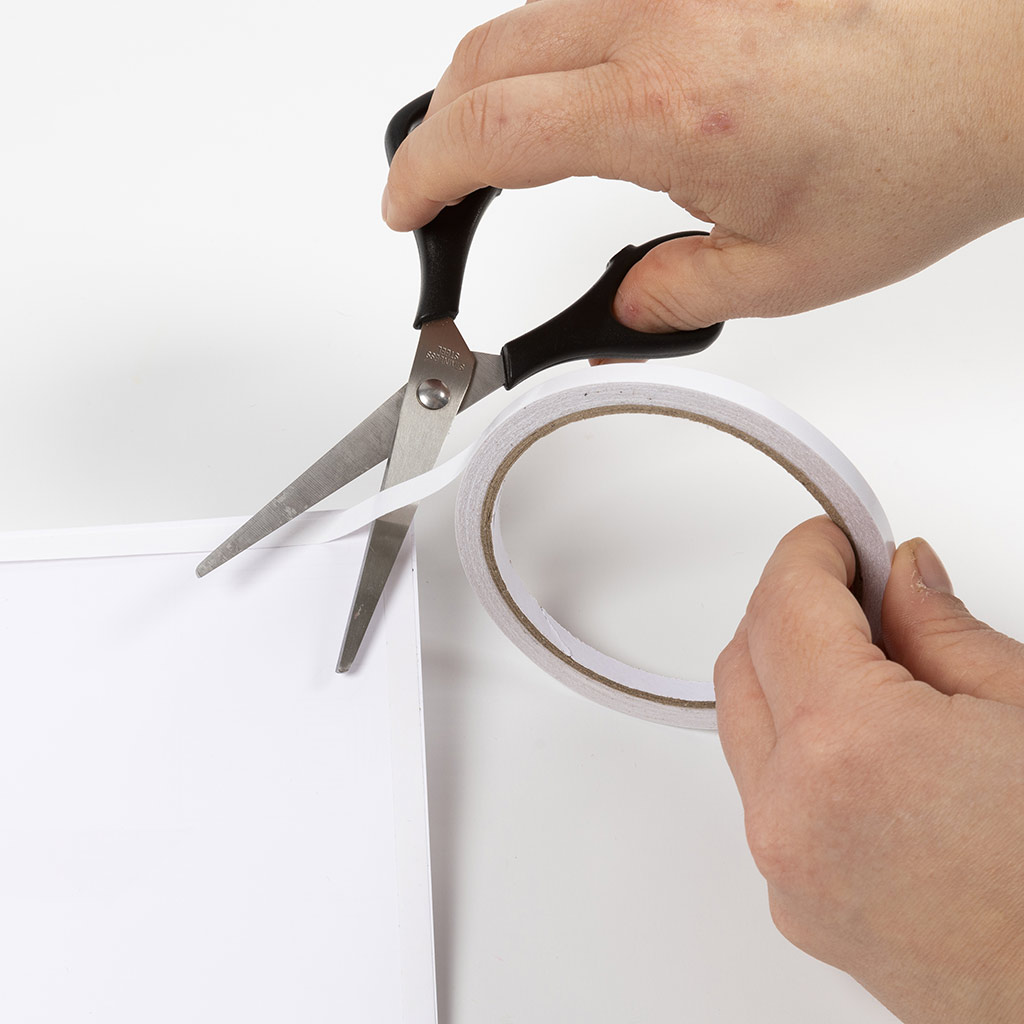 Cut to size.
Cut to size.16 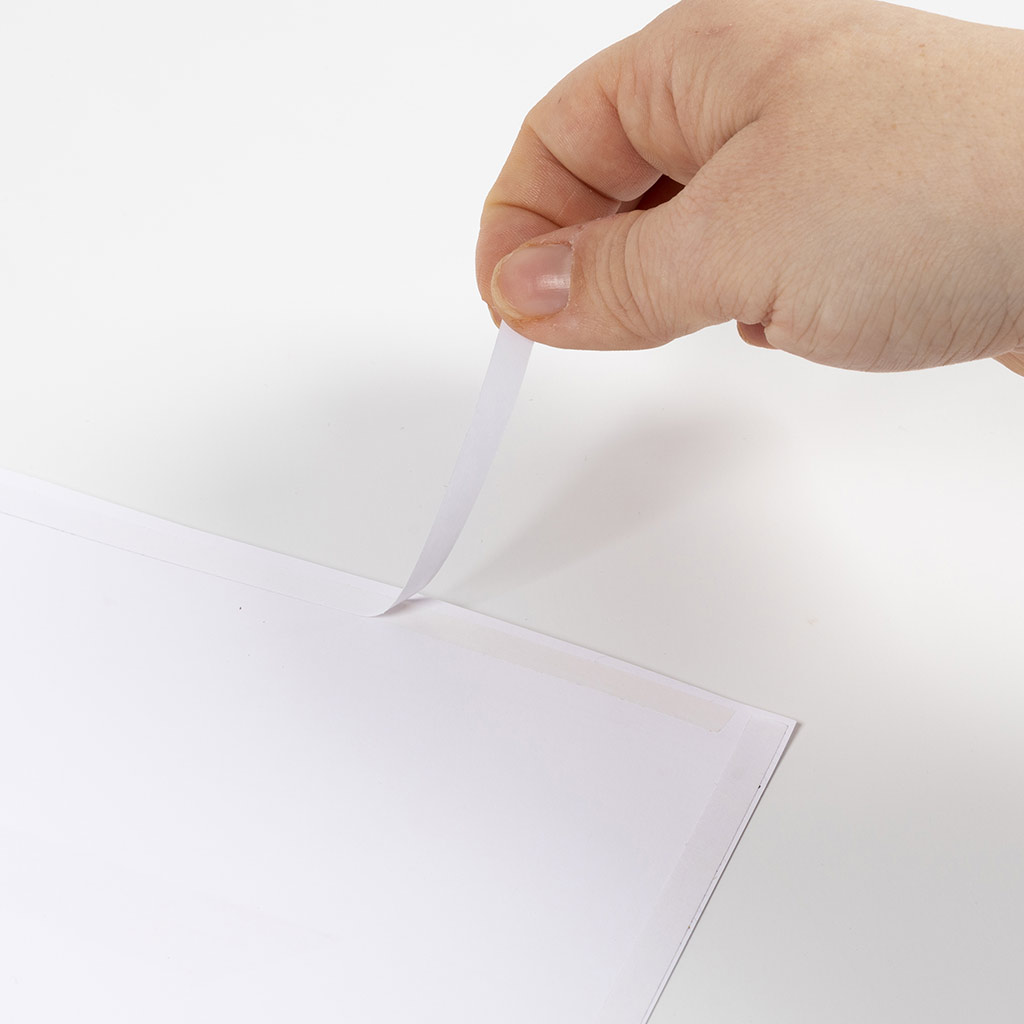 Peel off the paper layer on top of the tape to expose the adhesive.
Peel off the paper layer on top of the tape to expose the adhesive.17  Place the illustration on the black card.
Place the illustration on the black card.Already signed up? Download the template
Also go exploring in
