
Creative idea
New
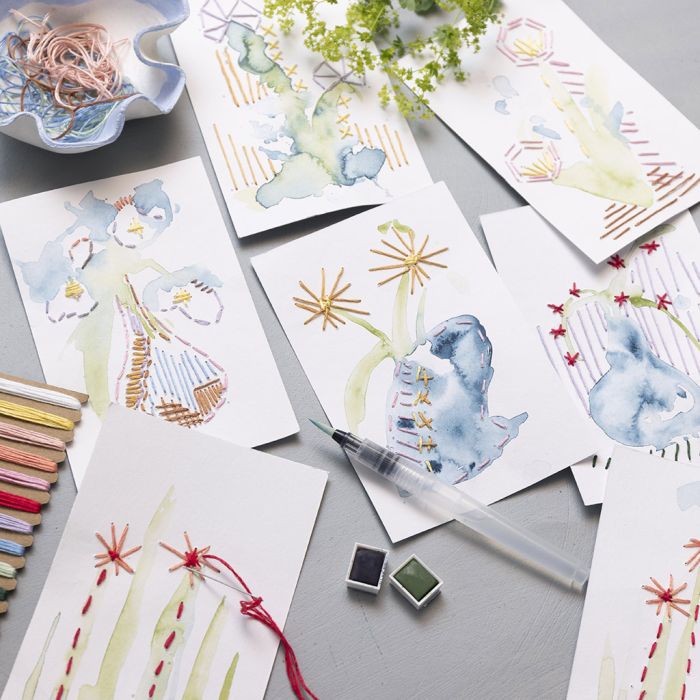
Watercolour and embroidery pictures
#v17117
Create these lovely pictures to decorate your wall at home. The pictures are painted with watercolours and decorated with embroidery in different patterns. There are no rules, so let your creativity run wild.
#v17117
How to do it
1  Unscrew the lid of the water brush and fill with water.
Unscrew the lid of the water brush and fill with water.2  Paint with water wherever you want colour.
Paint with water wherever you want colour.3  Dip the brush into the desired colour.
Dip the brush into the desired colour.4  Now paint wherever you want with this colour.
Now paint wherever you want with this colour.5  Clean the brush and dip it in another colour.
Clean the brush and dip it in another colour.6  Now paint wherever you want with that colour and allow to dry.
Now paint wherever you want with that colour and allow to dry.7  Thread the needle by pulling the loop of the needle threader through the eye of the needle.
Thread the needle by pulling the loop of the needle threader through the eye of the needle.8  Pull the thread through the loop of the needle threader.
Pull the thread through the loop of the needle threader.9  Now carefully pull the thread through the eye on the needle.
Now carefully pull the thread through the eye on the needle.10  Tie a knot at the end of the thread and insert the needle from the back as shown in the picture.
Tie a knot at the end of the thread and insert the needle from the back as shown in the picture.11  Start embroidering. Long straight stitches are used here. Insert the needle from the back to the front of the fabric and then from the front to the back as shown.
Start embroidering. Long straight stitches are used here. Insert the needle from the back to the front of the fabric and then from the front to the back as shown.12  Pull the thread and continue embroidering however you want. In the example, small straight long stitches are used, but there are no fixed rules.
Pull the thread and continue embroidering however you want. In the example, small straight long stitches are used, but there are no fixed rules.13  Once you are satisfied with the result, fasten the end of the thread on the back. Pull the needle through the last stitch to secure the thread.
Once you are satisfied with the result, fasten the end of the thread on the back. Pull the needle through the last stitch to secure the thread.14  Tie a knot, tighten and cut off the excess thread.
Tie a knot, tighten and cut off the excess thread.15  To switch colours, repeat steps 7-10. Use the same technique as before, but place them in a circle opposite each other as shown in the picture. Start by inserting from the back to the front.
To switch colours, repeat steps 7-10. Use the same technique as before, but place them in a circle opposite each other as shown in the picture. Start by inserting from the back to the front.16  and from the front to the back.
and from the front to the back.17  You end up with a flower like this if that’s what you want. Finish by repeating steps 13-14.
You end up with a flower like this if that’s what you want. Finish by repeating steps 13-14.18  Continue until the desired result is achieved. In this example, the middle of the flower is made by making lots of stitches on top of each other. Remember that there are no fixed rules – get creative!
Continue until the desired result is achieved. In this example, the middle of the flower is made by making lots of stitches on top of each other. Remember that there are no fixed rules – get creative!Already signed up? Download the template
Also go exploring in
