

New
Creative idea
Vase, tealight holder, candle holder and a small dish in self-hardening clay
#v17072
Create a unique and peronsal interior design. Everything is made from self-hardening clay – and the silicone mould helps you achieve a beautiful and highly detailed result. Finish by painting or leaving the white clay in its natural colour.
#v17072
How to do it
1  Knead around 100 g of clay thoroughly.
Knead around 100 g of clay thoroughly.2 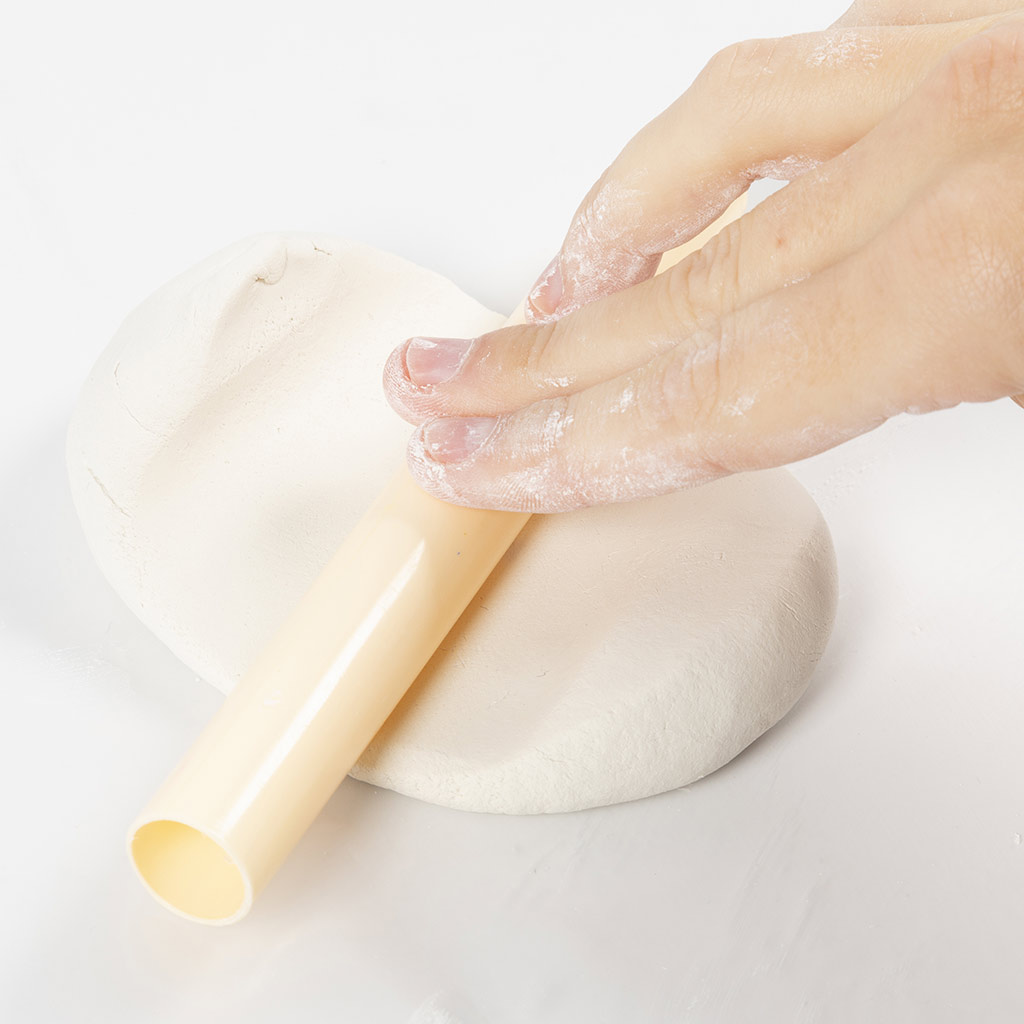 Roll out the clay to a thickness of around 0.5 cm.
Roll out the clay to a thickness of around 0.5 cm.3 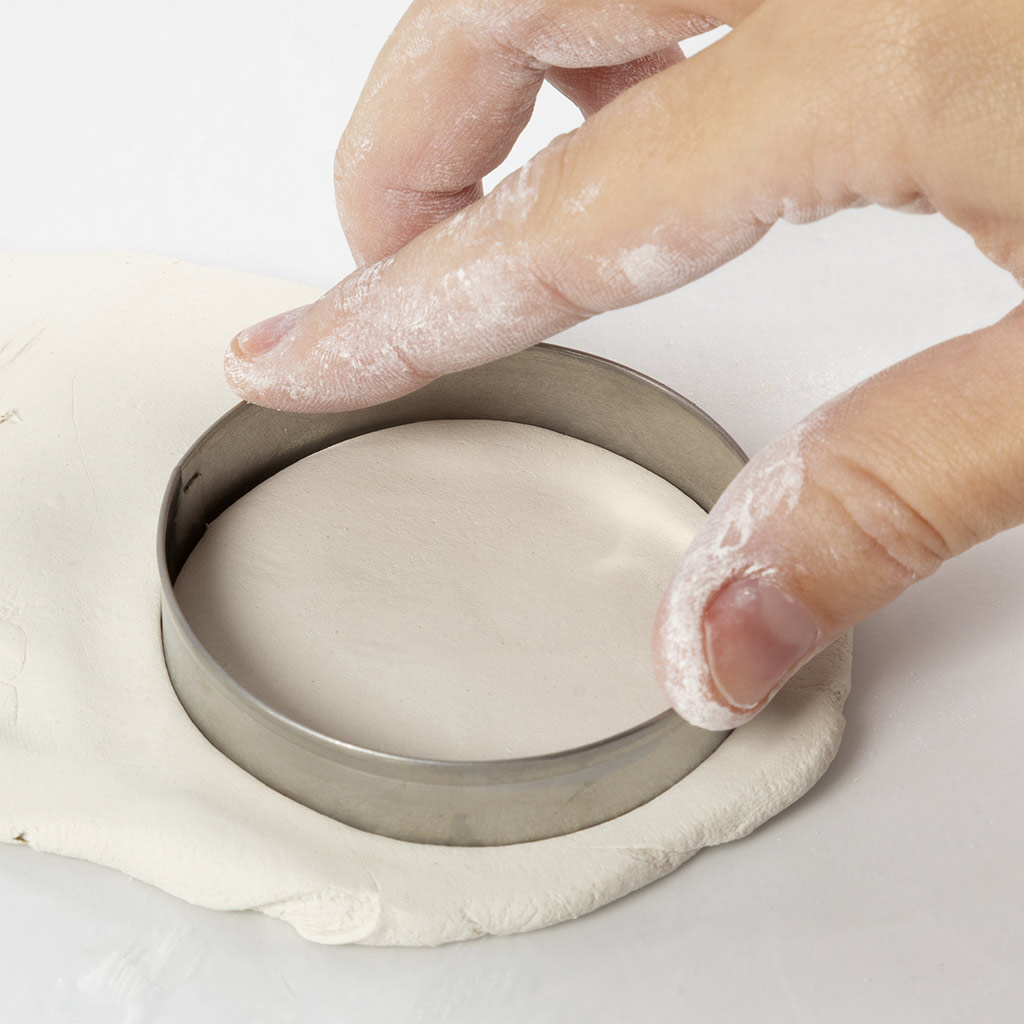 Now press the round cutter into the clay.
Now press the round cutter into the clay.4  You should end up with a circle as shown in the picture.
You should end up with a circle as shown in the picture.5 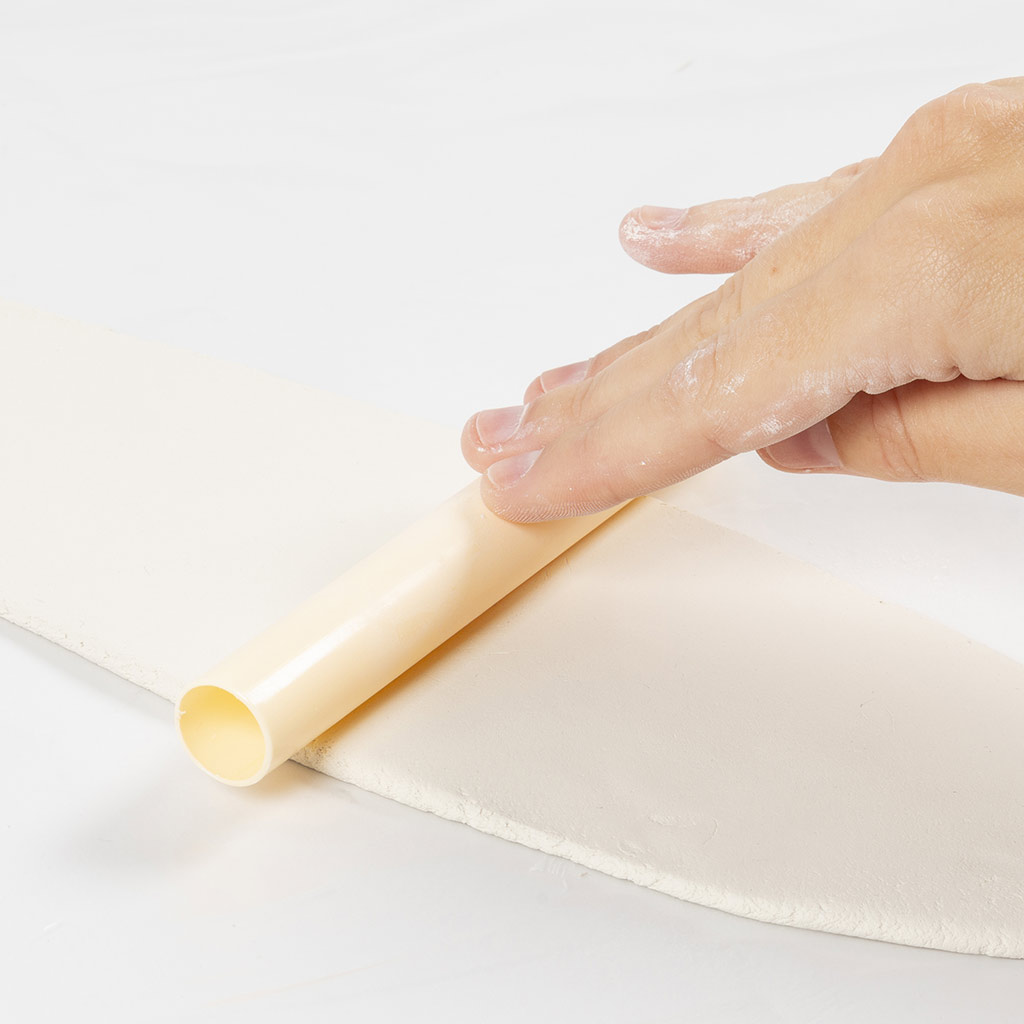 Knead the remaining clay thoroughly. Roll out the clay to a thickness of around 0.5 cm.
Knead the remaining clay thoroughly. Roll out the clay to a thickness of around 0.5 cm.6 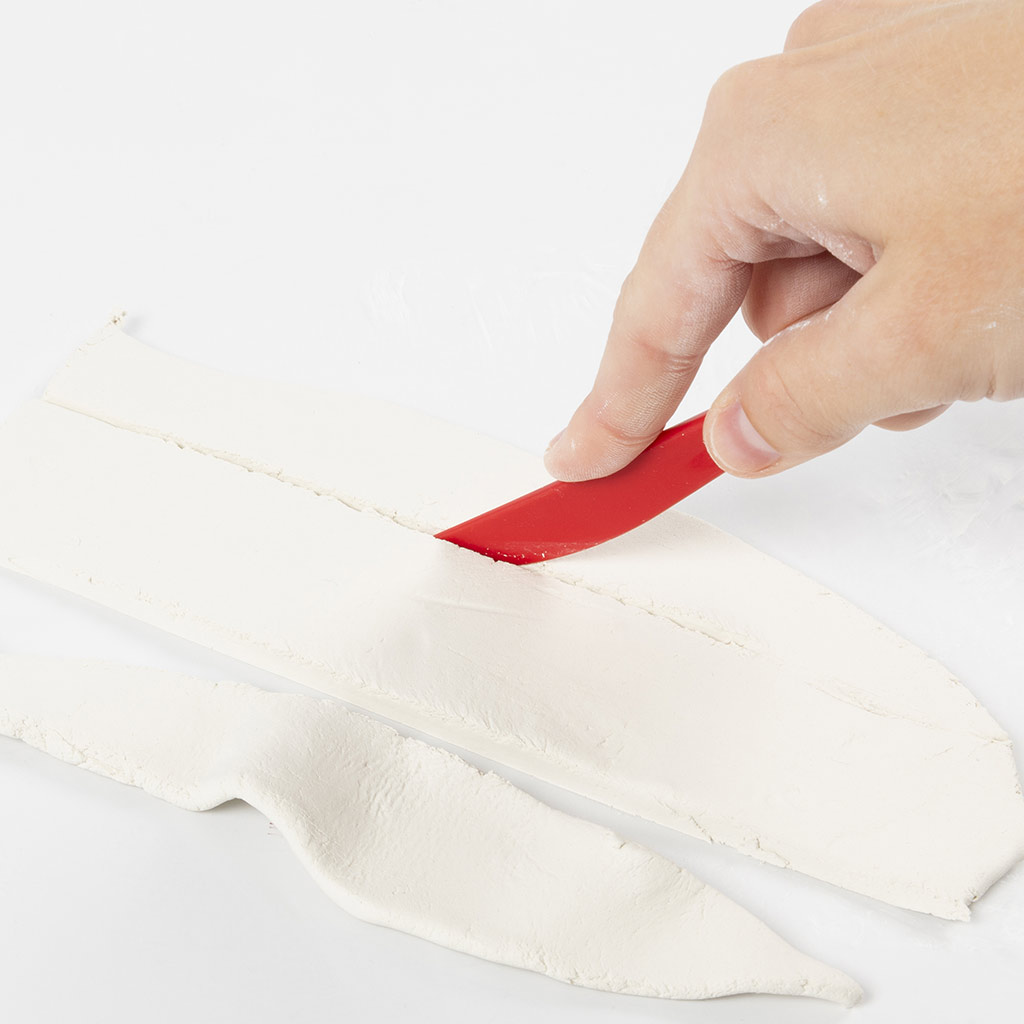 Cut the clay to a width of around 5 cm and a length of around 18 cm.
Cut the clay to a width of around 5 cm and a length of around 18 cm.7 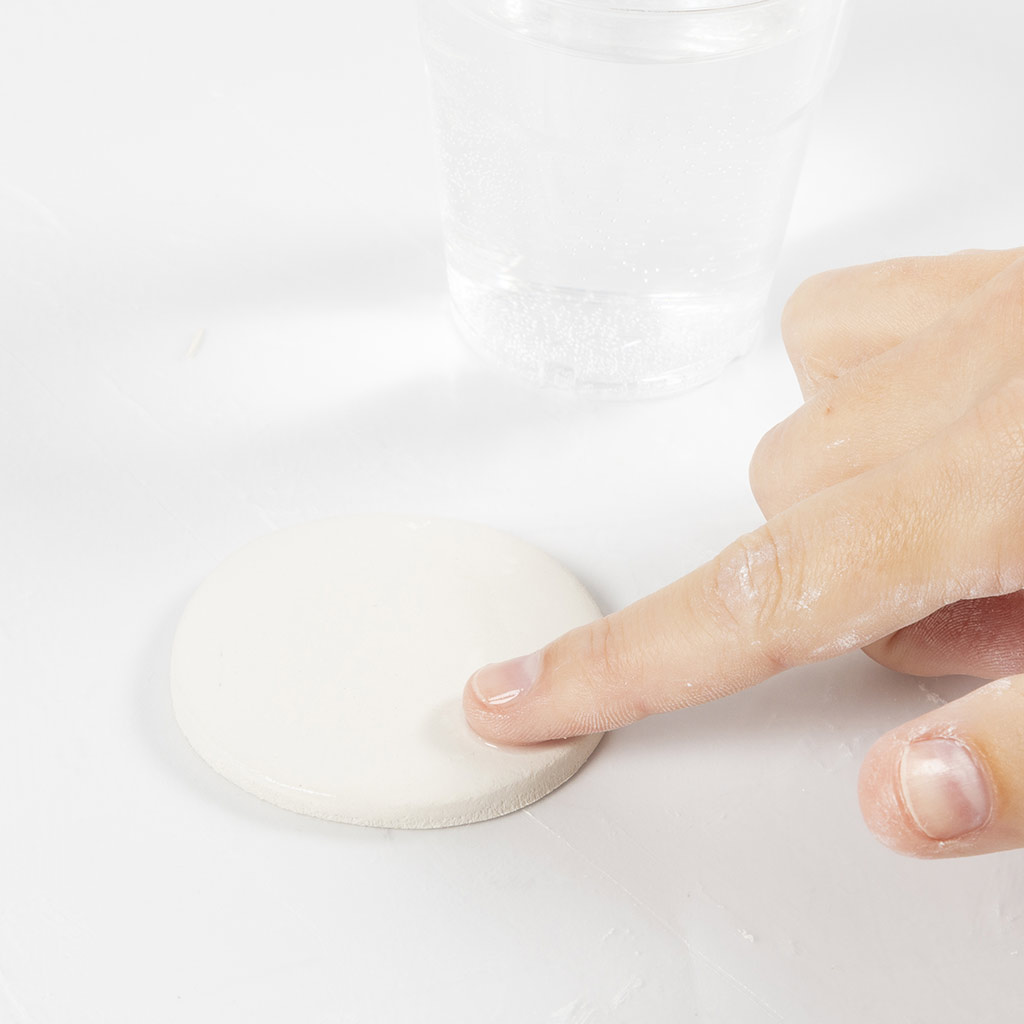 Take the circle from step 4 and moisten it with a little water.
Take the circle from step 4 and moisten it with a little water.8 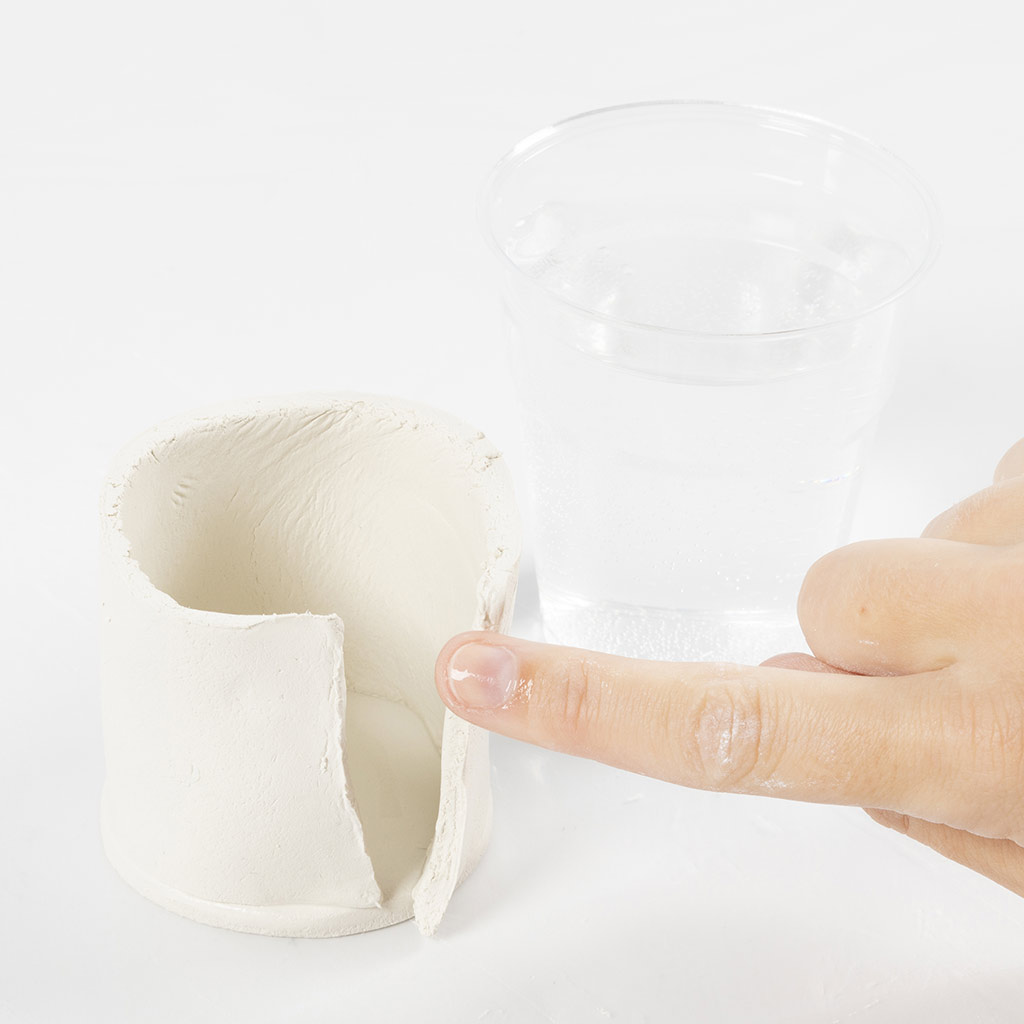 Take the piece you just cut out and place it around the edge of the round piece as shown in the picture. Moisten the edges with water.
Take the piece you just cut out and place it around the edge of the round piece as shown in the picture. Moisten the edges with water.9 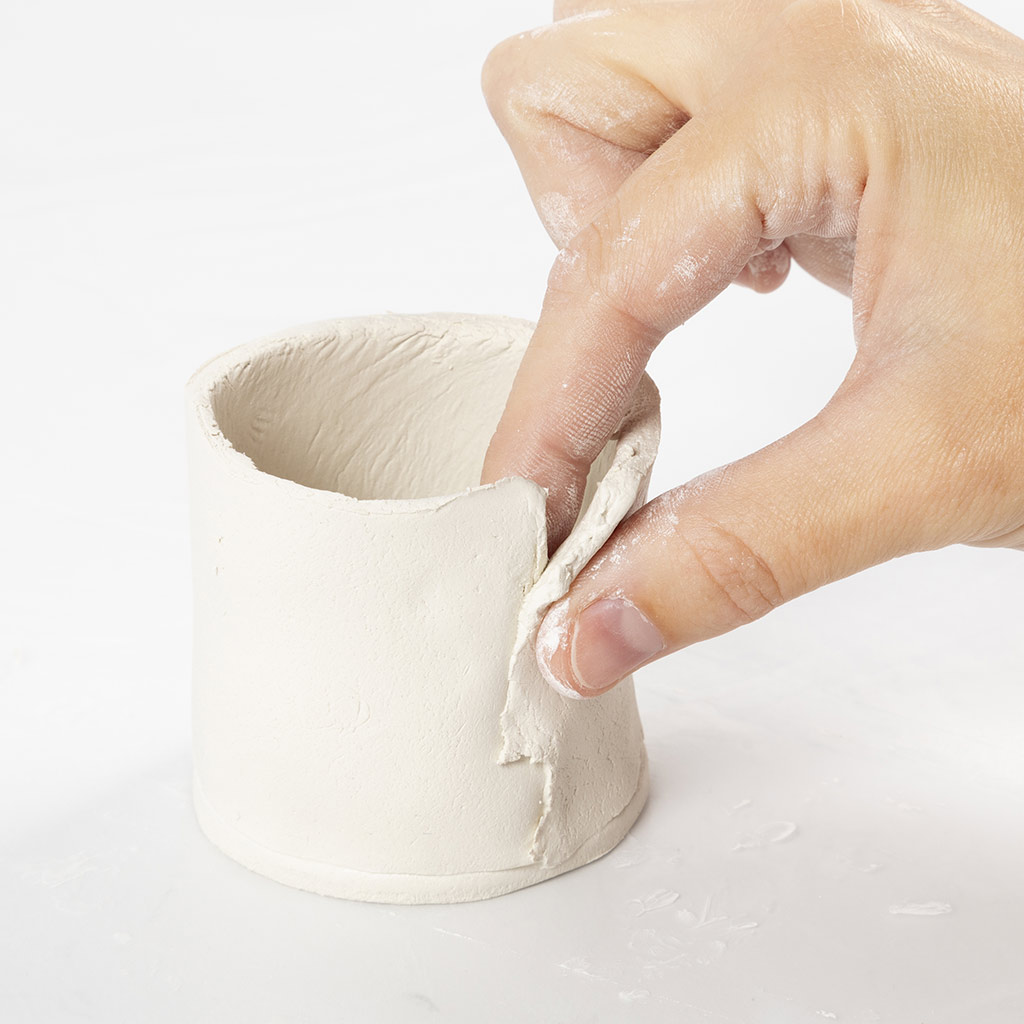 Gently squeeze the edges together as shown in the picture.
Gently squeeze the edges together as shown in the picture.10 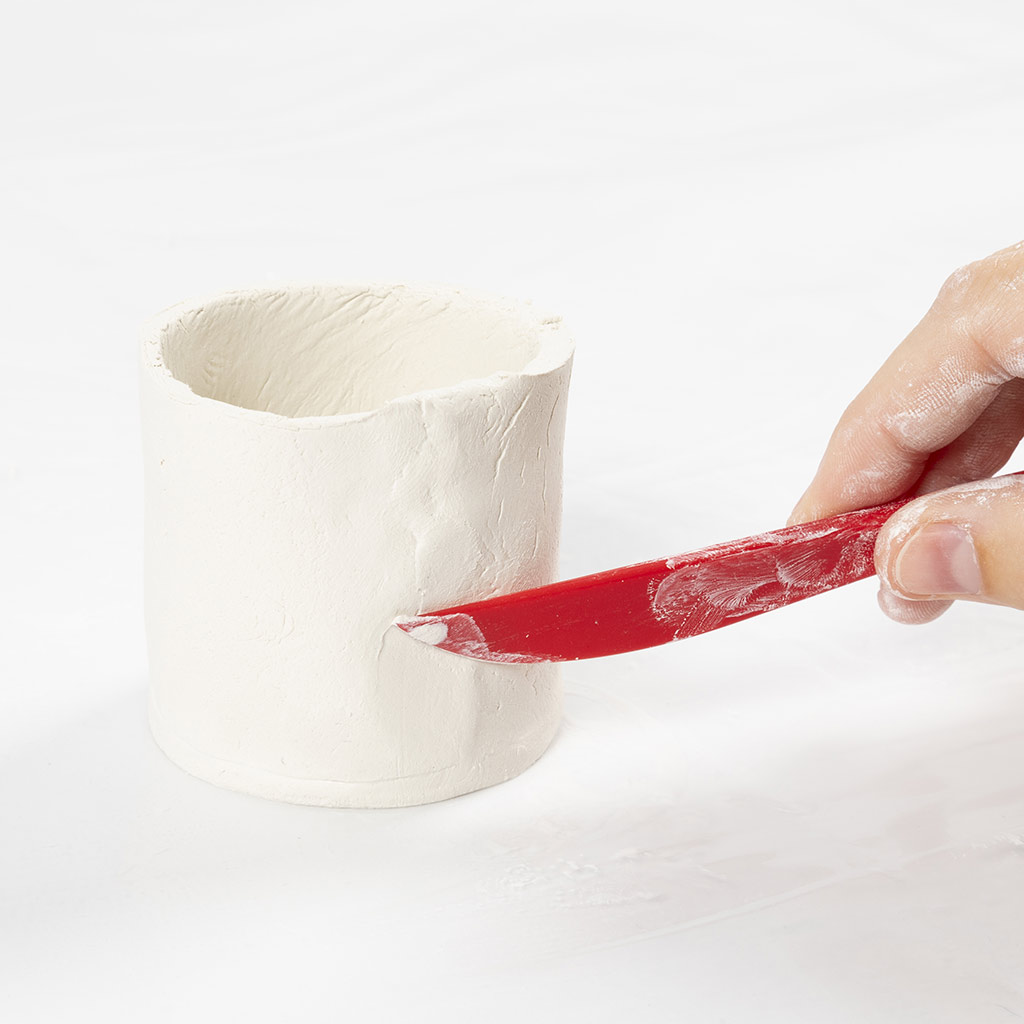 Use a knife to smooth the seam on the outside.
Use a knife to smooth the seam on the outside.11 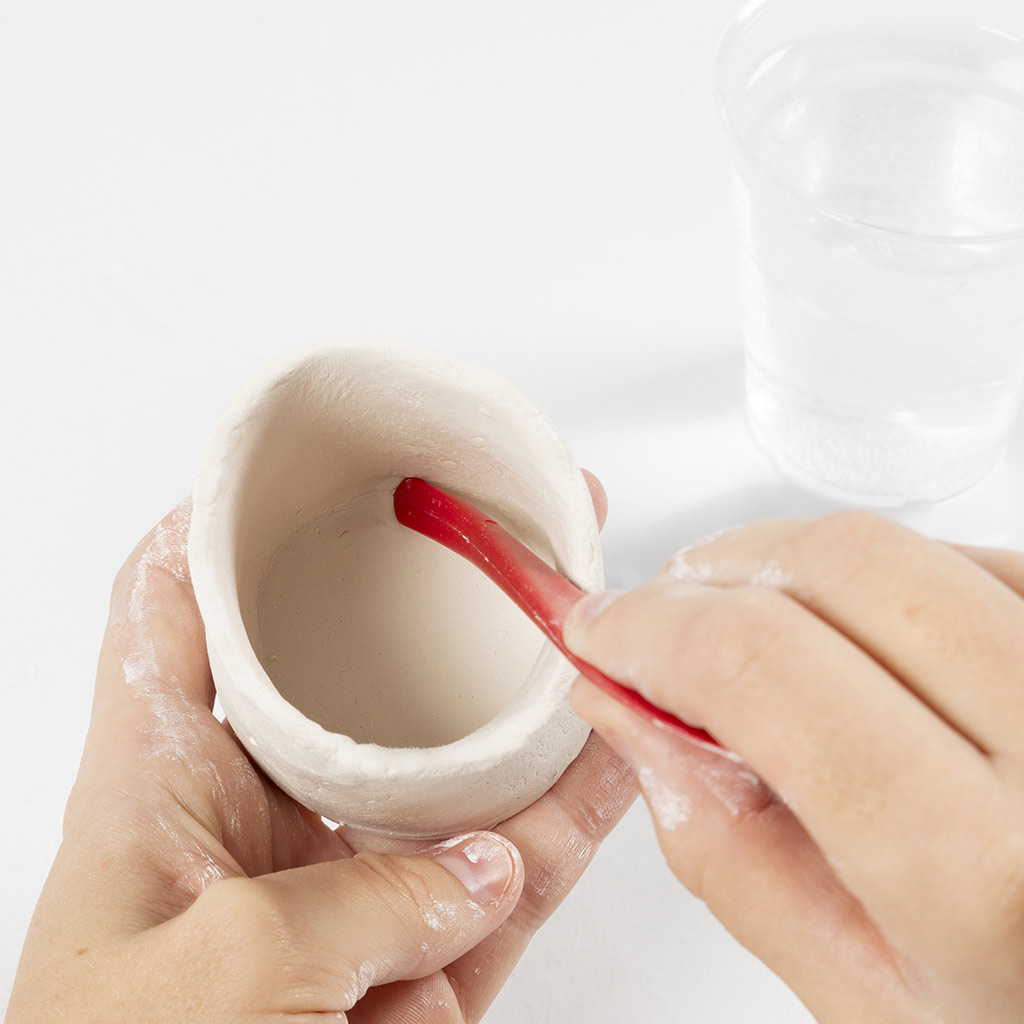 Also smooth the seam on the inside.
Also smooth the seam on the inside.12 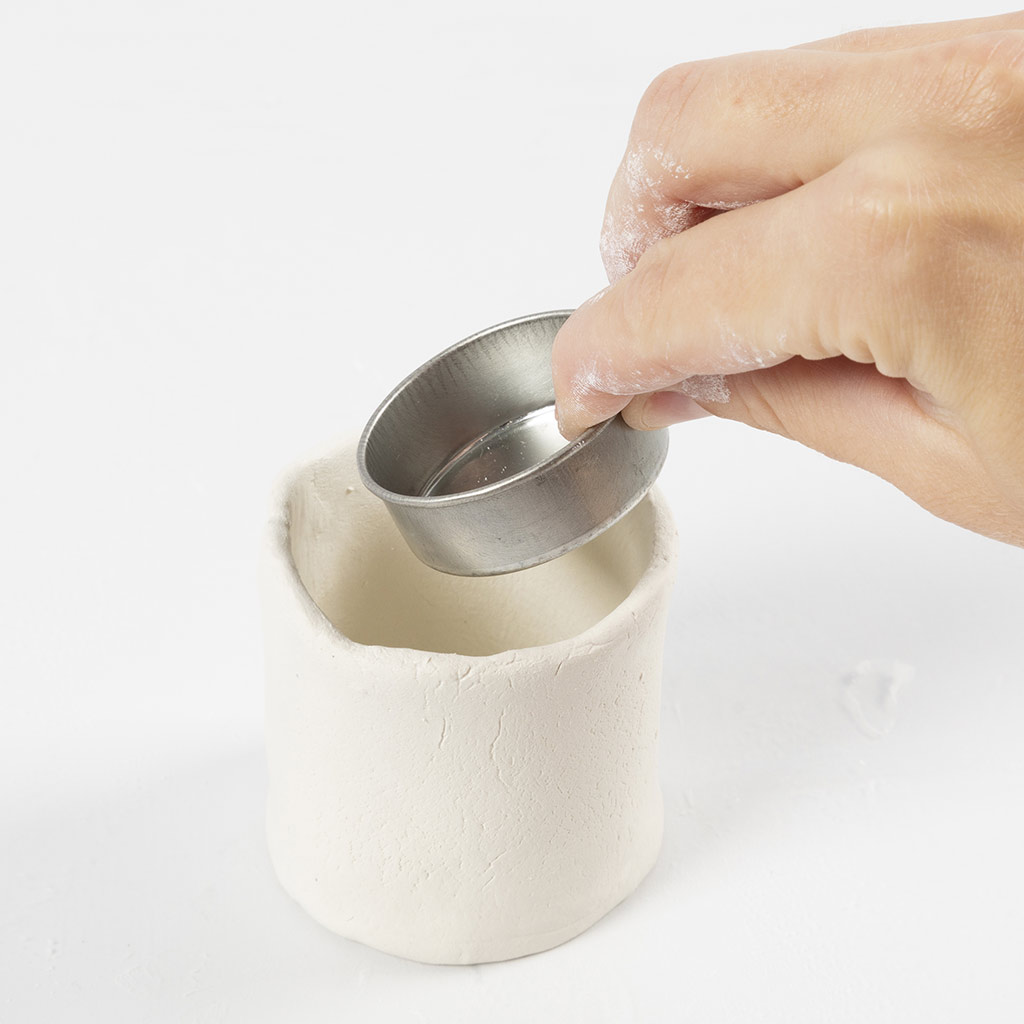 Insert the tealight holder.
Insert the tealight holder.13 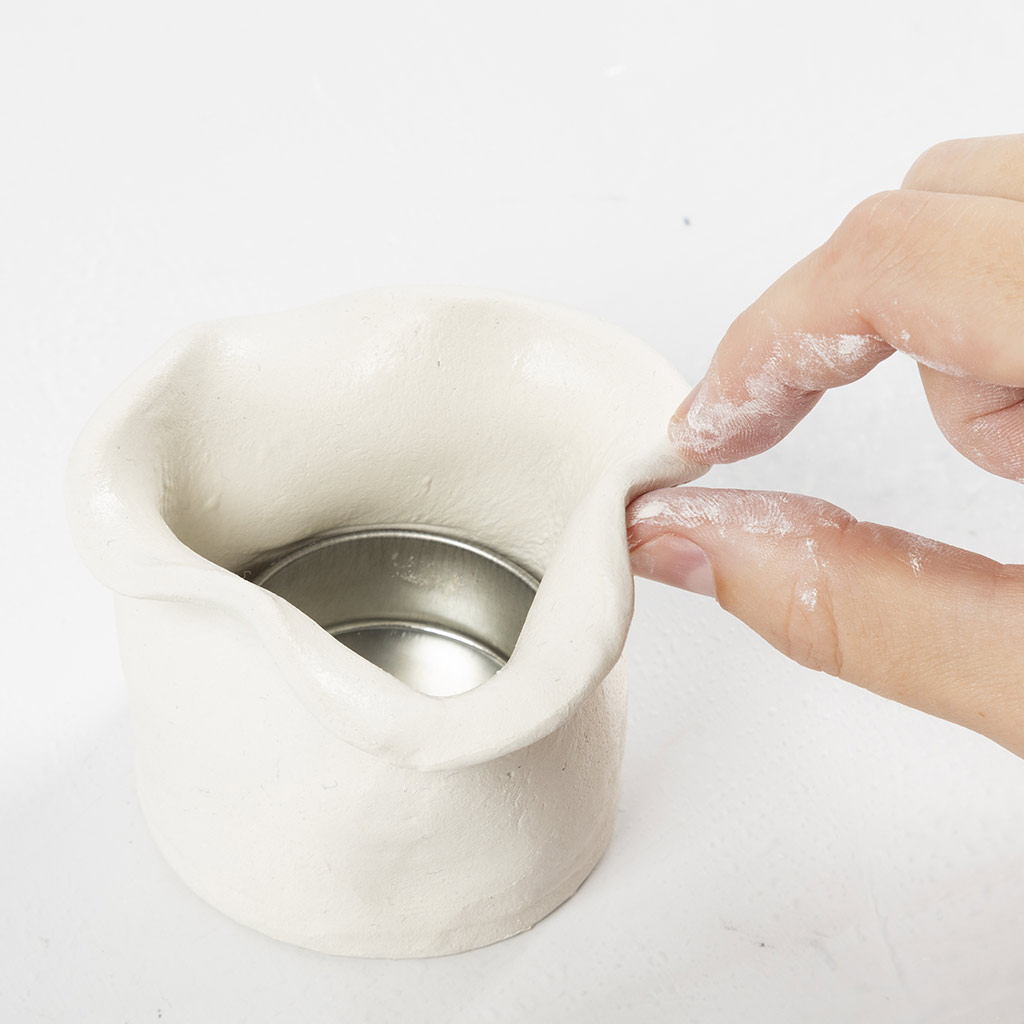 Make small wavy shapes along the edge.
Make small wavy shapes along the edge.14 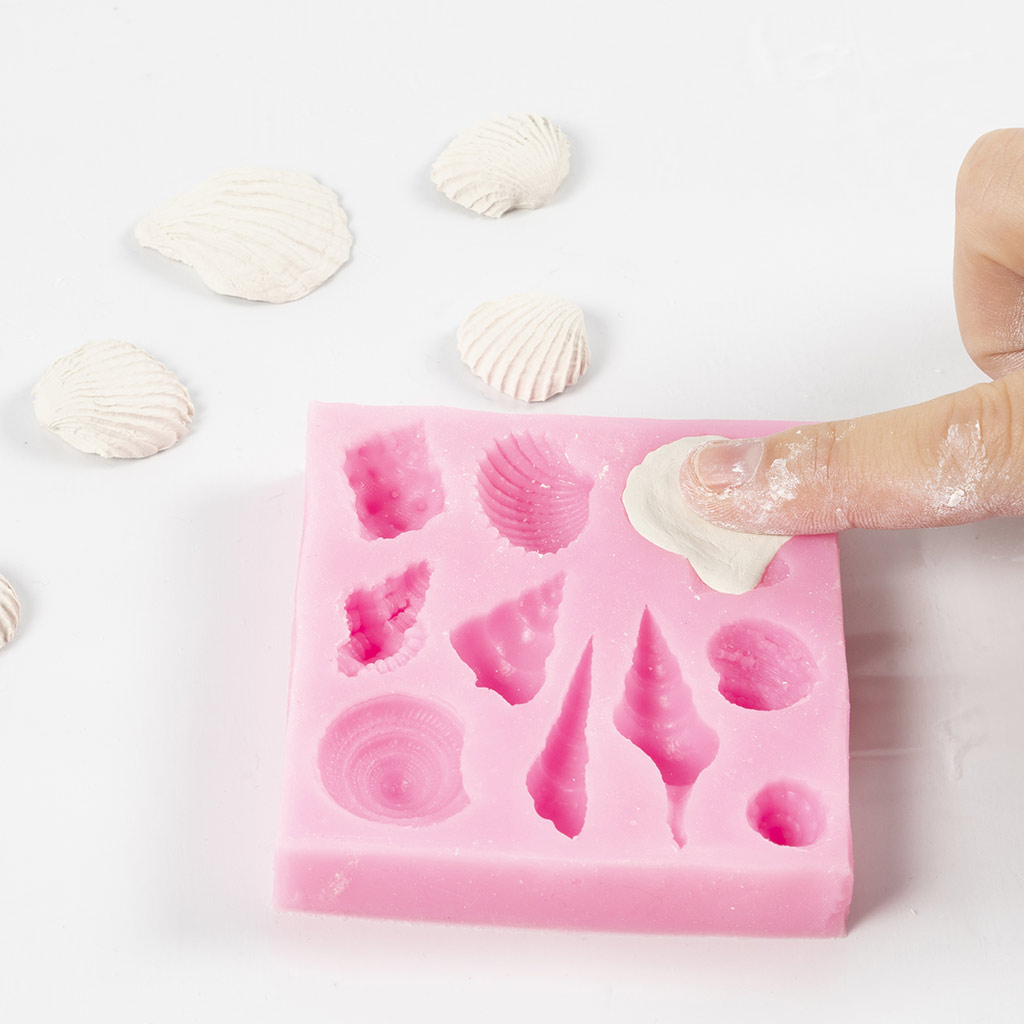 We're now going to make small shells with moulds. Take a small lump of clay that is large enough for the mould you want to use. Press it firmly into the mould.
We're now going to make small shells with moulds. Take a small lump of clay that is large enough for the mould you want to use. Press it firmly into the mould.15 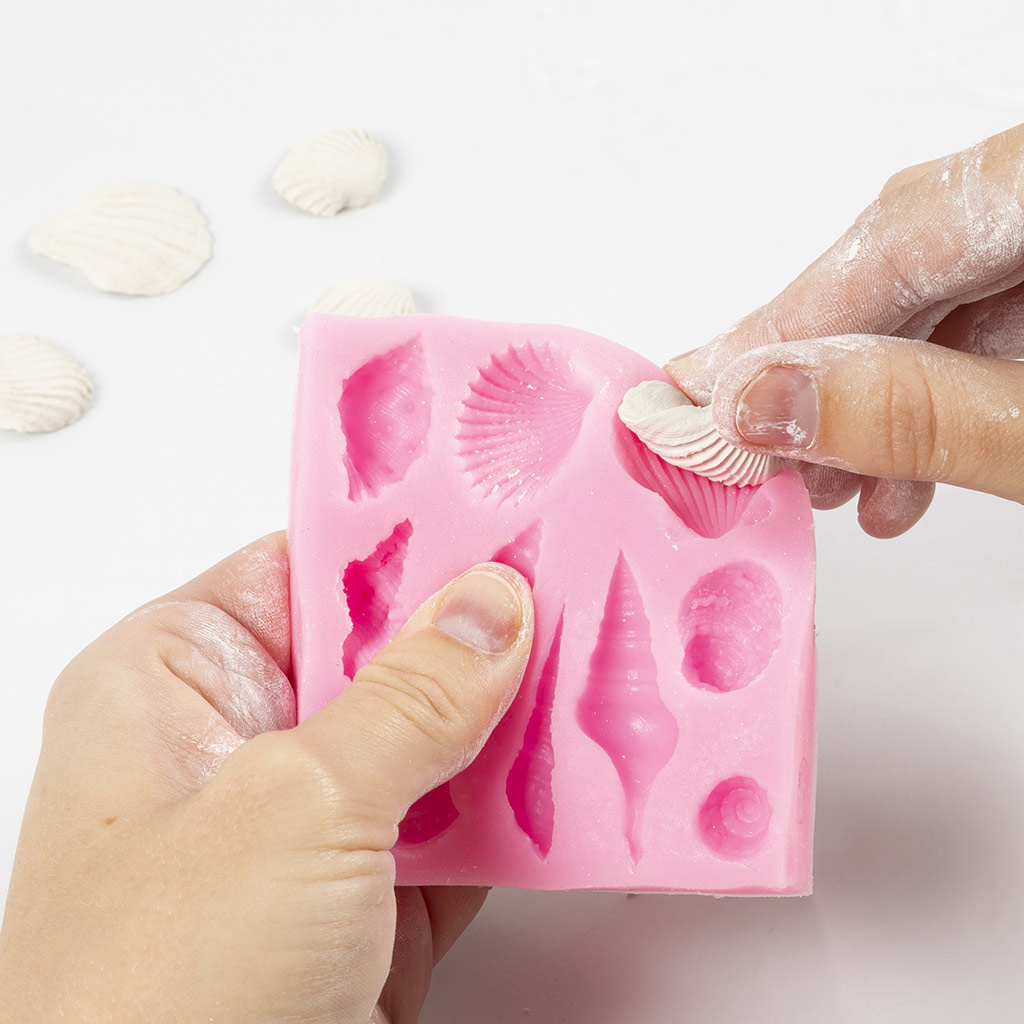 Gently remove the clay from the mould and repeat the process until you have all the shells you want.
Gently remove the clay from the mould and repeat the process until you have all the shells you want.16 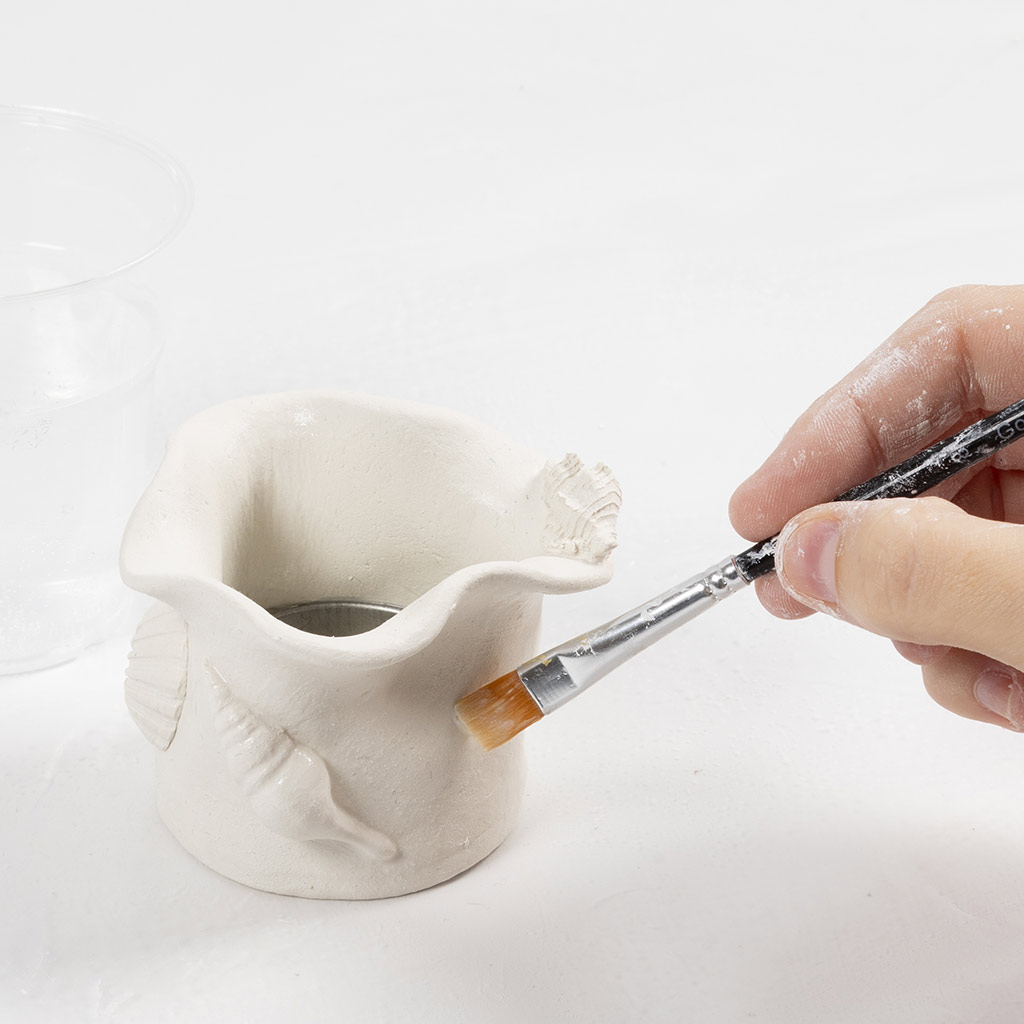 Use the brush to moisten the clay with water where you want to attach the shells.
Use the brush to moisten the clay with water where you want to attach the shells.17 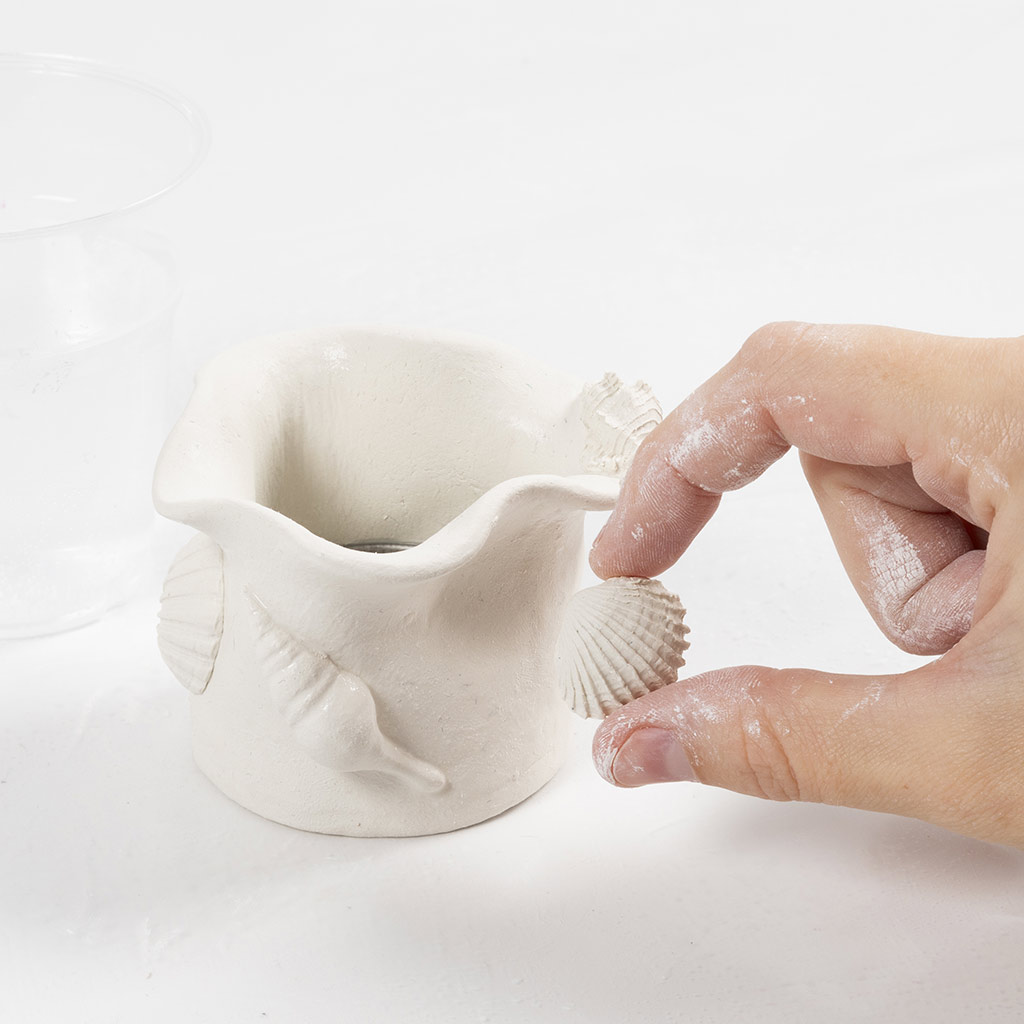 Attach a shell.
Attach a shell.18 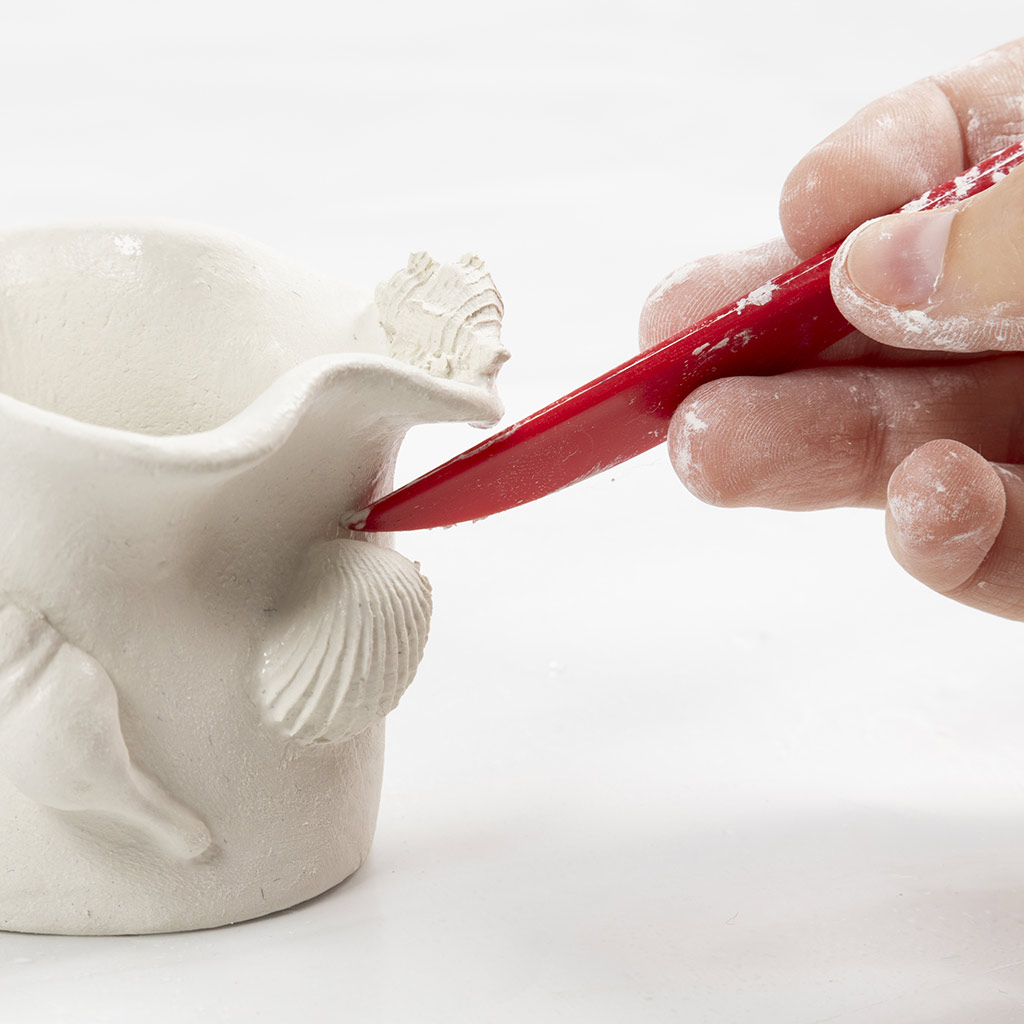 Work around the edge of the shell with the knife until you are sure that it is firmly in place.
Work around the edge of the shell with the knife until you are sure that it is firmly in place.19 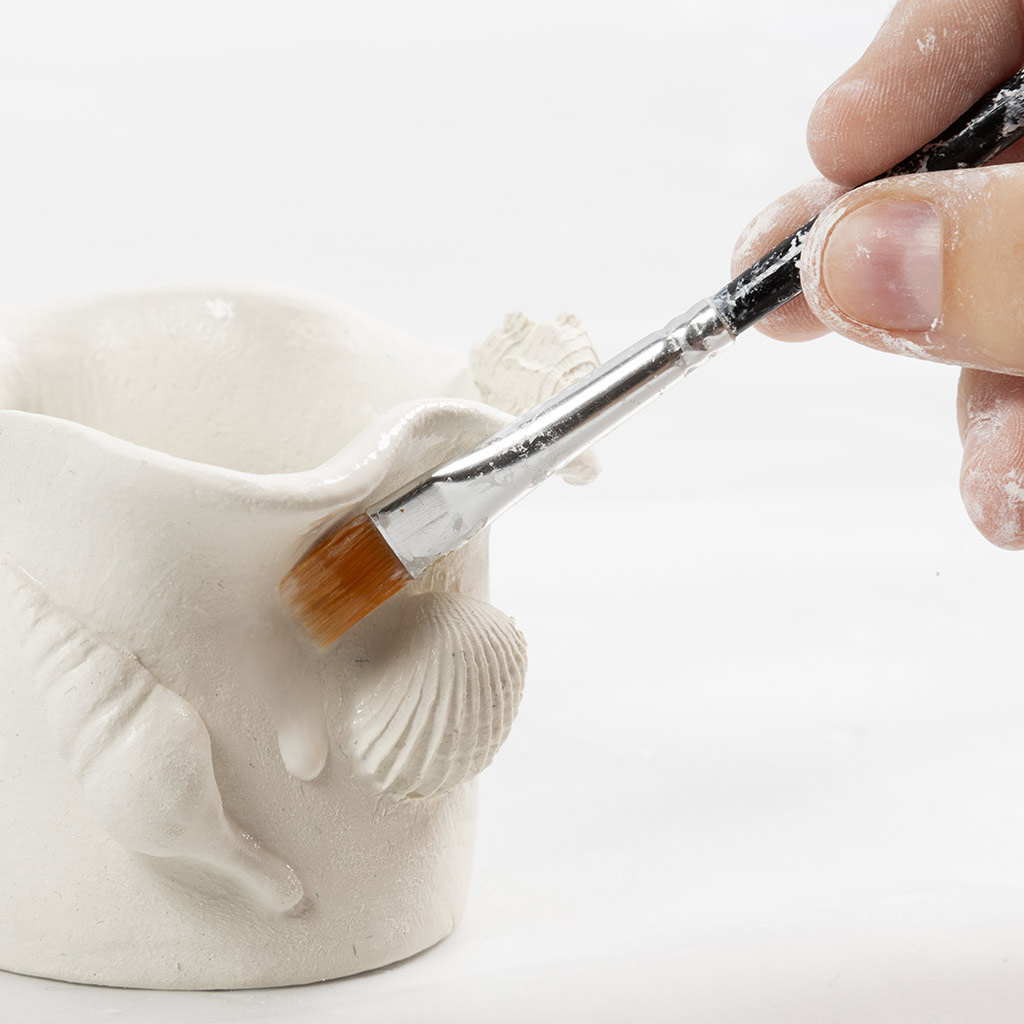 Smooth around the shell with water. Allow to dry for around 48 hours.
Smooth around the shell with water. Allow to dry for around 48 hours.20 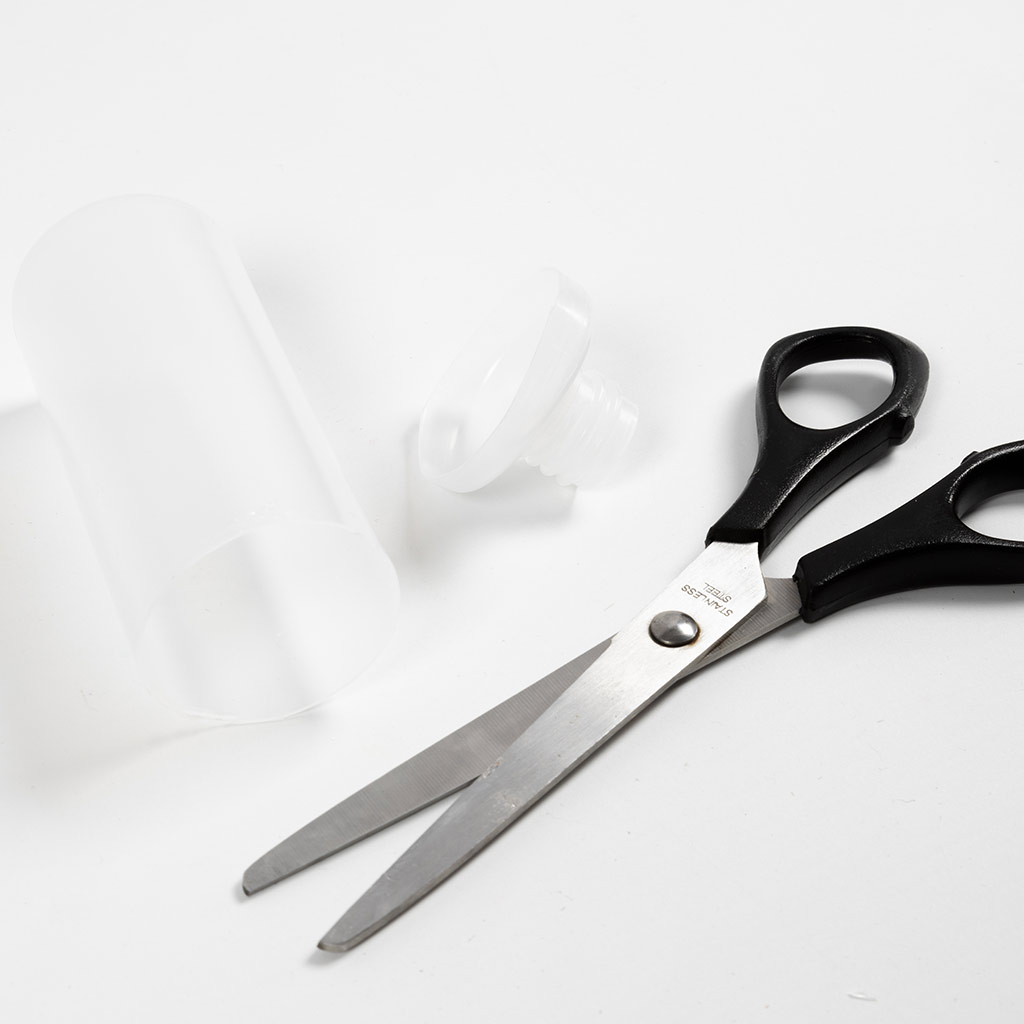 Cut off the top of the bottle so that it has a height of around 8 cm.
Cut off the top of the bottle so that it has a height of around 8 cm.21  Knead around 300 g of clay thoroughly. Repeat steps 2-11.
Knead around 300 g of clay thoroughly. Repeat steps 2-11.22 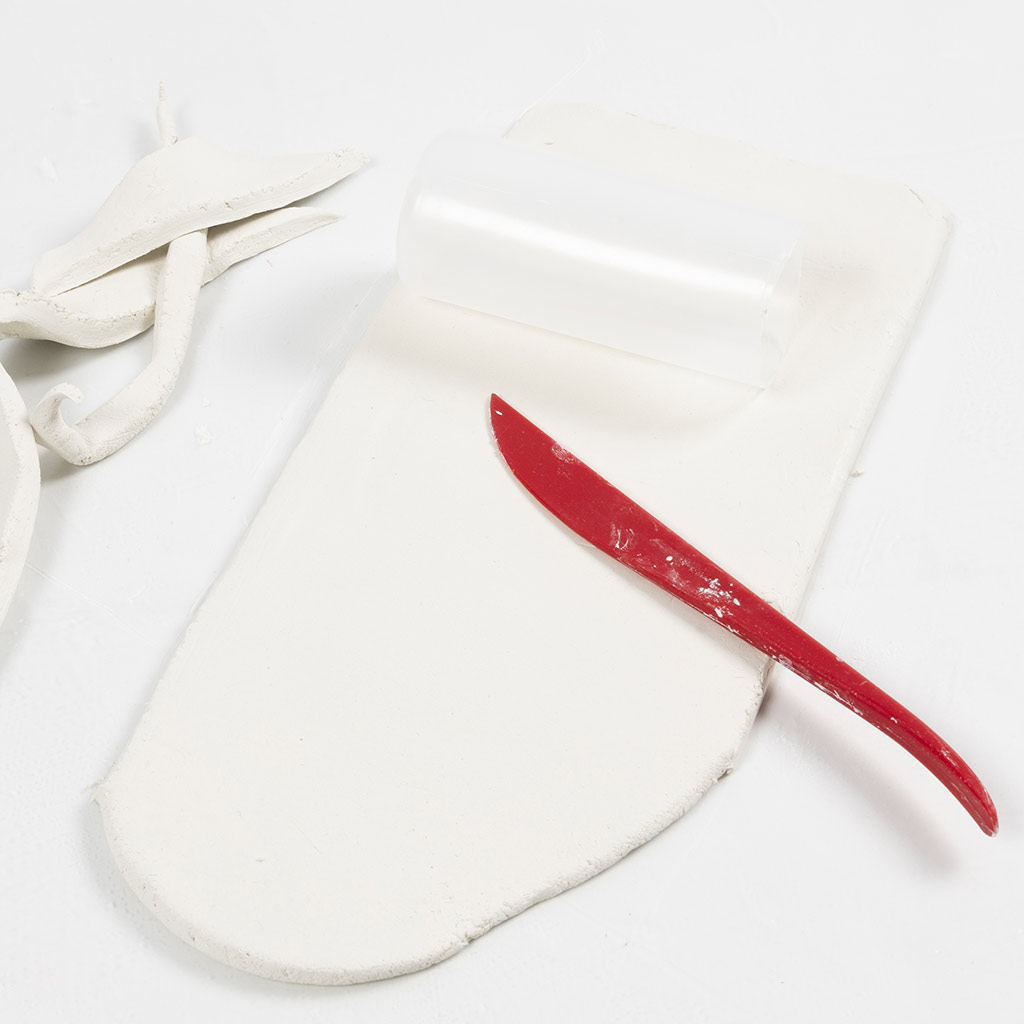 Cut the clay to a width of around 10 cm and a length of around 19 cm.
Cut the clay to a width of around 10 cm and a length of around 19 cm.23 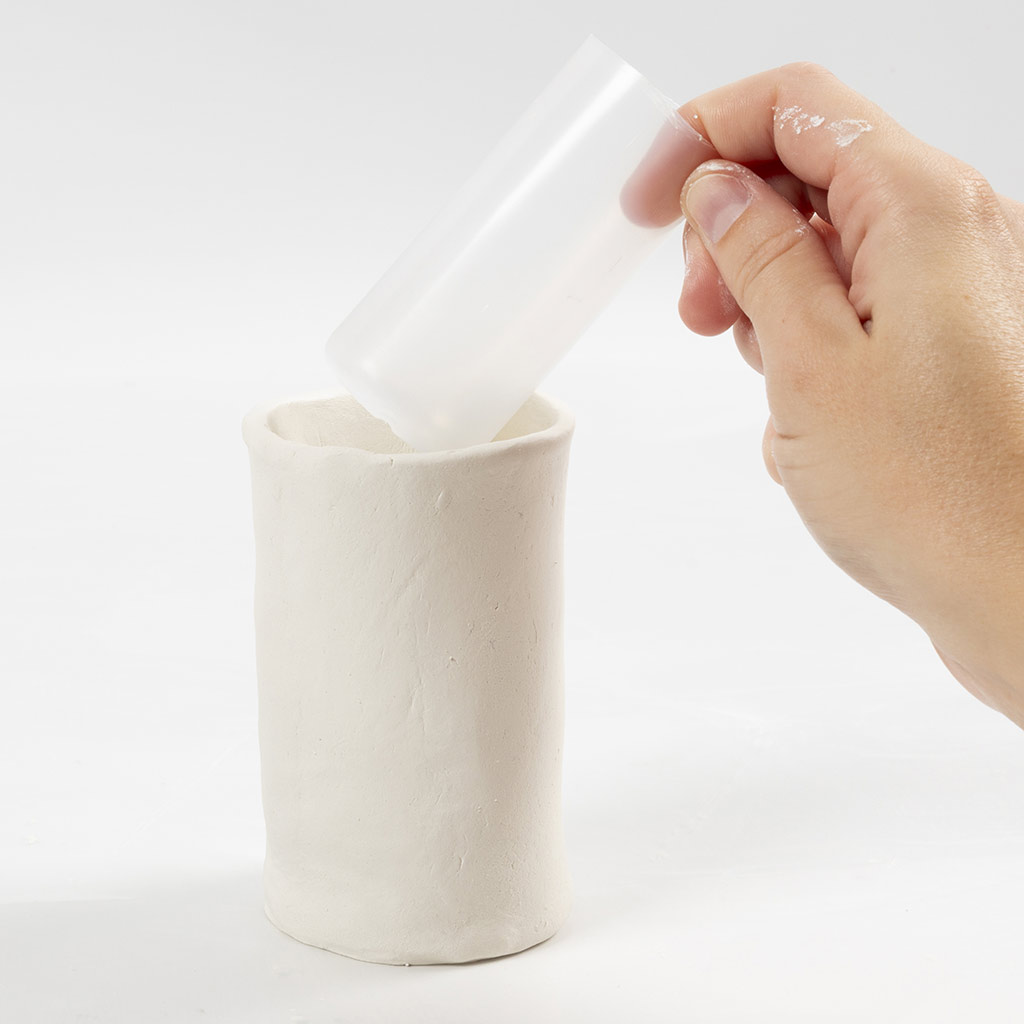 Place the bottle inside and repeat steps 13-19. Allow the vase to dry for around 48 hours.
Place the bottle inside and repeat steps 13-19. Allow the vase to dry for around 48 hours.24  Knead about 200 g of clay thoroughly.
Knead about 200 g of clay thoroughly.25 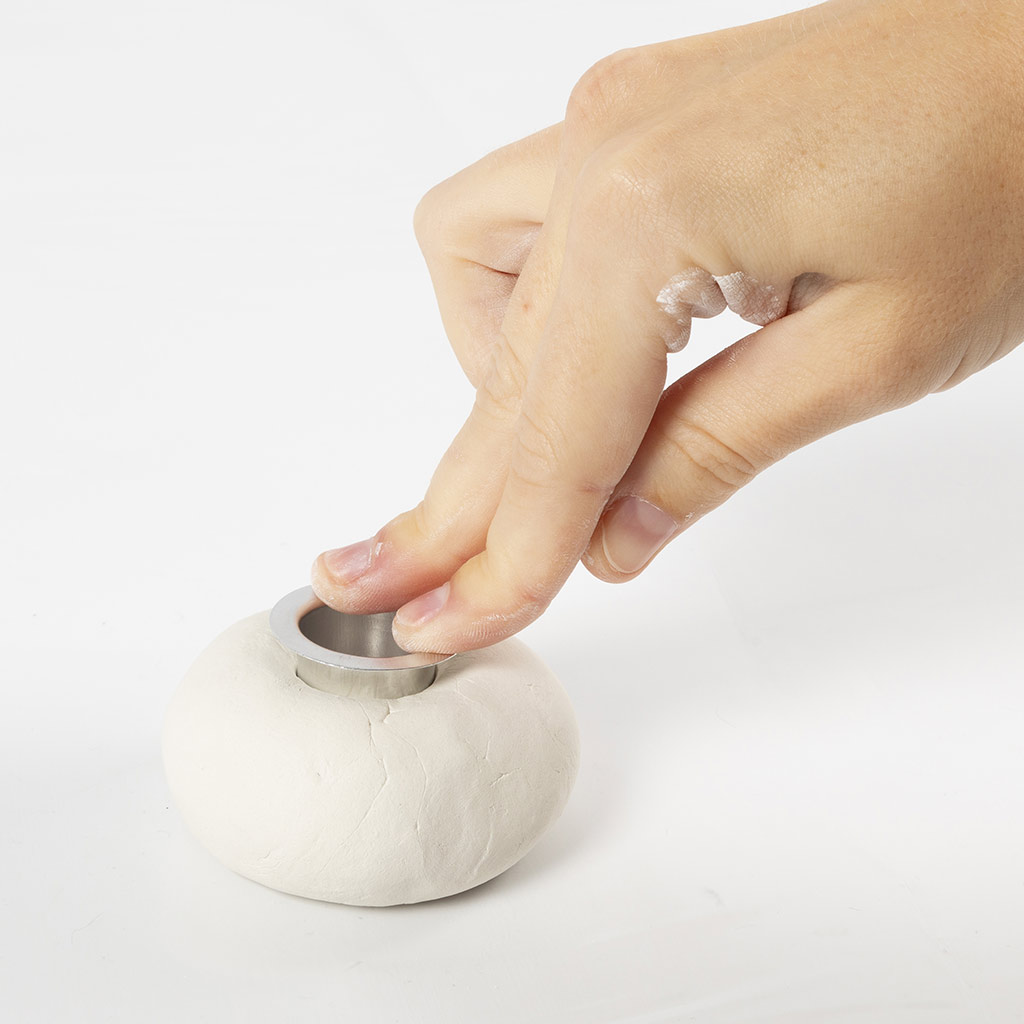 Knead around 100 g of clay and shape it into a ball. Insert the tealight holder.
Knead around 100 g of clay and shape it into a ball. Insert the tealight holder.26 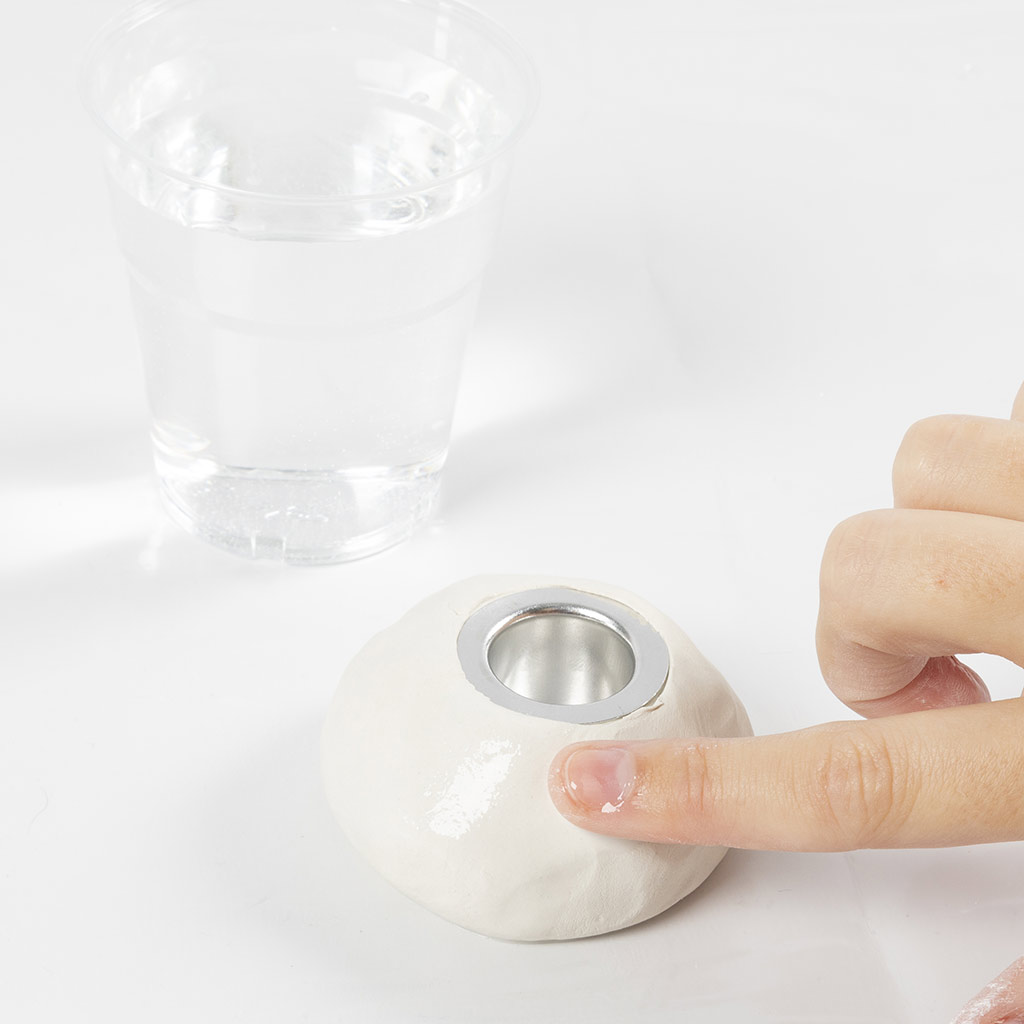 Smooth the clay with water.
Smooth the clay with water.27 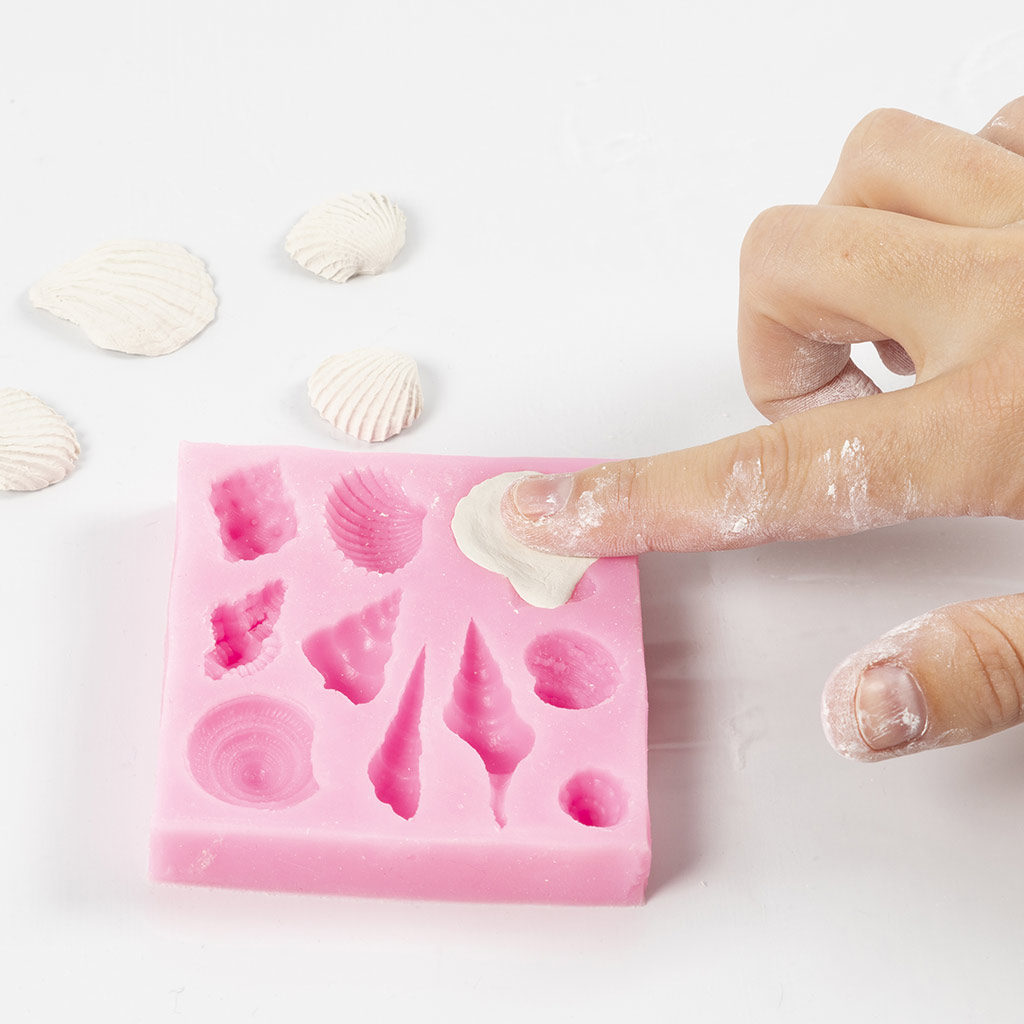 We're now going to make small shells with moulds. Take a small lump of clay that is large enough for the mould you want to use. Press it firmly into the mould.
We're now going to make small shells with moulds. Take a small lump of clay that is large enough for the mould you want to use. Press it firmly into the mould.28  Gently remove the clay out of the mould and repeat the process until you have all the shells you want.
Gently remove the clay out of the mould and repeat the process until you have all the shells you want.29 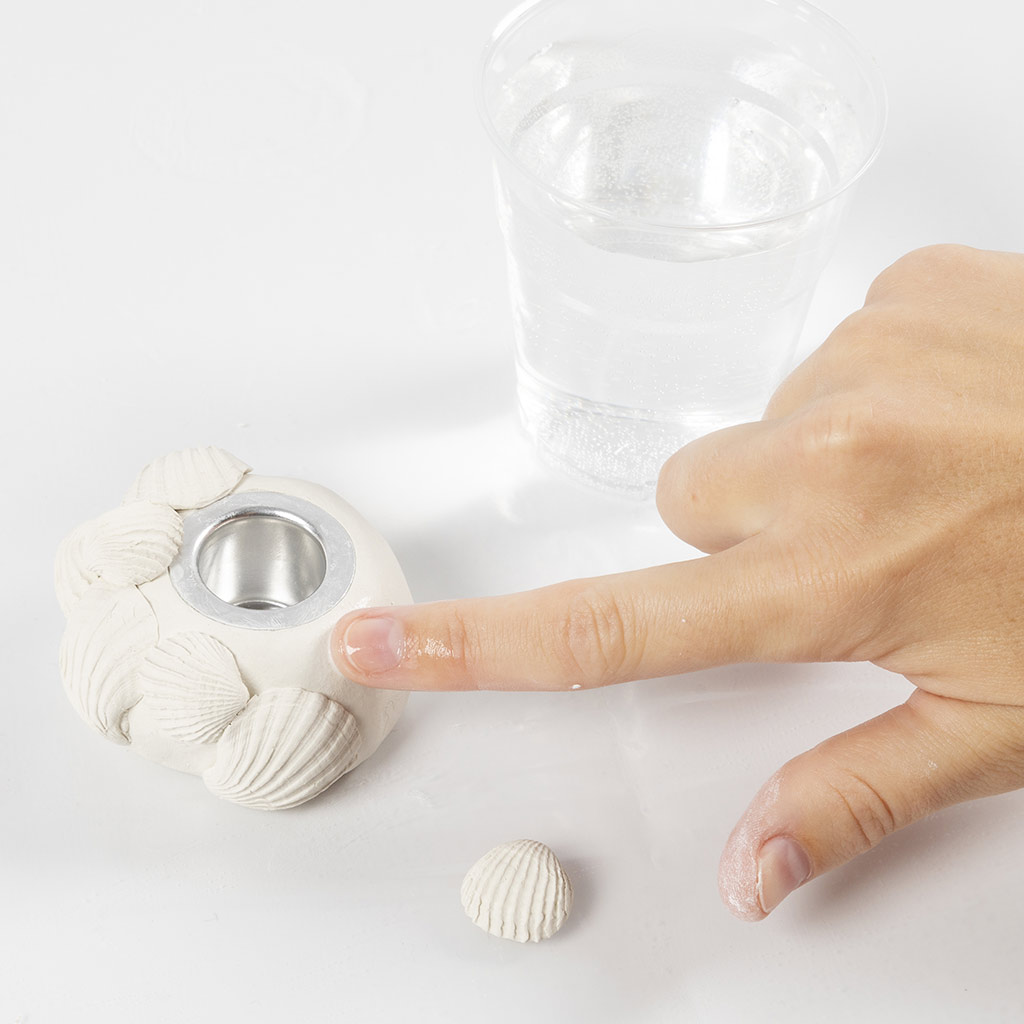 Moisten with water where you want to attach the shell.
Moisten with water where you want to attach the shell.30 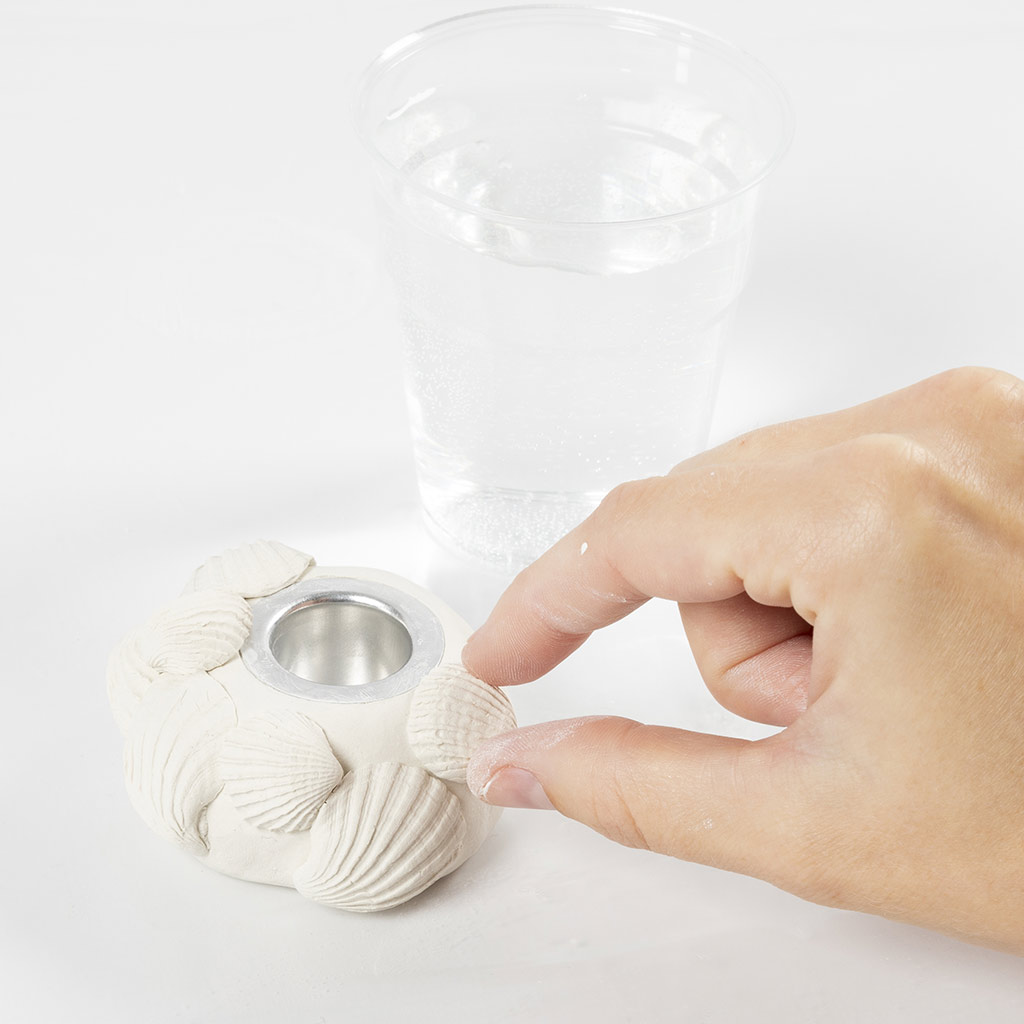 Attach the shell. Repeat steps 17-19.
Attach the shell. Repeat steps 17-19.31 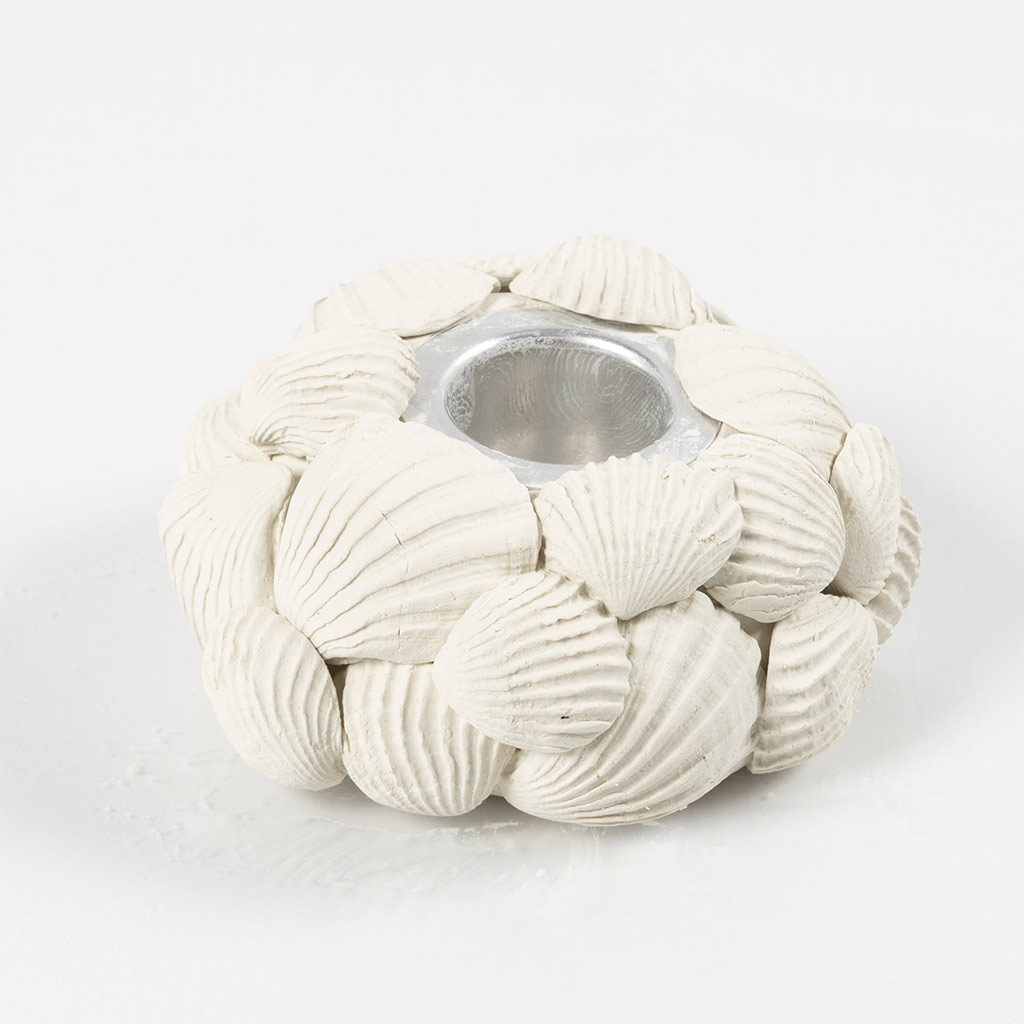 Allow the tealight holder to dry for around 48 hours.
Allow the tealight holder to dry for around 48 hours.32 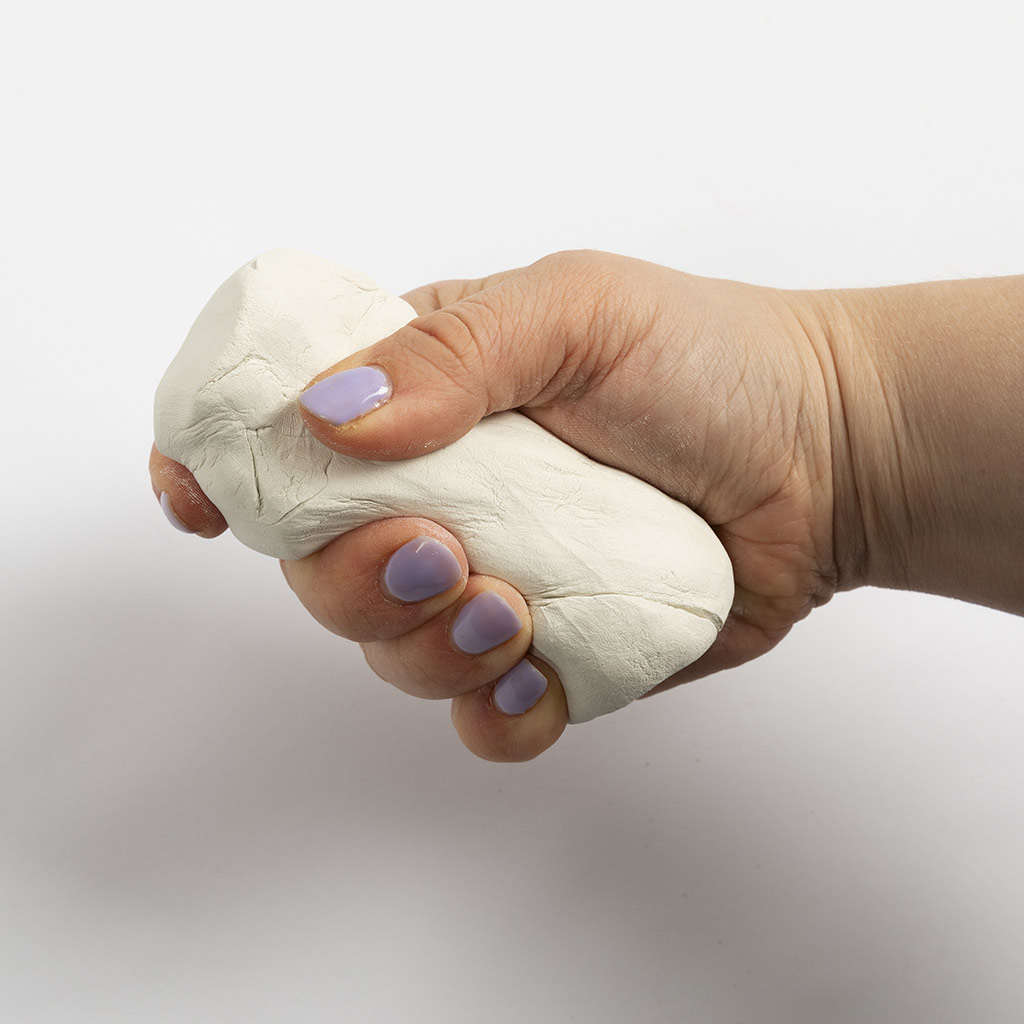 Knead 130 g of clay thoroughly.
Knead 130 g of clay thoroughly.33 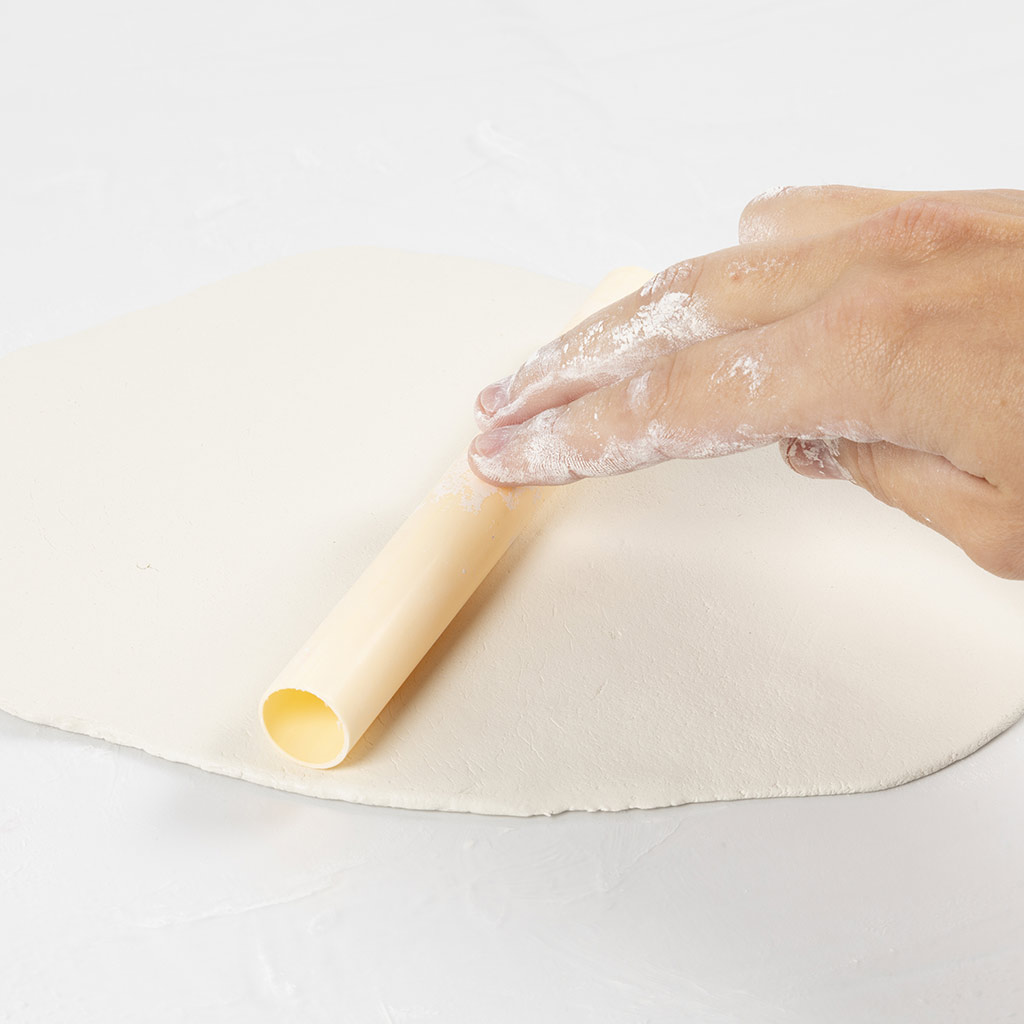 Roll out the clay to an oval shape with a thickness of around 2.5 mm.
Roll out the clay to an oval shape with a thickness of around 2.5 mm.34 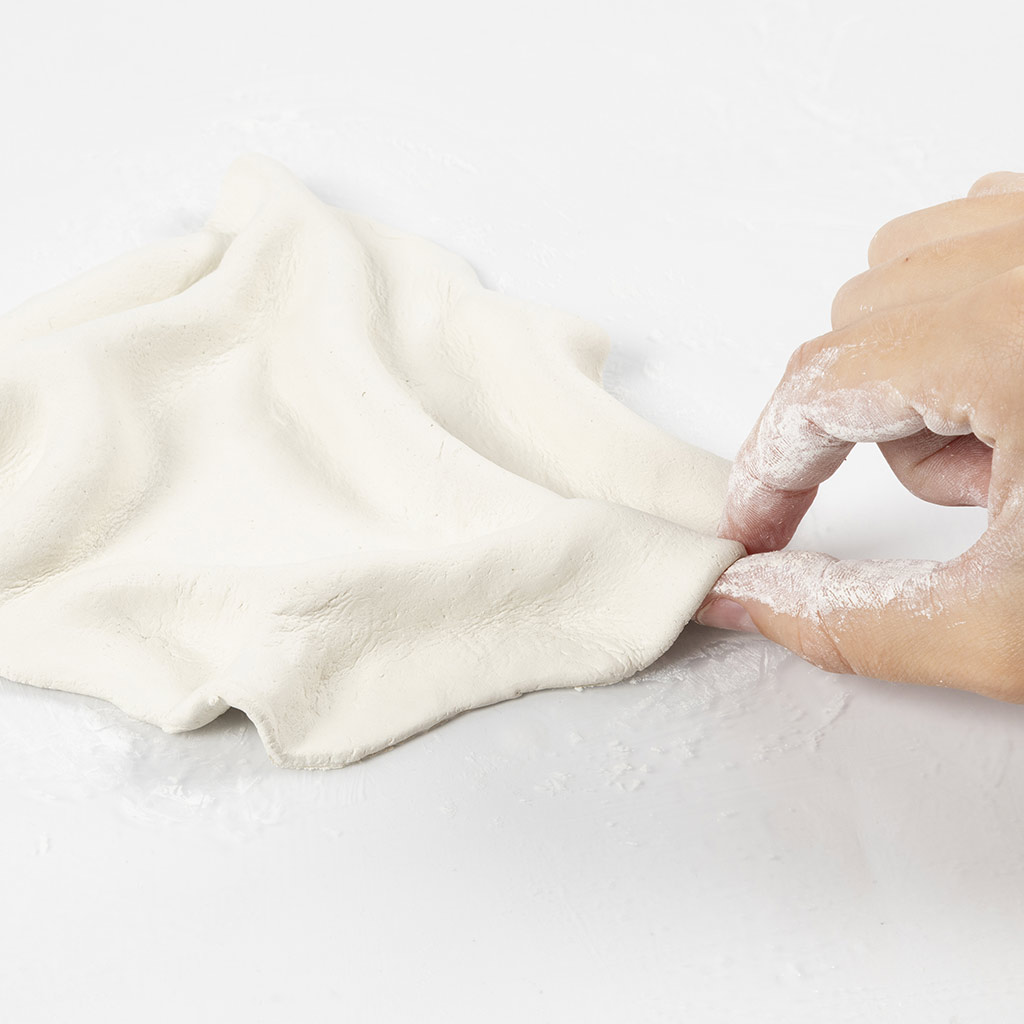 Gently create a wavy shape out of the clay as shown in the picture.
Gently create a wavy shape out of the clay as shown in the picture.35 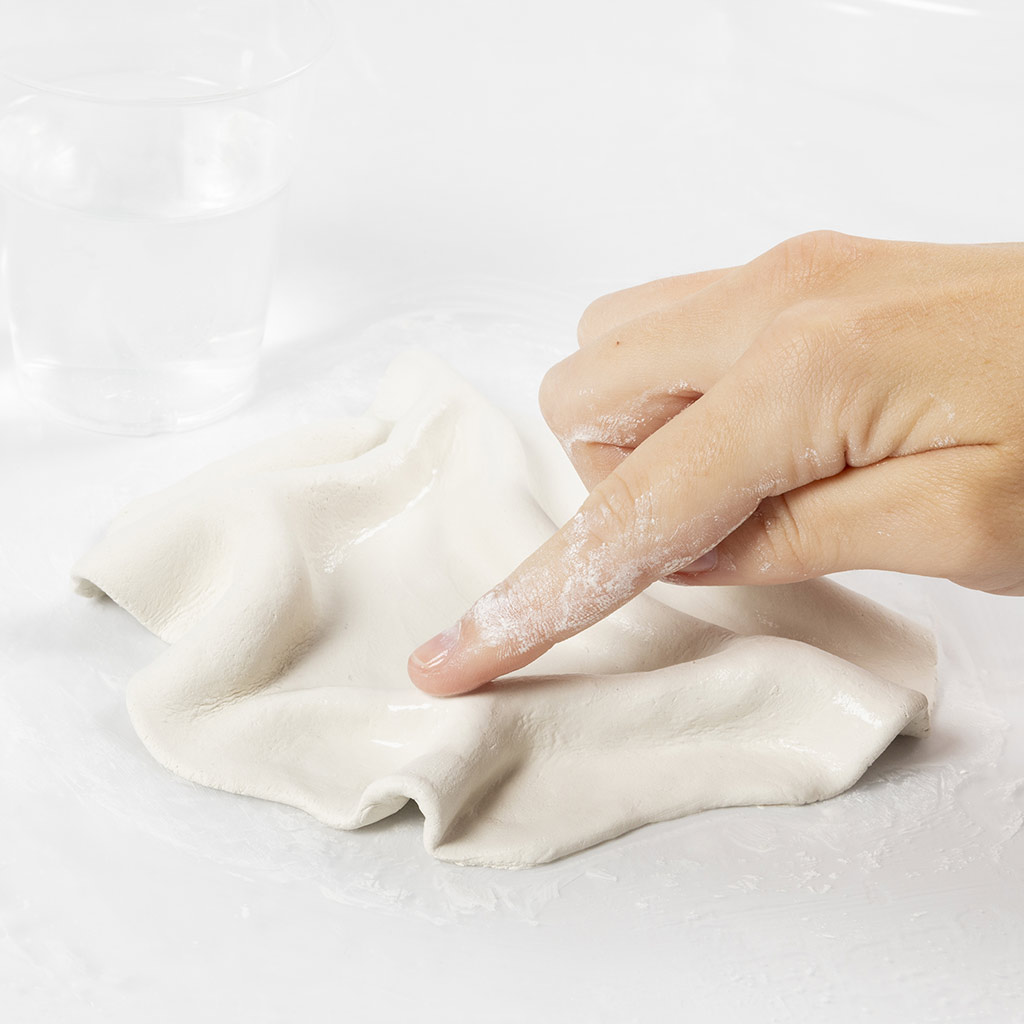 If the clay cracks slightly, smooth it out with water. Make as many shapes as you want by repeating steps 14-15.
If the clay cracks slightly, smooth it out with water. Make as many shapes as you want by repeating steps 14-15.36  Moisten with water where you want to attach the shell.
Moisten with water where you want to attach the shell.37 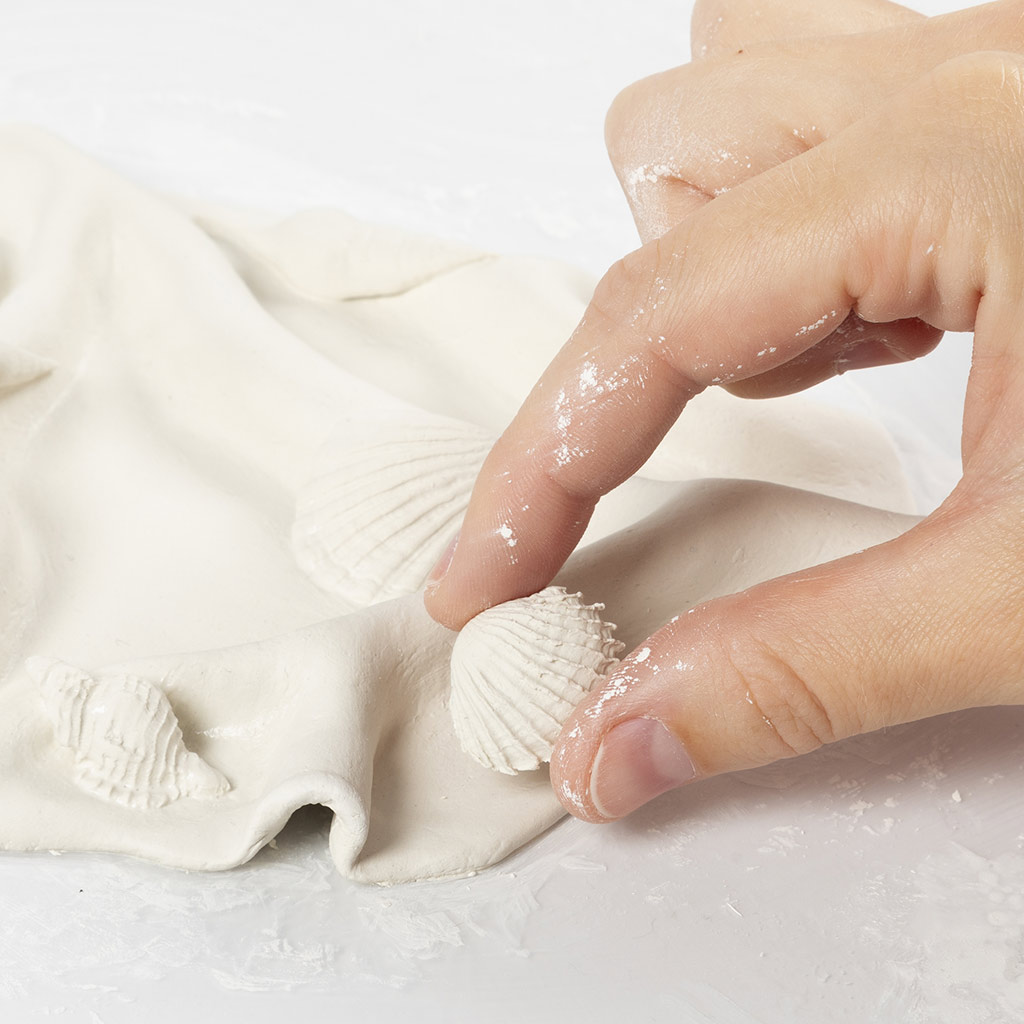 Attach the shell and make sure it sticks well, using the modelling knife provided if necessary.
Attach the shell and make sure it sticks well, using the modelling knife provided if necessary.38  Paint around the shell with water. Repeat the process until you have the desired number of shells.
Paint around the shell with water. Repeat the process until you have the desired number of shells.39 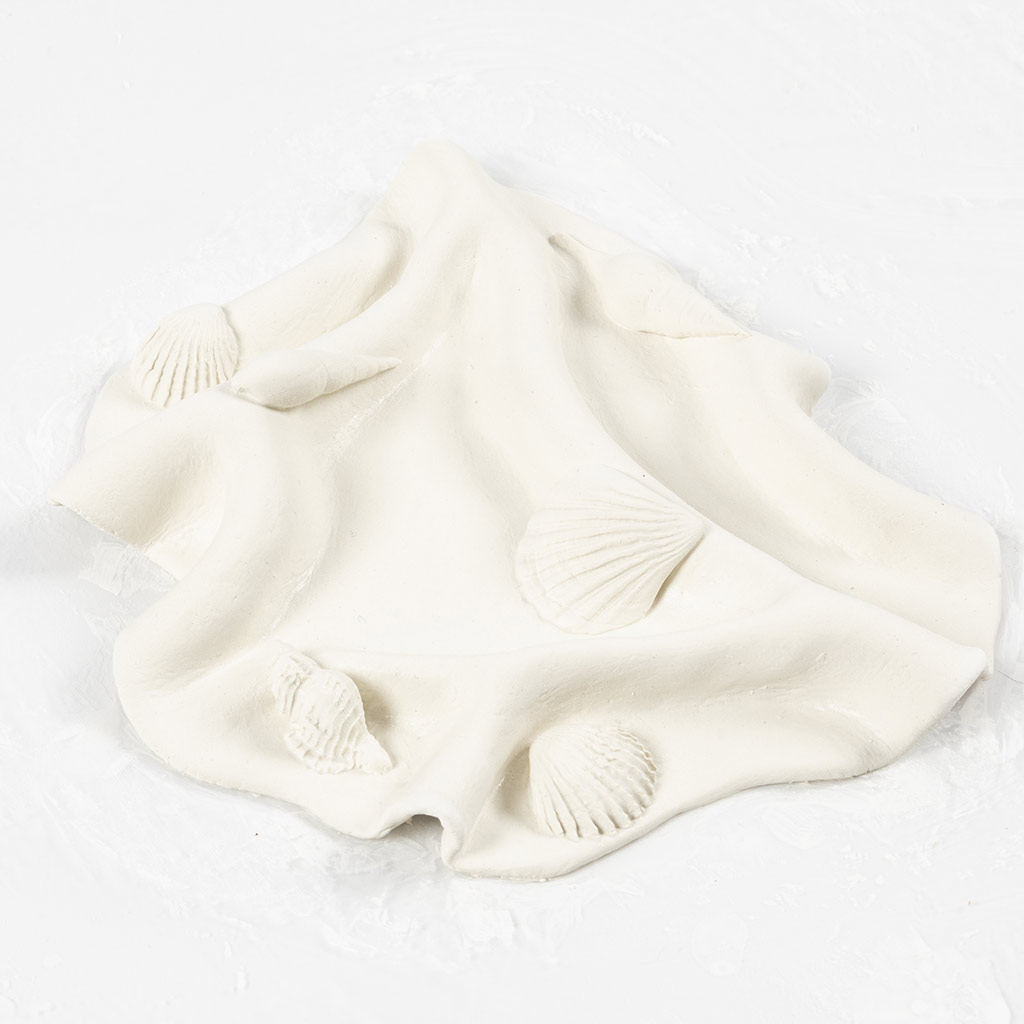 Allow to dry for around 48 hours.
Allow to dry for around 48 hours.40 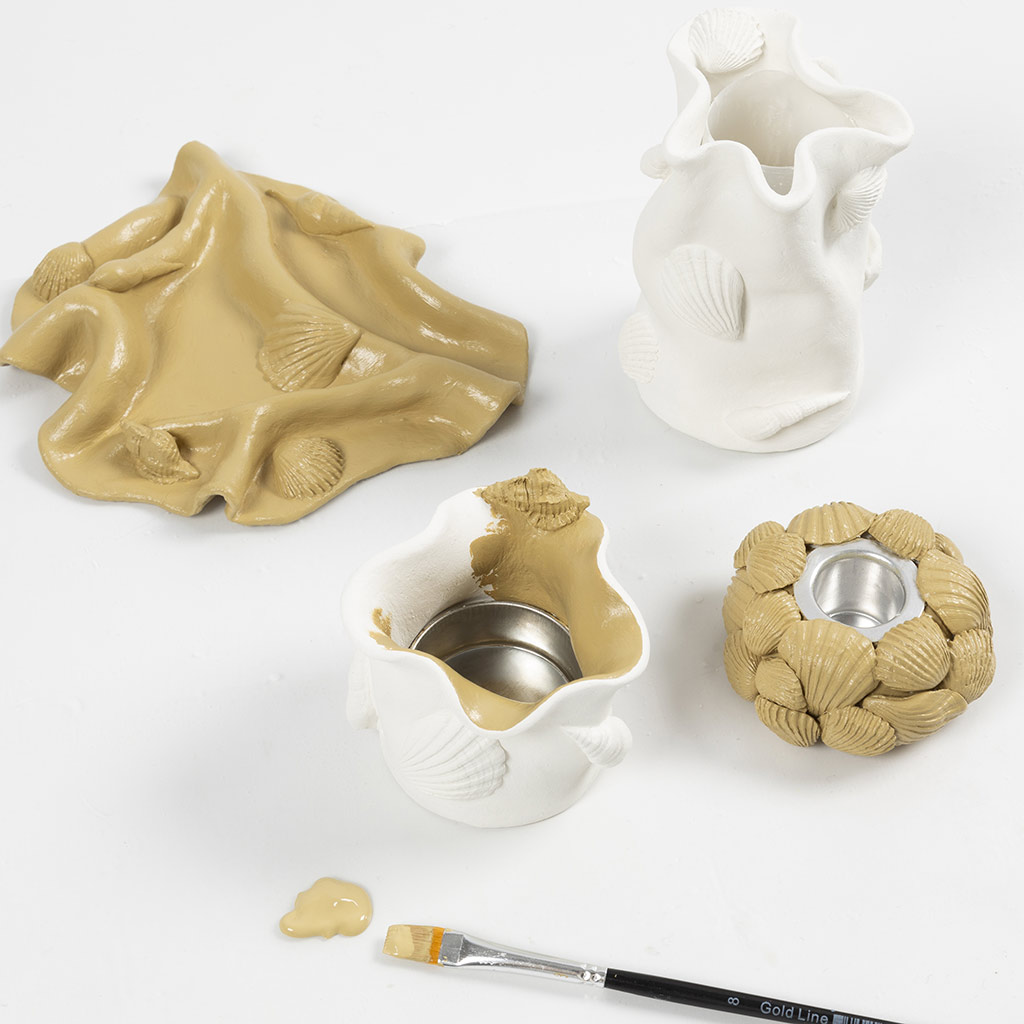 Once the clay is dry, you can paint it however you like.
Once the clay is dry, you can paint it however you like.Already signed up? Download the template
Also go exploring in
