
Creative idea
New
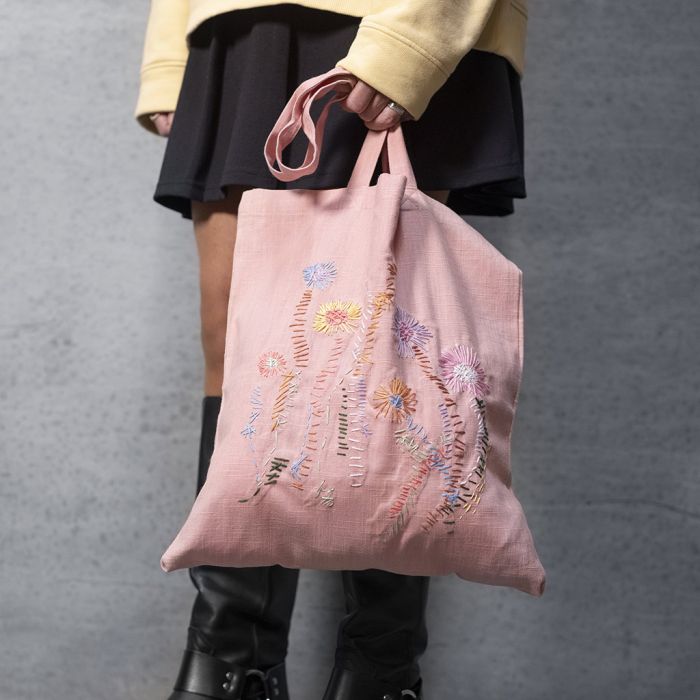
Tote bag with floral embroidery
#v17115
Decorate a tote bag with delightful floral embroidery. Simply follow the dotted pattern however you want – it doesn't have to be perfect since, after all, imperfection is part of the charm. When the embroidery is finished, secure the back of the embroidery with sticky base.
#v17115
How to do it Download the templates/recipes
1 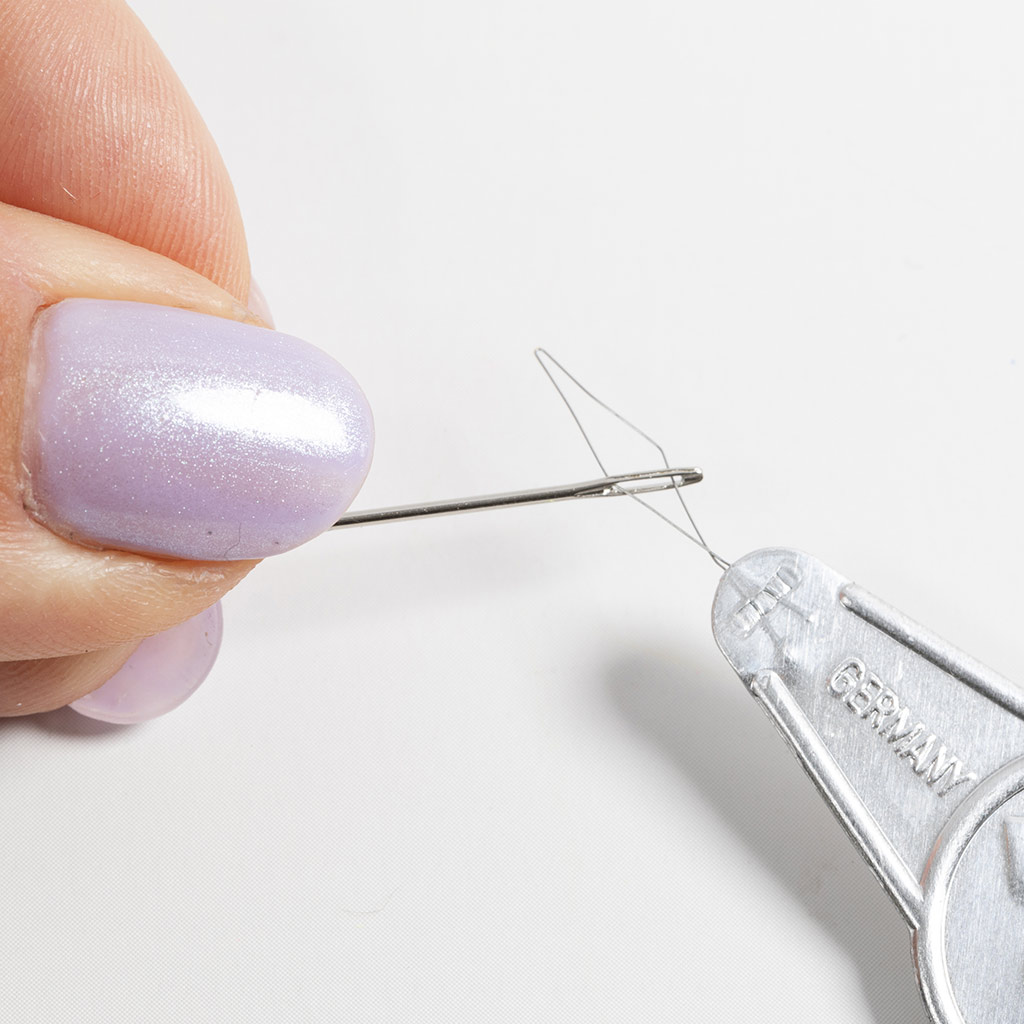 Start by threading the needle. Insert the loop of the needle threader through the eye of the needle.
Start by threading the needle. Insert the loop of the needle threader through the eye of the needle.2 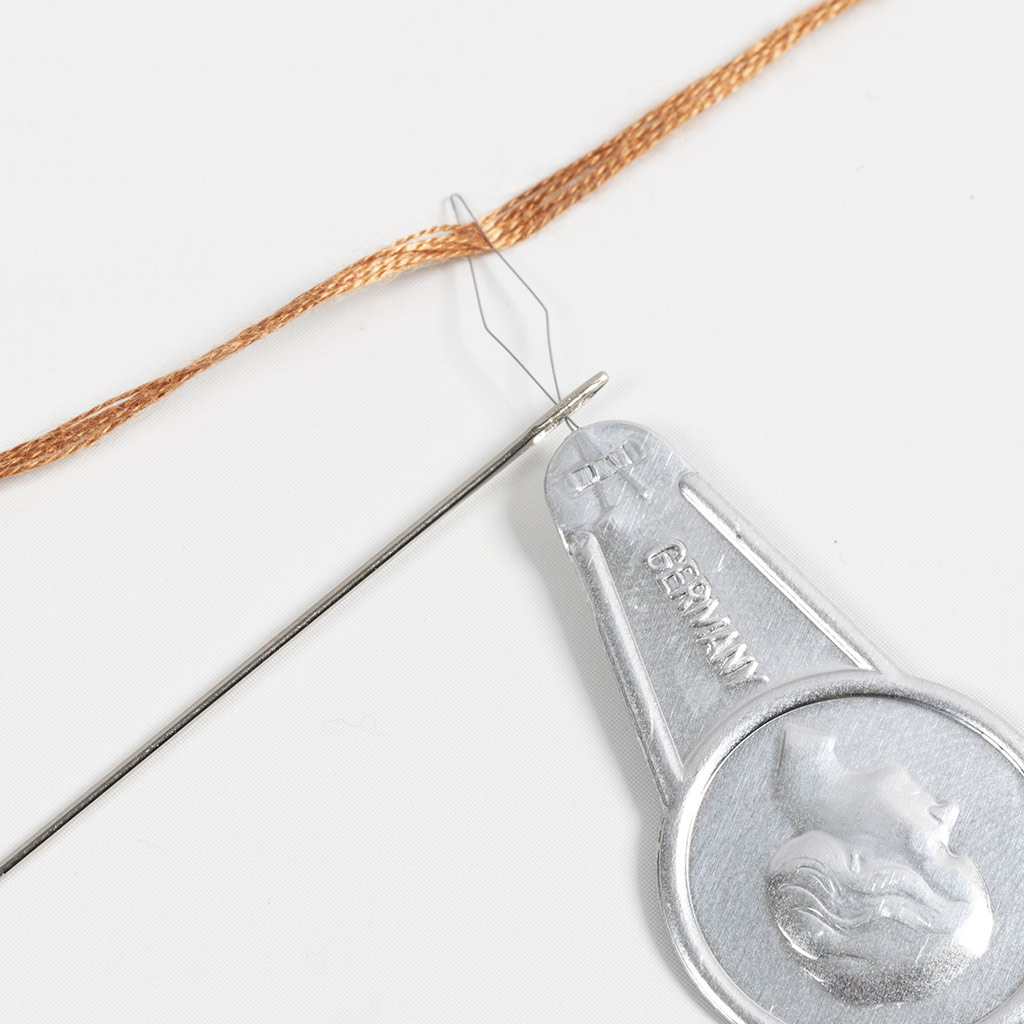 Now thread the yarn through the loop on the needle threader.
Now thread the yarn through the loop on the needle threader.3 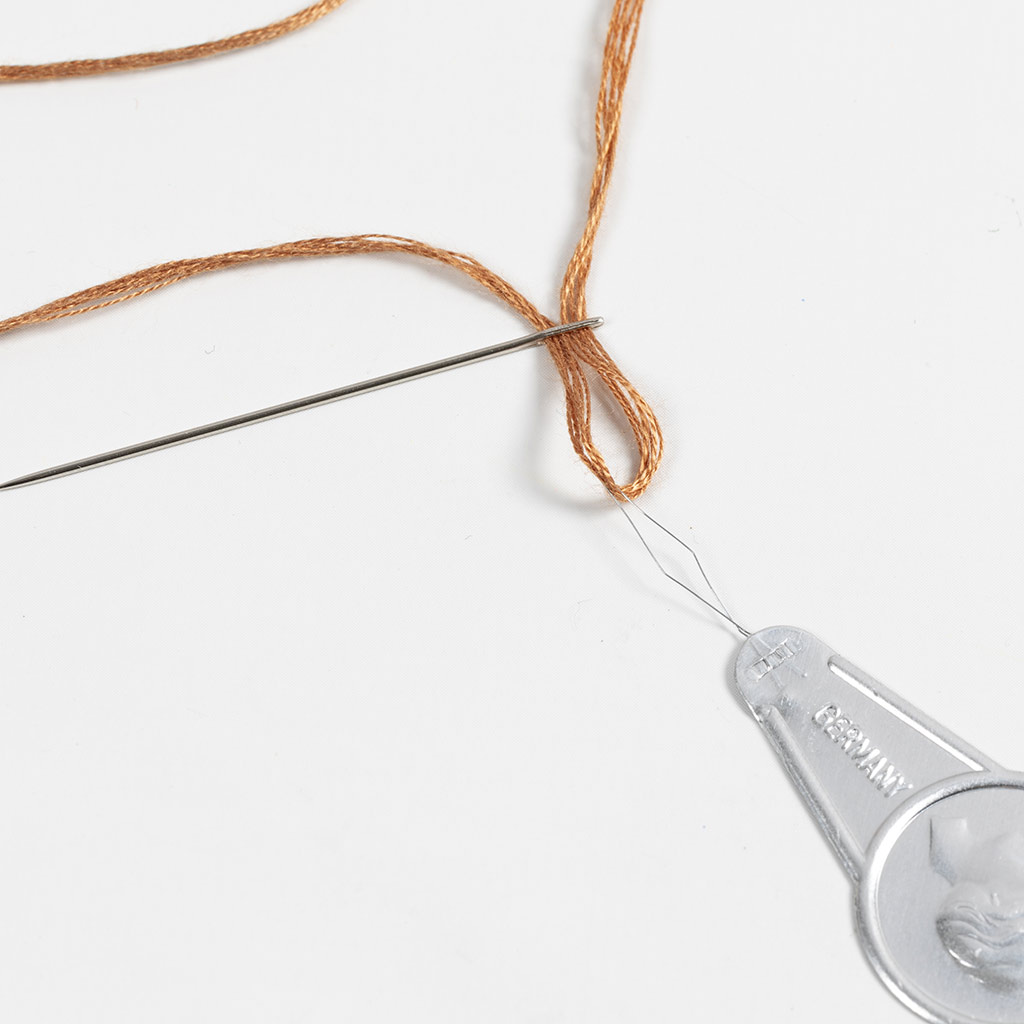 Thread the yarn through the eye of the needle by pulling the needle threader.
Thread the yarn through the eye of the needle by pulling the needle threader.4 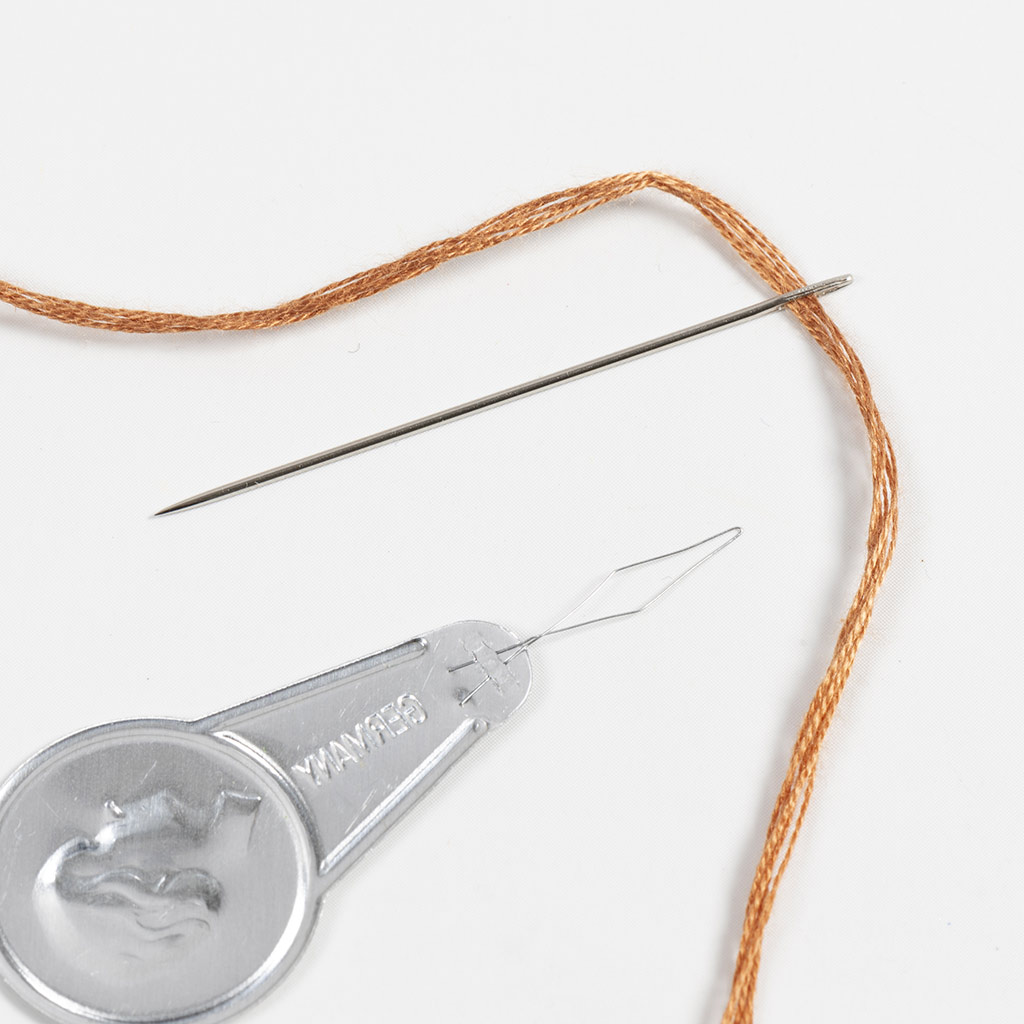 Remove the needle threader from the yarn and your needle is now ready for use.
Remove the needle threader from the yarn and your needle is now ready for use.5 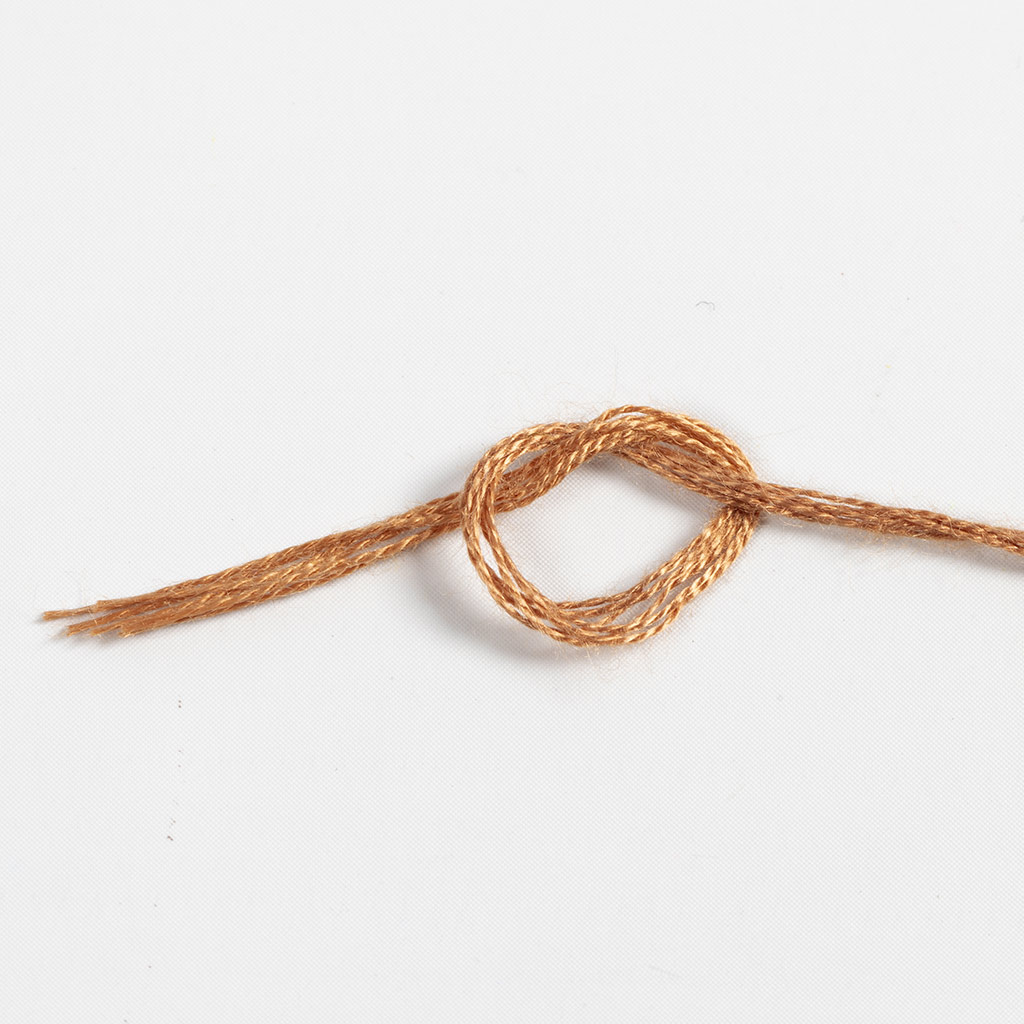 Tie a knot at the end of the yarn.
Tie a knot at the end of the yarn.6 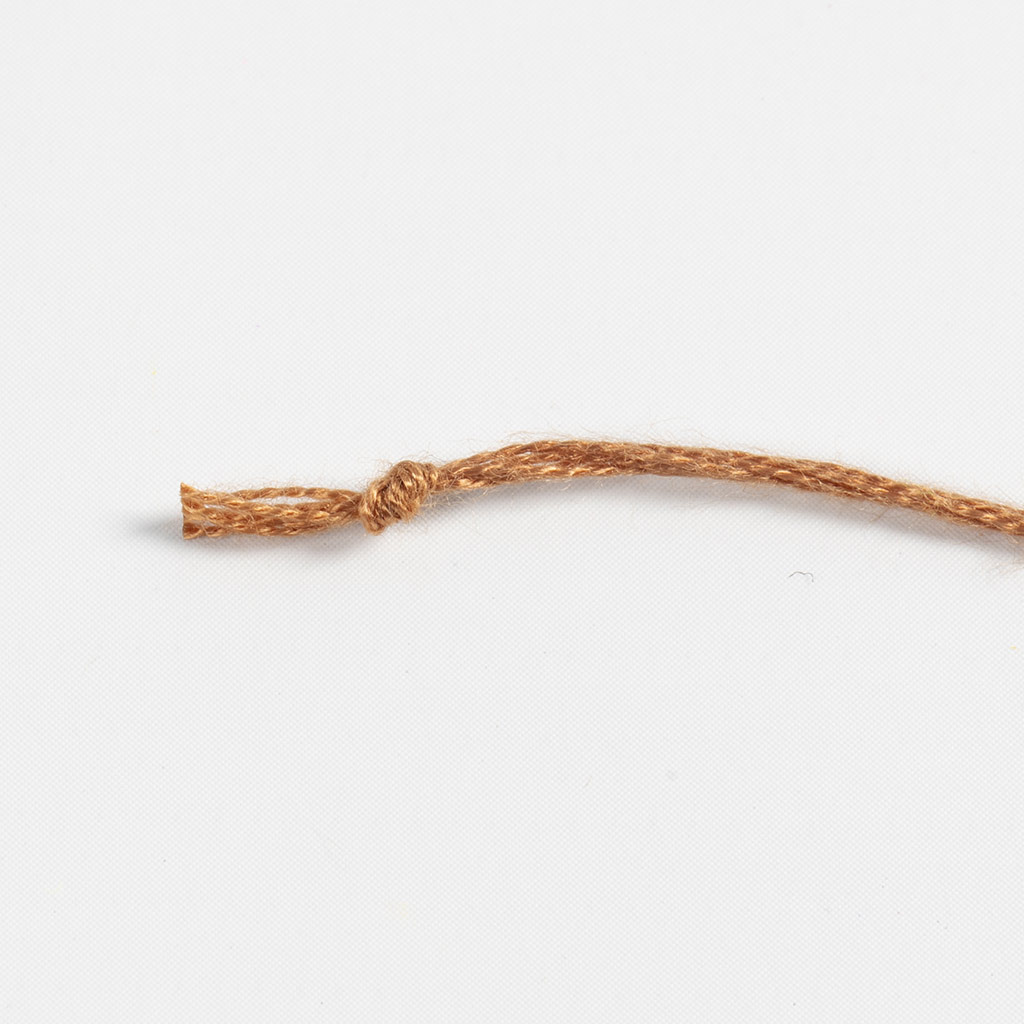 Tighten.
Tighten.7 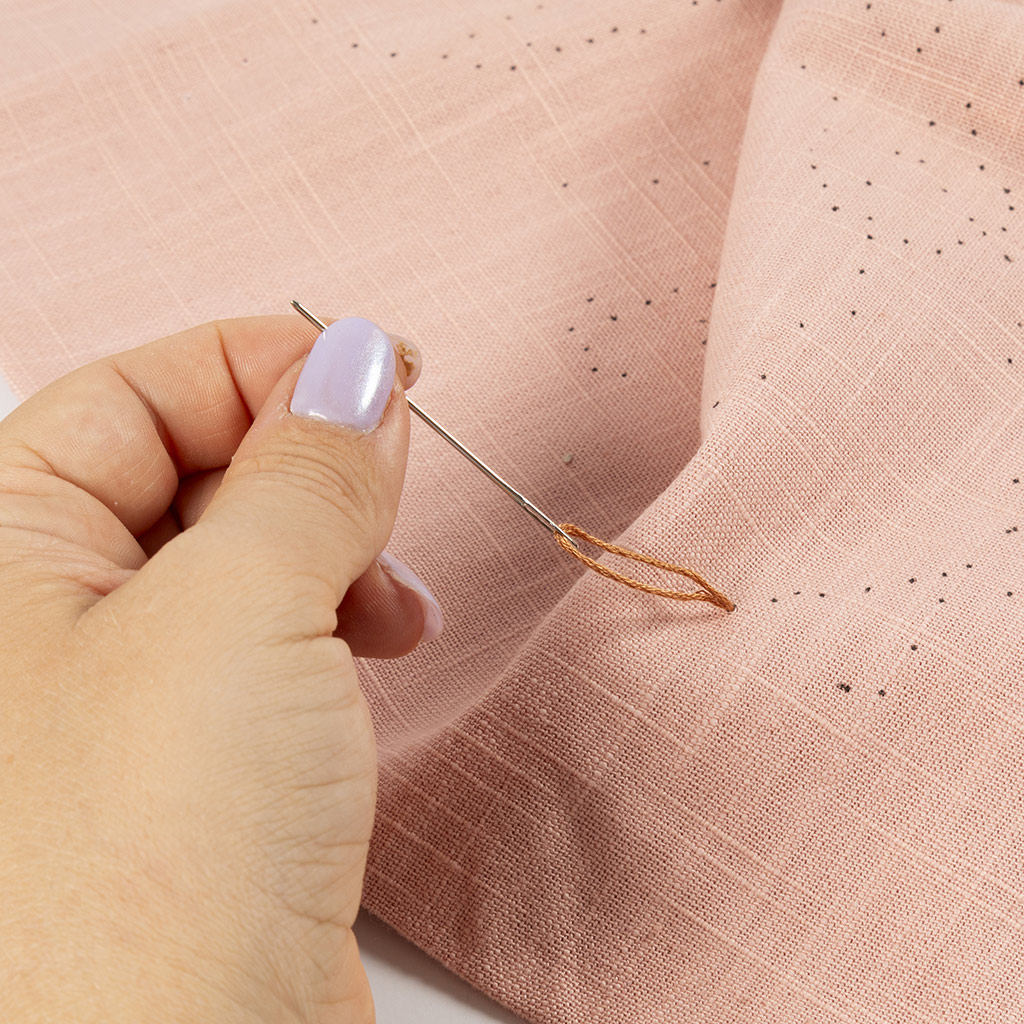 Insert the needle from the inside of the bag.
Insert the needle from the inside of the bag.8 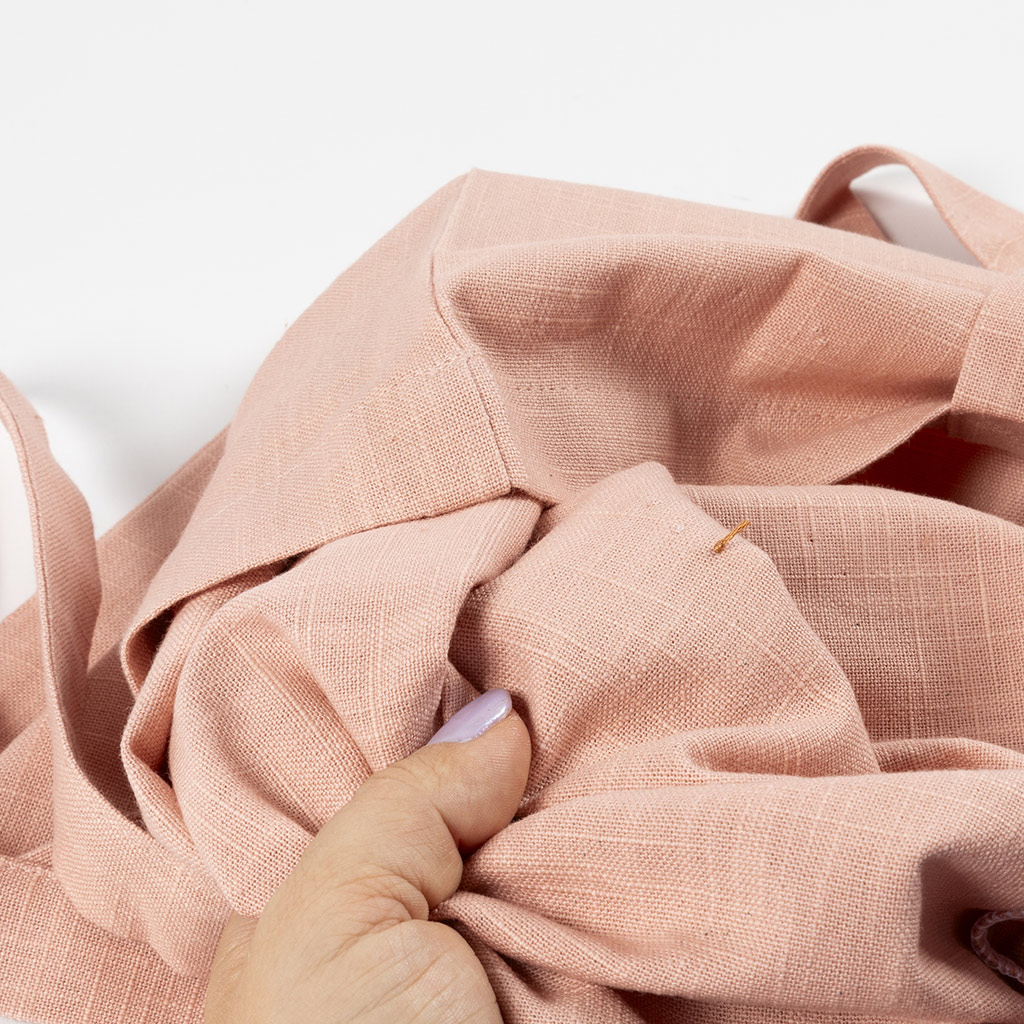 The knot keeps the thread in place.
The knot keeps the thread in place.9 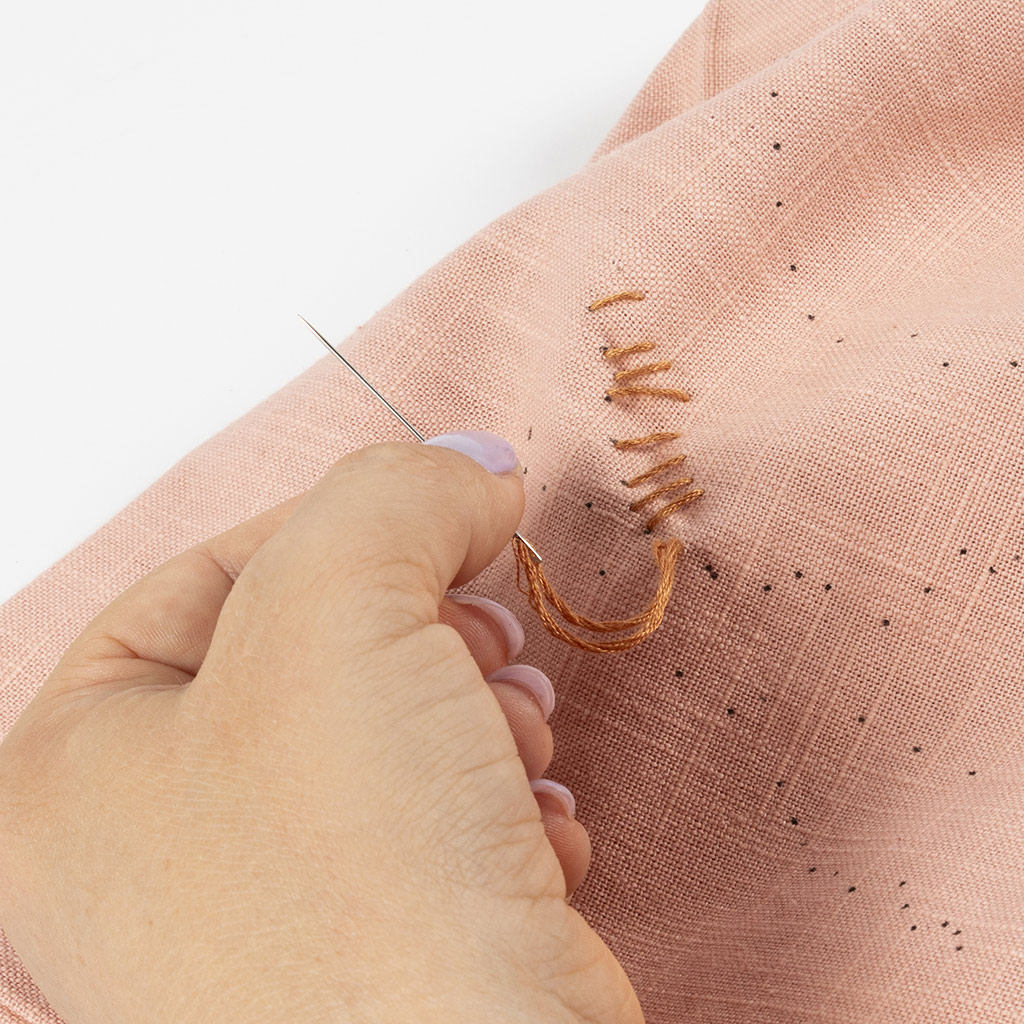 Make stitches by, for example, inserting the needle through the dot from the back
Make stitches by, for example, inserting the needle through the dot from the back10  and down through the front around 1 cm from the dot. Continue this process until you have embroidered everything you want with this colour of yarn. Remember, there are no rules – there is no right or wrong way to embroider. After all, perfection comes from imperfection.
and down through the front around 1 cm from the dot. Continue this process until you have embroidered everything you want with this colour of yarn. Remember, there are no rules – there is no right or wrong way to embroider. After all, perfection comes from imperfection.11 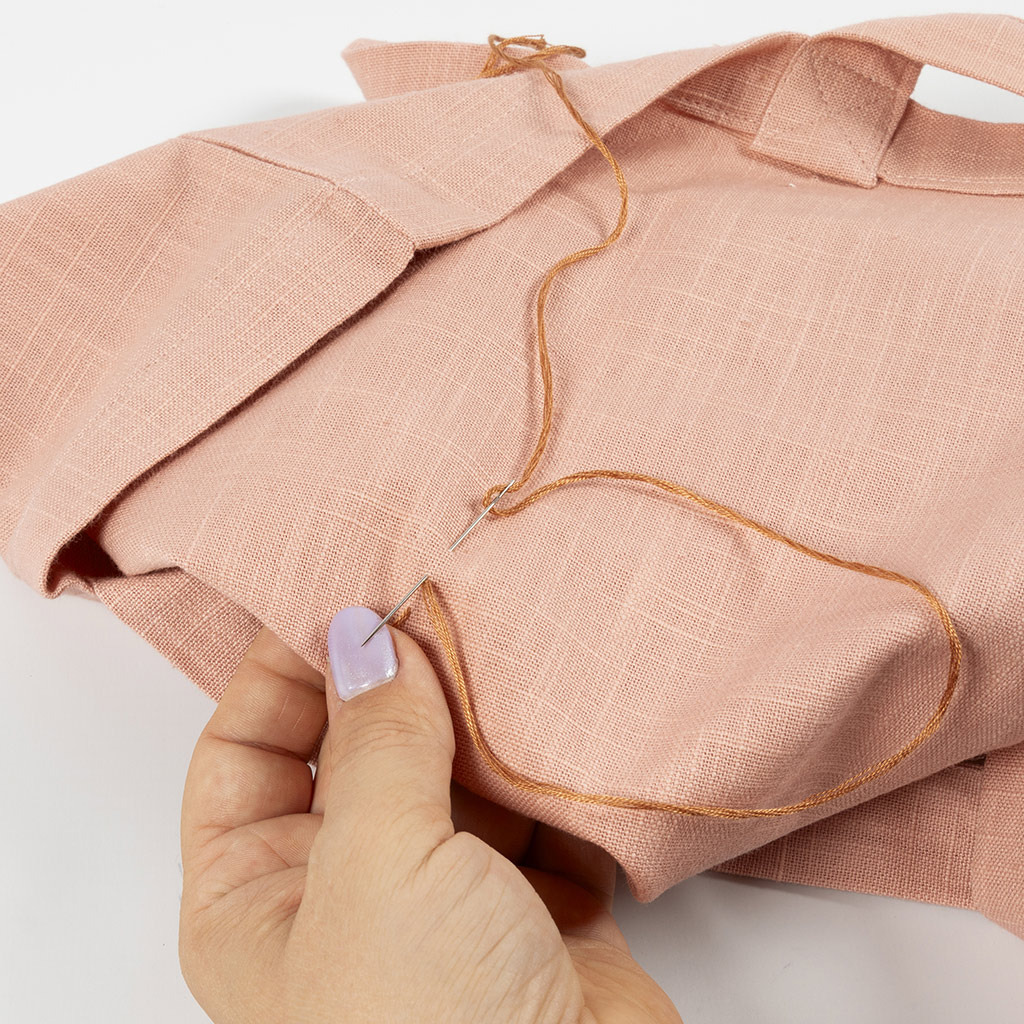 Fasten off the thread by inserting the needle back one step as shown in the picture.
Fasten off the thread by inserting the needle back one step as shown in the picture.12  Before tightening the thread, insert the needle through the loop.
Before tightening the thread, insert the needle through the loop.13 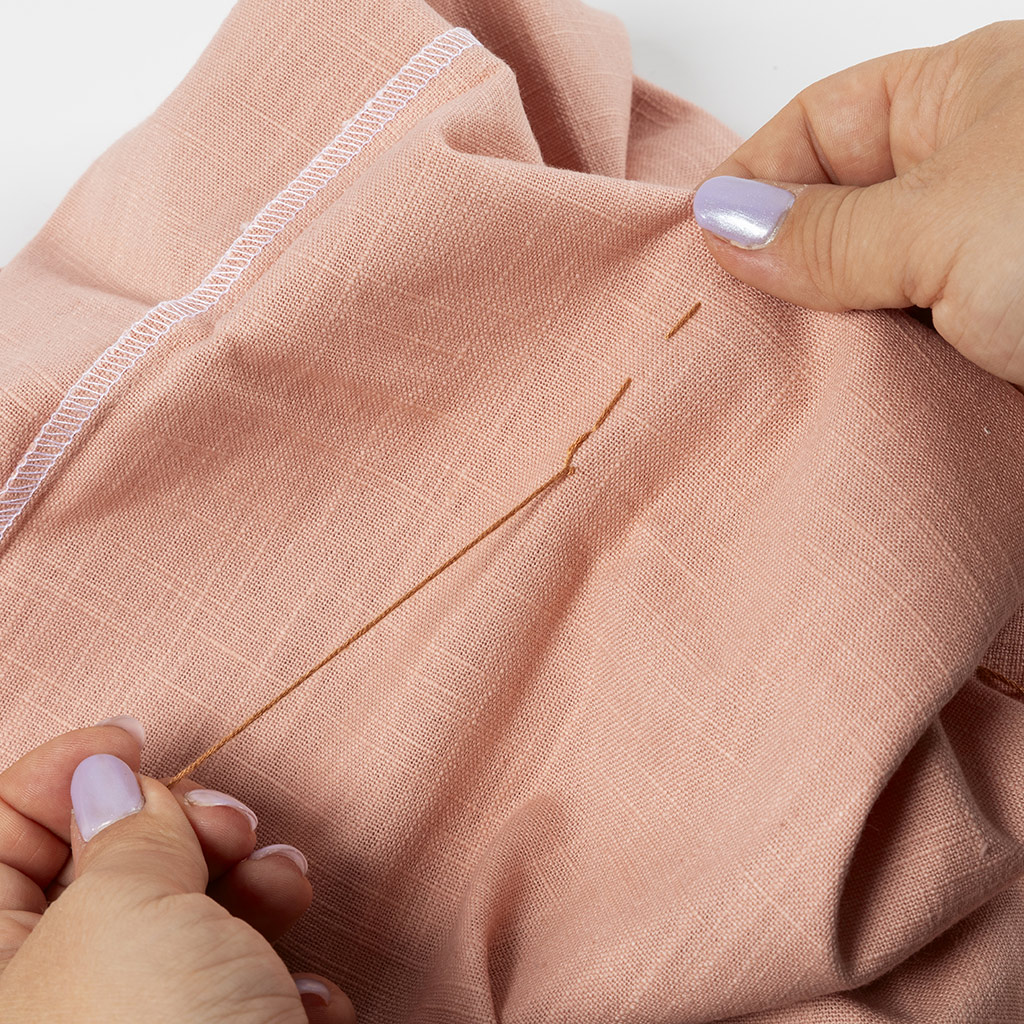 Tighten the yarn.
Tighten the yarn.14 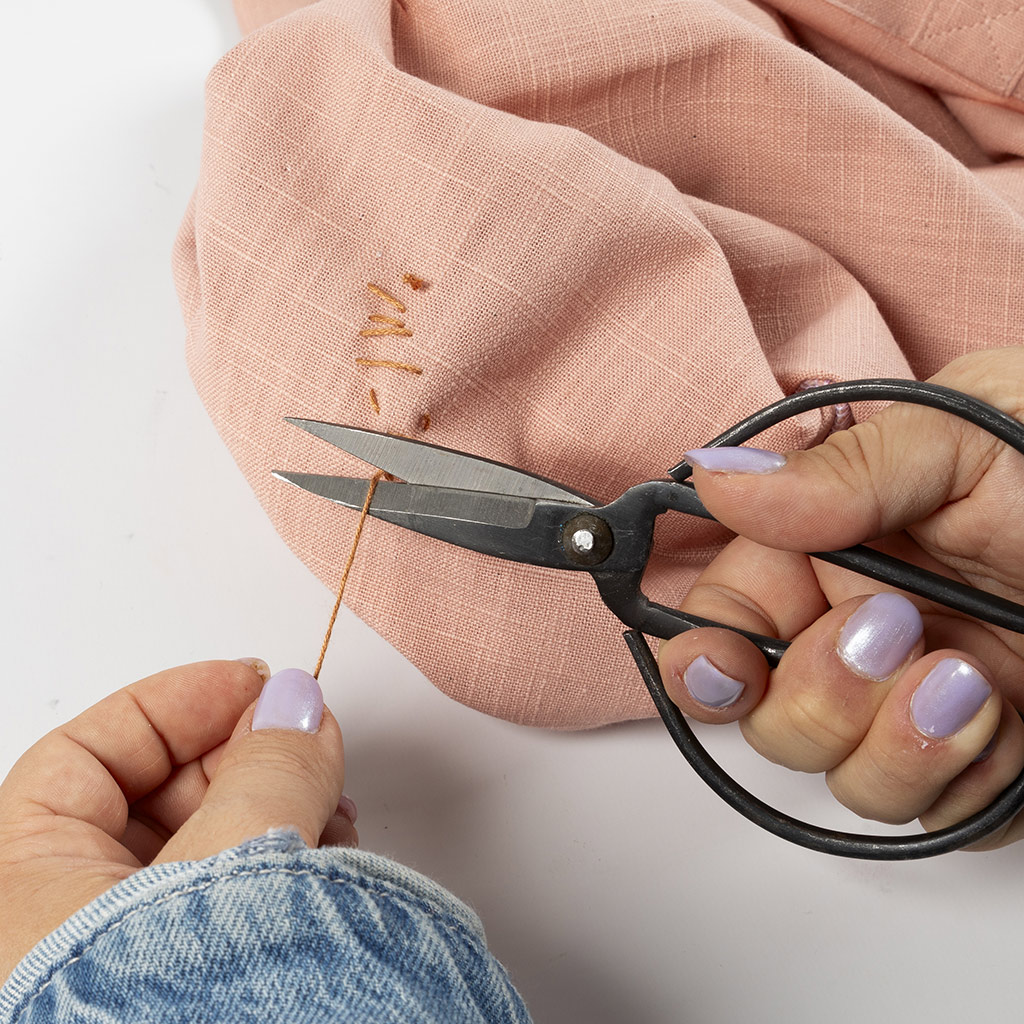 Cut off the excess thread.
Cut off the excess thread.15 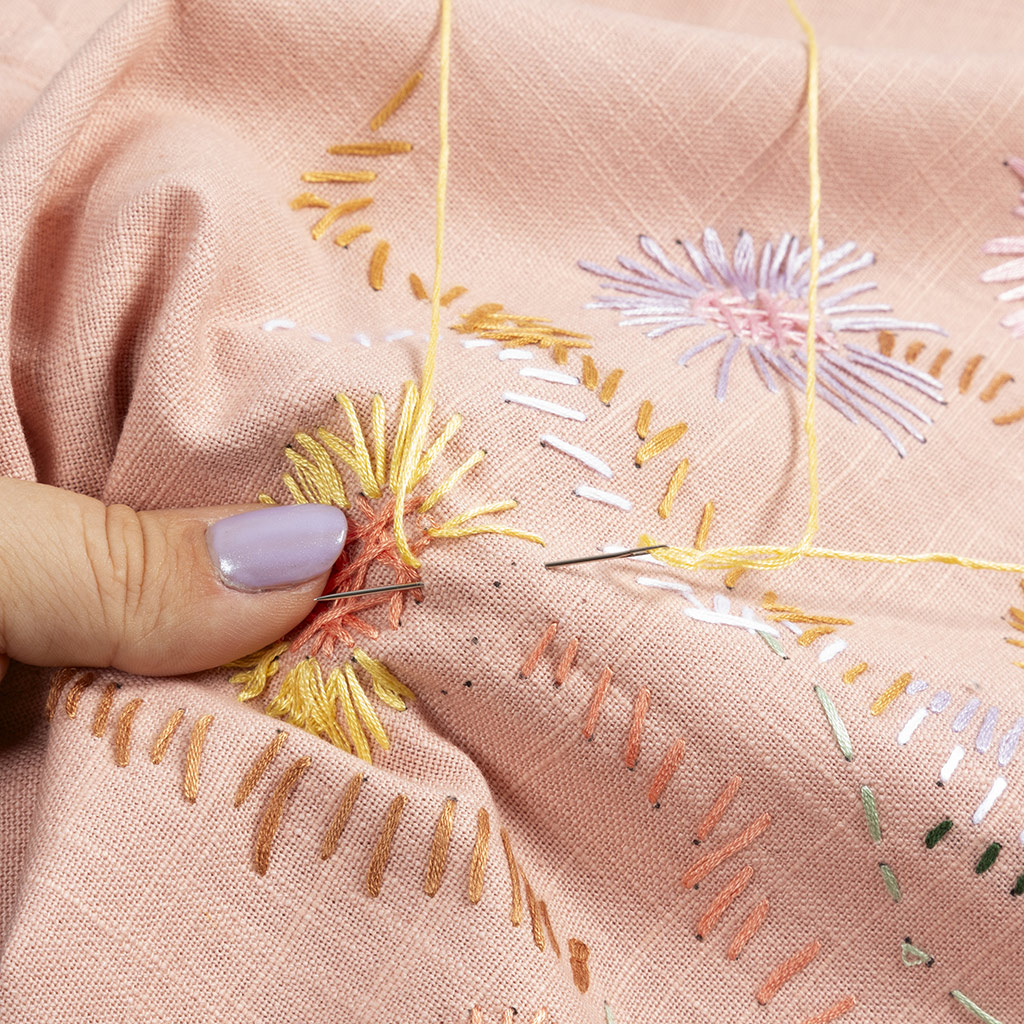 To switch colours, repeat steps 1-8. To make the flower petals, insert the needle all the way through from the front with around 2 cm of fabric between the end of the needle and the tip, as shown in the picture.
To switch colours, repeat steps 1-8. To make the flower petals, insert the needle all the way through from the front with around 2 cm of fabric between the end of the needle and the tip, as shown in the picture.16 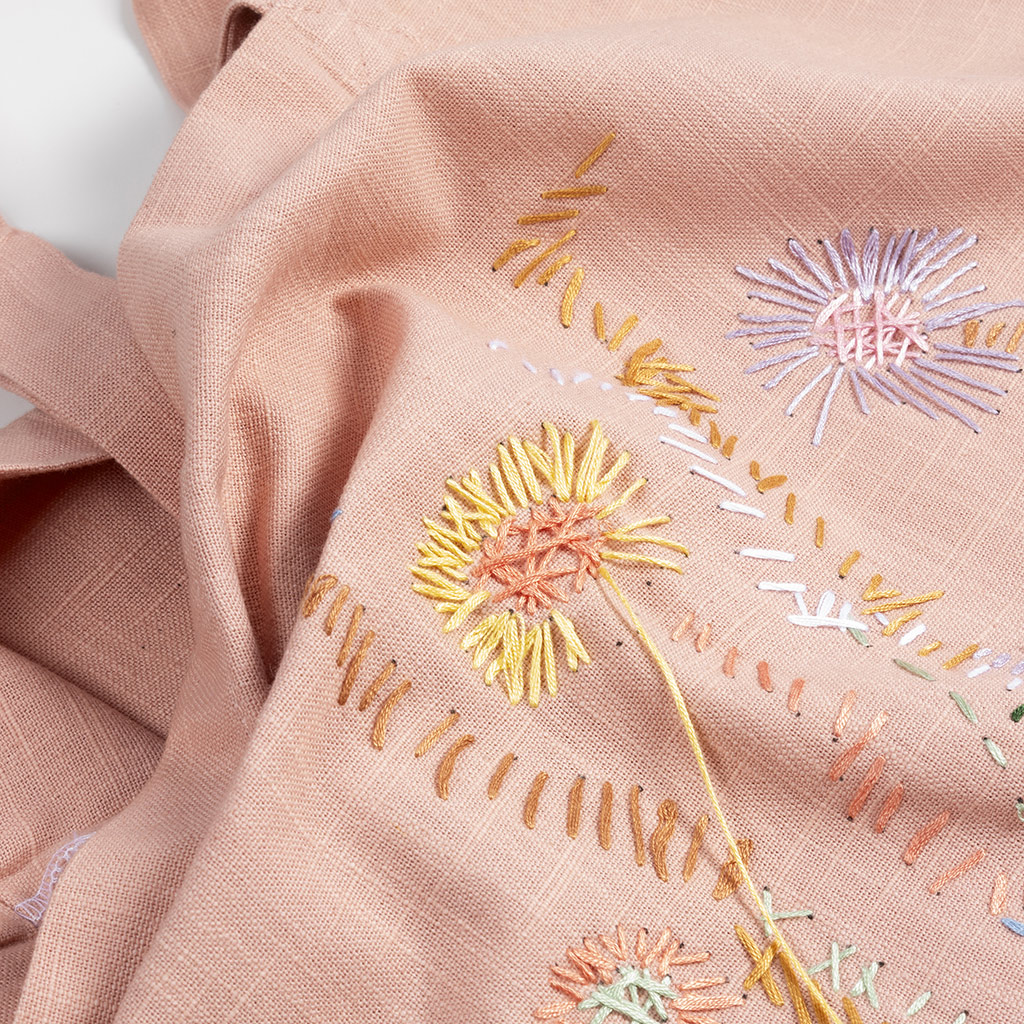 Once you’ve threaded it through, it will look like this.
Once you’ve threaded it through, it will look like this.17 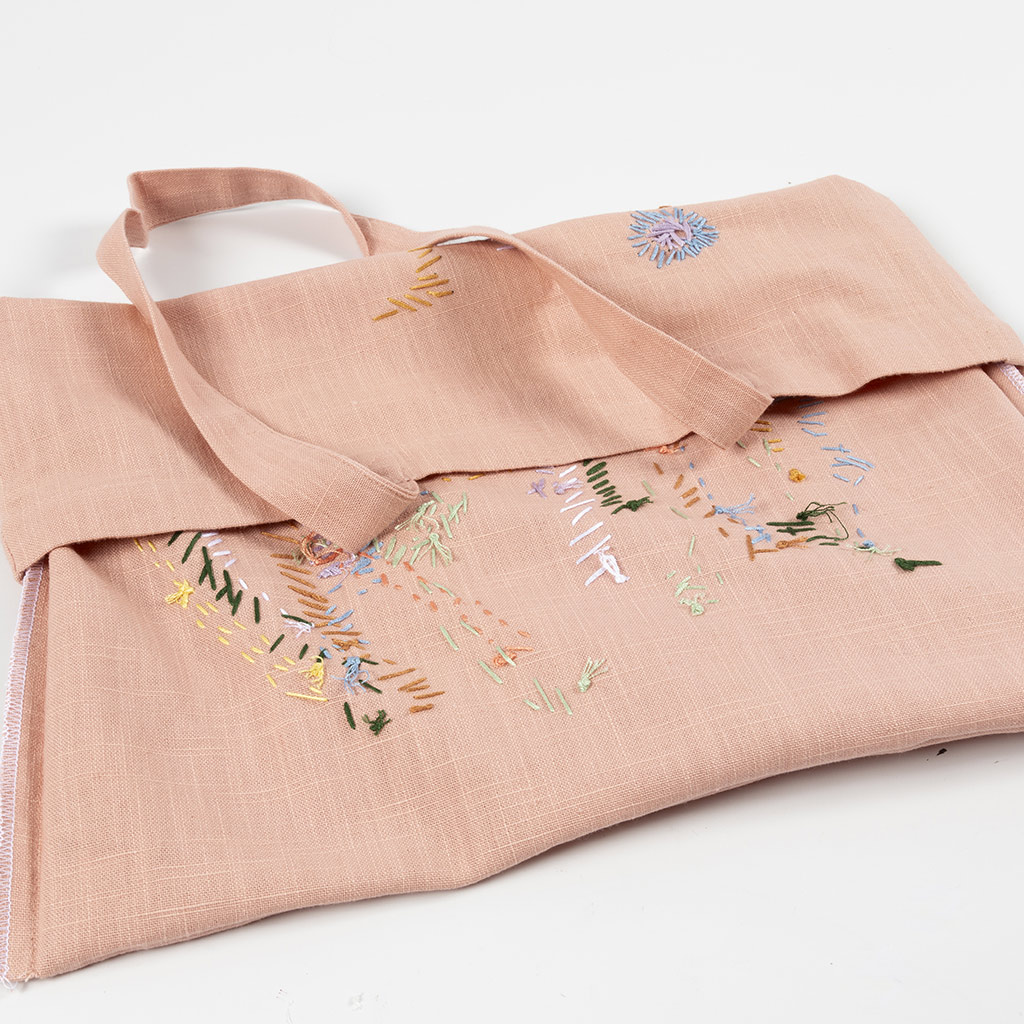 Once the embroidery is just how you want it, turn the bag inside out.
Once the embroidery is just how you want it, turn the bag inside out.18 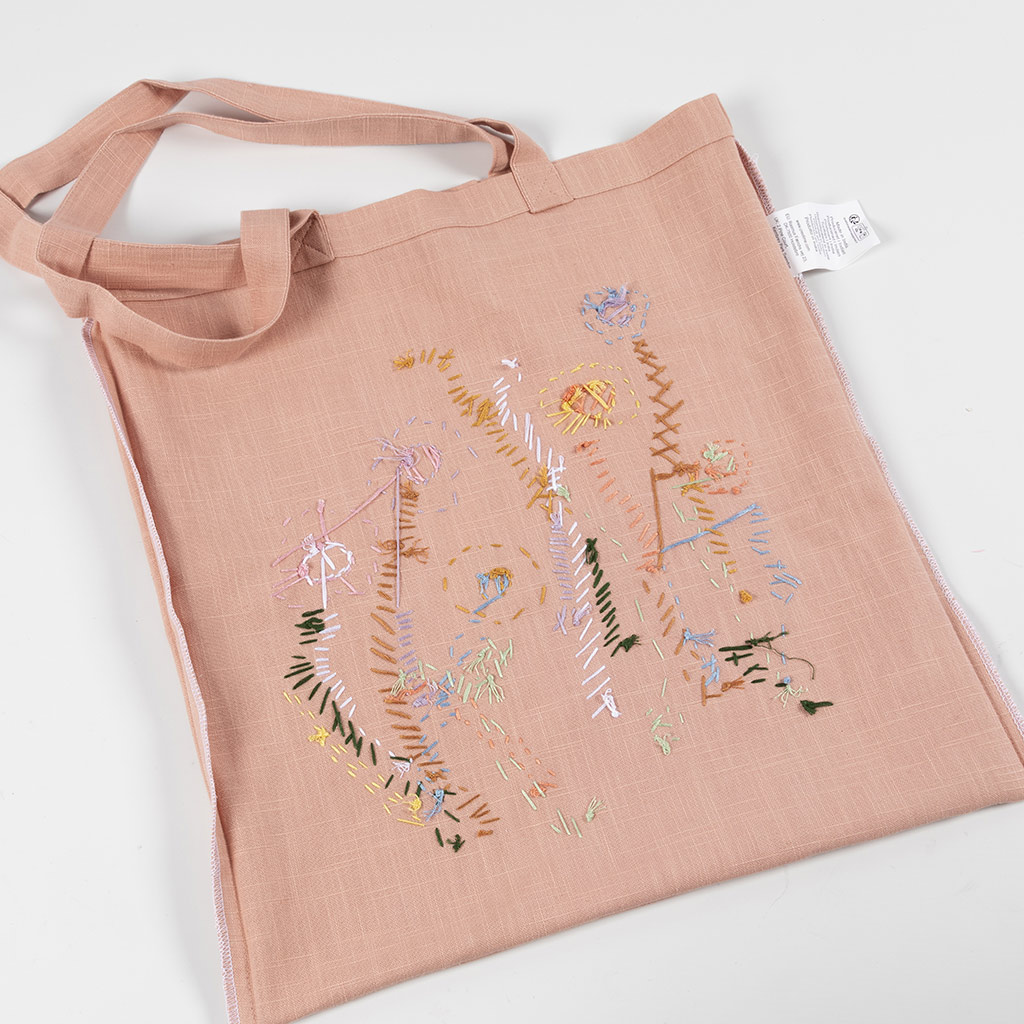 It should look like this.
It should look like this.19 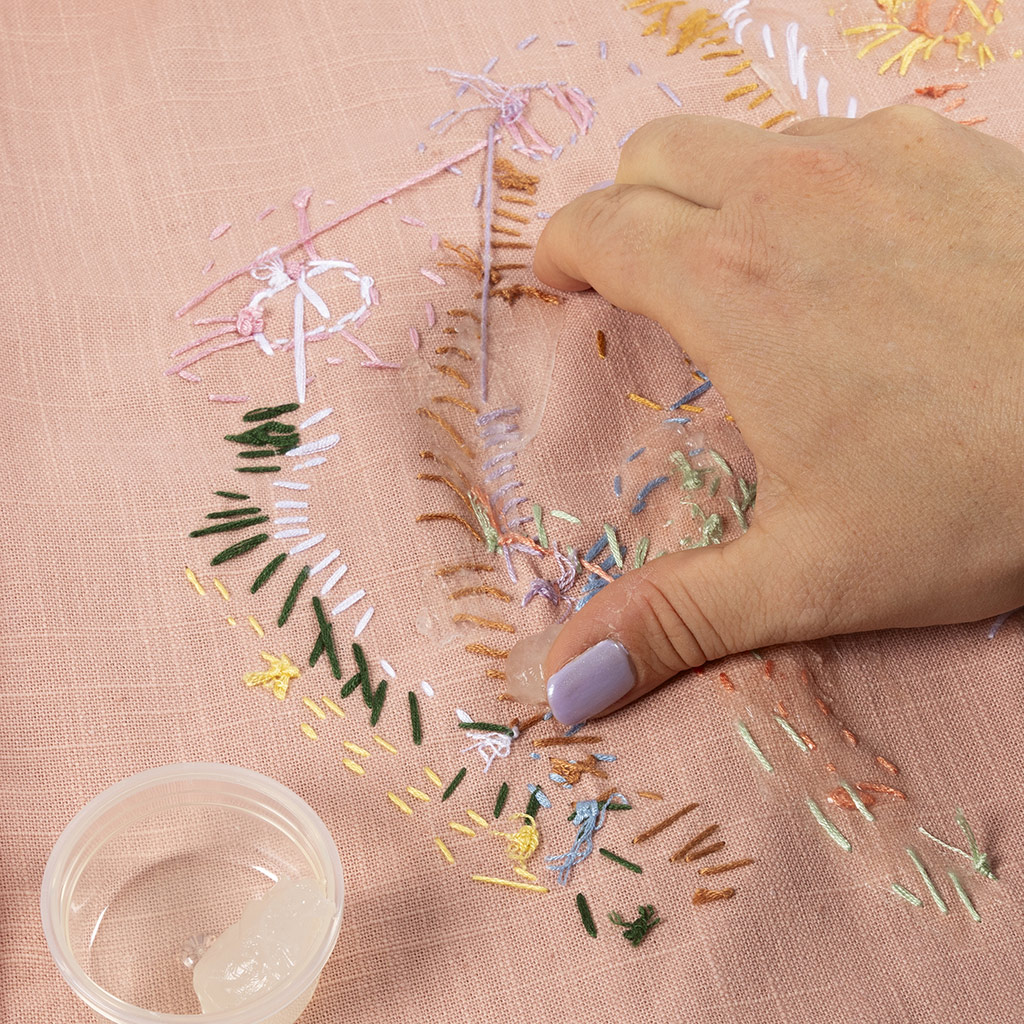 Protect the inside of the embroidery by applying a thin layer of sticky base. Allow to dry, turn the bag right side out and it's ready to use.
Protect the inside of the embroidery by applying a thin layer of sticky base. Allow to dry, turn the bag right side out and it's ready to use.Already signed up? Download the template
Also go exploring in
