

New
Creative idea
Graphic illustrations with gouache paint
#v17110
Make colourful illustrations with gouache paint. You learn how to adjust the texture of the paint and shade of the colours with white and create gradations. Once you've learned the techniques, you're ready to paint the illustrations. Start with the graduation technique wherever you want and then paint the areas you want to colour. Once everything is painted and dry, carefully remove the tape and your artwork is ready to hang.
#v17110
How to do it Download the templates/recipes
1 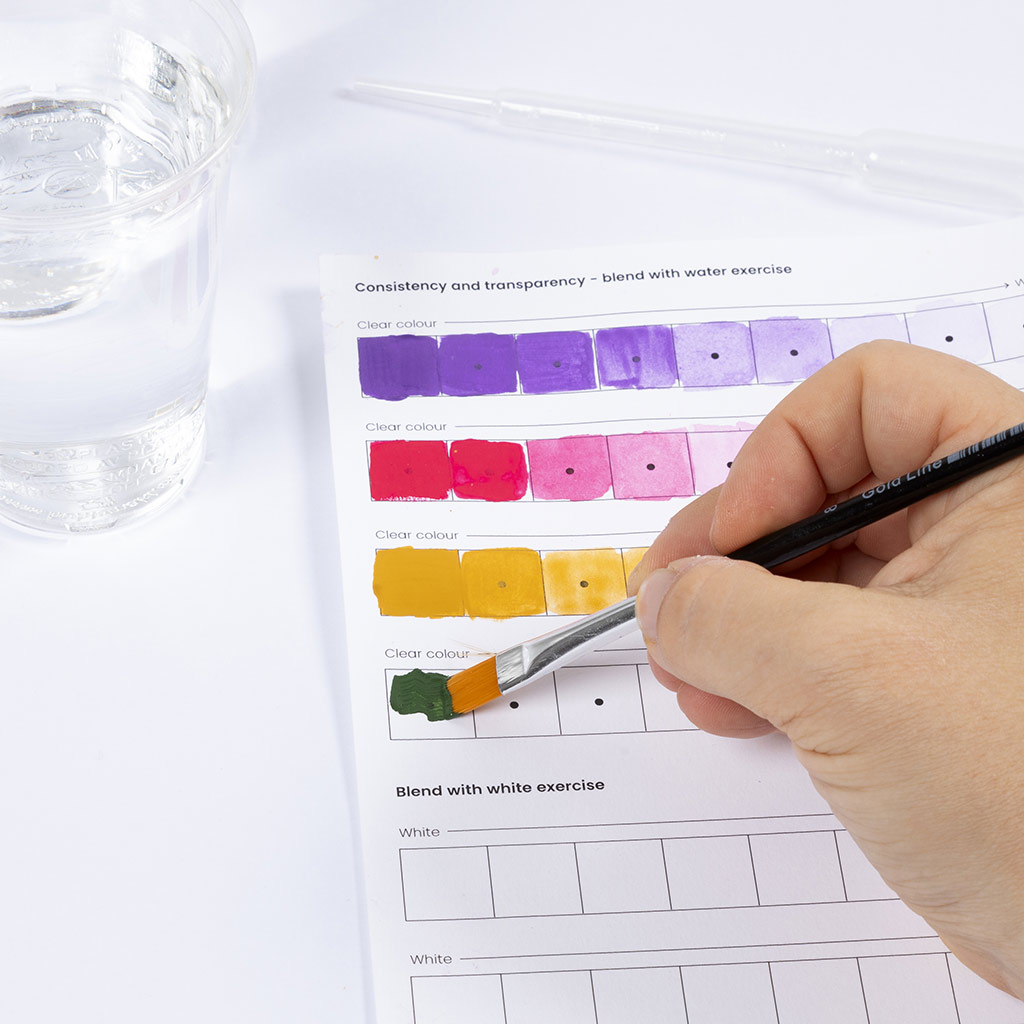 We're now going to learn how the gouache changes consitency and transparency depending on how much water we add to the colour. Sometimes we need to work with the colour as is, while other times we need it to be more watery and transparent in consistency.
Paint with the same colour as in the first box.
We're now going to learn how the gouache changes consitency and transparency depending on how much water we add to the colour. Sometimes we need to work with the colour as is, while other times we need it to be more watery and transparent in consistency.
Paint with the same colour as in the first box.2 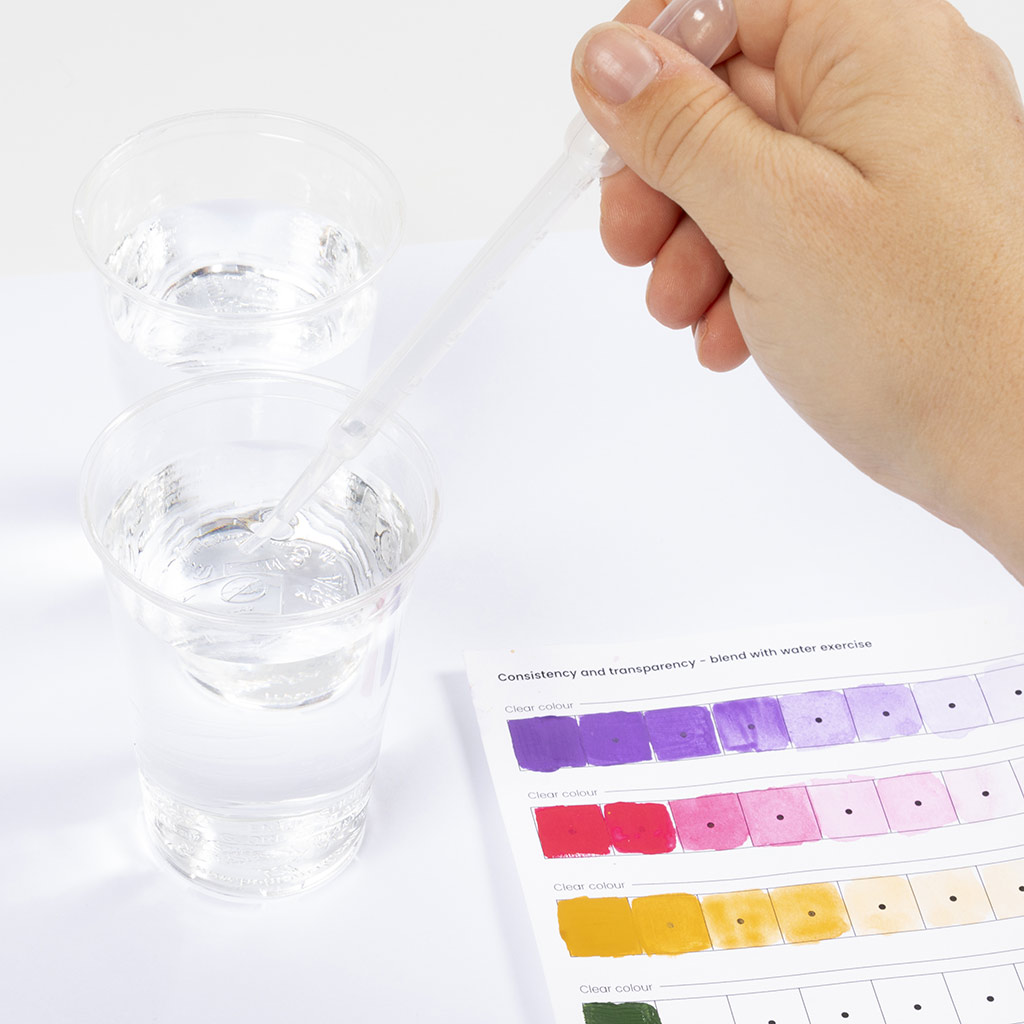 Draw a small amount of clean water into the pipette.
Draw a small amount of clean water into the pipette.3 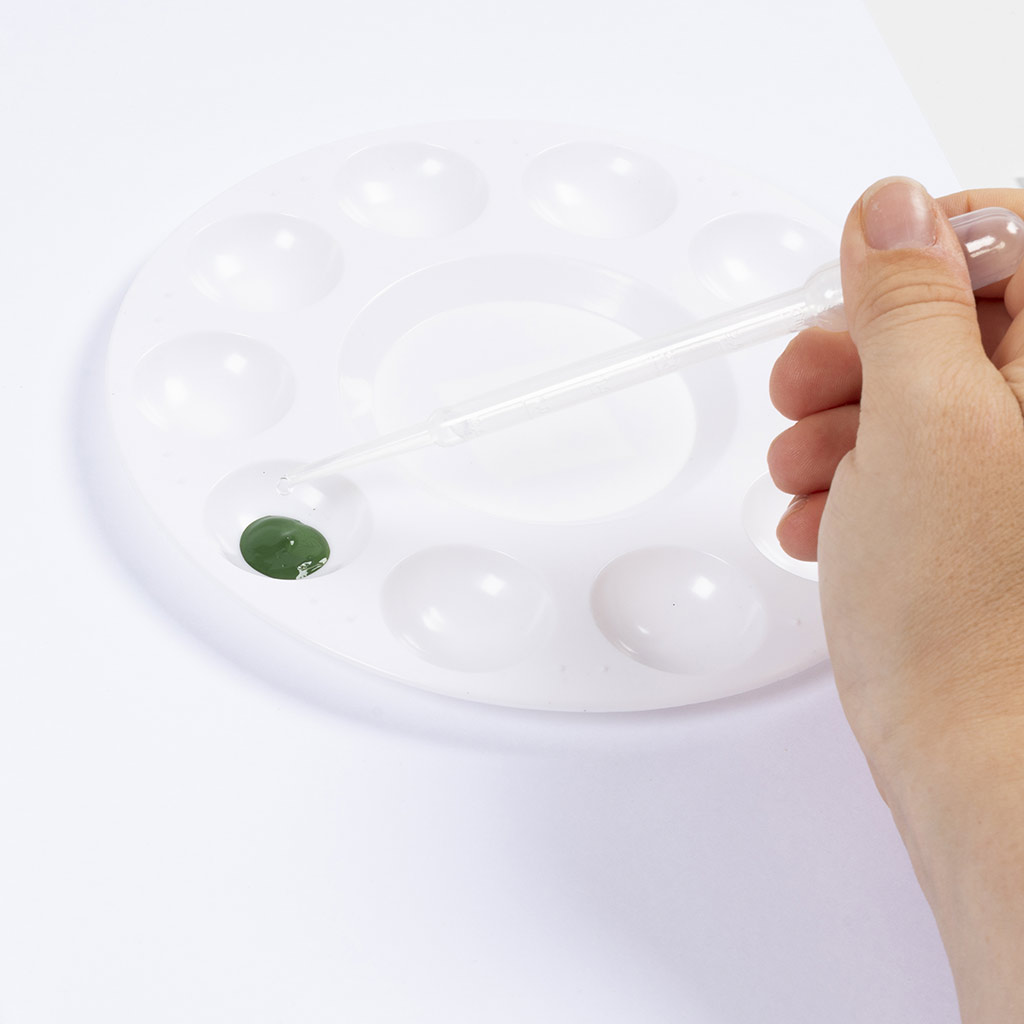 Add a drop of water to the paint and stir.
Add a drop of water to the paint and stir.4 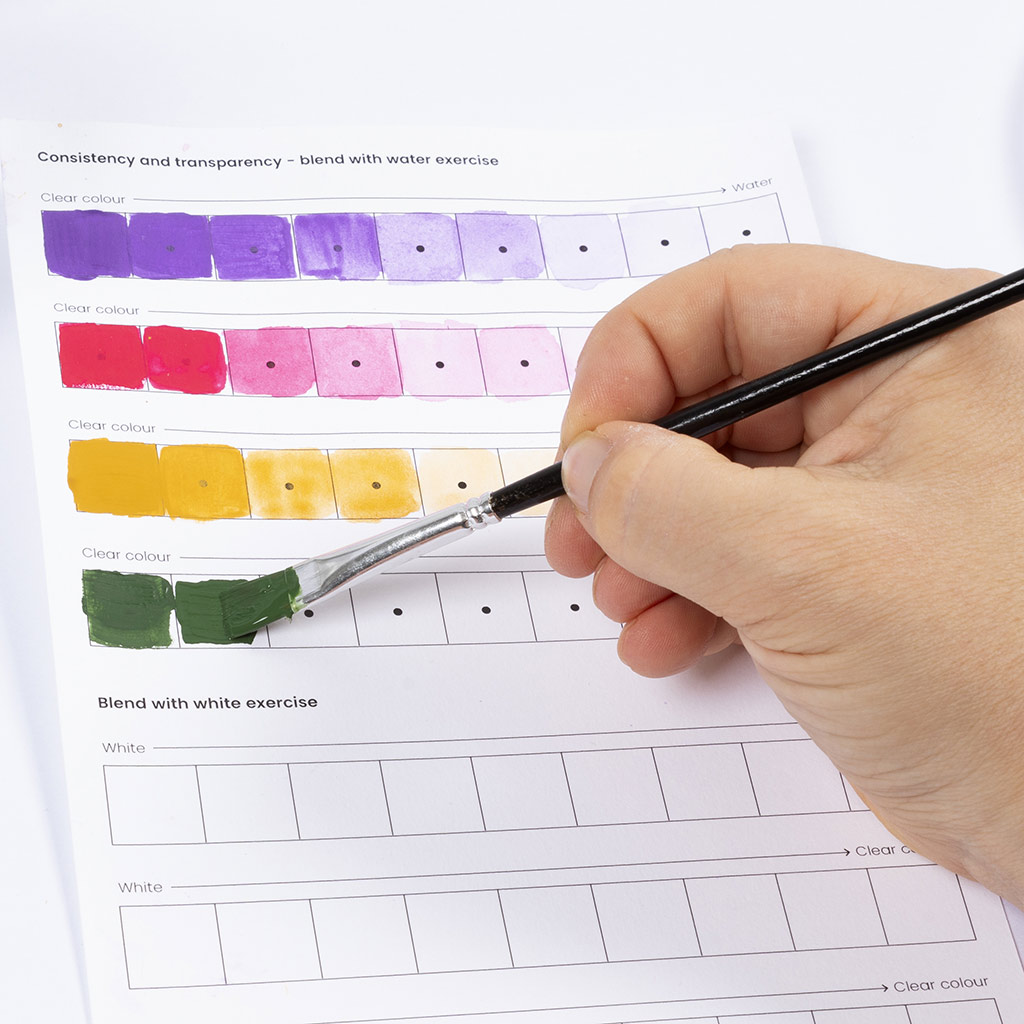 Paint again and notice how the paint has become a little thinner.
Paint again and notice how the paint has become a little thinner.5 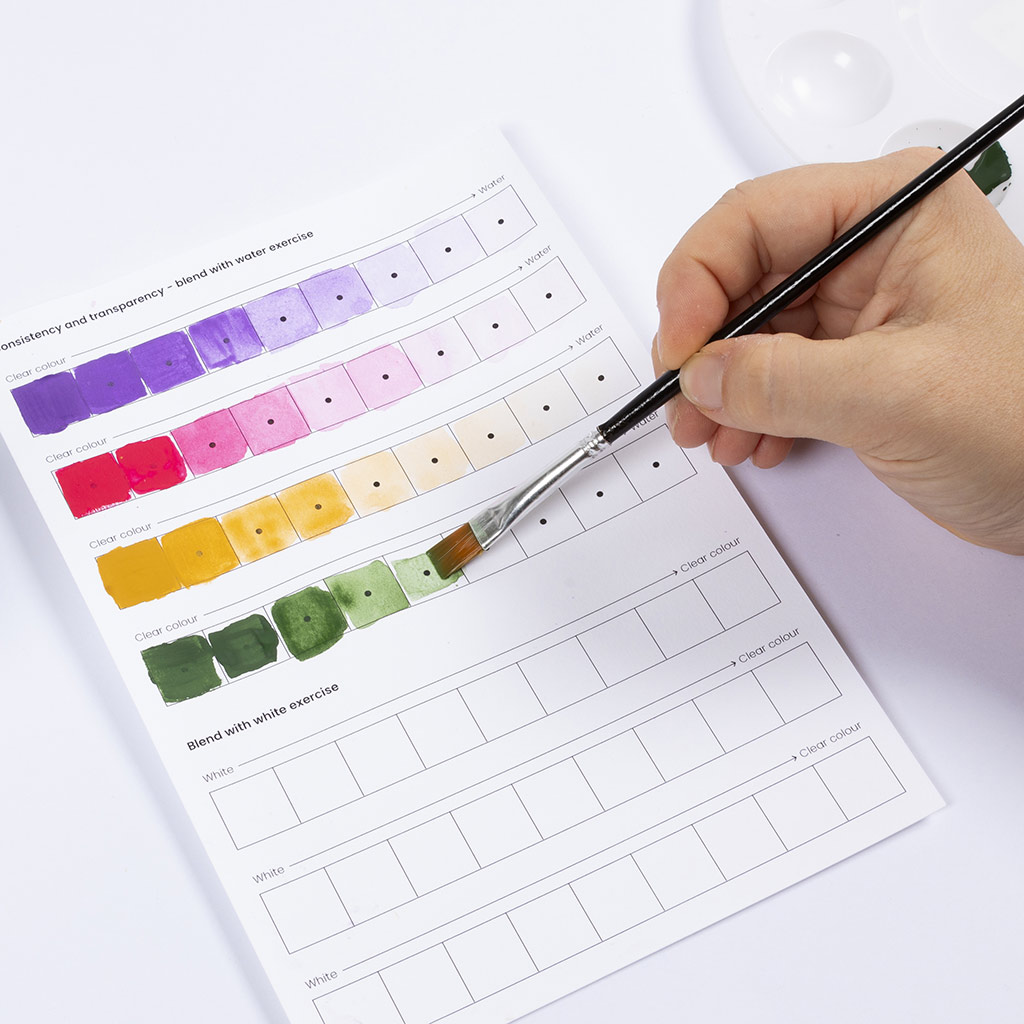 Continue by adding more and more water. Notice how the paint becomes more and more transparent as you paint.
Continue by adding more and more water. Notice how the paint becomes more and more transparent as you paint.6 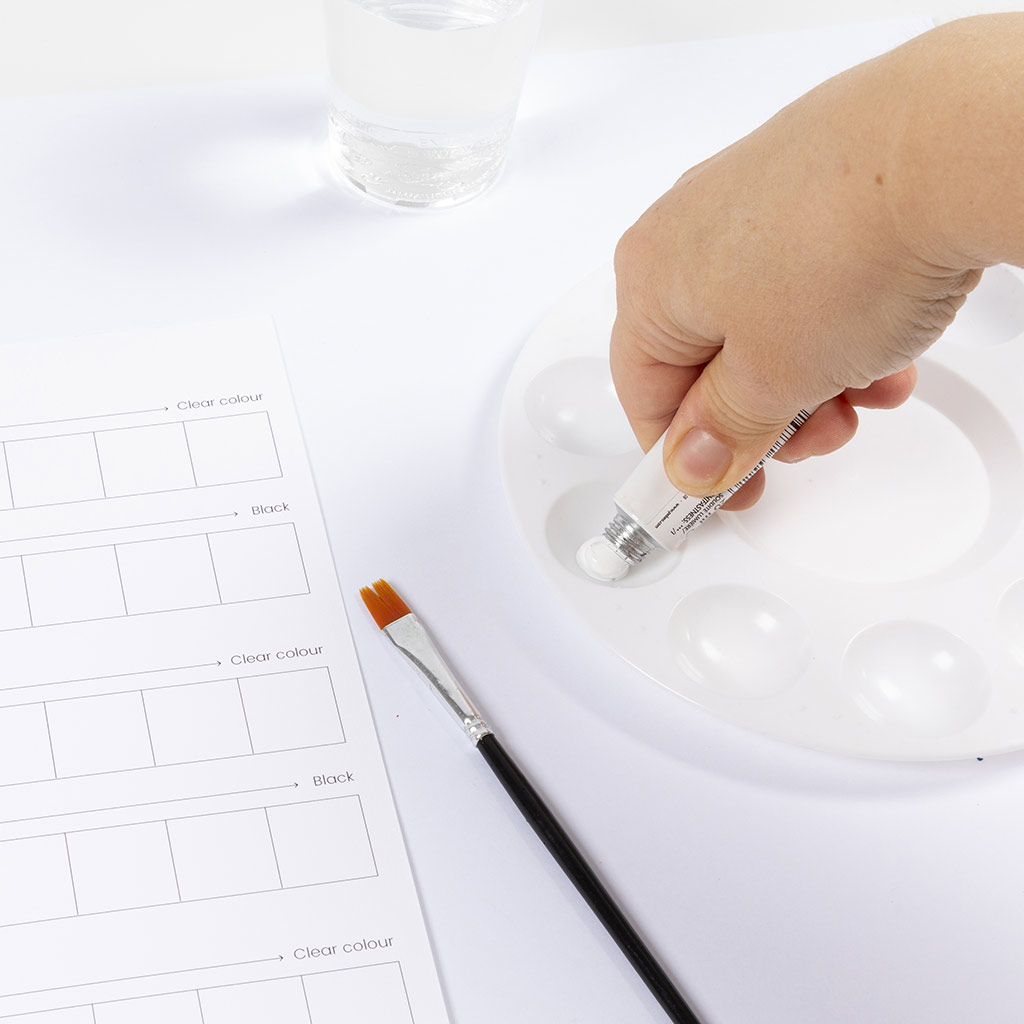 Now let’s add white. This technique is used when you want a lighter shade of your colour.
Start by squeezing a little white paint onto the palette.
Now let’s add white. This technique is used when you want a lighter shade of your colour.
Start by squeezing a little white paint onto the palette.
Now let’s add white. This technique is used when you want a lighter shade of your colour.
Start by squeezing a little white paint onto the palette.7 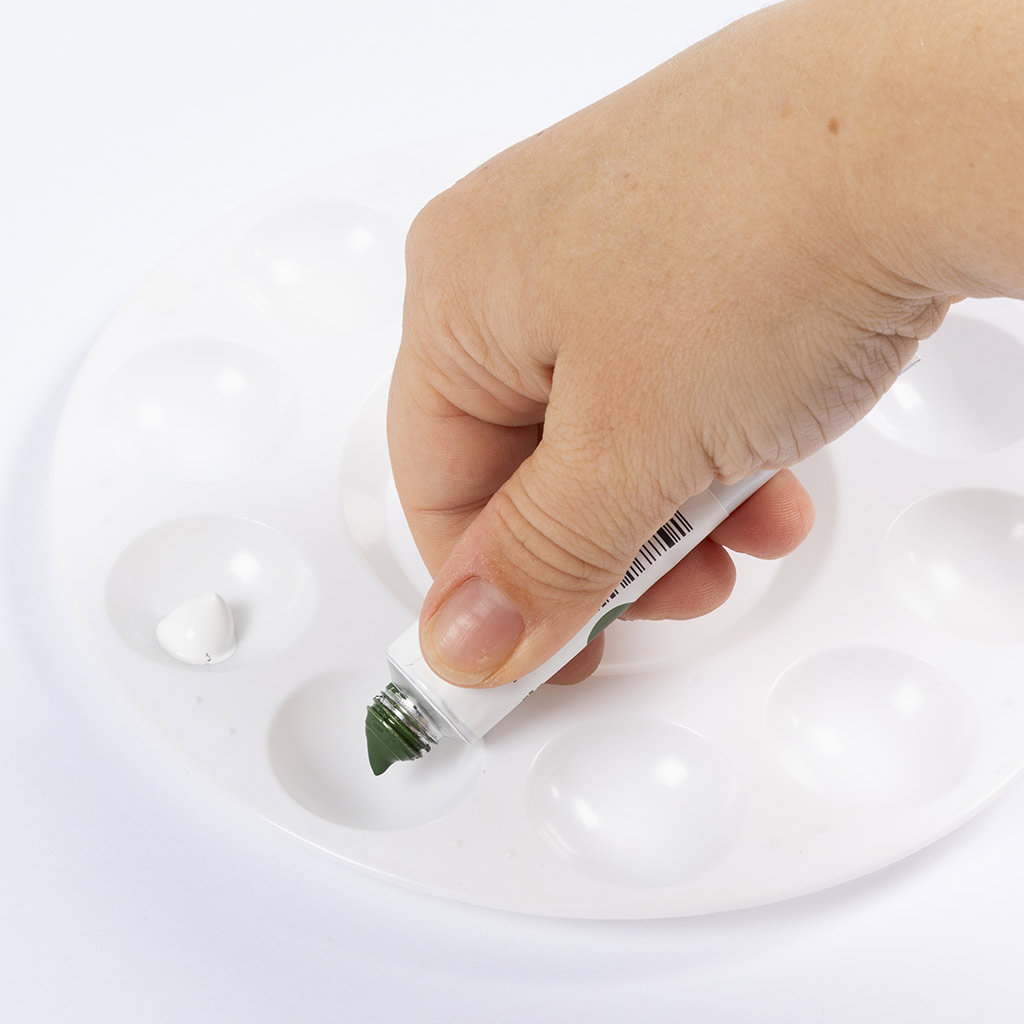 Also add the colour you want to use.
Also add the colour you want to use.8 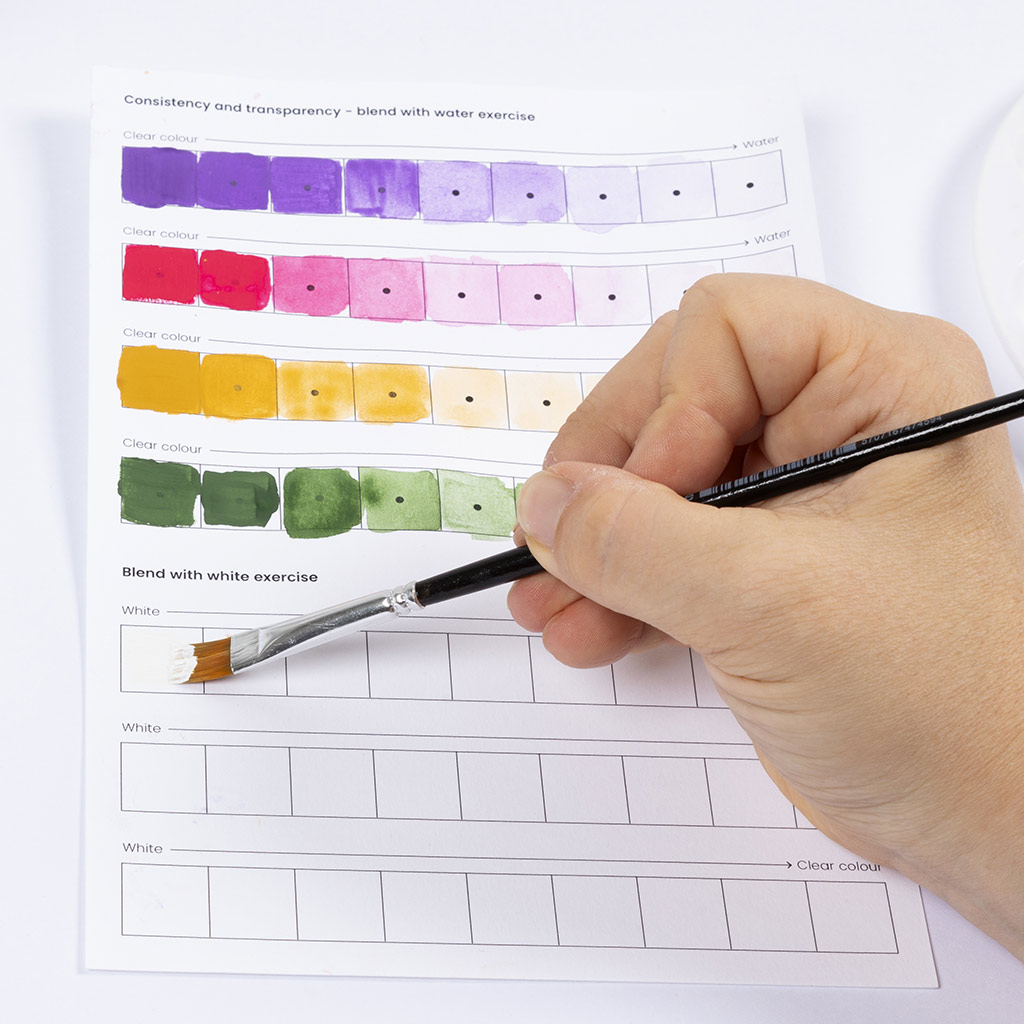 Paint the first field with pure white.
Paint the first field with pure white.9 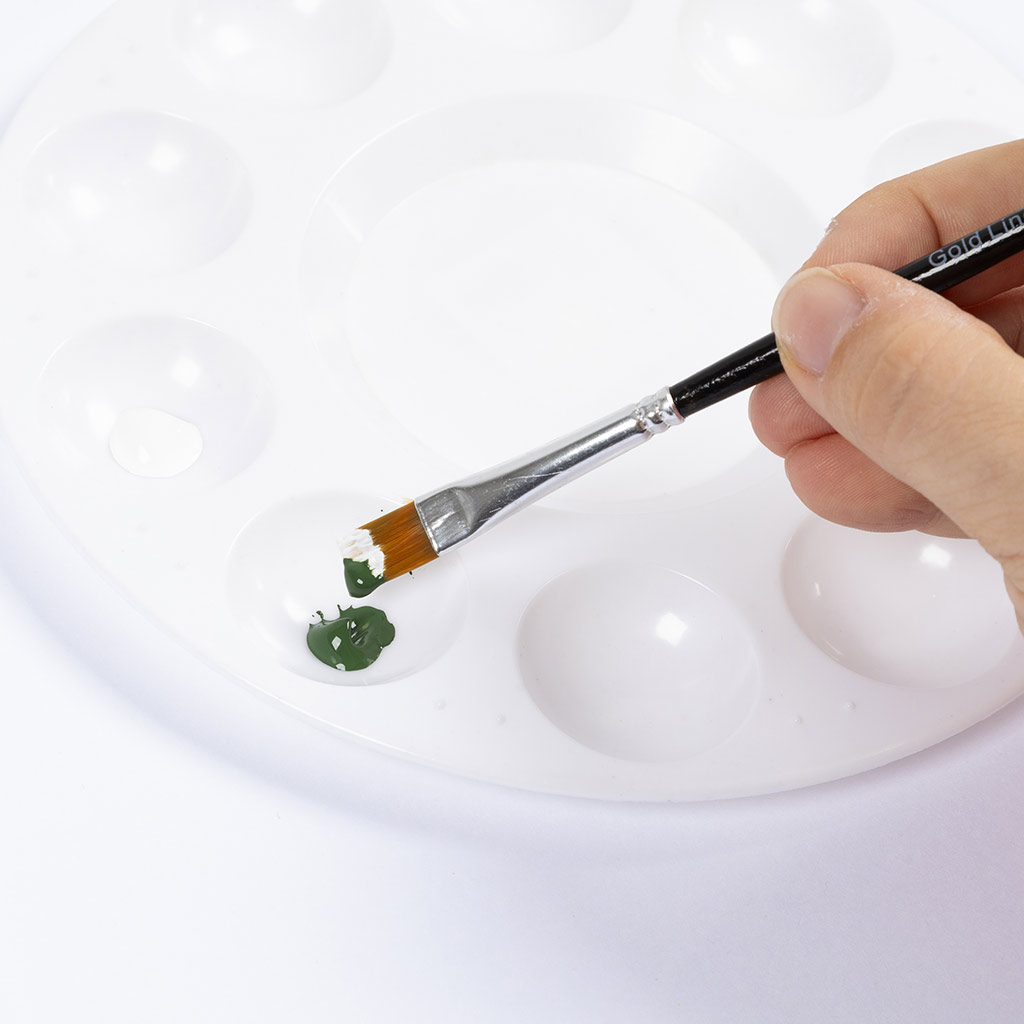 Now put some of the coloured paint on your brush.
Now put some of the coloured paint on your brush.10 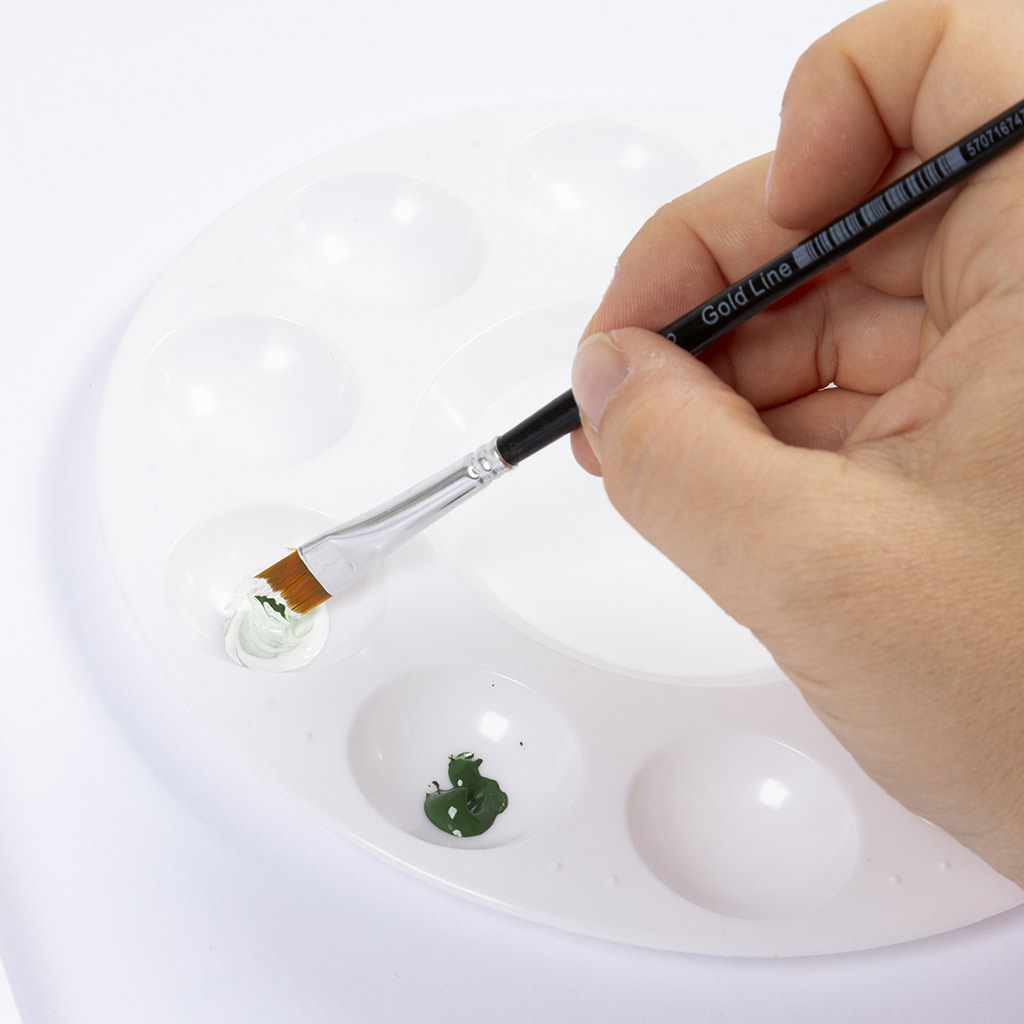 Mix it with the white.
Mix it with the white.11 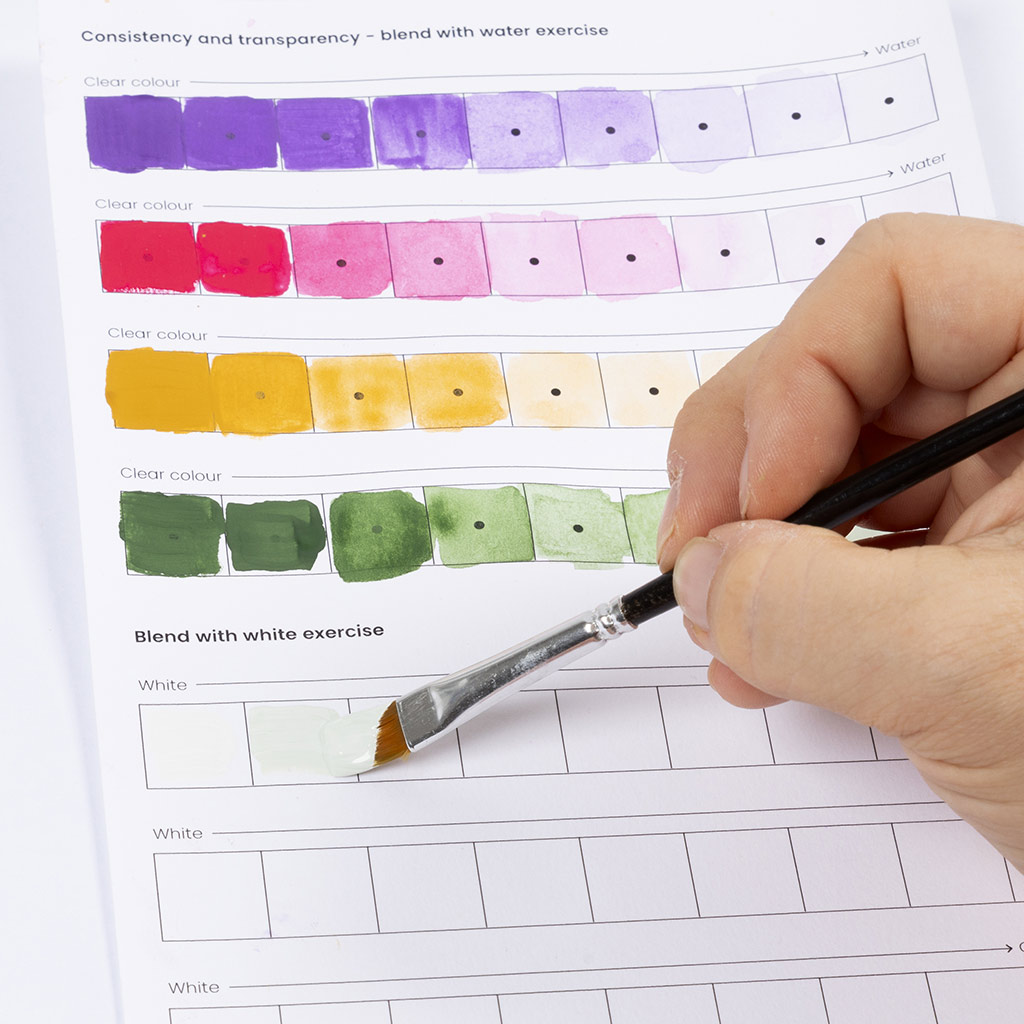 Paint the other field with the mixture.
Paint the other field with the mixture.12 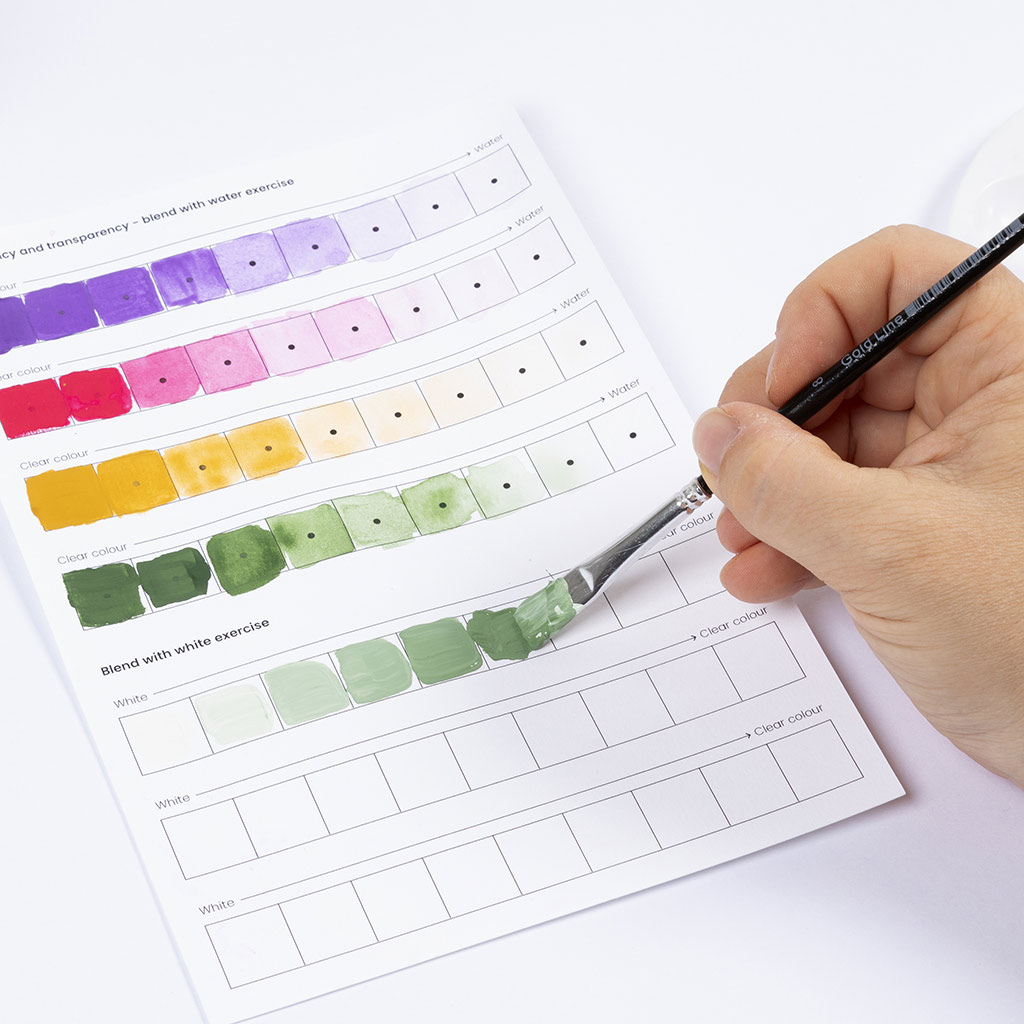 Repeat the process by adding more and more green to the white.
Repeat the process by adding more and more green to the white.13 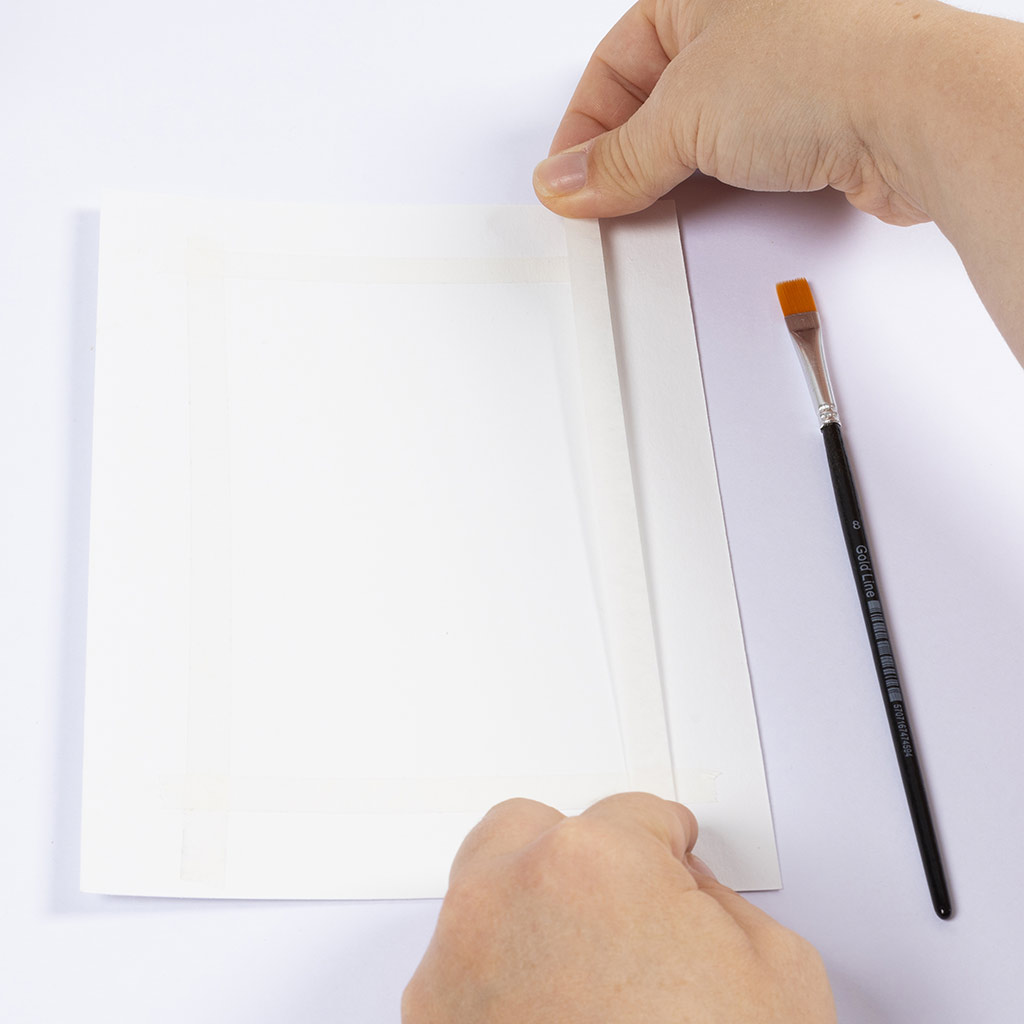 We're now going to learn how to make colour gradations. This technique is used to create a beautiful sunrise, for example.
Start by applying masking tape in a square as shown in the picture.
We're now going to learn how to make colour gradations. This technique is used to create a beautiful sunrise, for example.
Start by applying masking tape in a square as shown in the picture.
We're now going to learn how to make colour gradations. This technique is used to create a beautiful sunrise, for example.
Start by applying masking tape in a square as shown in the picture.14 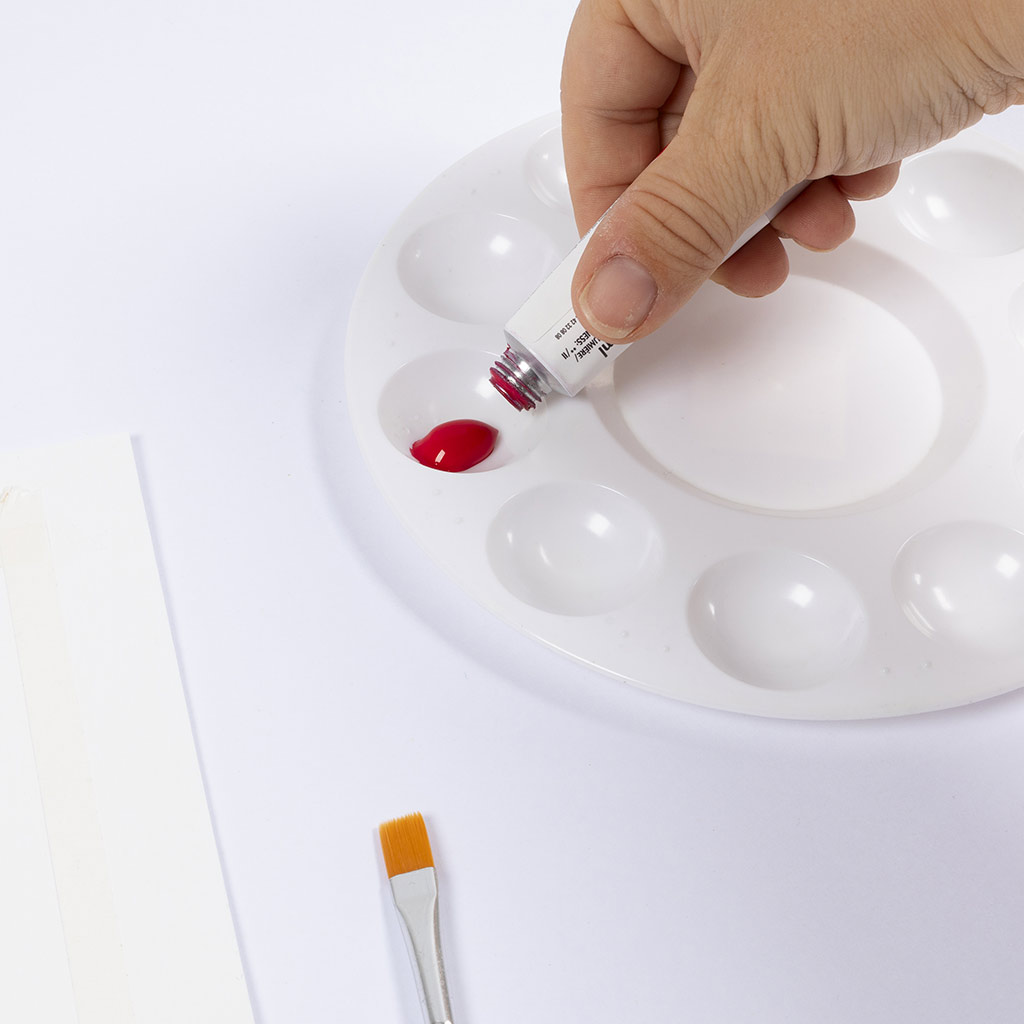 Now squeeze out the first colour you want to use.
Now squeeze out the first colour you want to use.15 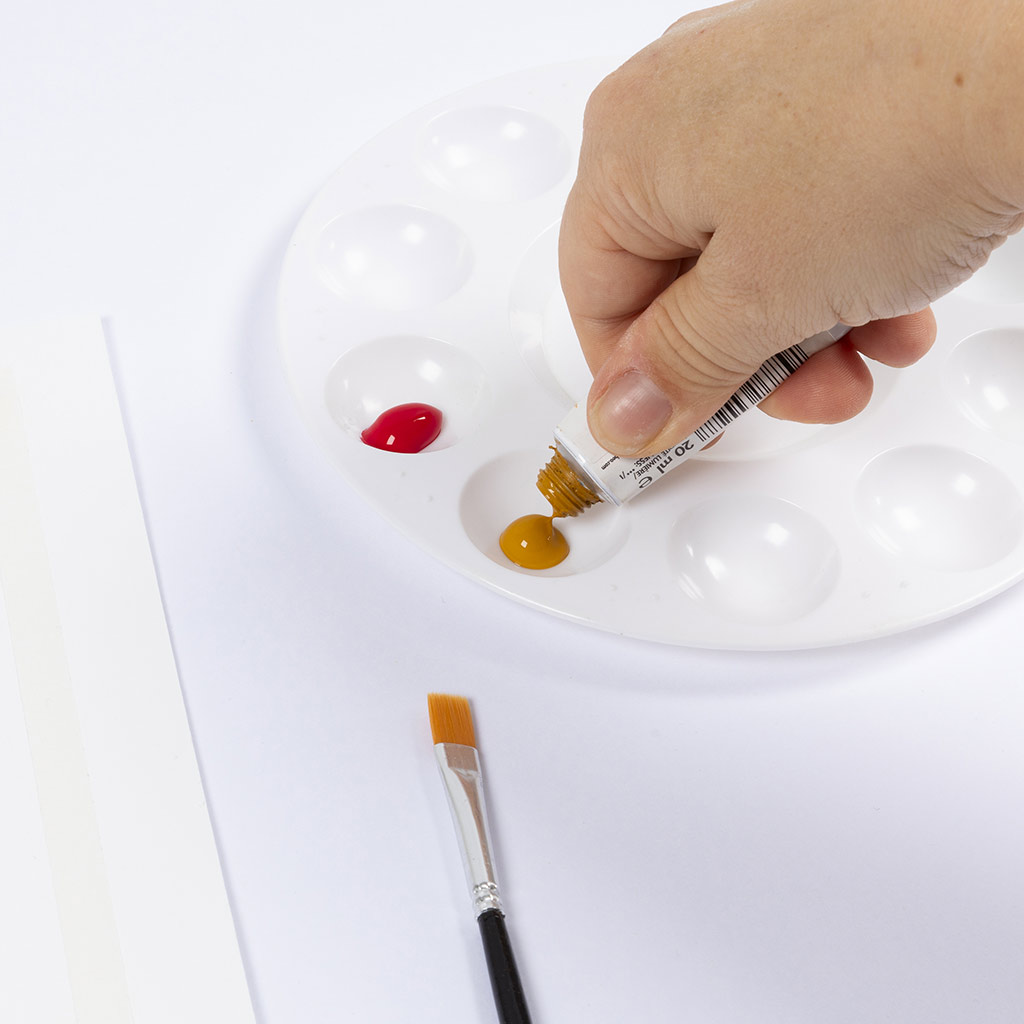 Add the second colour you want to use.
Add the second colour you want to use.16 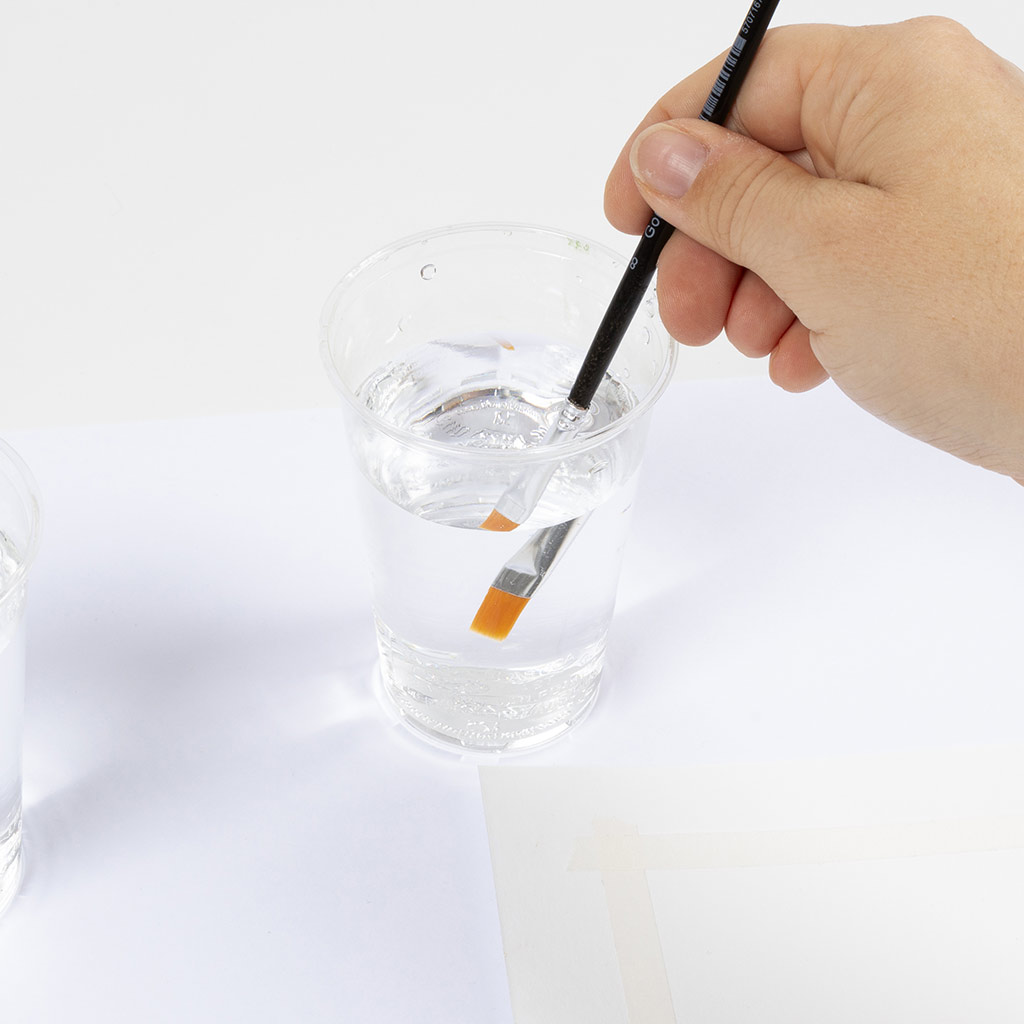 Dip the clean brush in clean water.
Dip the clean brush in clean water.17 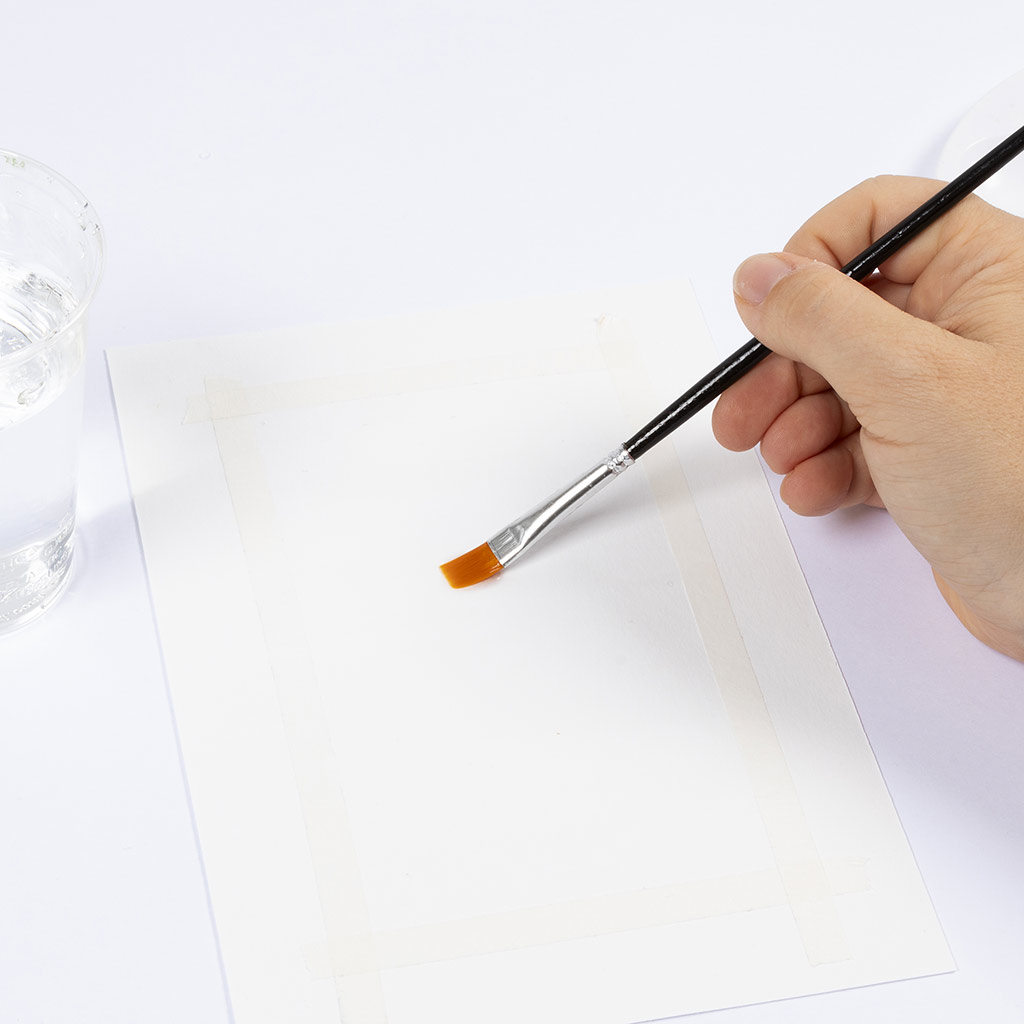 Moisten the marked area with water.
Moisten the marked area with water.18 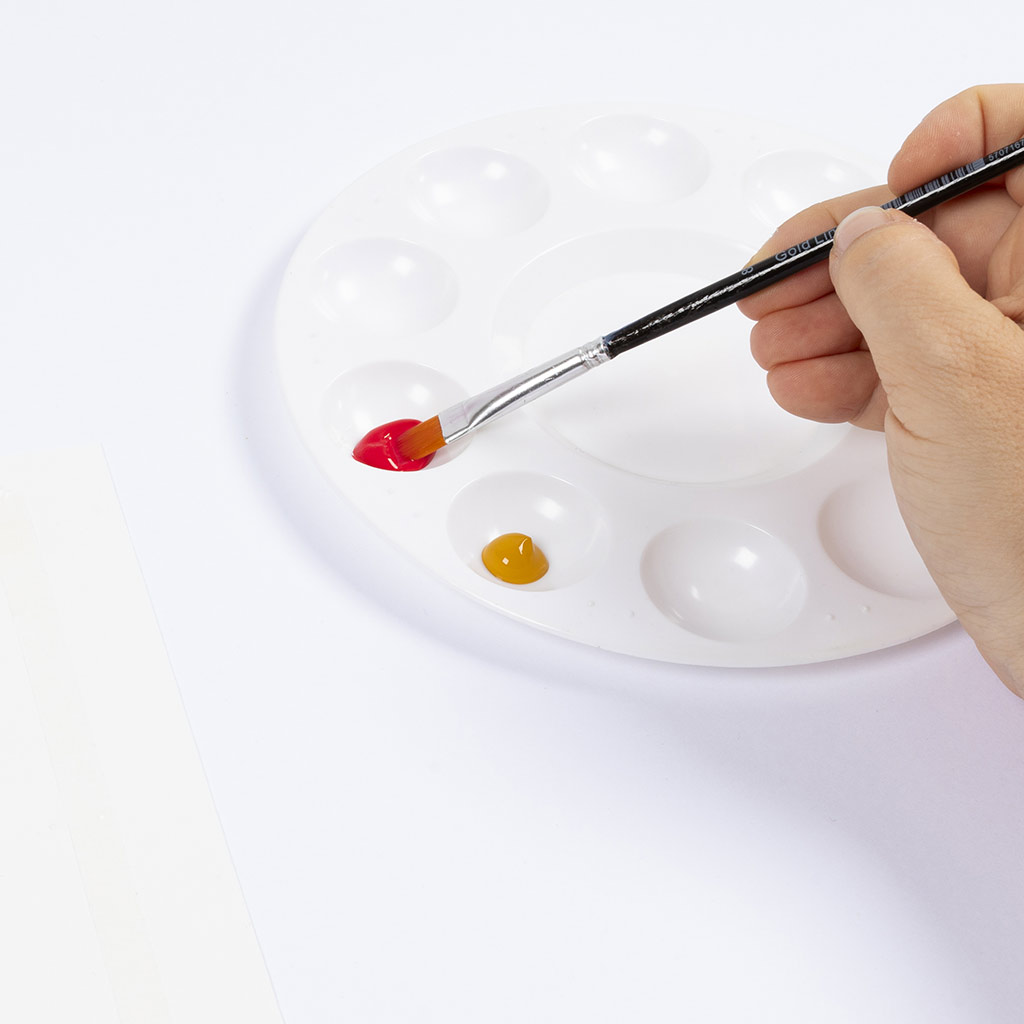 Dip the brush into the first colour.
Dip the brush into the first colour.19 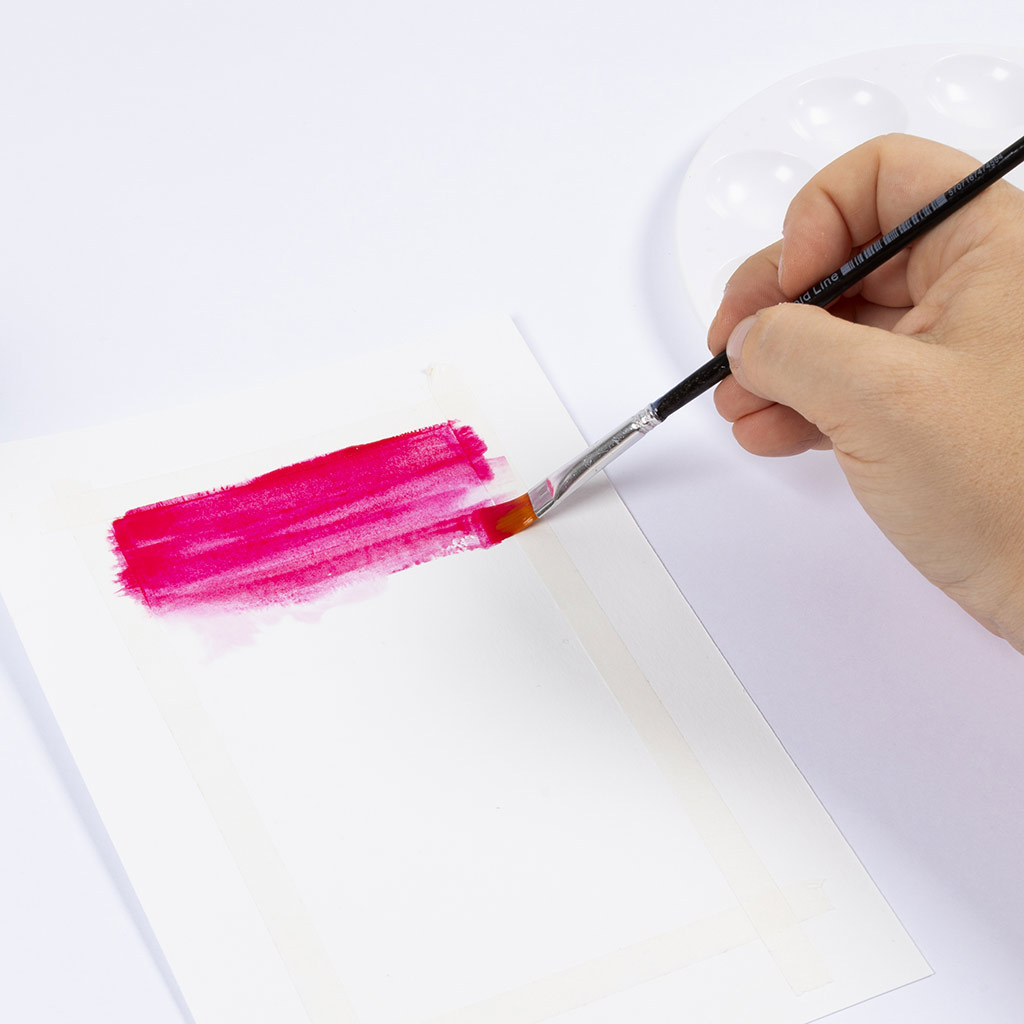 Paint from top to bottom. Have the colour become thinner and thinner towards the middle. Only paint slightly less than halfway down the paper, as shown in the picture.
Paint from top to bottom. Have the colour become thinner and thinner towards the middle. Only paint slightly less than halfway down the paper, as shown in the picture.20 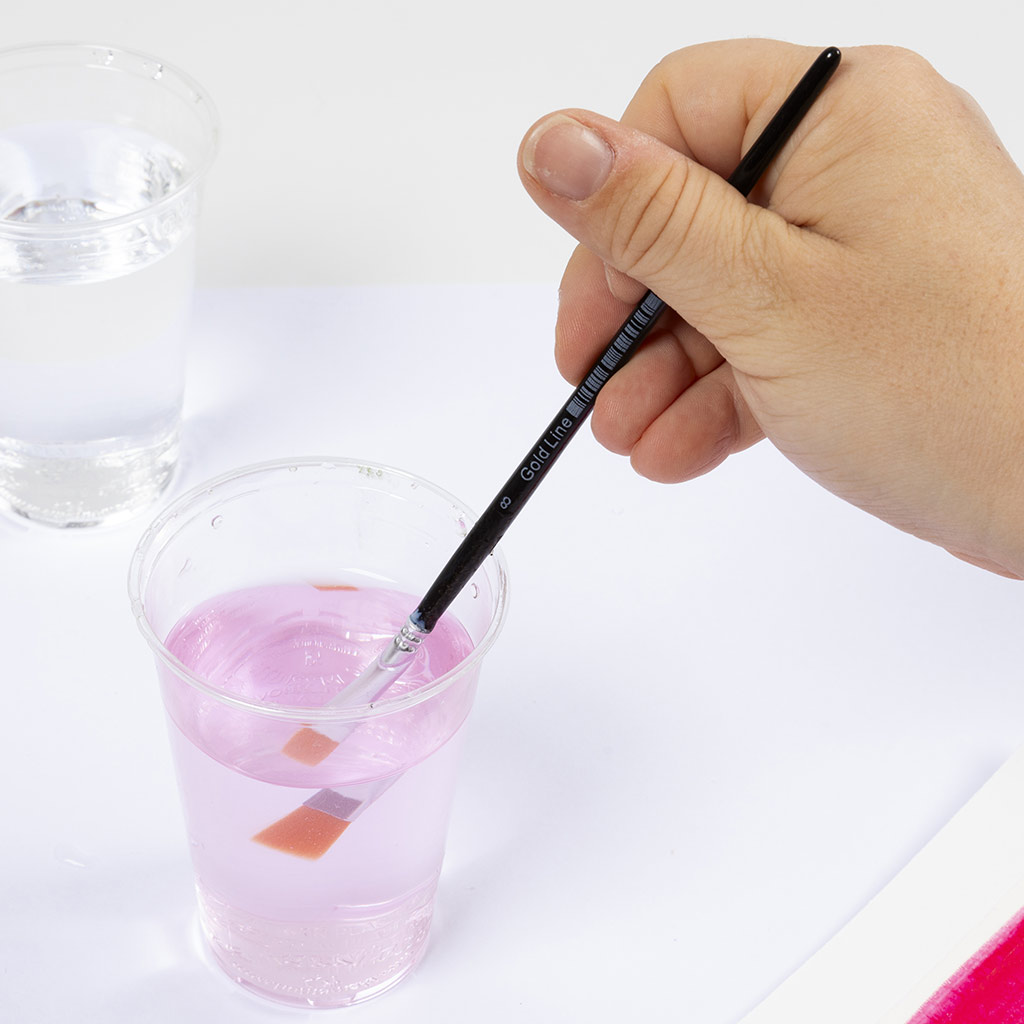 Clean the brush.
Clean the brush.21 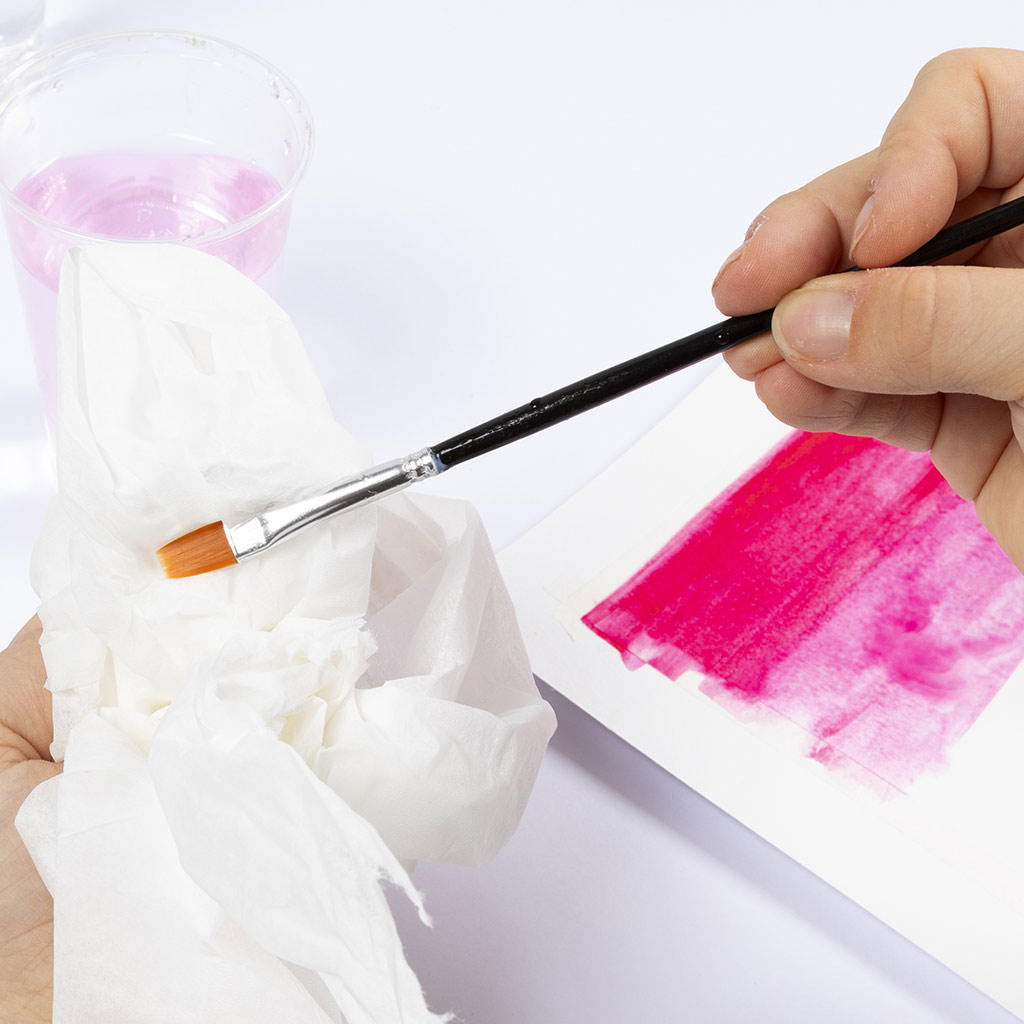 Dry the brush.
Dry the brush.22 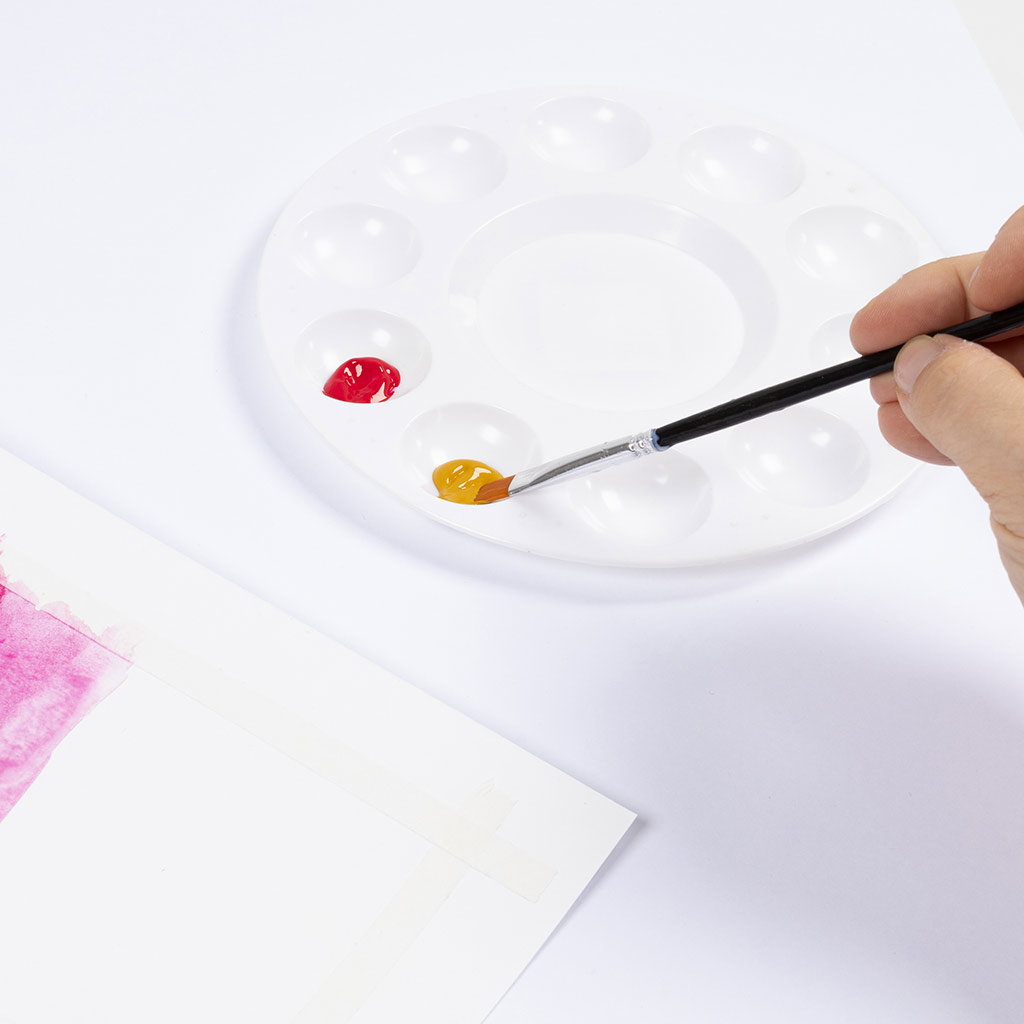 Now dip the brush in the second colour.
Now dip the brush in the second colour.23 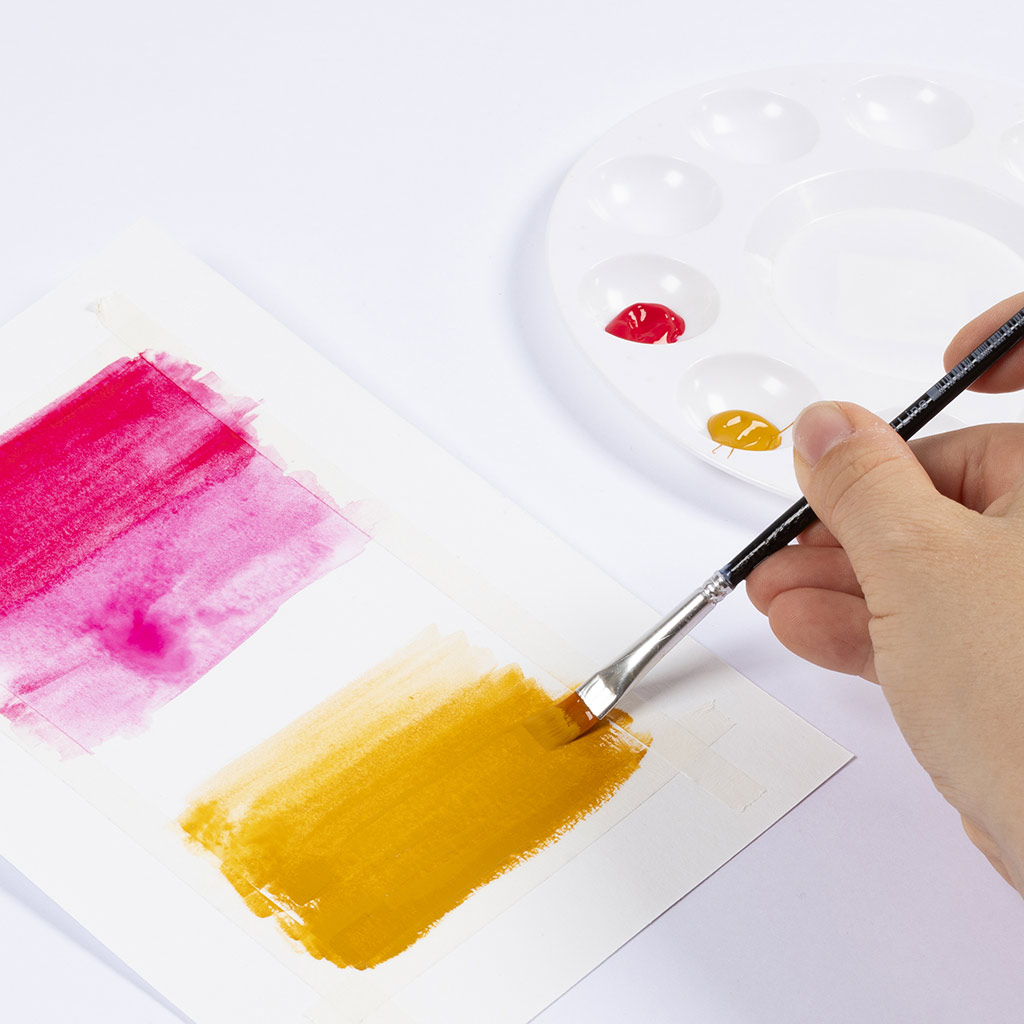 Paint from the other side, with the colour becoming more and more transparent towards the middle.
Paint from the other side, with the colour becoming more and more transparent towards the middle.24 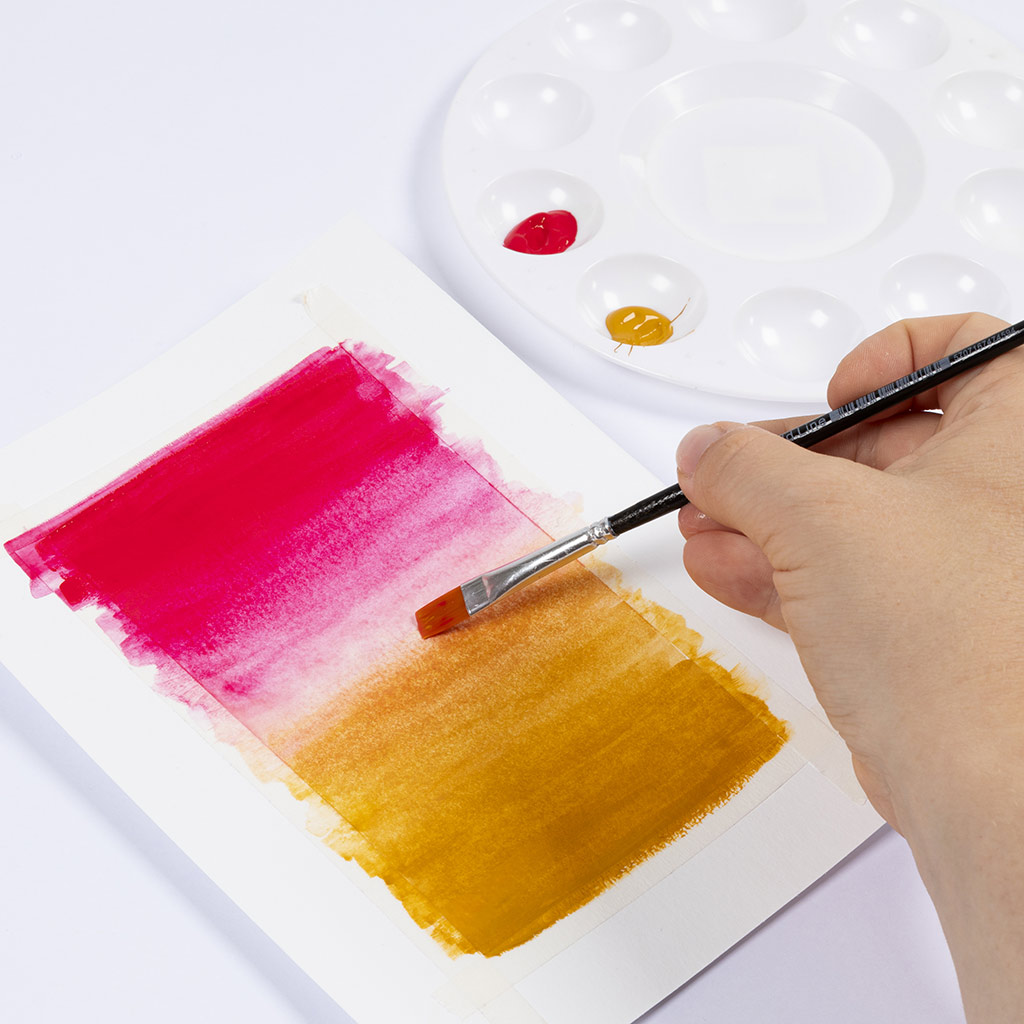 Clean the brush. Moisten it with a little water and gently blend the colours together in the middle.
Clean the brush. Moisten it with a little water and gently blend the colours together in the middle.25 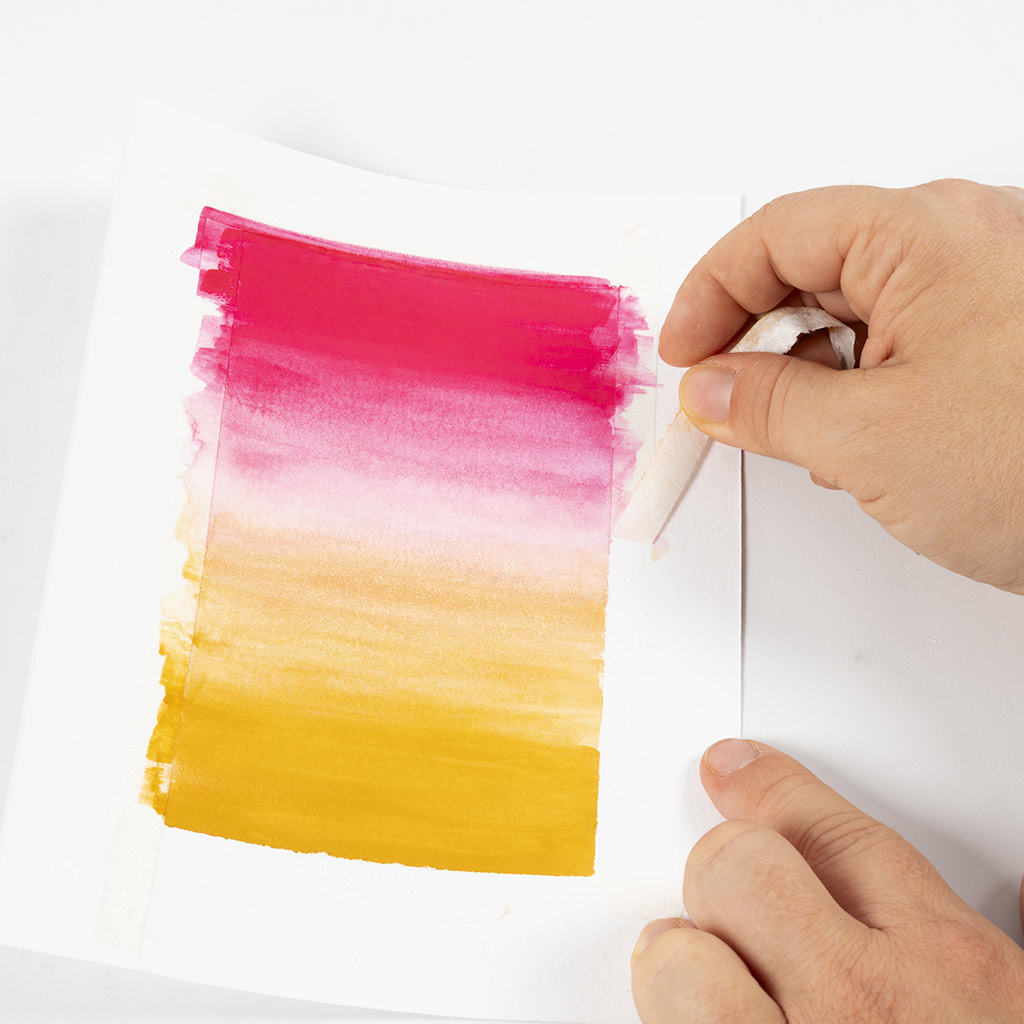 Once the paint is dry, carefully remove the tape.
Once the paint is dry, carefully remove the tape.26  We will now prepare with illustration. Tape the illustration to the table or box that comes with the kit. Make sure that the tape covers the entire edge of the illustration all the way around.
We will now prepare with illustration. Tape the illustration to the table or box that comes with the kit. Make sure that the tape covers the entire edge of the illustration all the way around.27 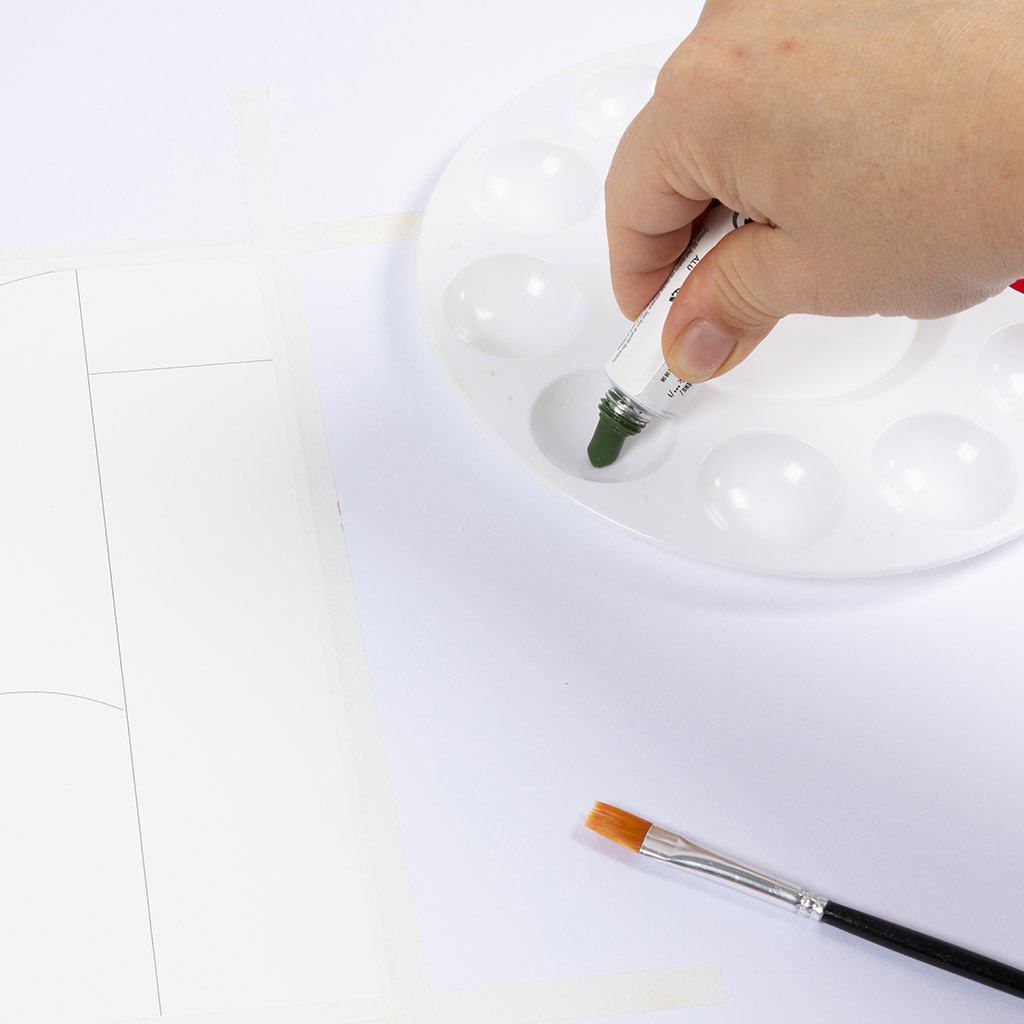 We start by make gradations in the desired sections. Prepare your colours and add one colour first.
We start by make gradations in the desired sections. Prepare your colours and add one colour first.28 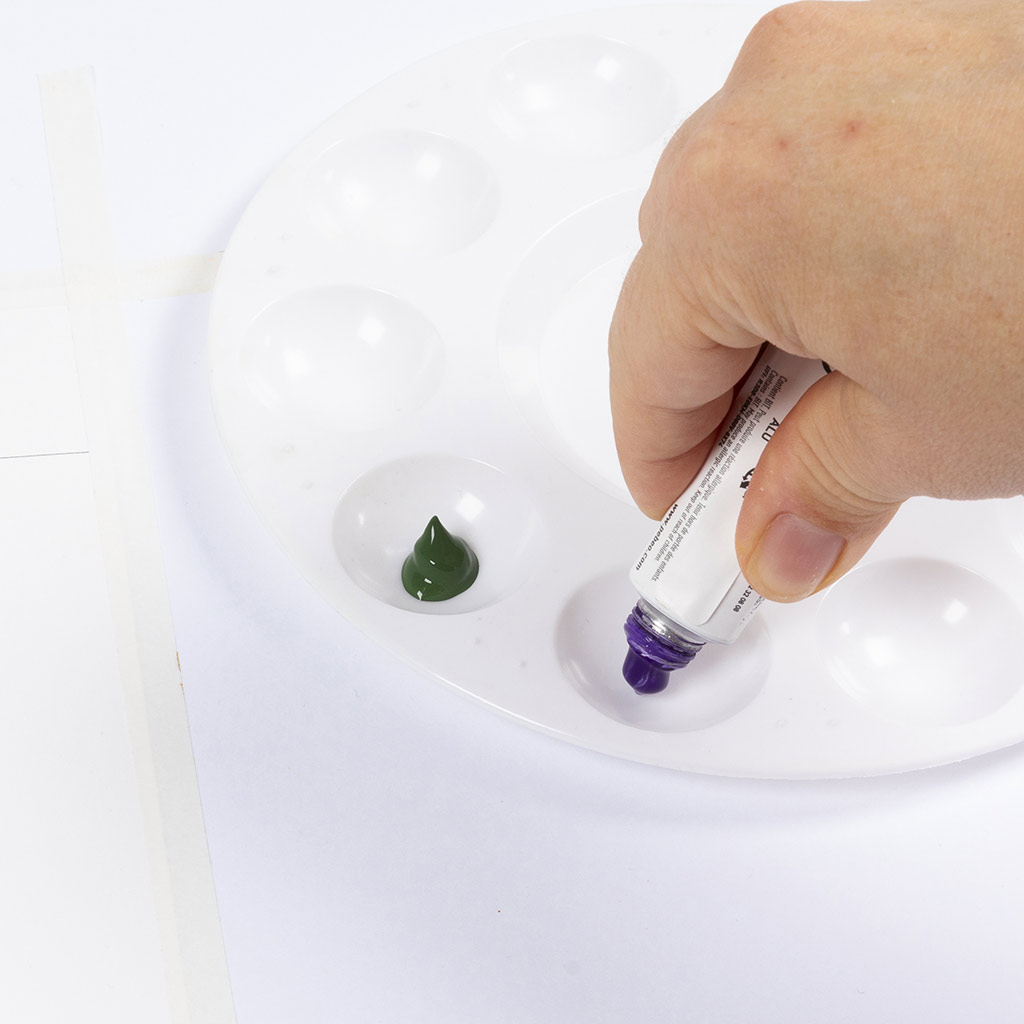 Add the second colour.
Add the second colour.29 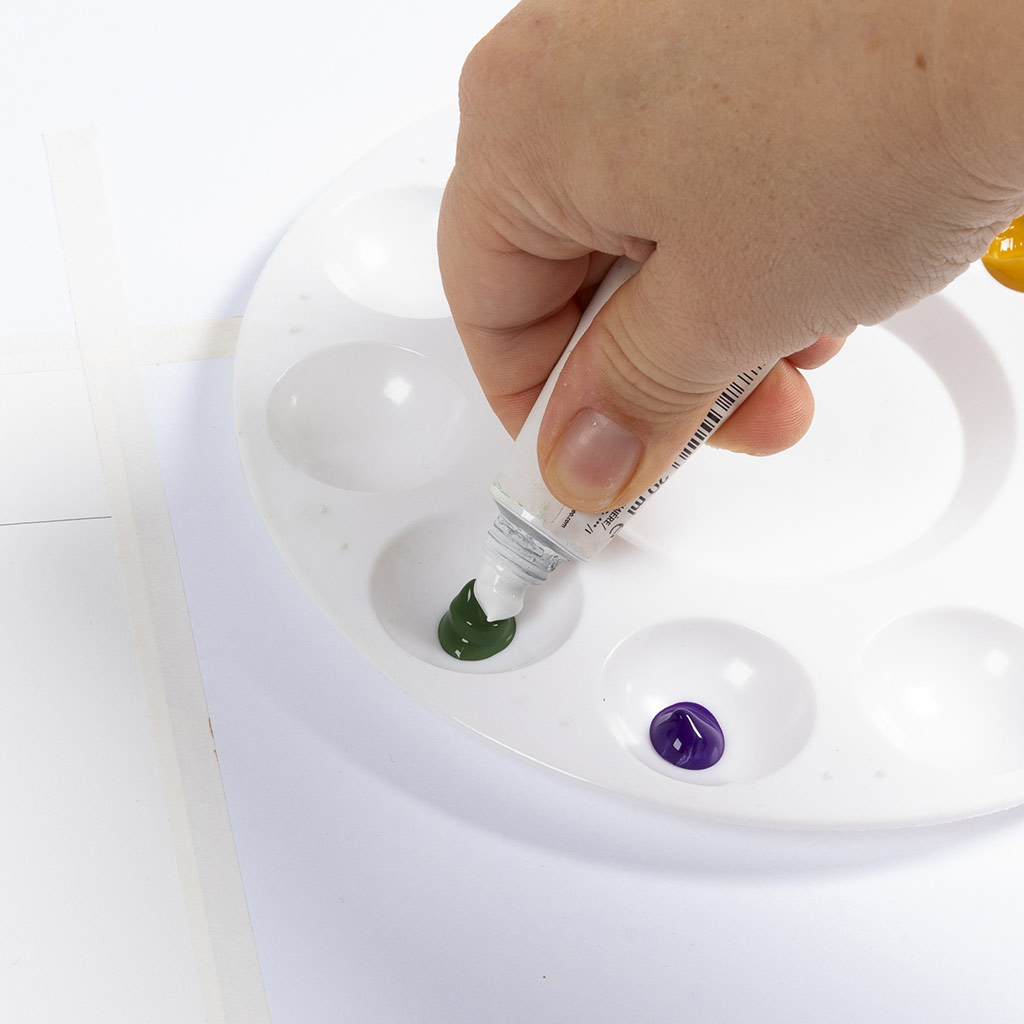 Add a little white to the one colour.
Add a little white to the one colour.30 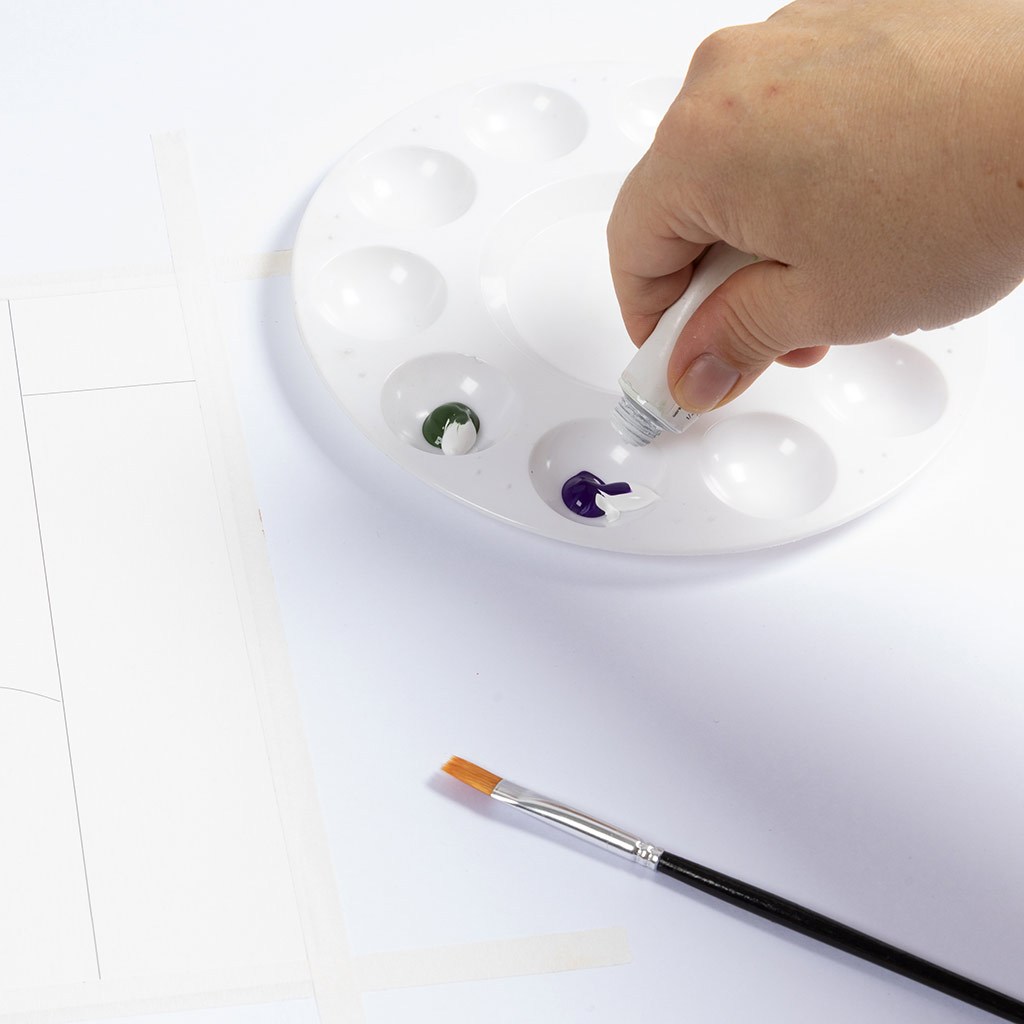 Add white to the other colour.
Add white to the other colour.31 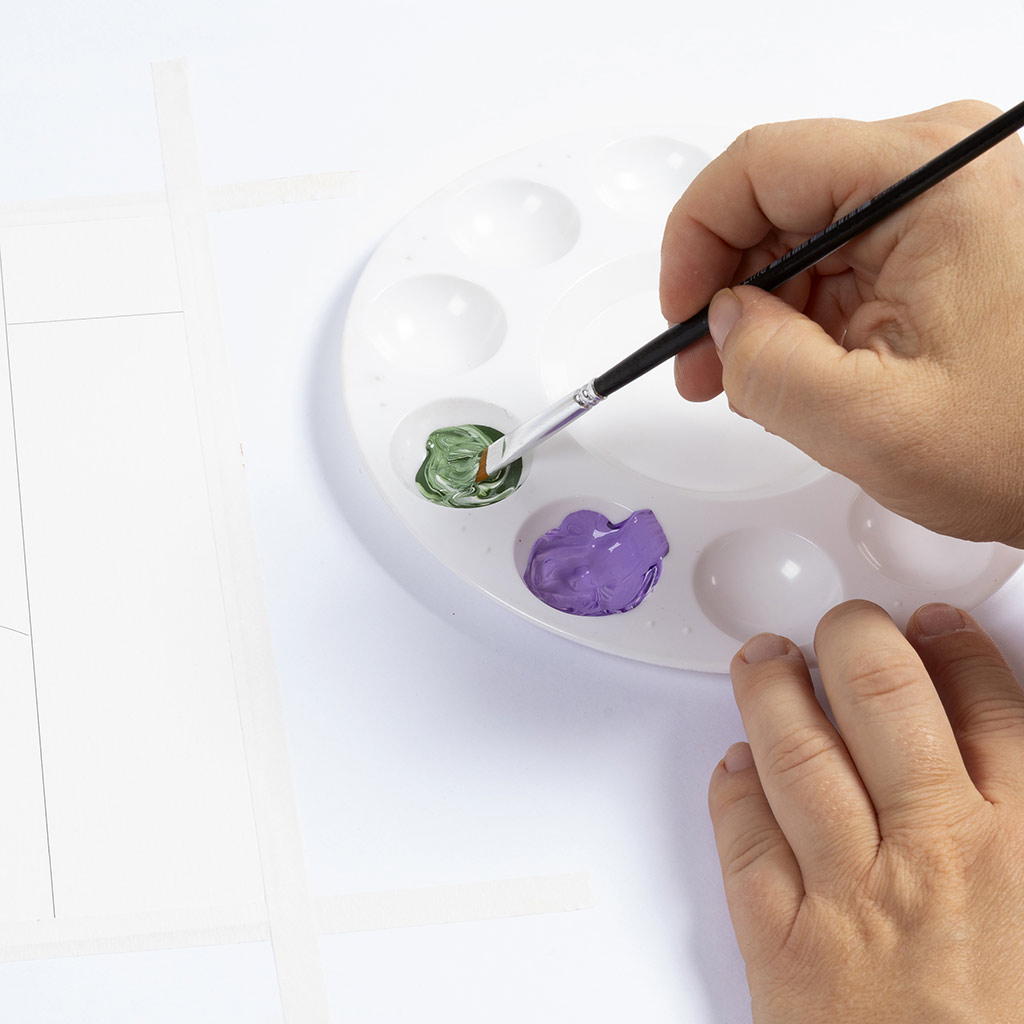 Mix the colour.
Mix the colour.32 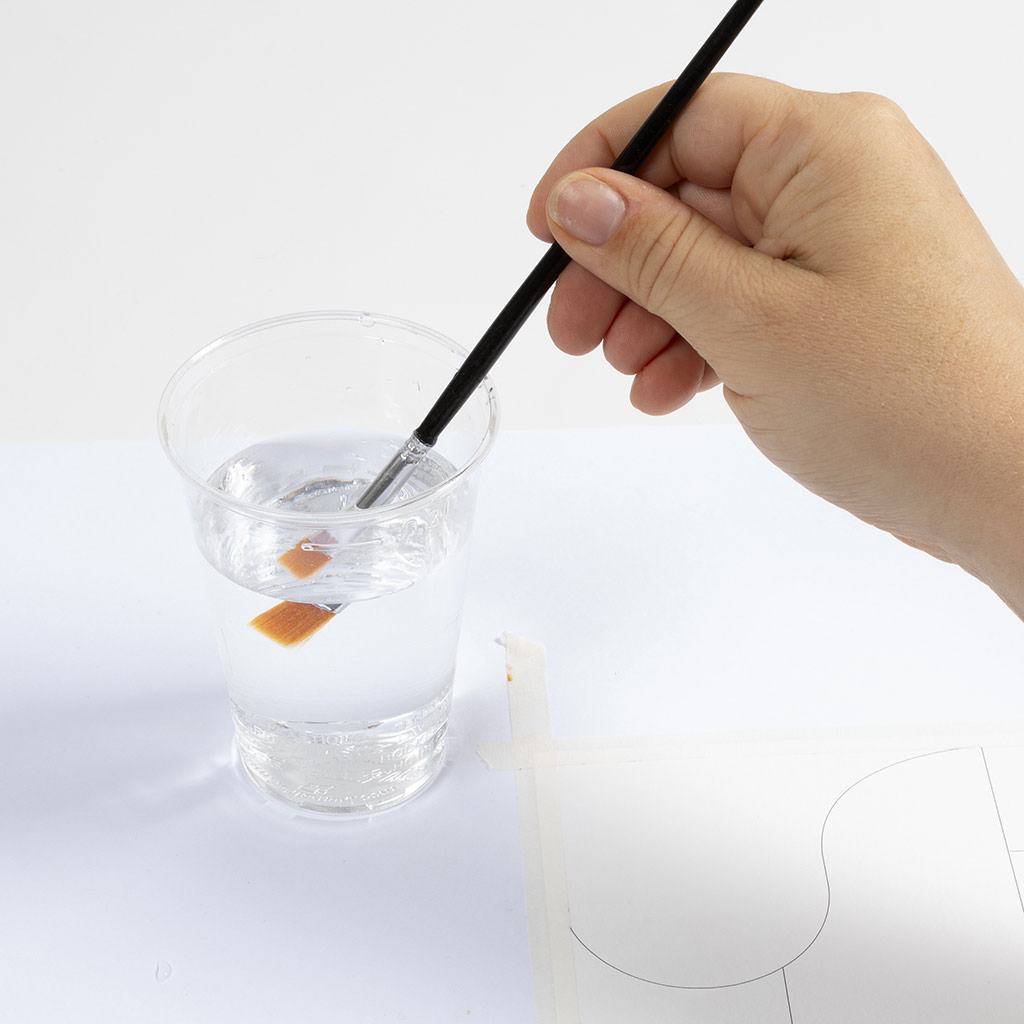 Dip a clean brush in water.
Dip a clean brush in water.33 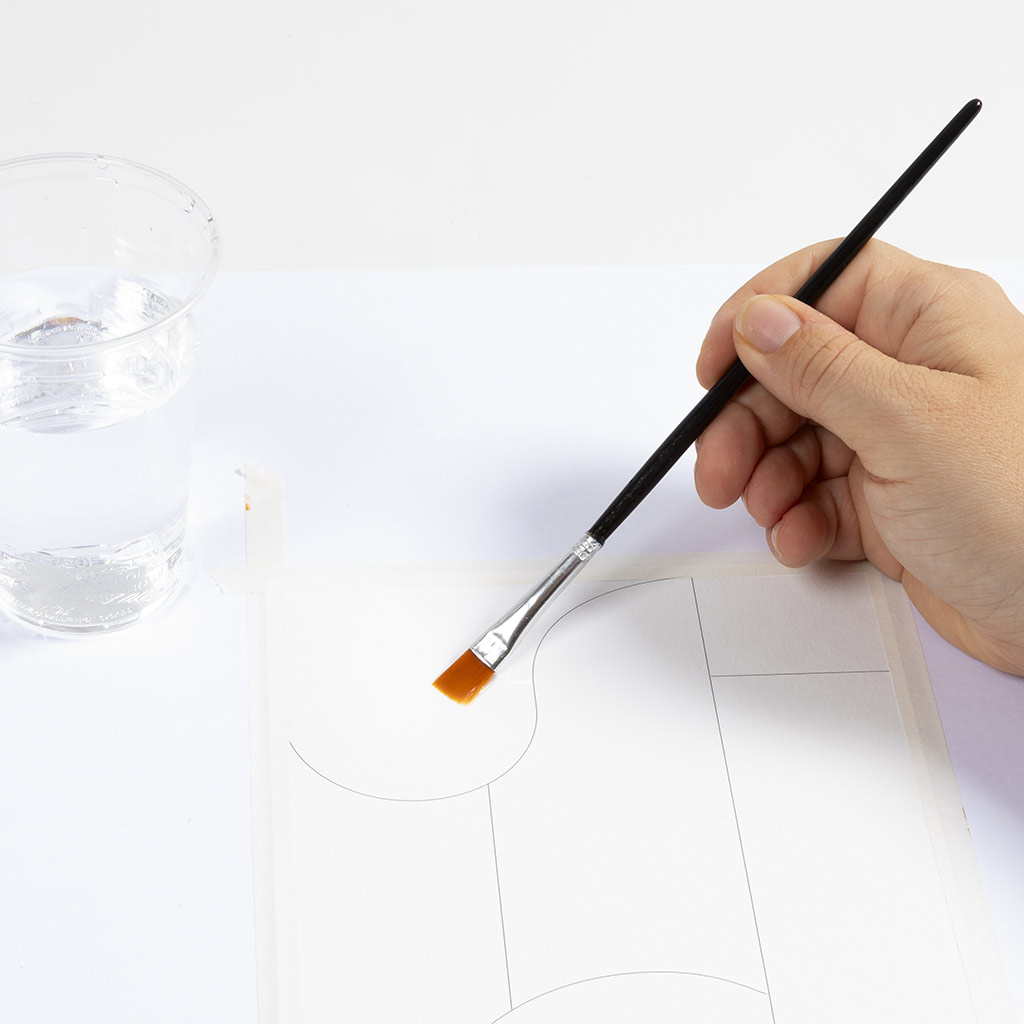 Moisten the area you want to paint.
Moisten the area you want to paint.34 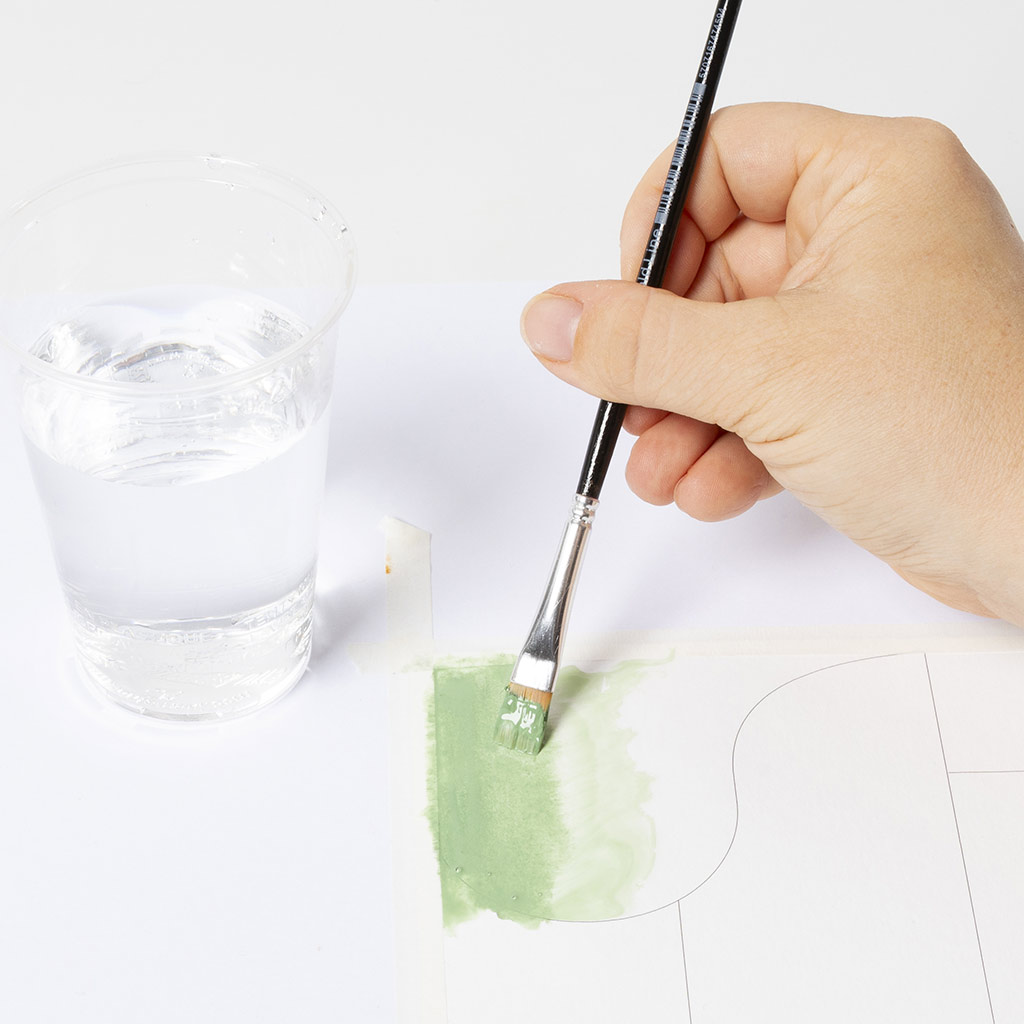 Paint halfway in the area with the one colour.
Paint halfway in the area with the one colour.35 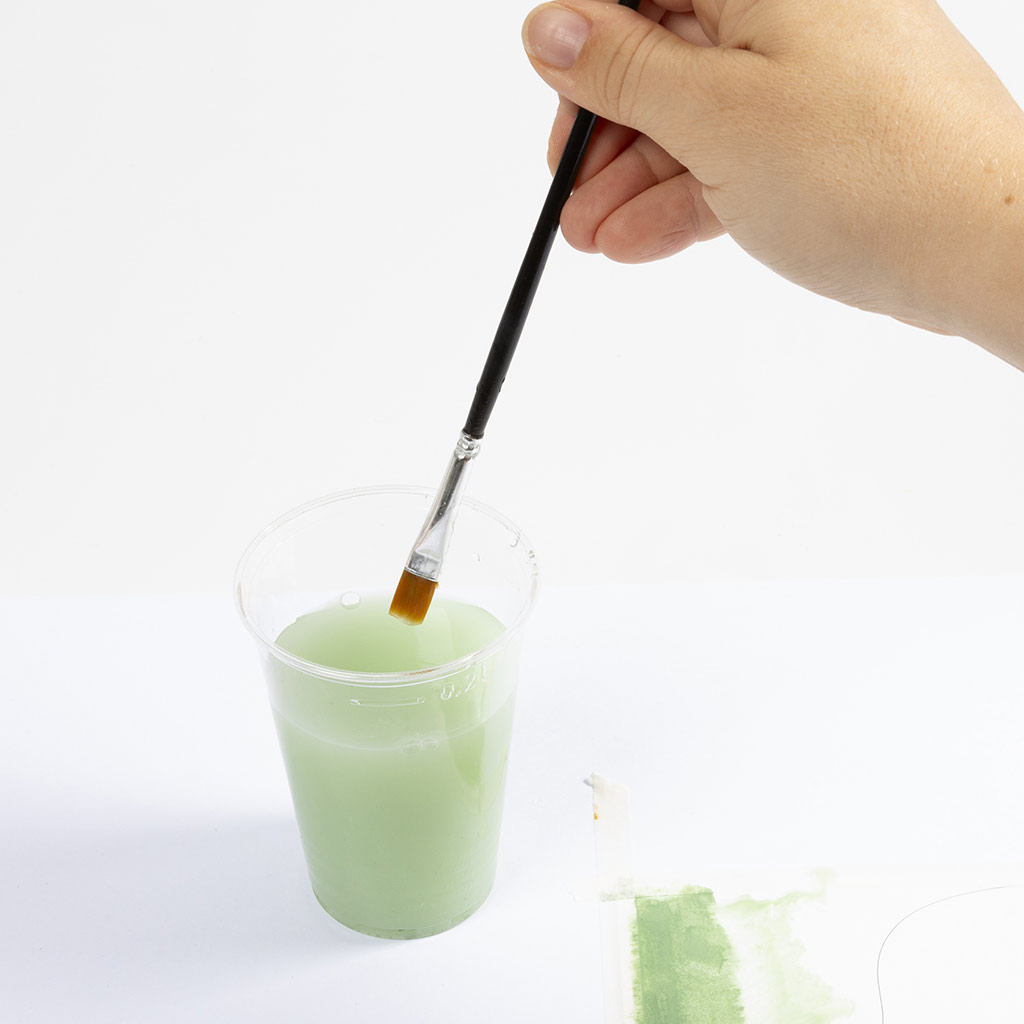 Clean the brush.
Clean the brush.36 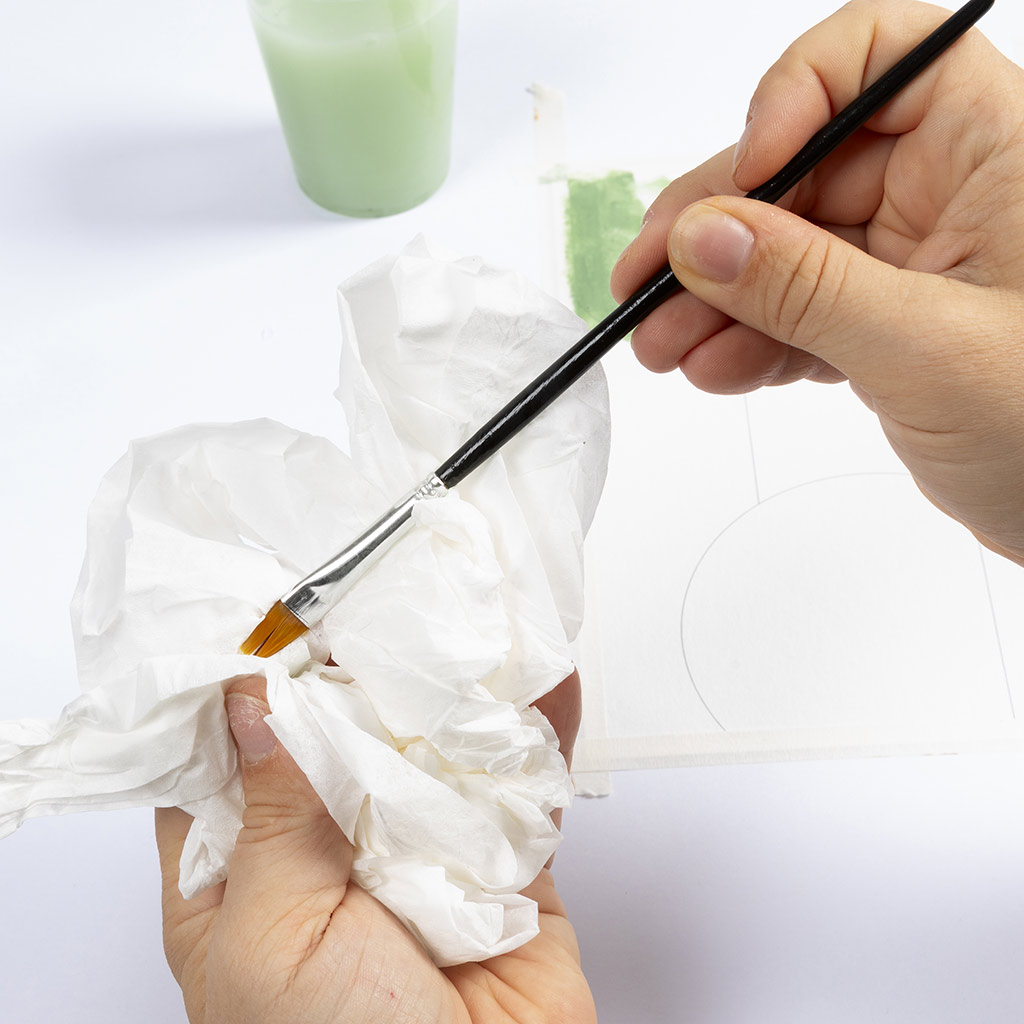 Dry the brush.
Dry the brush.37 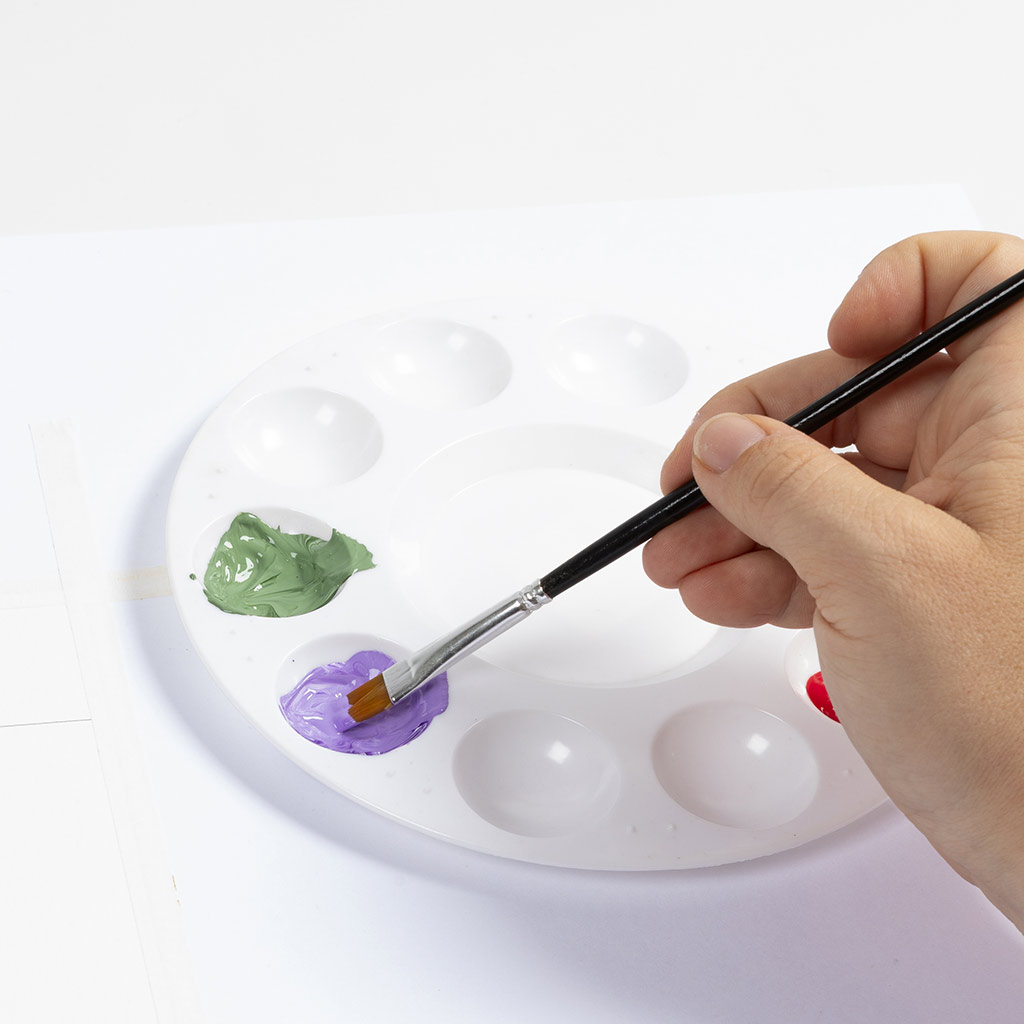 Dip the brush in the second colour.
Dip the brush in the second colour.38 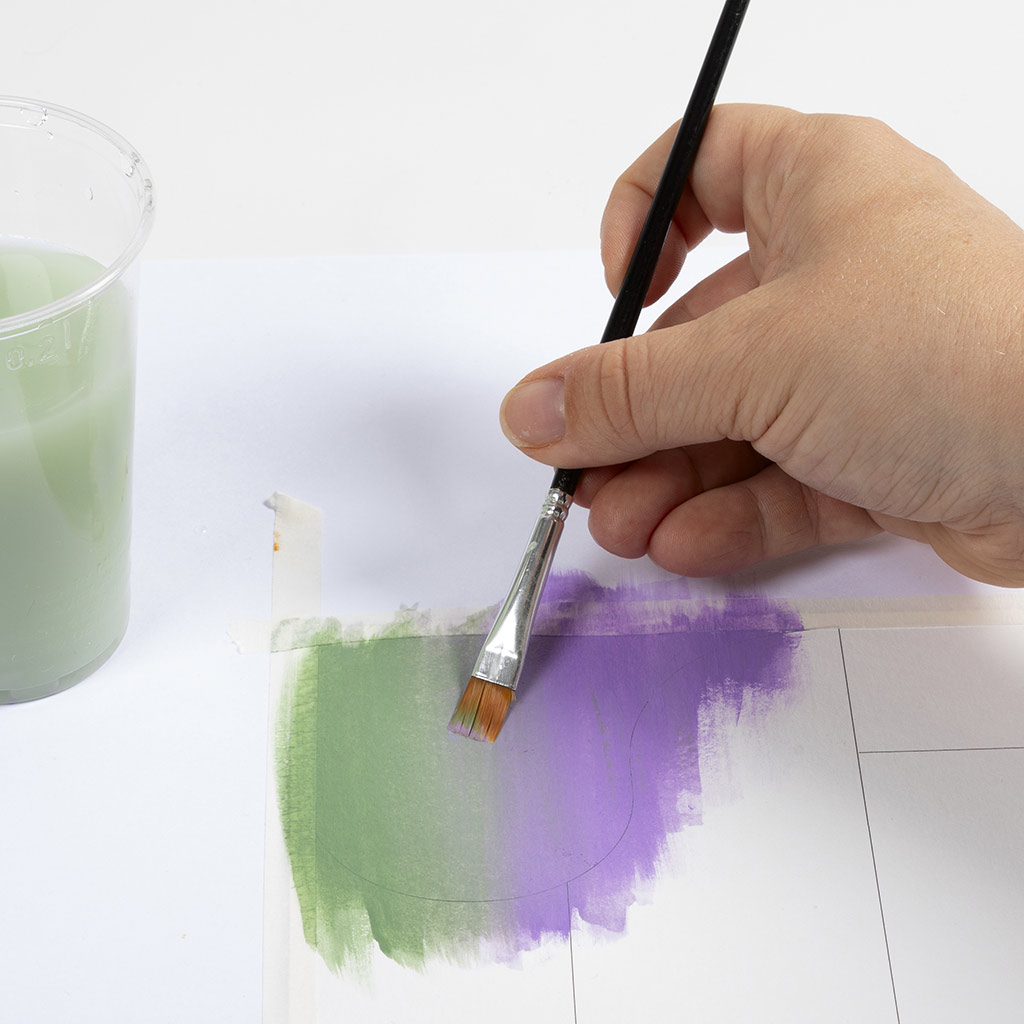 Paint from the other side and blend the colours together in the middle. If necessary, clean the brush for a perfect transition.
Paint from the other side and blend the colours together in the middle. If necessary, clean the brush for a perfect transition.39 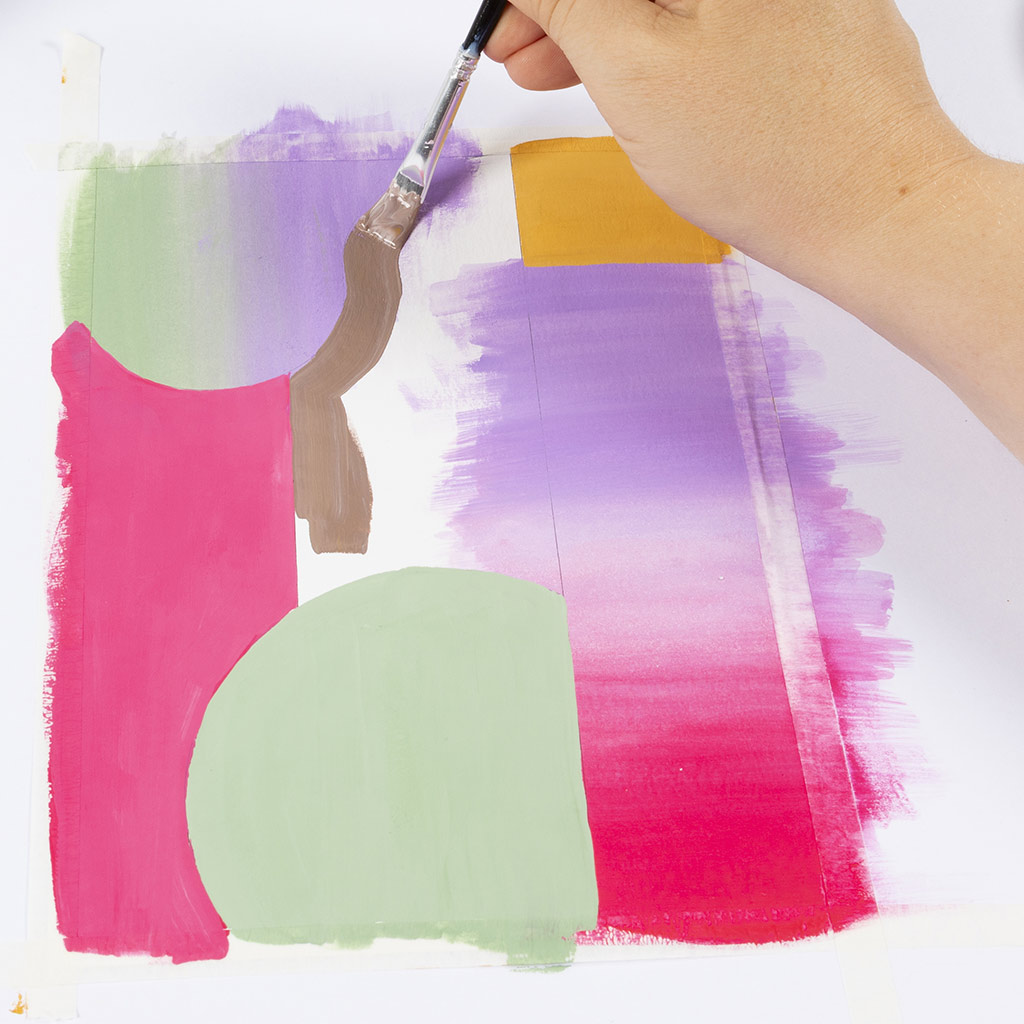 Once the sections with gradations are dry, paint the remaining areas. Start by painting around the edge to get a sharp edge.
Once the sections with gradations are dry, paint the remaining areas. Start by painting around the edge to get a sharp edge.40 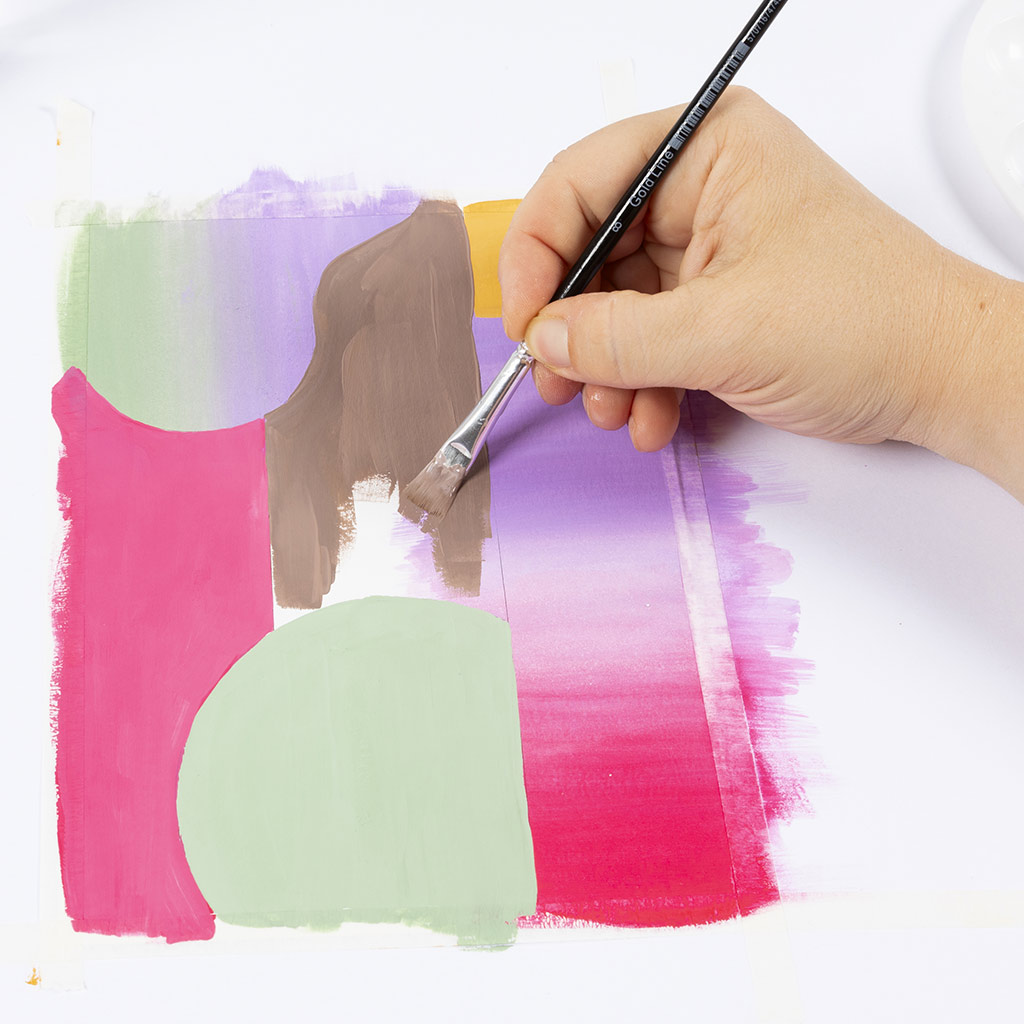 Next, paint the middle of the section and allow the paint to dry.
Next, paint the middle of the section and allow the paint to dry.41 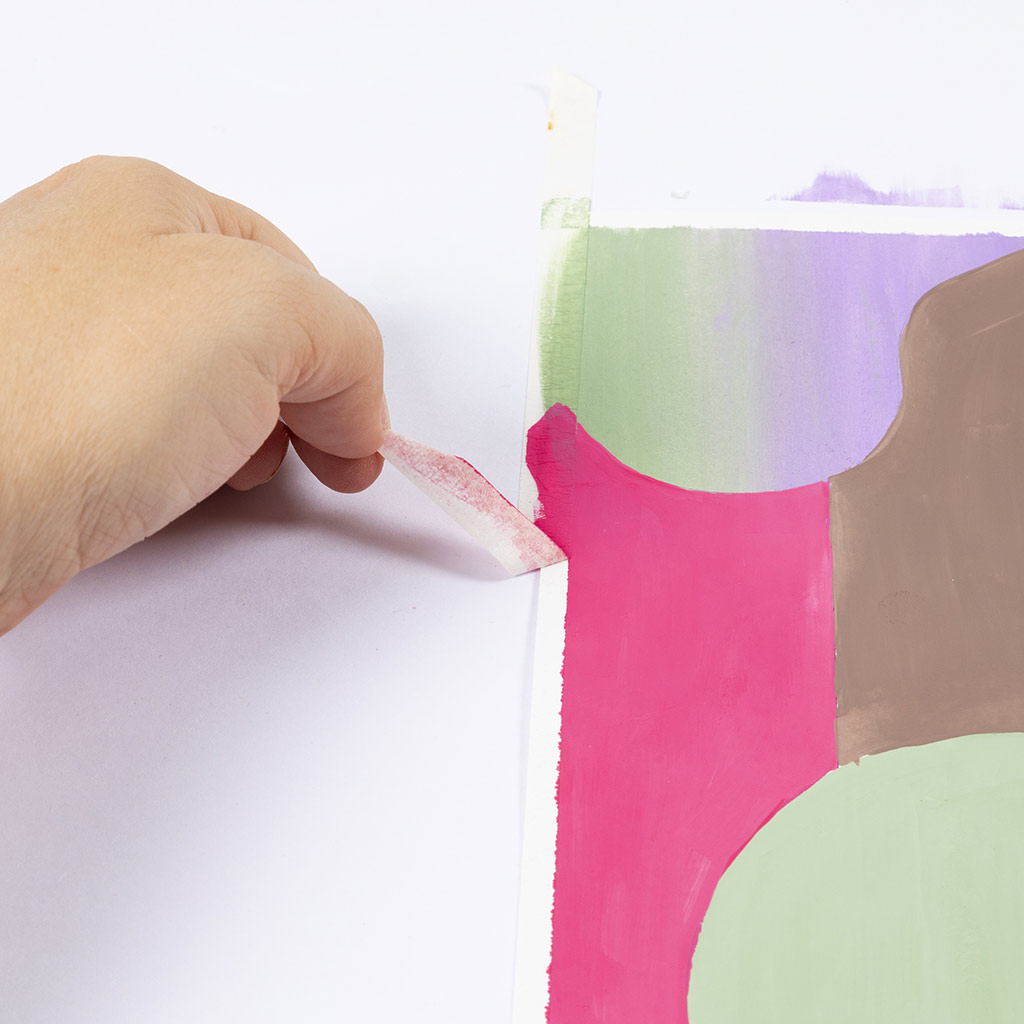 Once the masking tape is dry, carefully remove the tape.
Once the masking tape is dry, carefully remove the tape.42 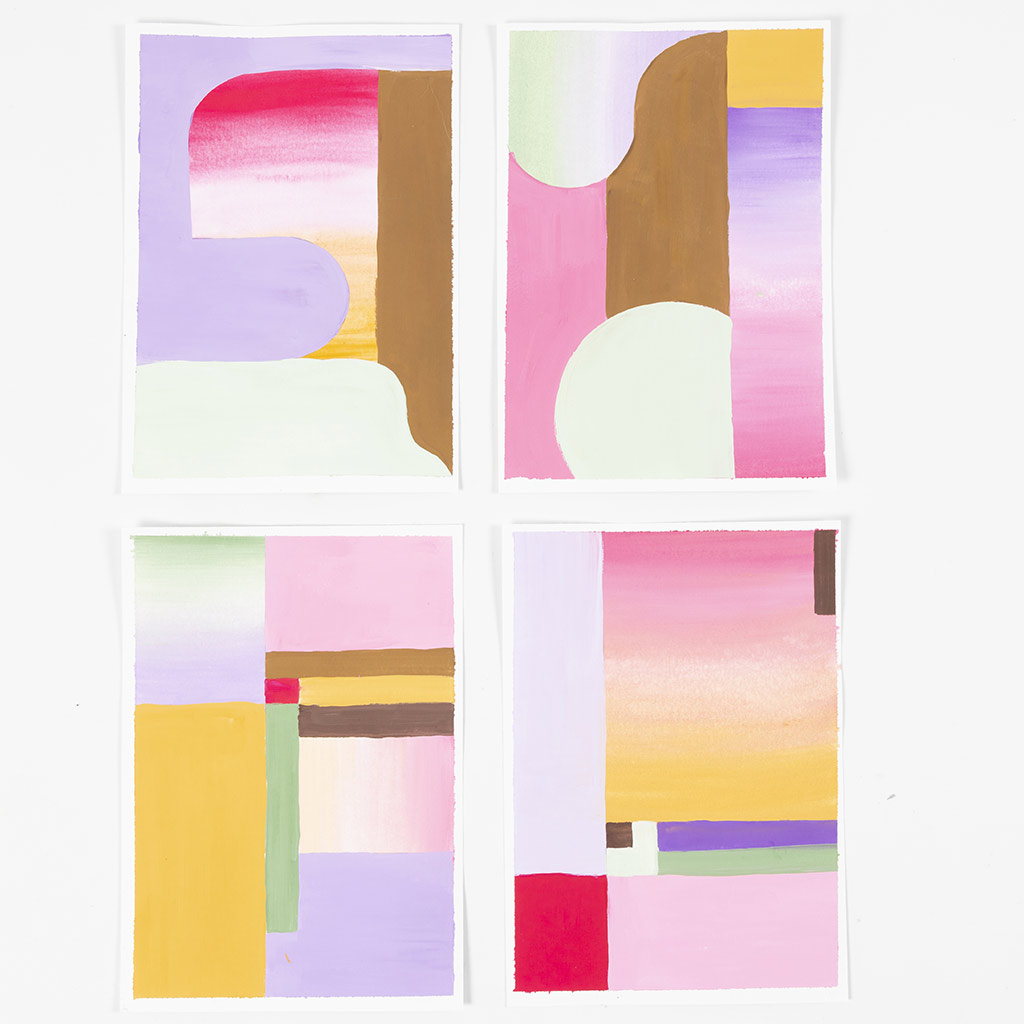 Here you can see a few ideas for inspiration, but only your imagination sets the limits.
Here you can see a few ideas for inspiration, but only your imagination sets the limits.Already signed up? Download the template
Also go exploring in
