
New
Creative idea
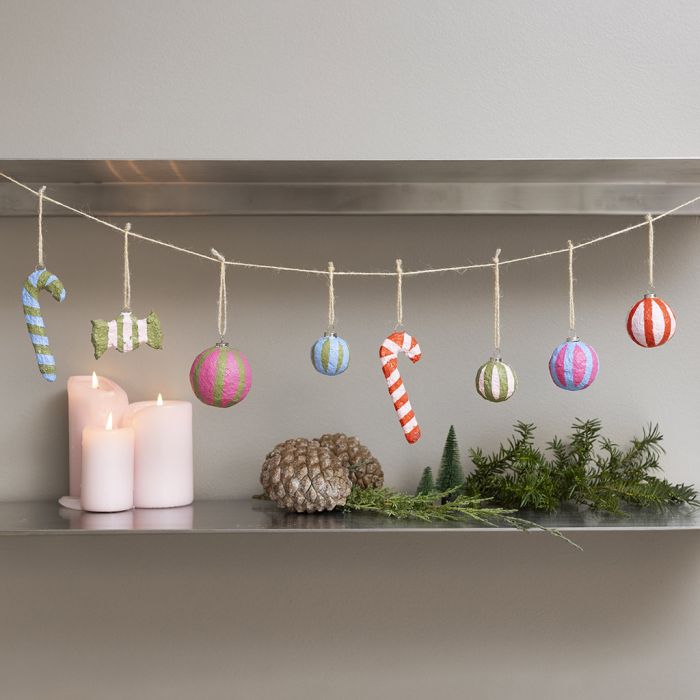
Colourful Christmas decorations made from papier-mâché pulp
#v17079
Make these festive Christmas decorations to decorate any room. They are made out of polystyrene balls and cut-out cardboard stencils, which are then covered with paper-maché pulp and painted with colours and patterns.
#v17079
How to do it Download the templates/recipes
1  Cut out the designs marked on the box.
Cut out the designs marked on the box.2 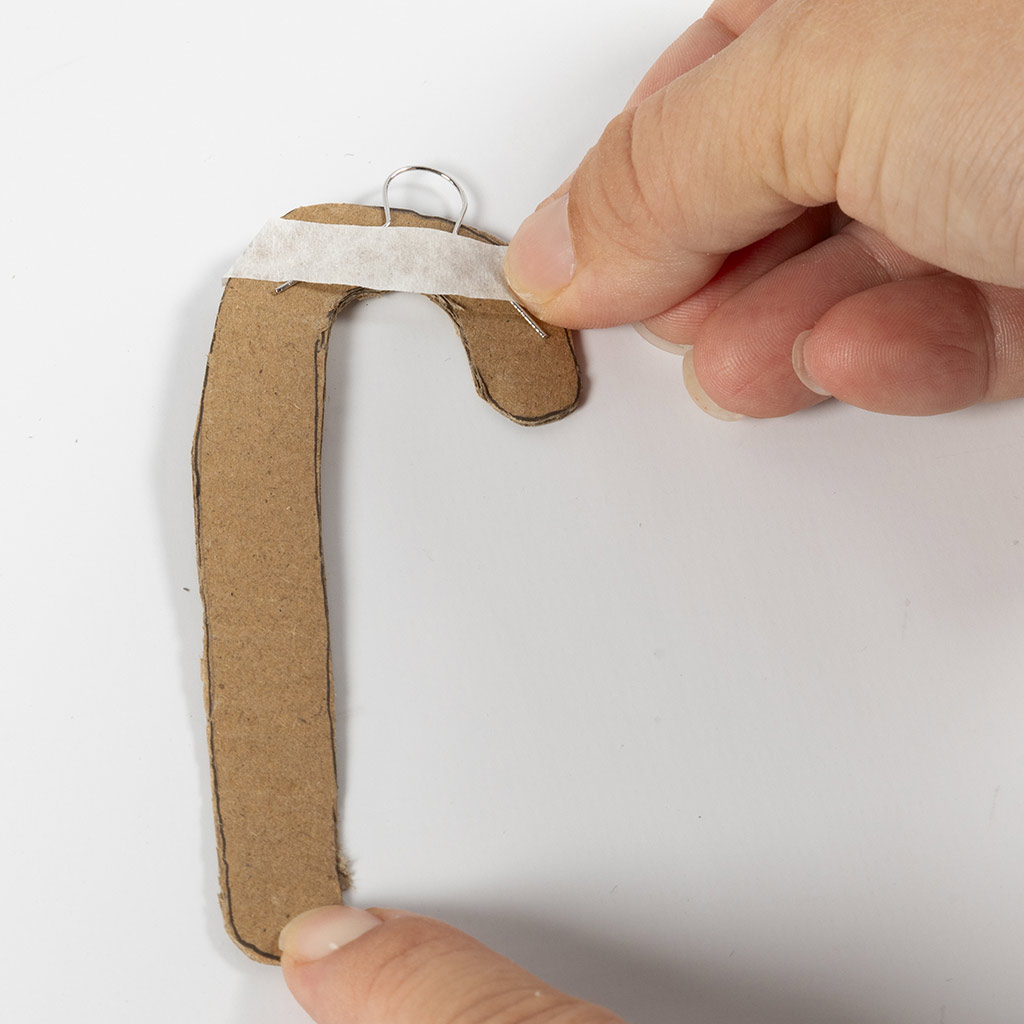 Wrap the masking tape provided around the hanging decoration.
Wrap the masking tape provided around the hanging decoration.3 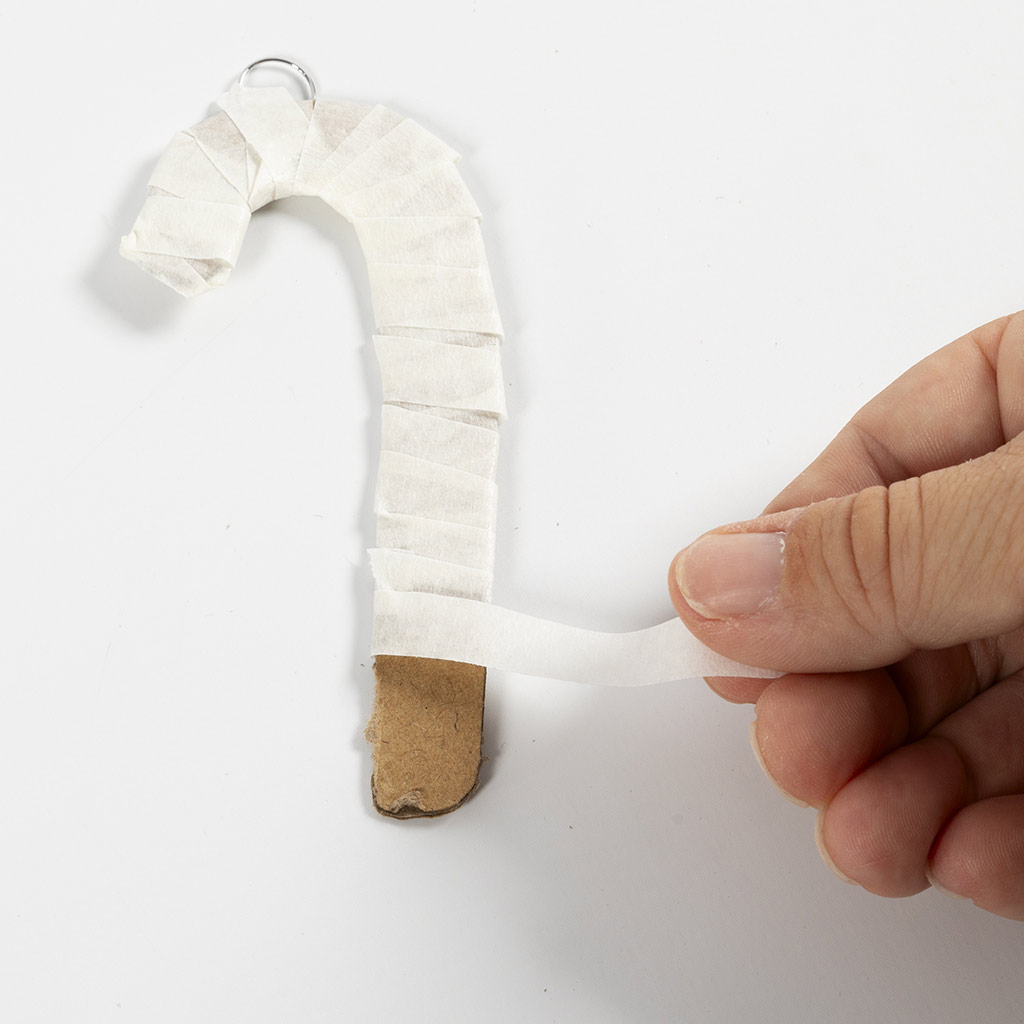 Cover everything with tape. This ensures that the cardboard does not dissolve when wet pulp is applied.
Cover everything with tape. This ensures that the cardboard does not dissolve when wet pulp is applied.4 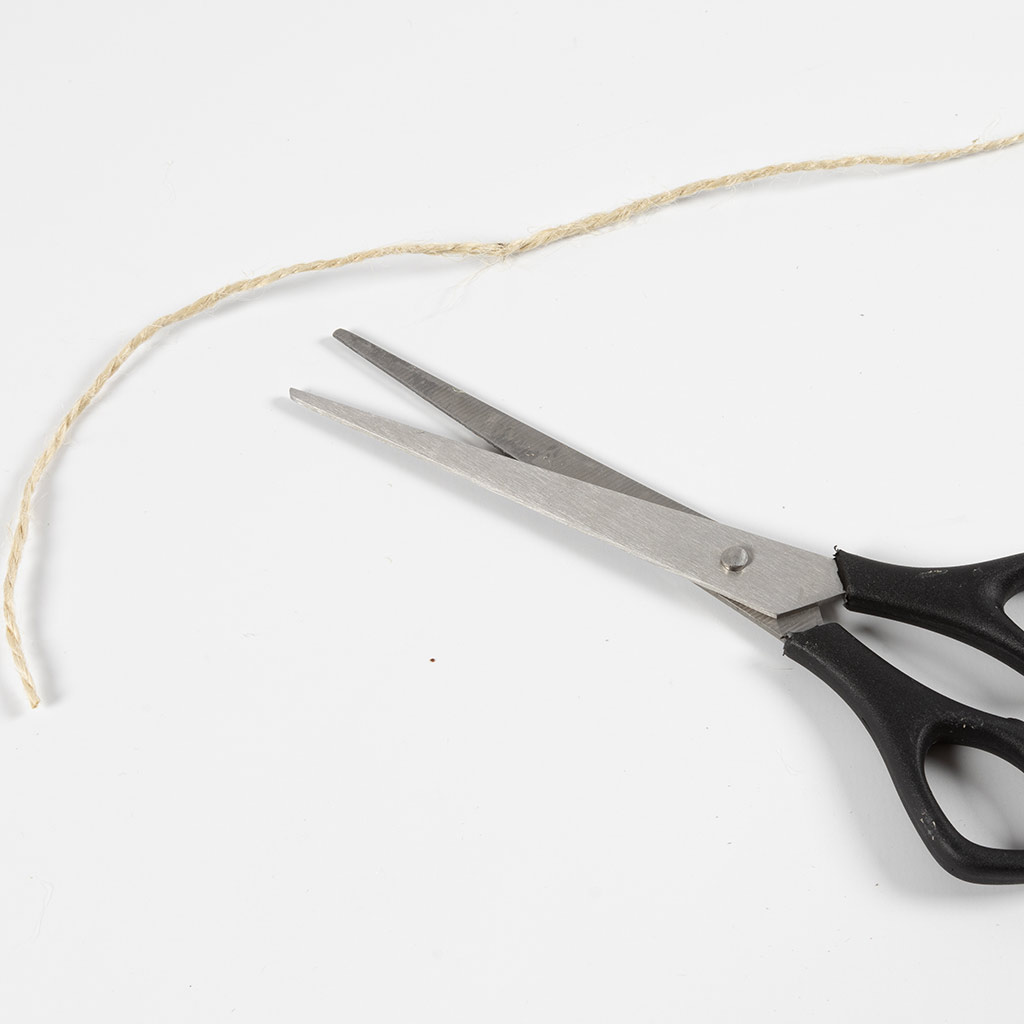 Cut 20 cm of cord.
Cut 20 cm of cord.5  Pull the cord through the hanging decoration and tie a knot.
Pull the cord through the hanging decoration and tie a knot.6 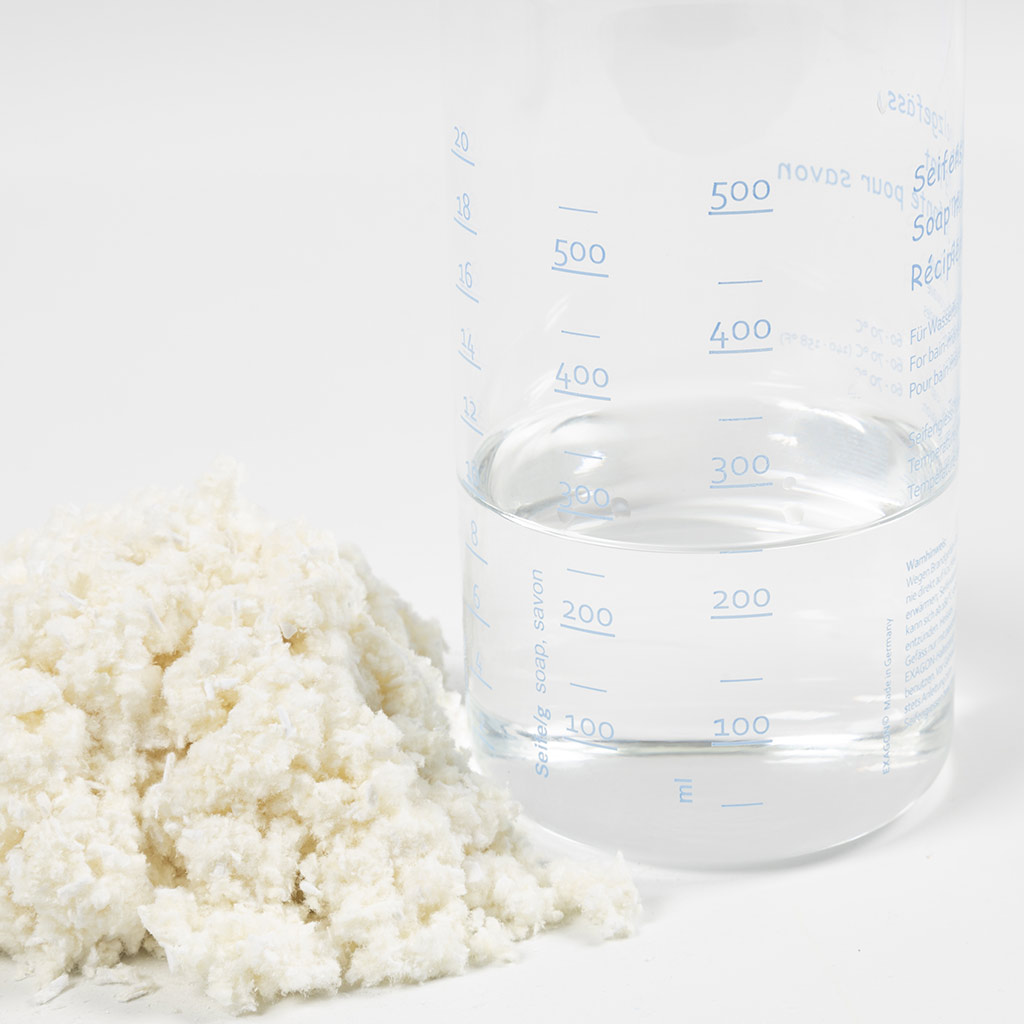 Mix the pulp. Three parts pulp are used to one part water.
Mix the pulp. Three parts pulp are used to one part water.7  Knead the pulp thoroughly. If it feels too dry, add a little more water.
Knead the pulp thoroughly. If it feels too dry, add a little more water.8 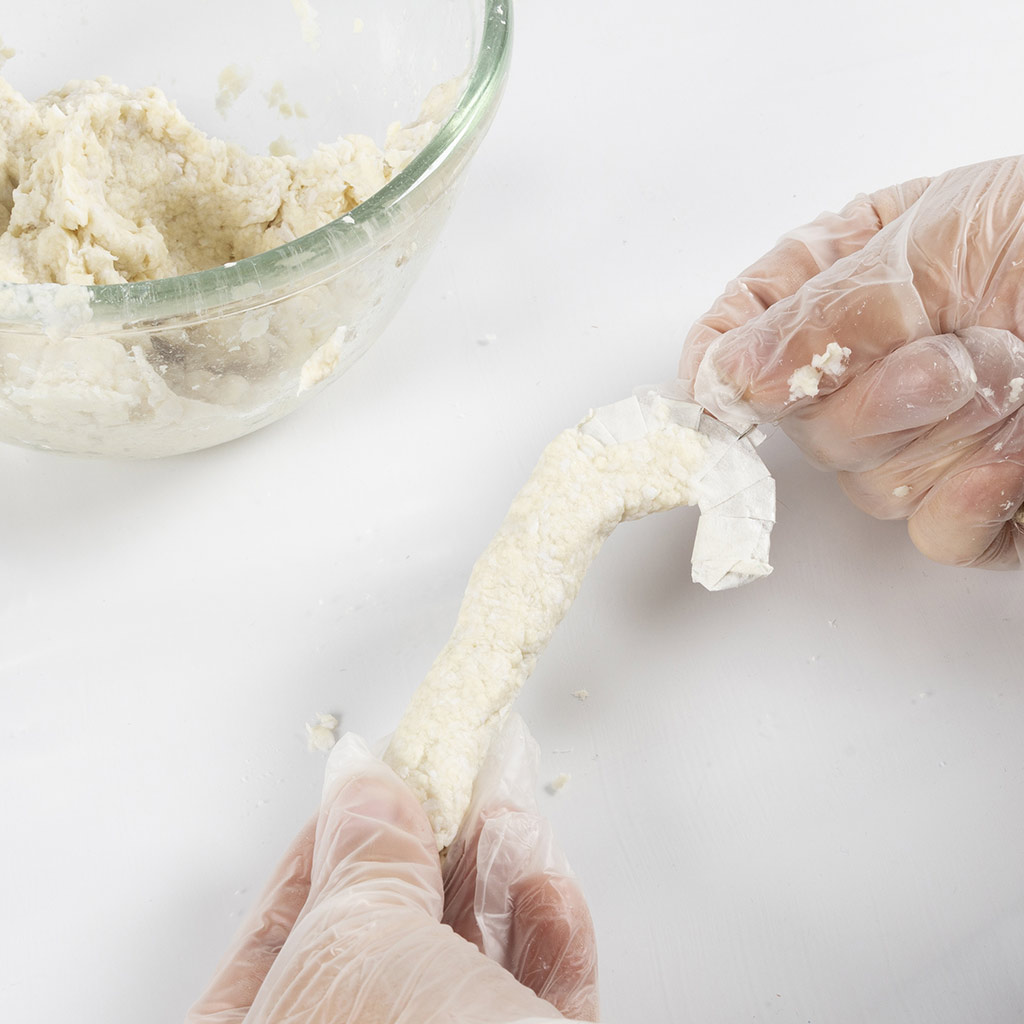 Add the pulp.
Add the pulp.9  Smooth the pulp to create an even surface.
Smooth the pulp to create an even surface.10 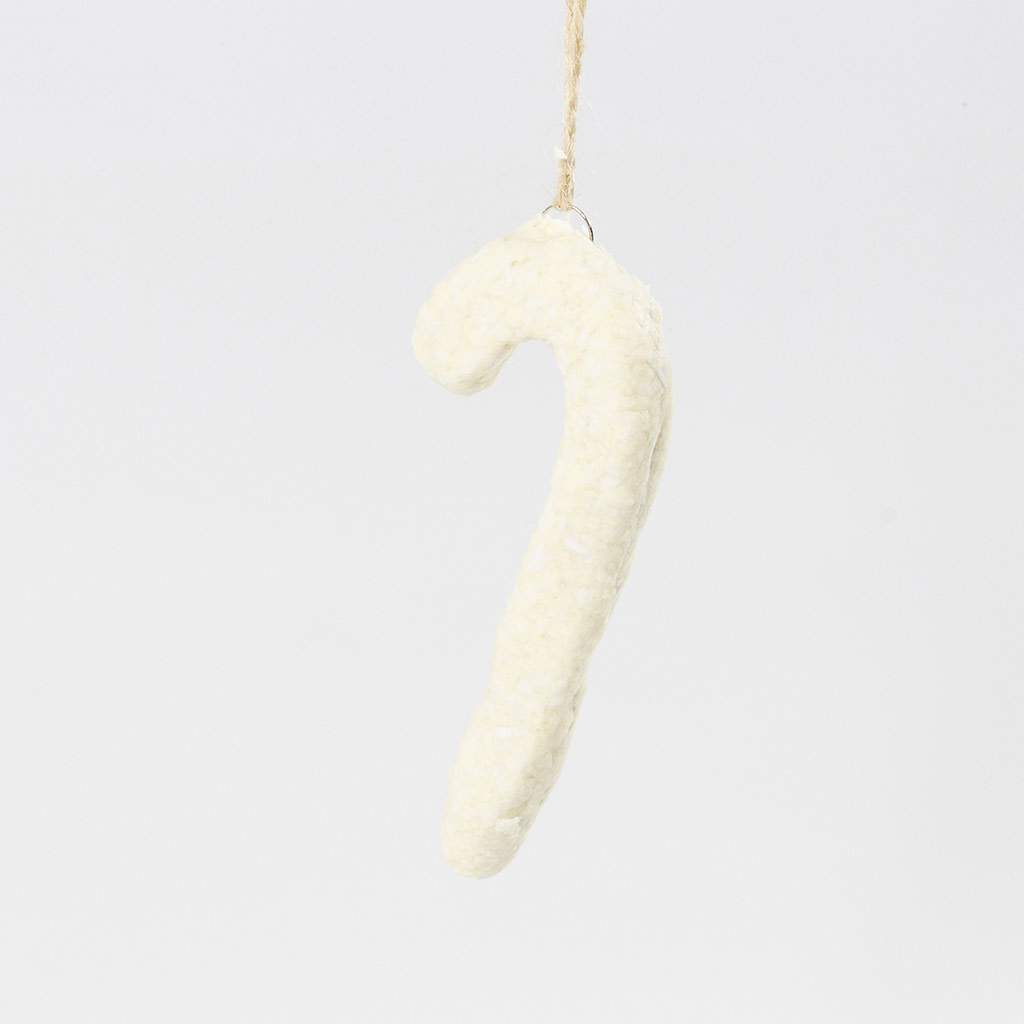 Hang the hanging decoration to dry. It takes around 4 days for the pulp to dry completely.
Hang the hanging decoration to dry. It takes around 4 days for the pulp to dry completely.11  Paint the hanging decoration.
Paint the hanging decoration.12 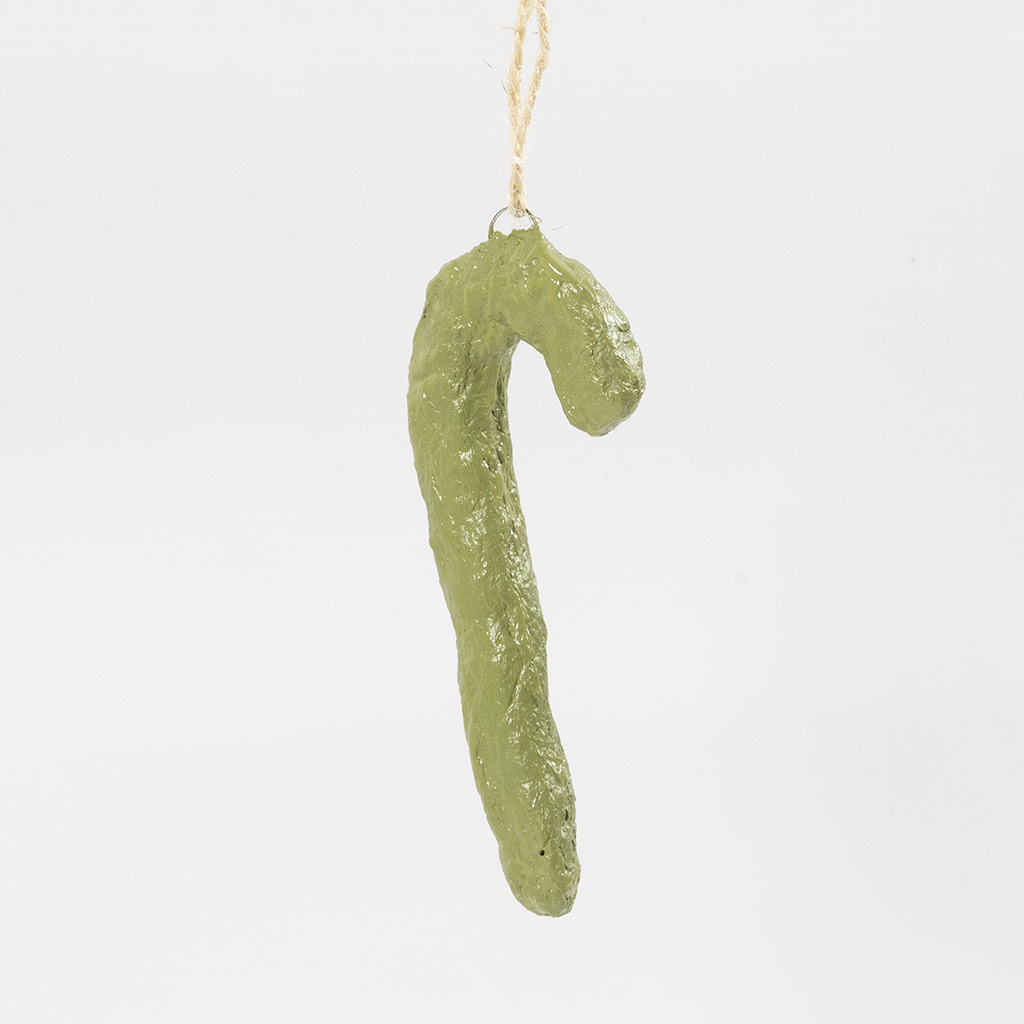 Allow to dry.
Allow to dry.13  If you want stripes, you can use the masking tape provided and attach it as shown in the picture. Press the tape firmly so that it adheres well.
If you want stripes, you can use the masking tape provided and attach it as shown in the picture. Press the tape firmly so that it adheres well.14 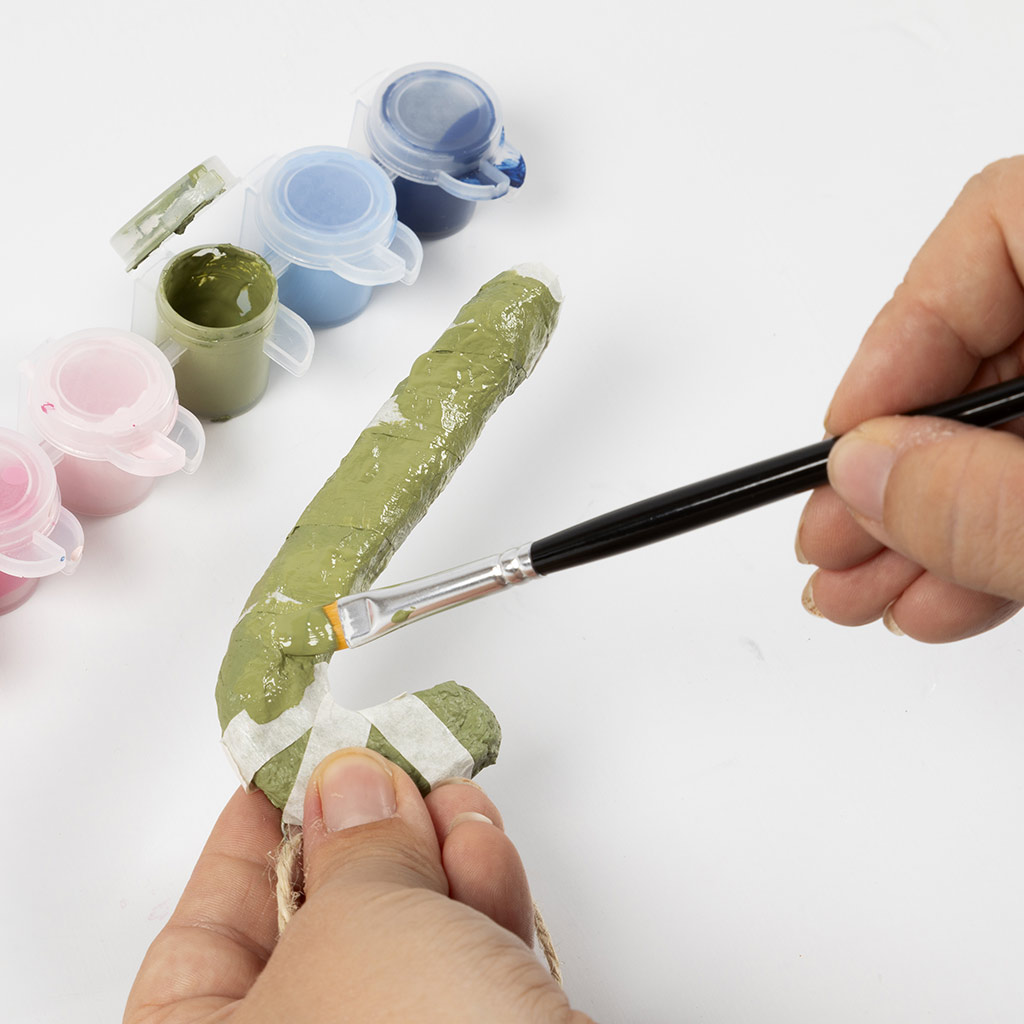 Now paint along the edges of the tape with the same colour to make sure the lines are sharp.
Now paint along the edges of the tape with the same colour to make sure the lines are sharp.15 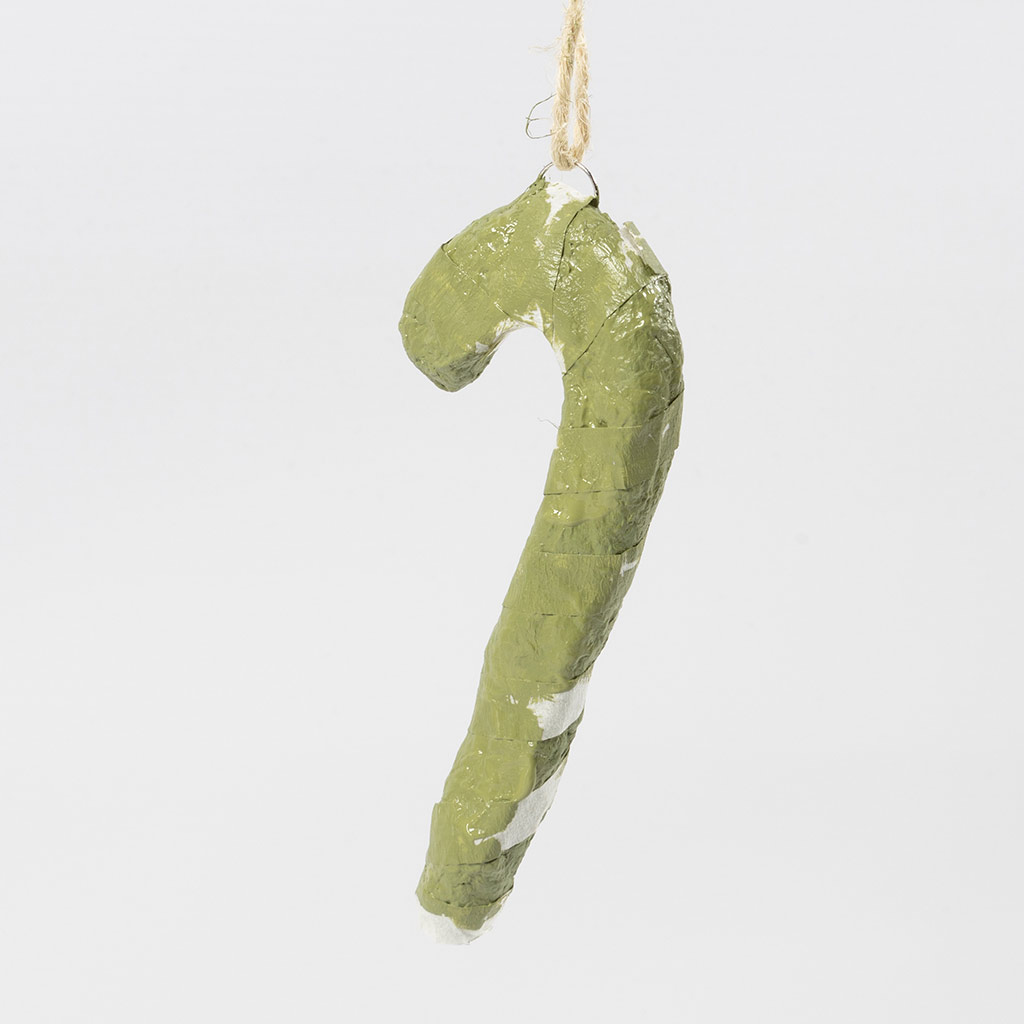 Allow to dry.
Allow to dry.16 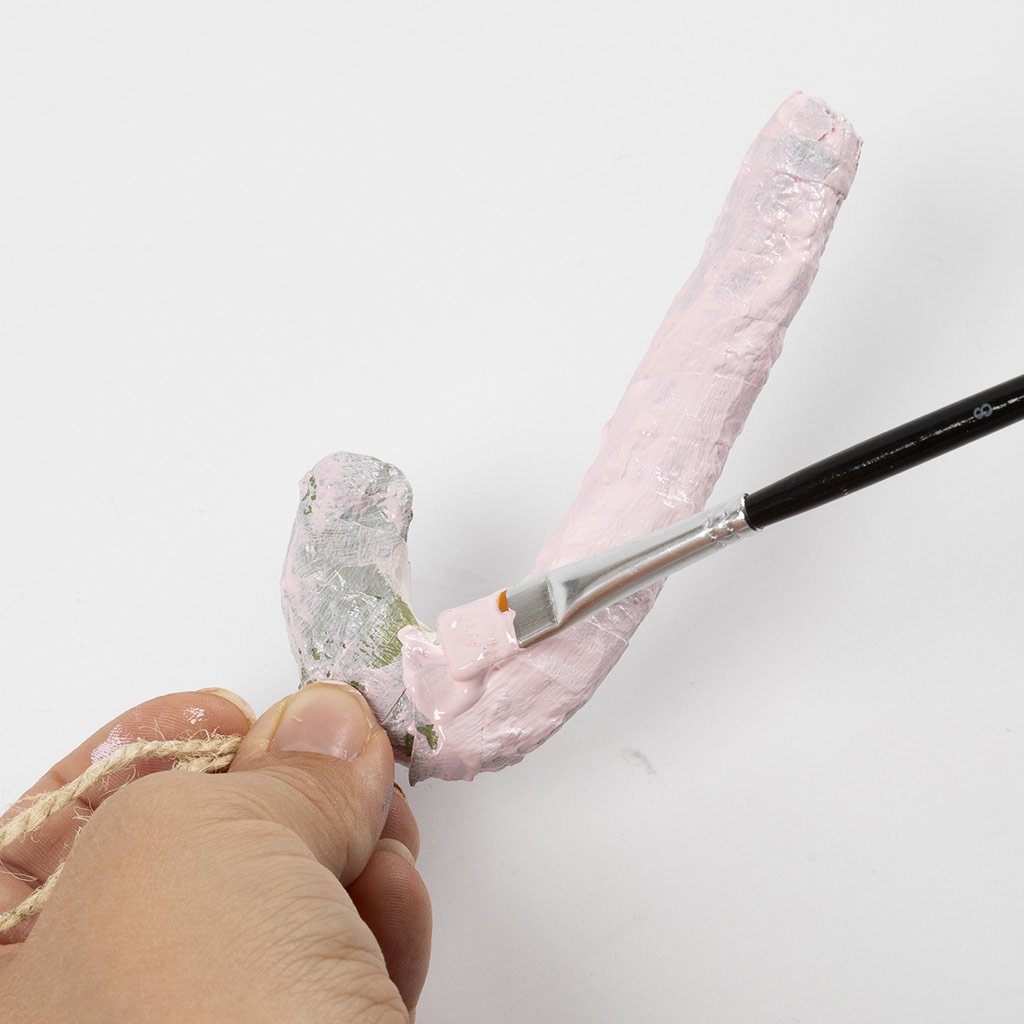 Now paint with the desired colour for the other stripes.
Now paint with the desired colour for the other stripes.17 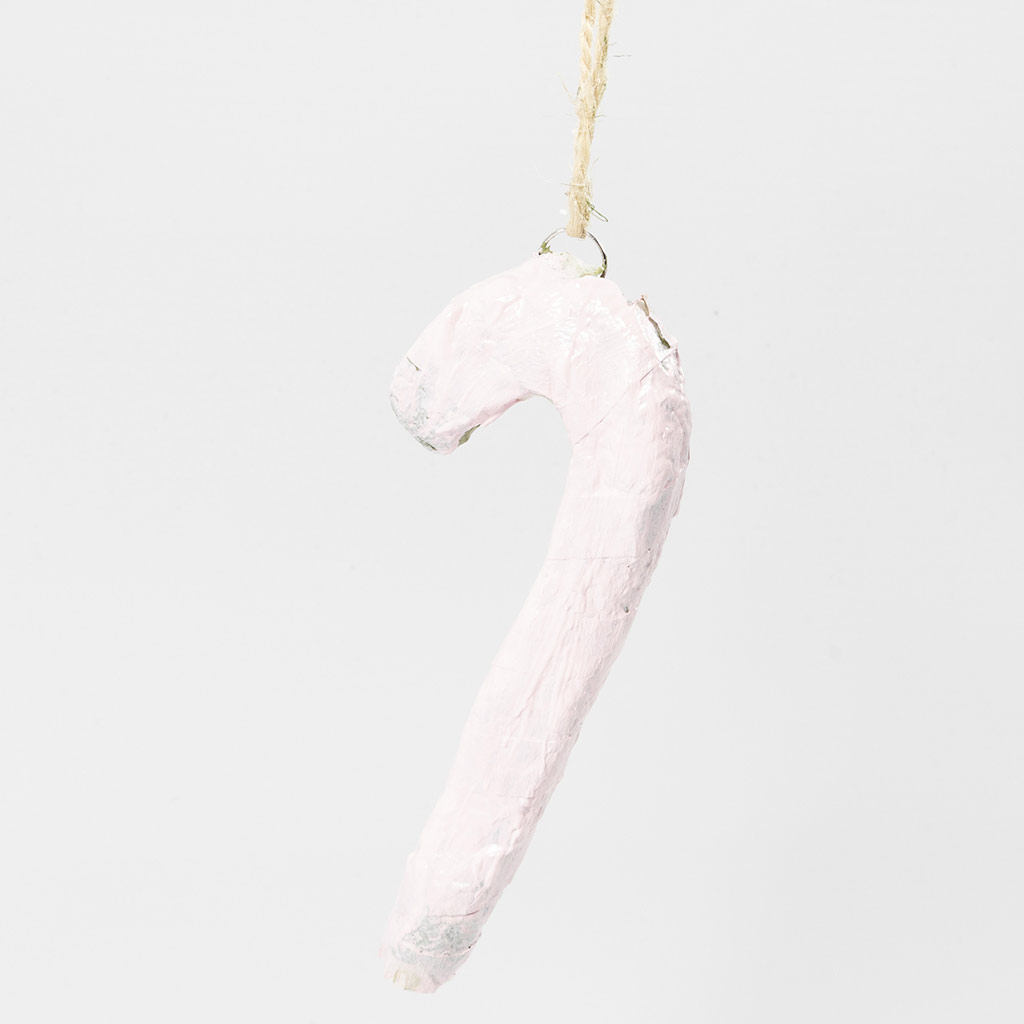 Allow to dry.
Allow to dry.18 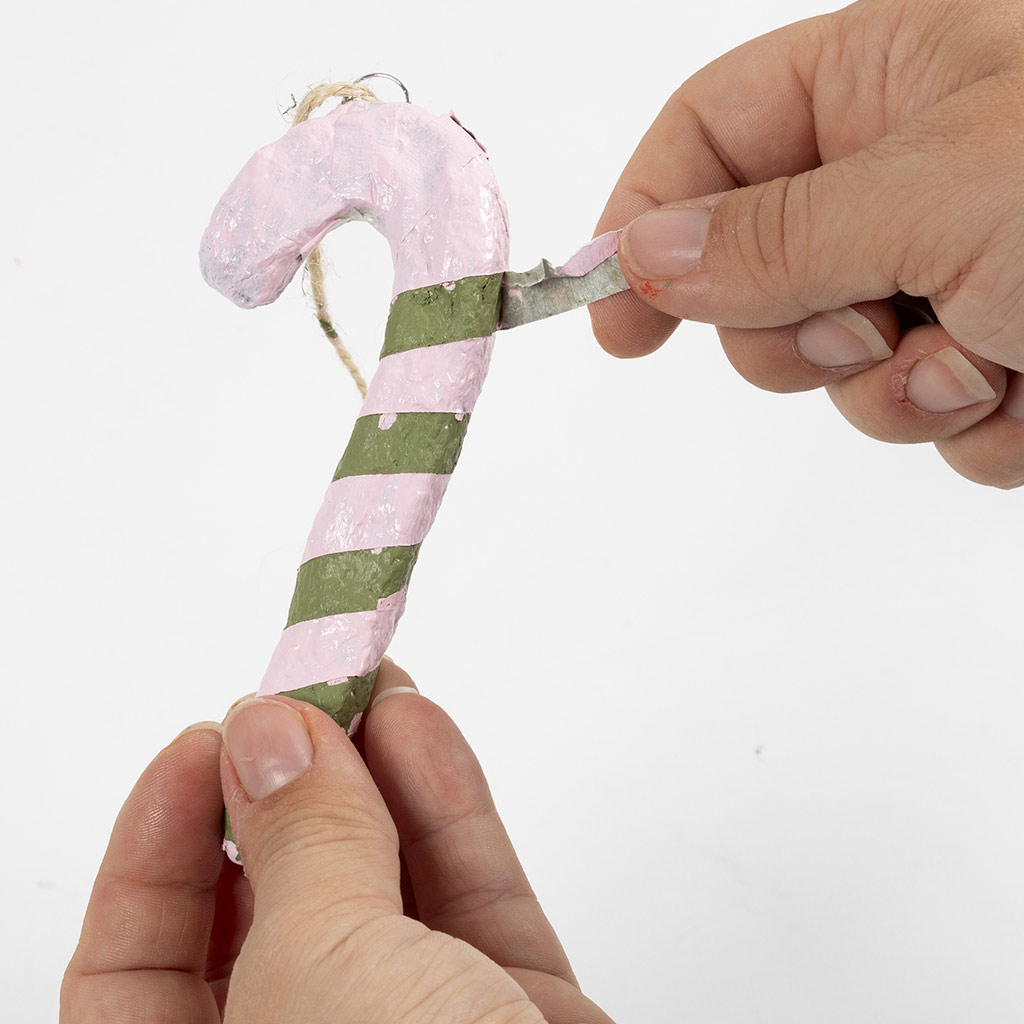 Remove the tape and your hanging decoration is ready for use. Repeat the process with the other hanging decorations you cut out of the box.
Remove the tape and your hanging decoration is ready for use. Repeat the process with the other hanging decorations you cut out of the box.19 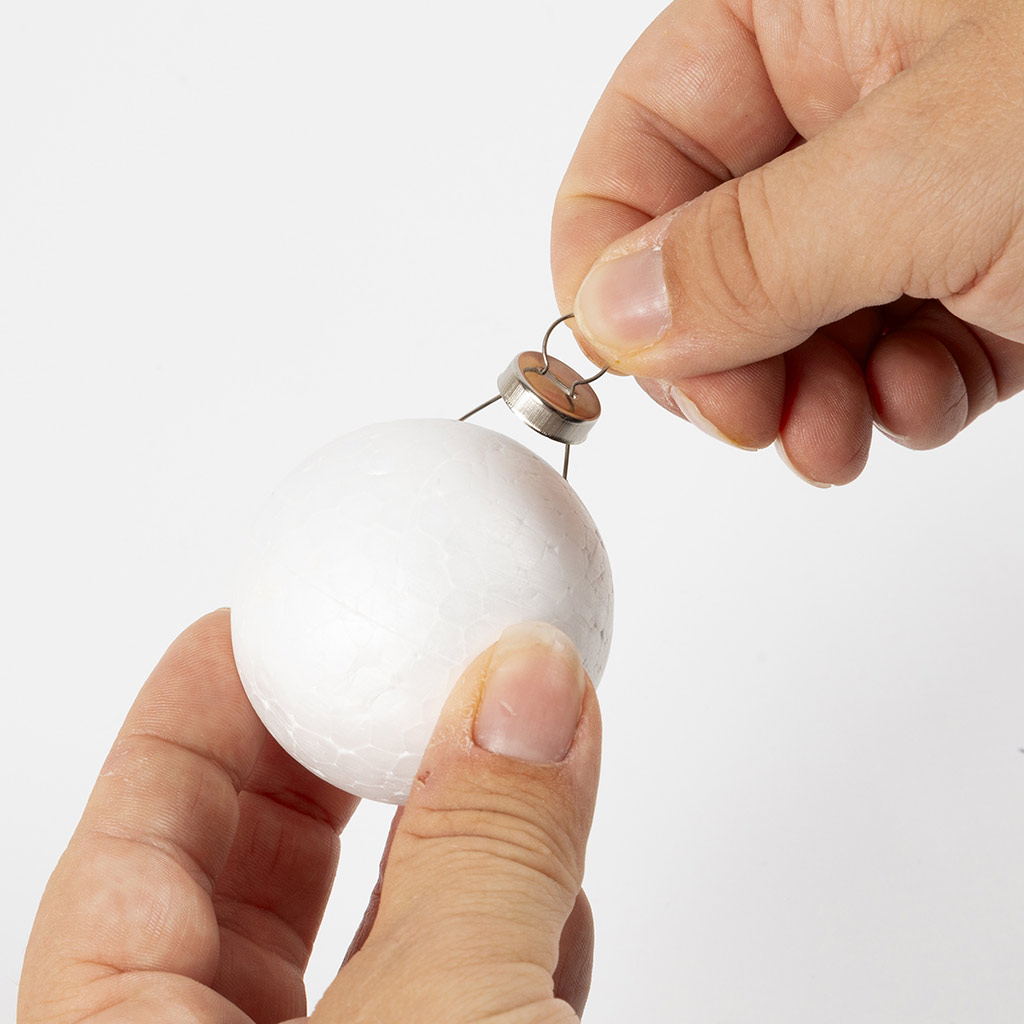 Take a polystyrene ball and attach the hanging decoration by gathering it in the middle and pressing it into the ball.
Take a polystyrene ball and attach the hanging decoration by gathering it in the middle and pressing it into the ball.20  Cut 20 cm of cord.
Cut 20 cm of cord.21 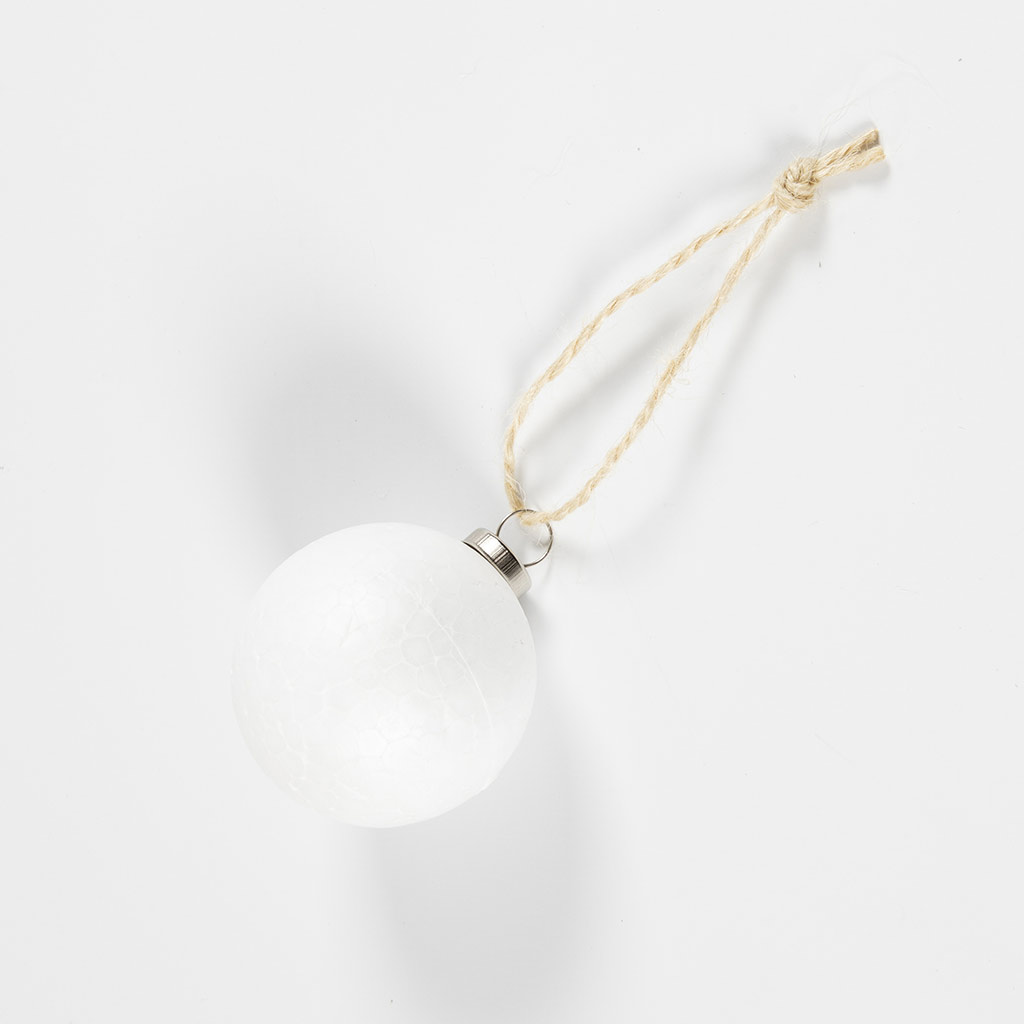 Add cord and tie a knot.
Add cord and tie a knot.22 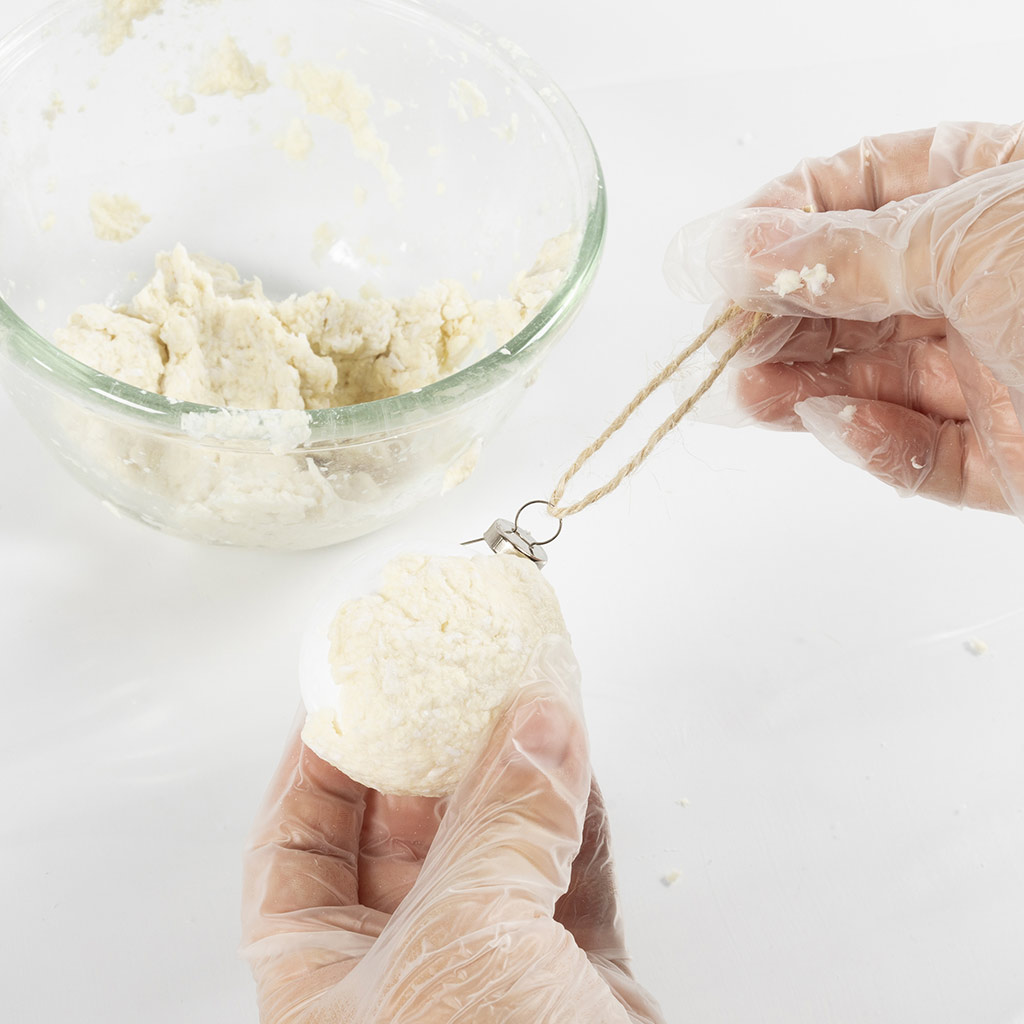 Start applying the pulp.
Start applying the pulp.23  Once the ball is filled, the pulp is smoothed out to create an even surface.
Once the ball is filled, the pulp is smoothed out to create an even surface.24 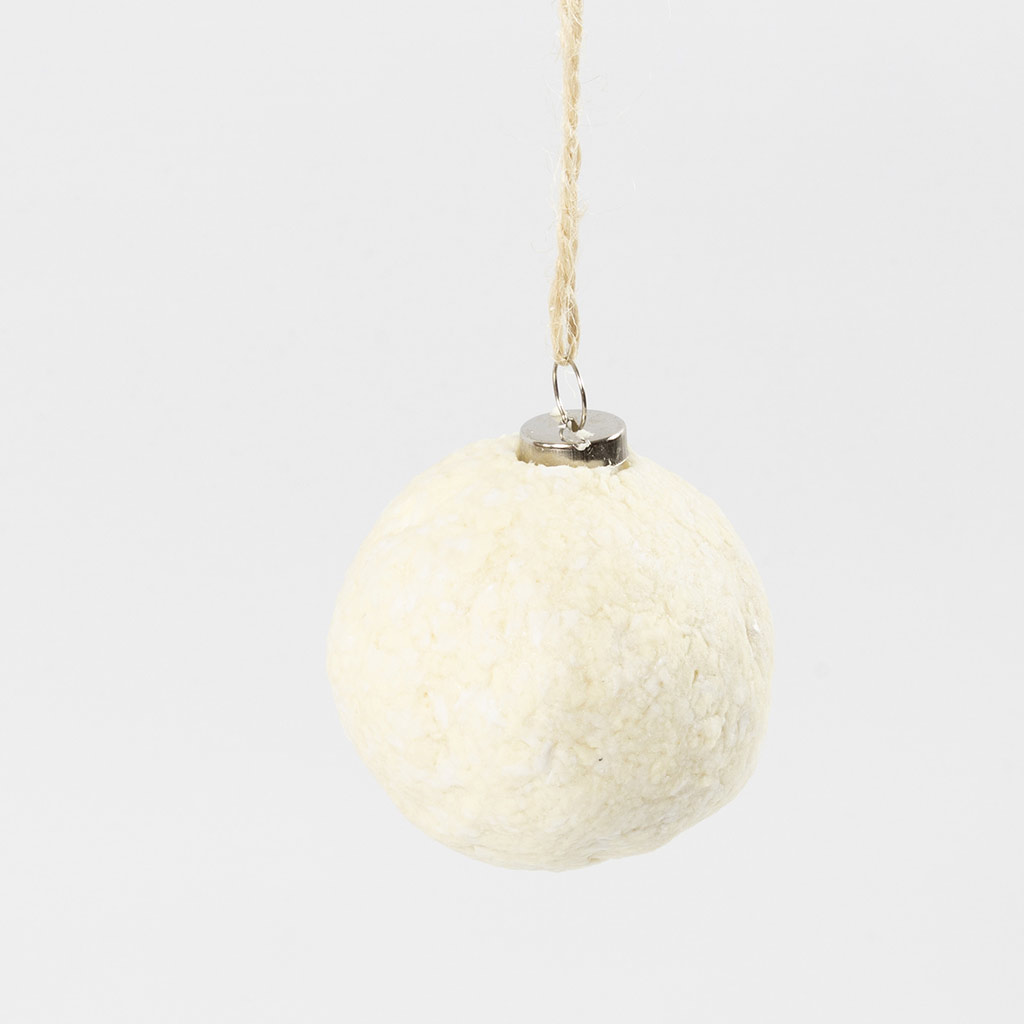 Allow to dry.
Allow to dry.25 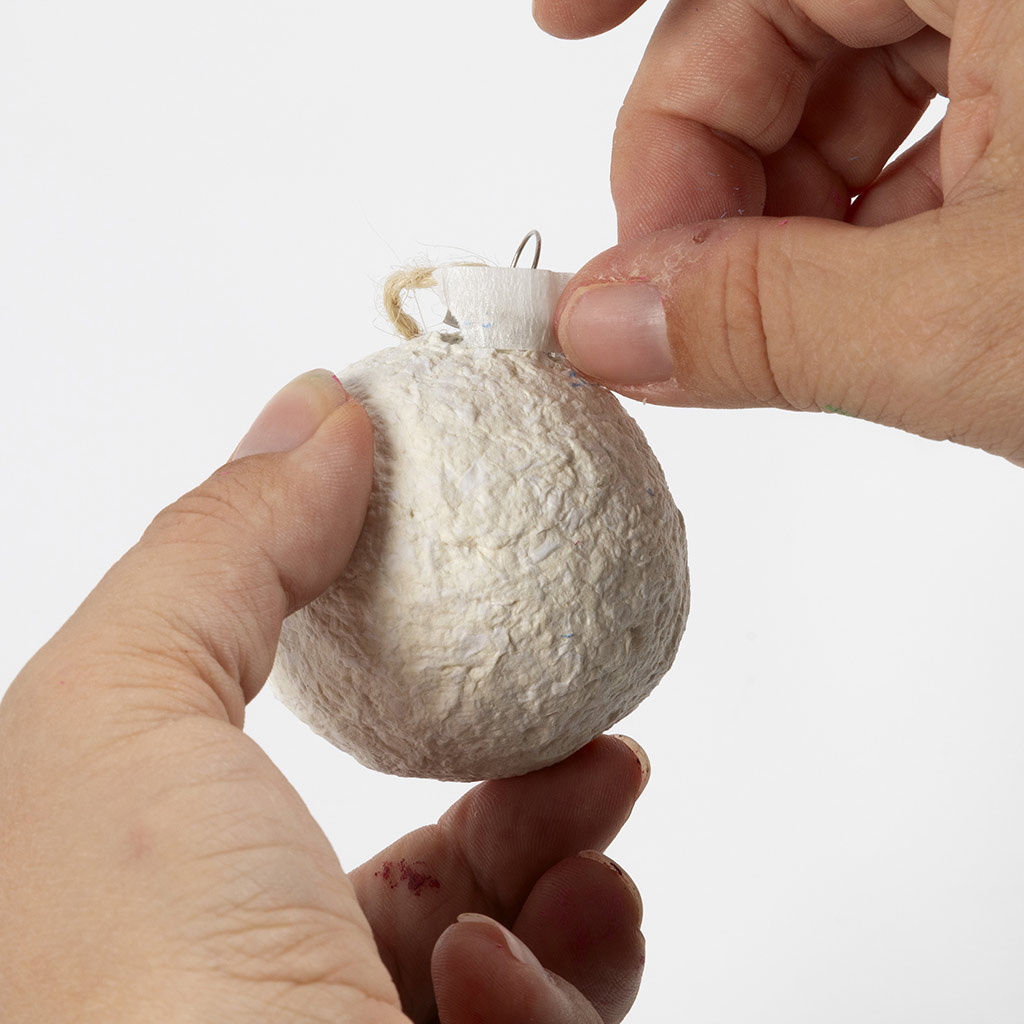 Once the hanging decoration is dry, apply masking tape to the metal part as shown in the picture.
Once the hanging decoration is dry, apply masking tape to the metal part as shown in the picture.26 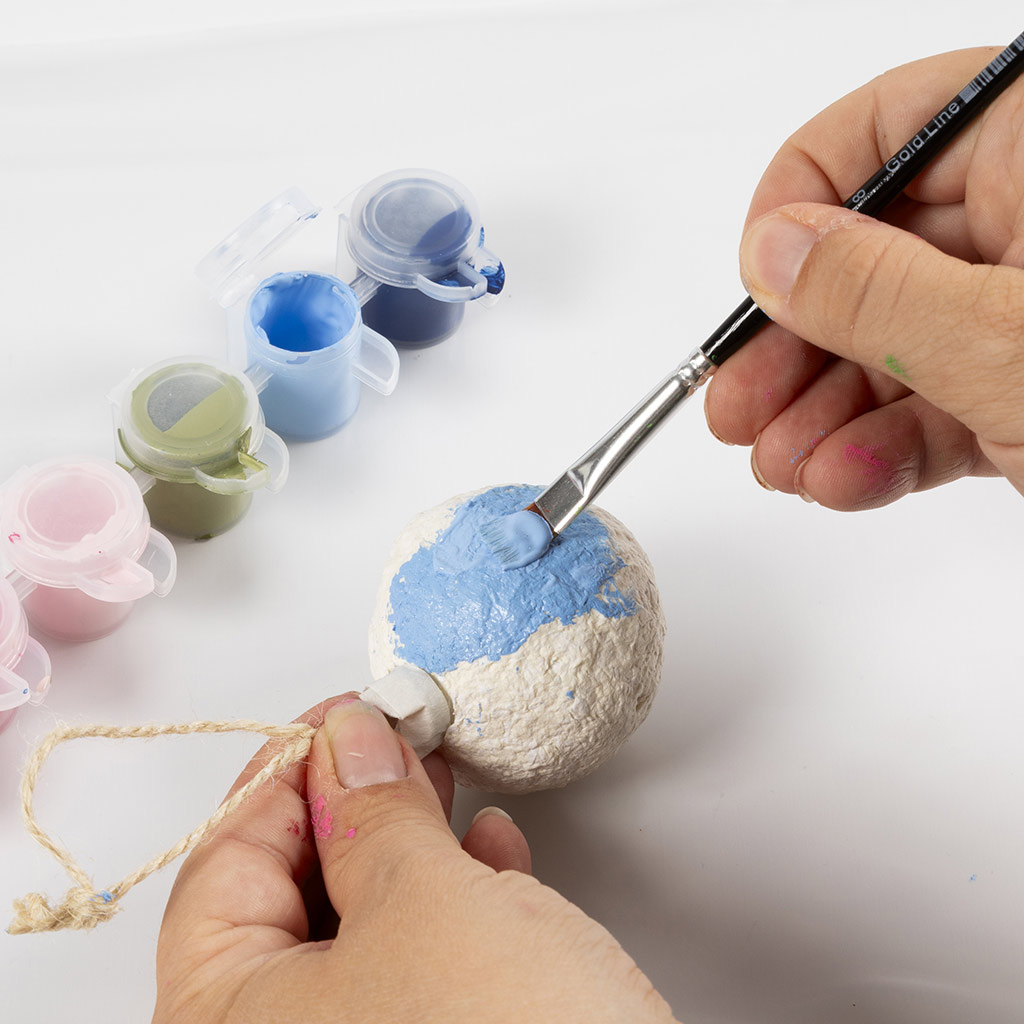 Now paint the entire ball in whichever colour you want.
Now paint the entire ball in whichever colour you want.27 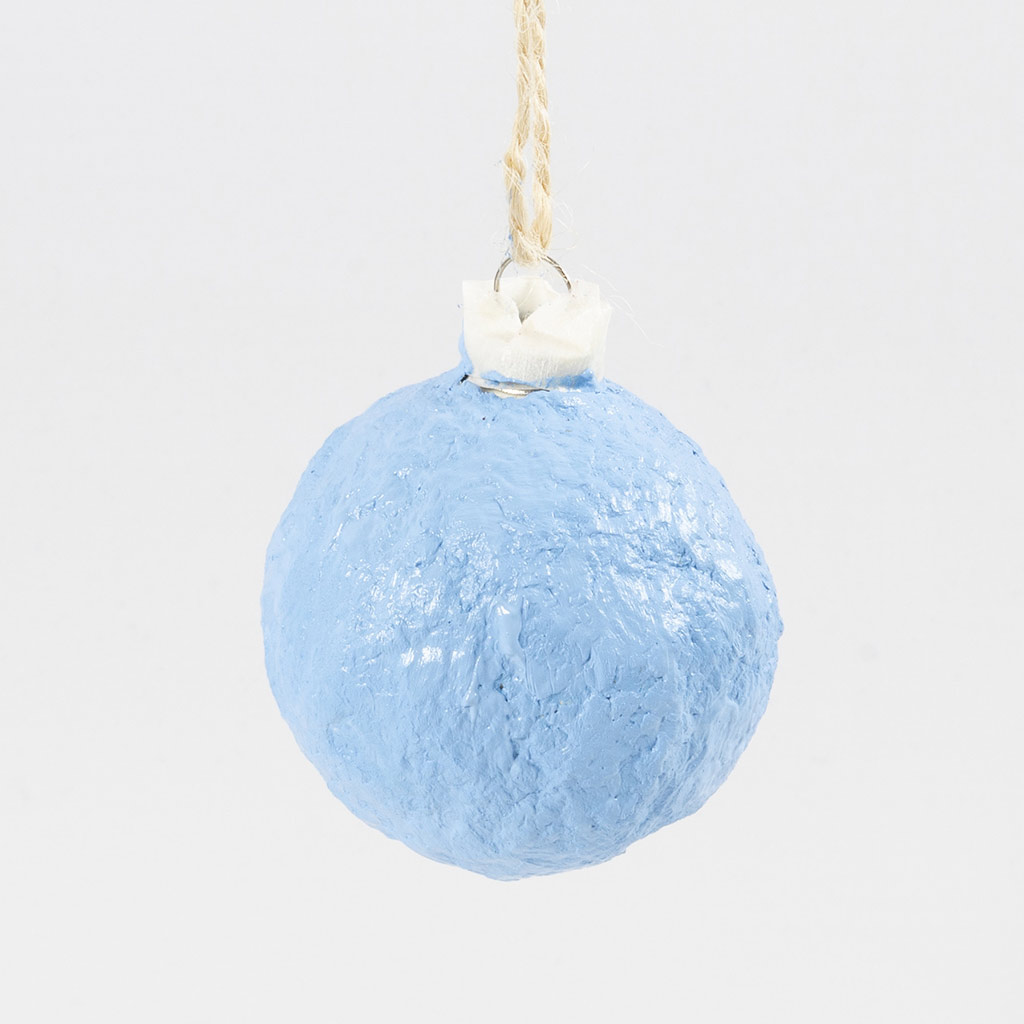 Allow to dry.
Allow to dry.28 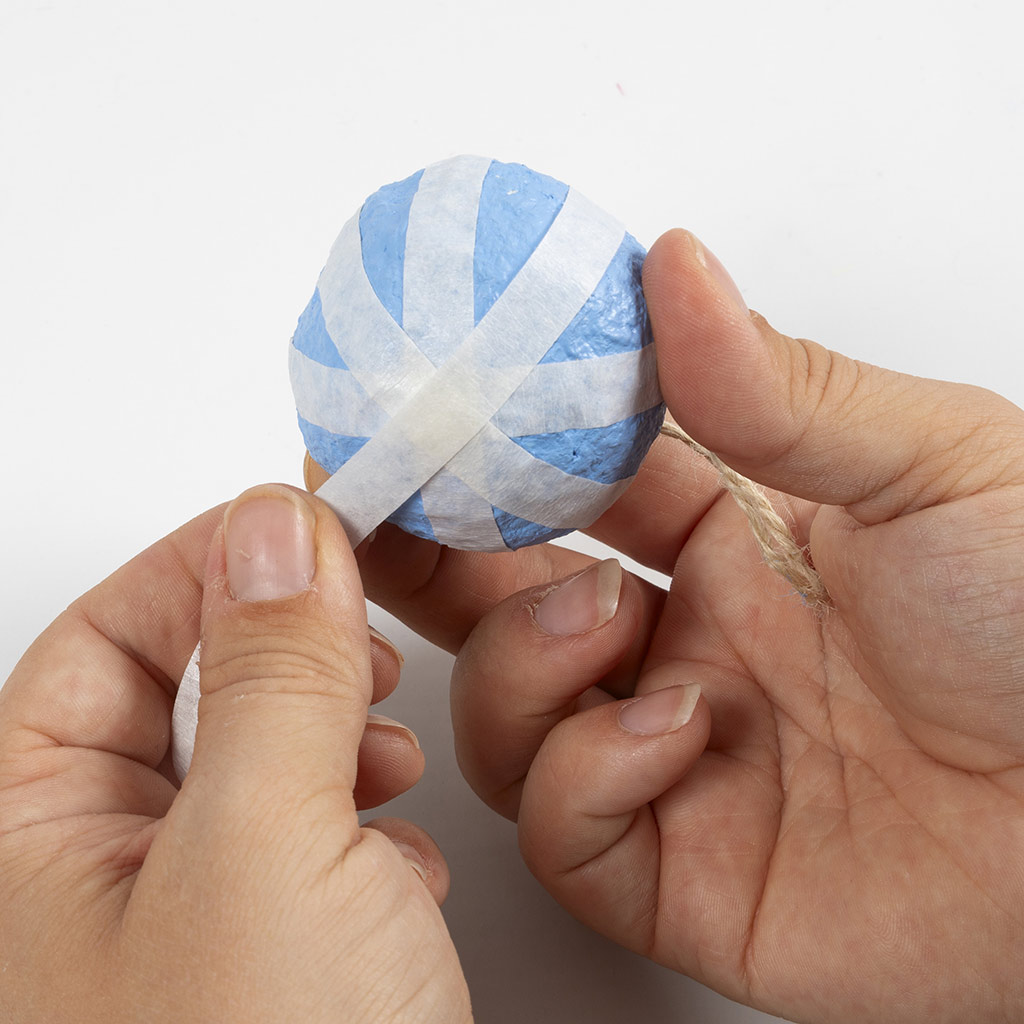 Apply the tape in the desired pattern.
Apply the tape in the desired pattern.29 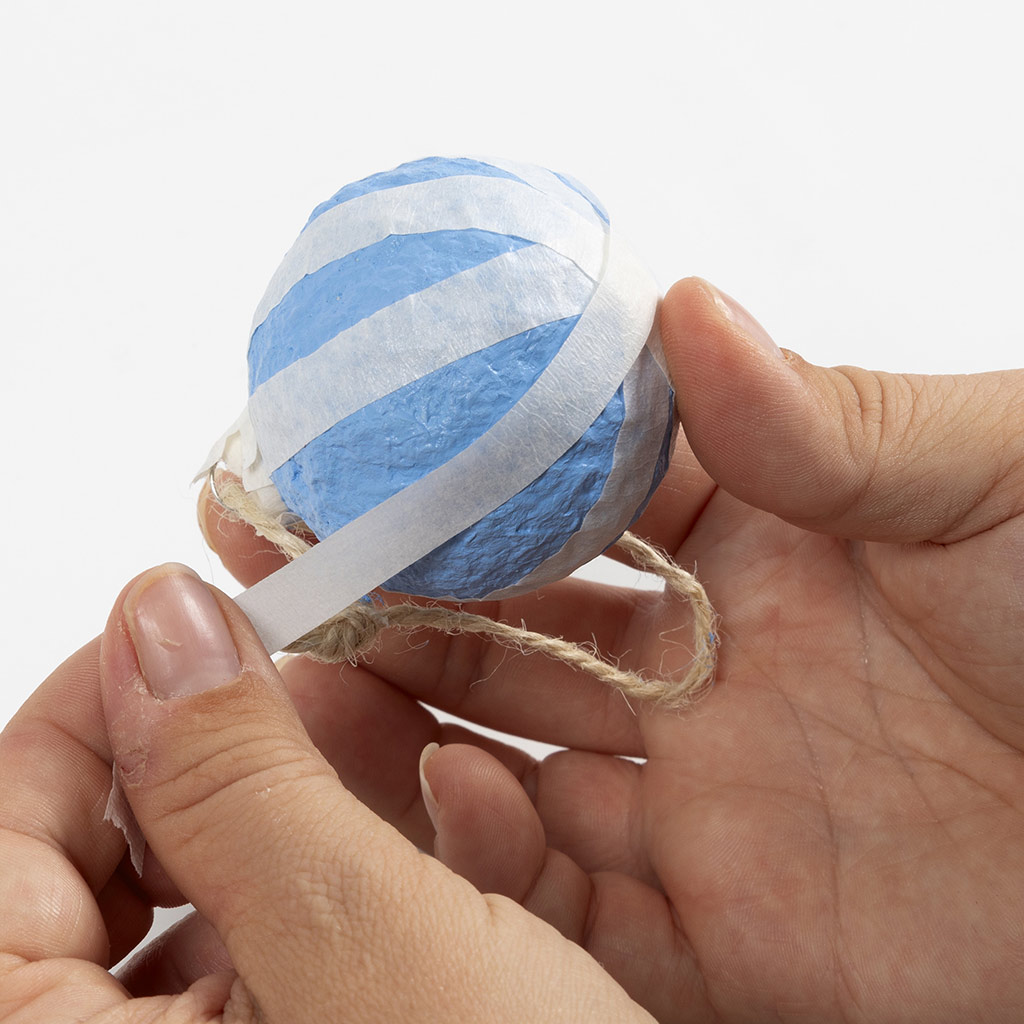 Make sure that the tape covers it completely.
Make sure that the tape covers it completely.30  Now paint with the same colour again so that there are sharp lines where there is tape.
Now paint with the same colour again so that there are sharp lines where there is tape.31 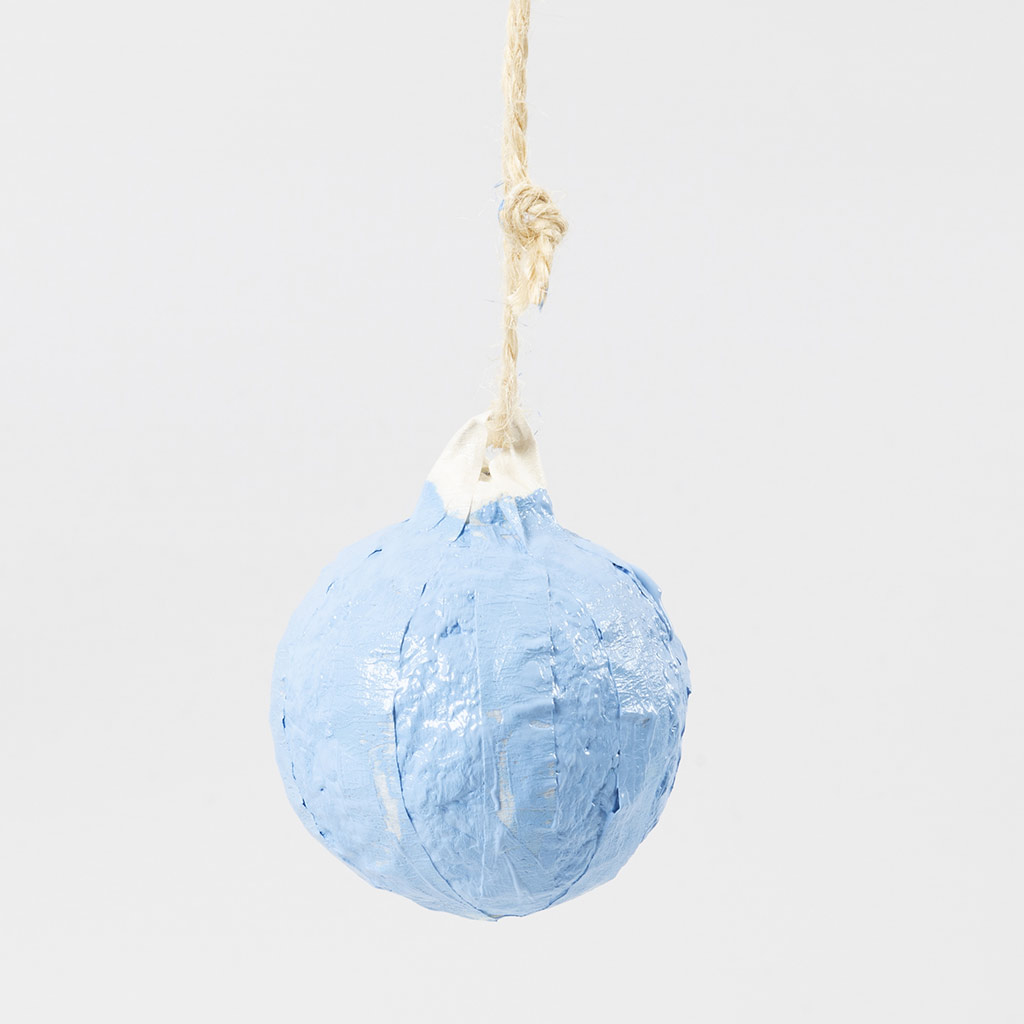 Allow to dry.
Allow to dry.32 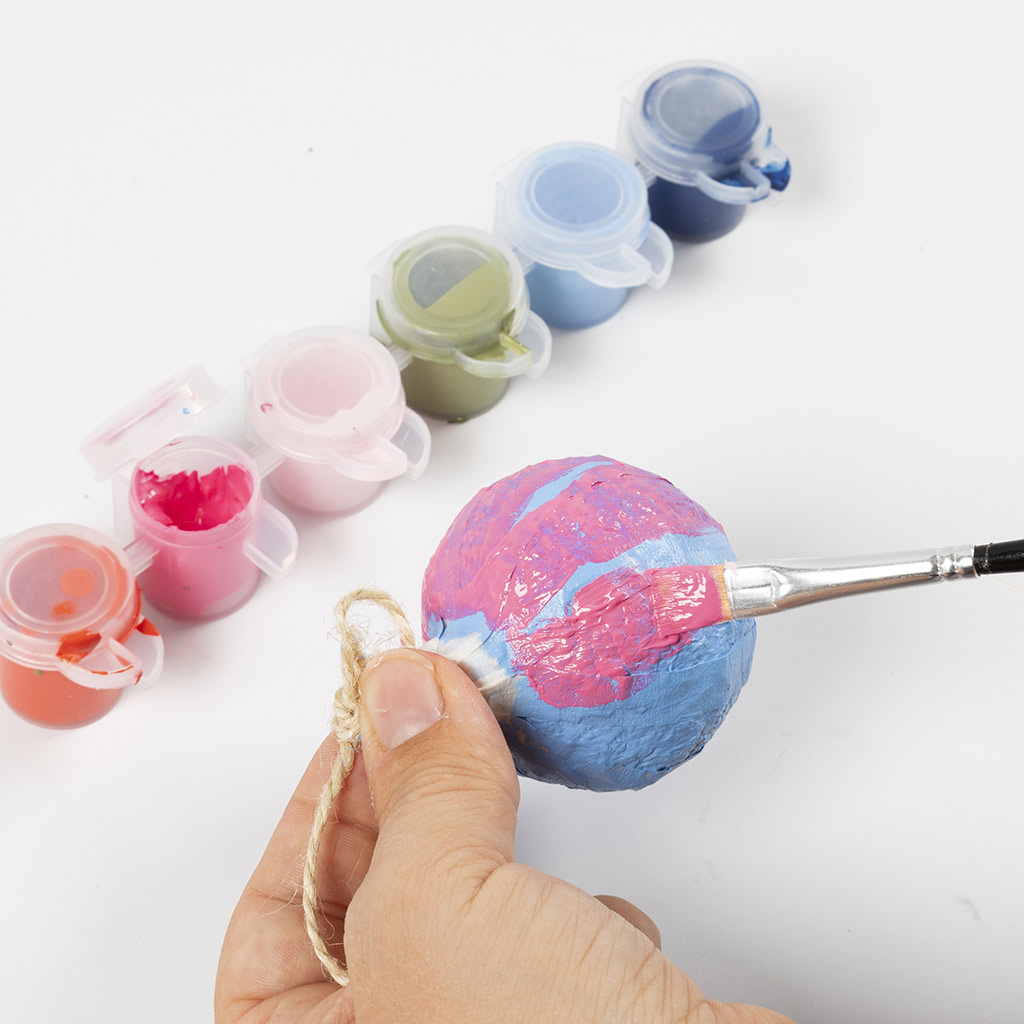 Now paint with a different colour.
Now paint with a different colour.33 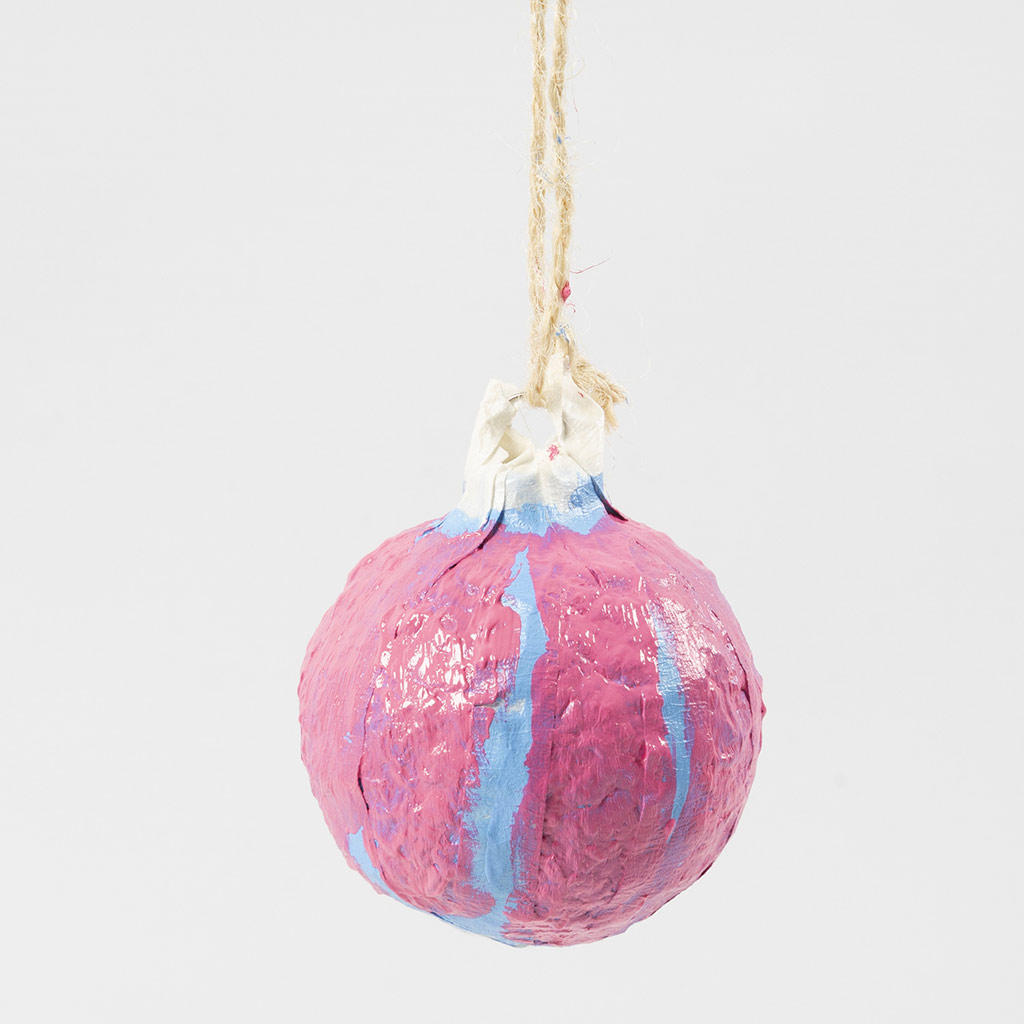 Allow to dry.
Allow to dry.34 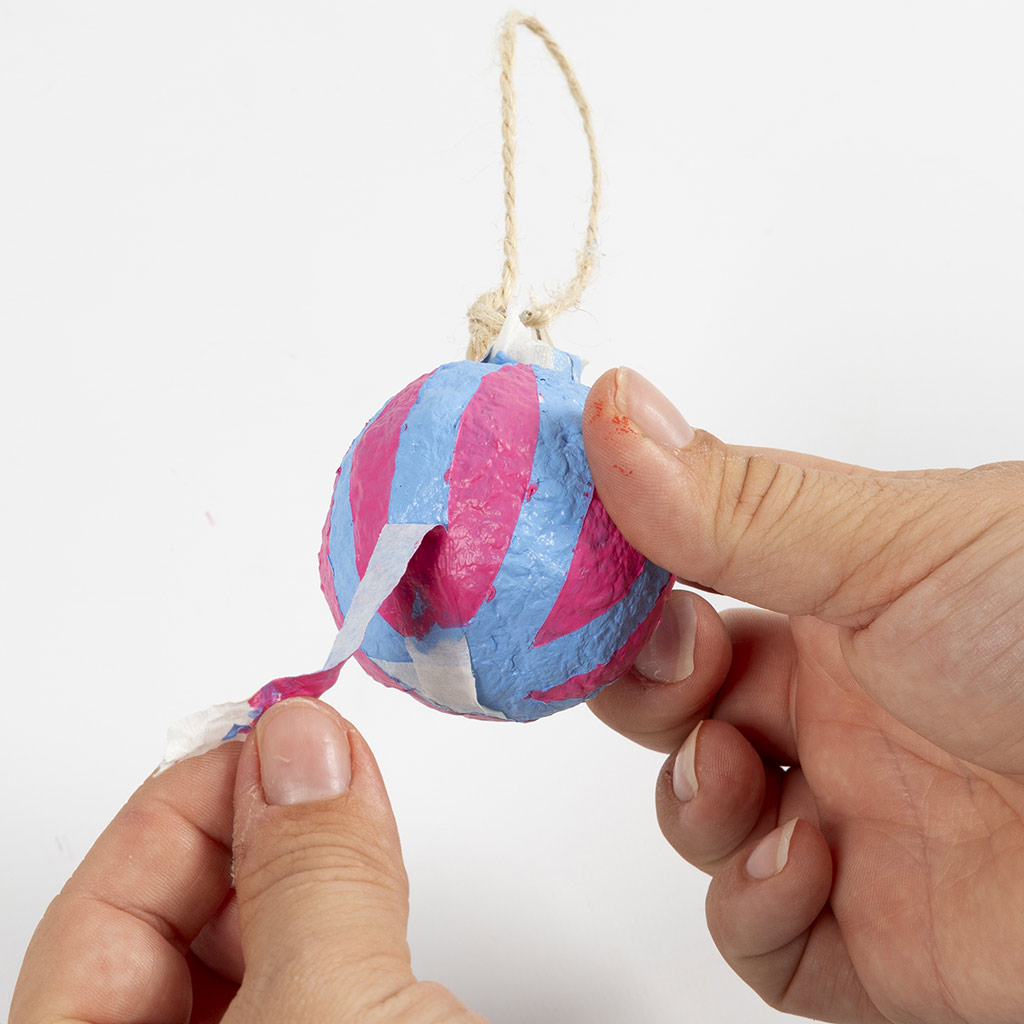 Remove the masking tape and your hanging decoration is ready for use. Repeat the process with the other balls.
Remove the masking tape and your hanging decoration is ready for use. Repeat the process with the other balls.Already signed up? Download the template
Also go exploring in
