
New
Creative idea
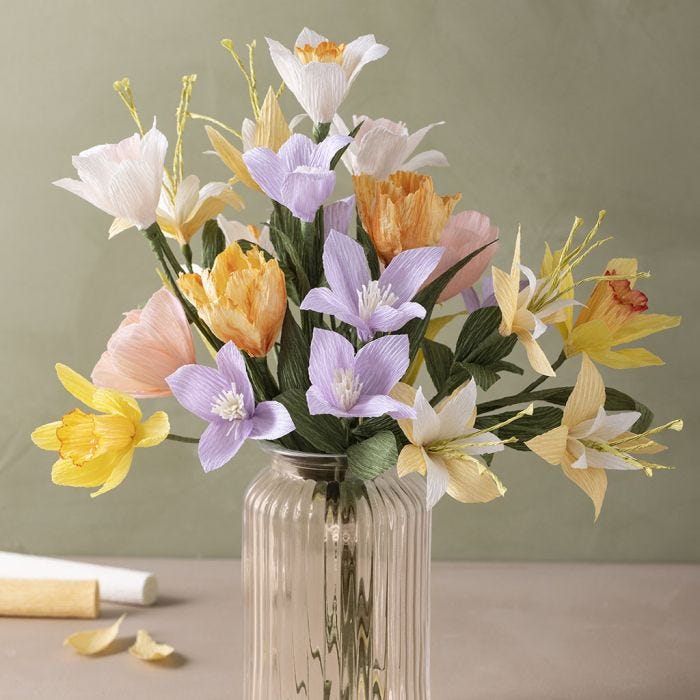
Buket i crepepapir
#v16645
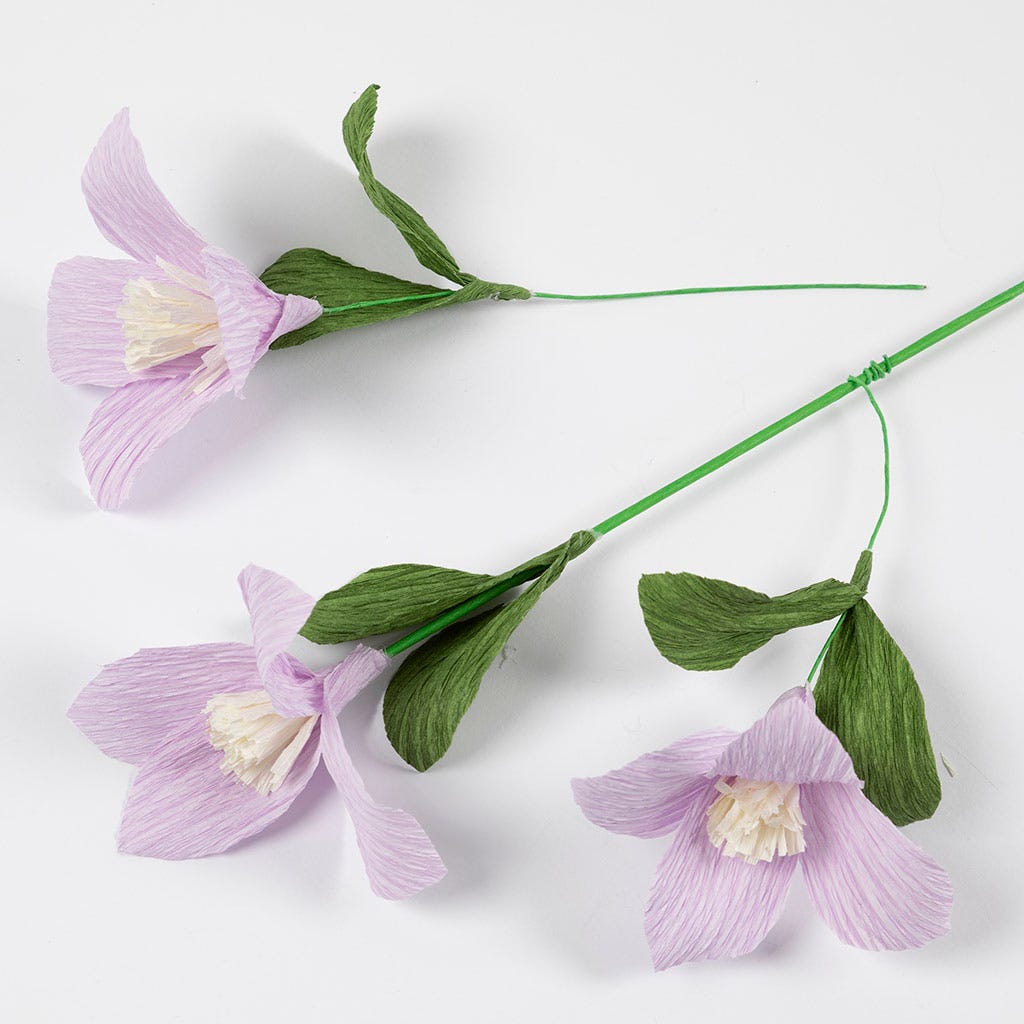
Make a bouquet consisting of seven different crepe paper flowers. Using crepe paper, cut out the corresponding stencils and glue them together using either a glue gun or Multi Glue. With Multi Glue, the drying time is approx. 1/2 per step. Make 2 daffodils in 3 different colour combinations (Easter, Pentecost and May lily), 2 tulips, 2 parrot tulips, 2 clematis, and 2 clematis pink fantasy. Collect the Head Pins of a staggered bouquet and tie them together.
#v16645
How to do it Download the templates/recipes
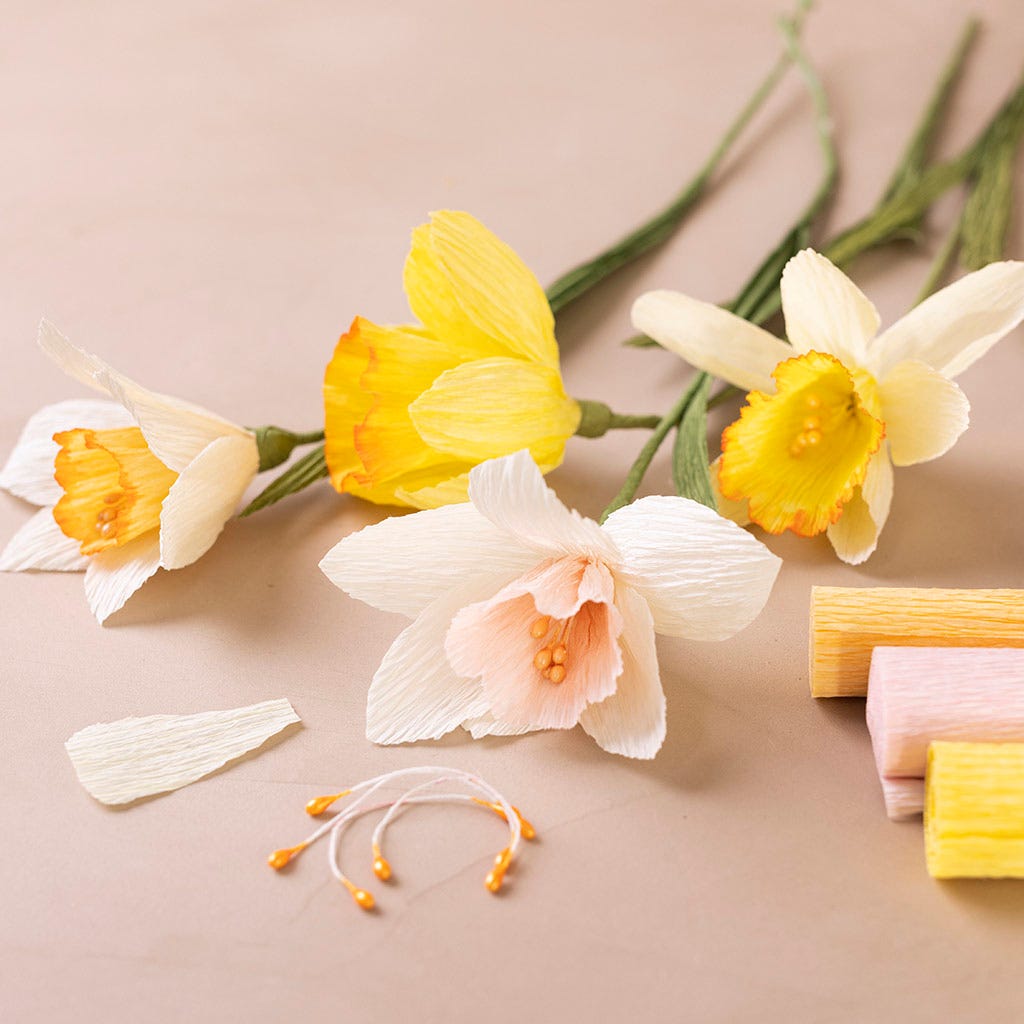
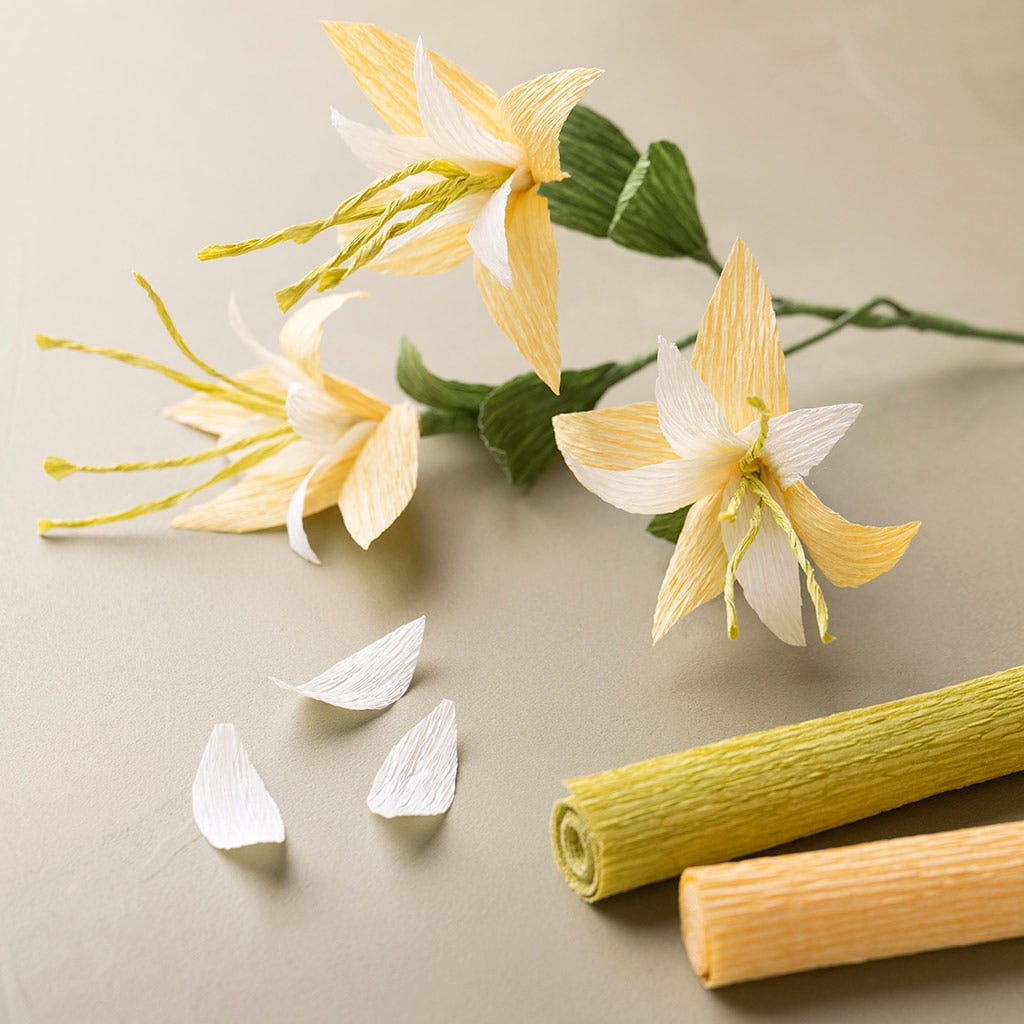
Daffodil, May lily, and Pentecost lily – make two in each colour Click here for instructions.
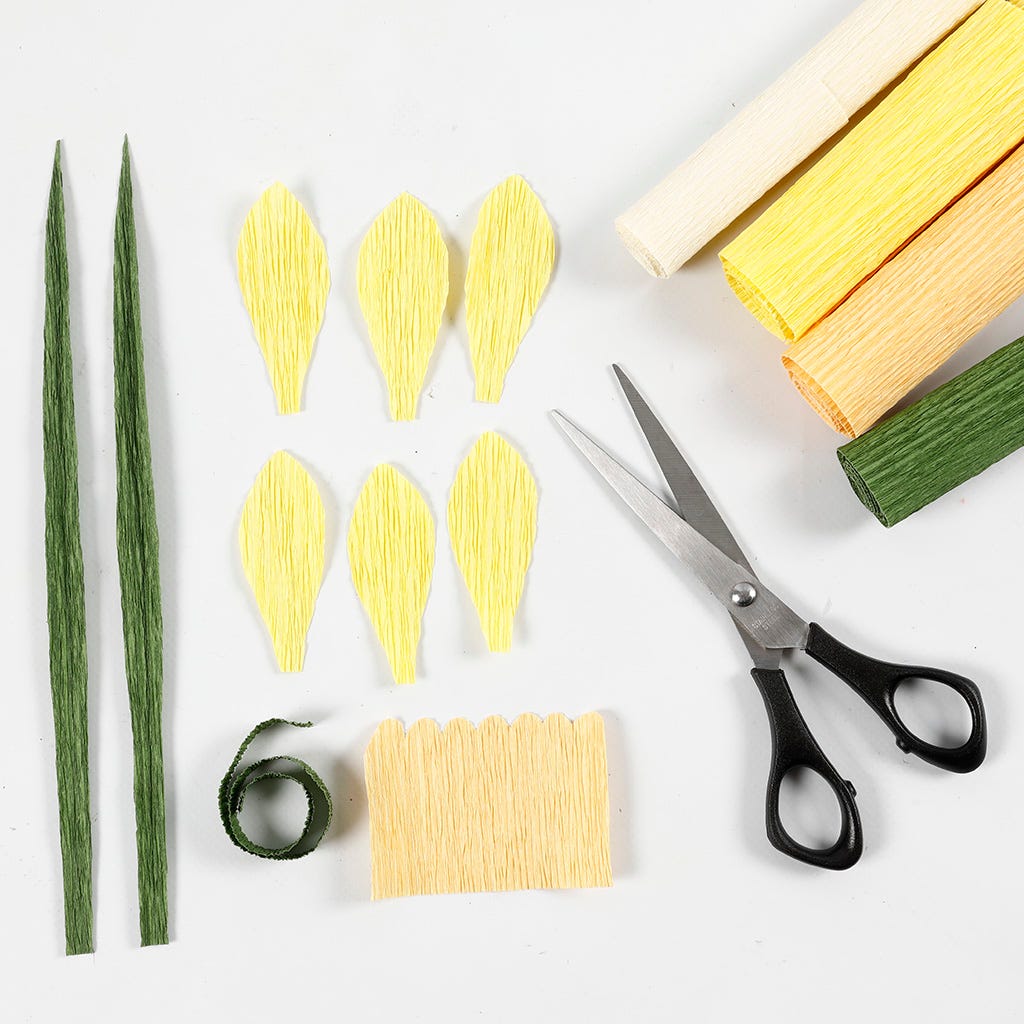
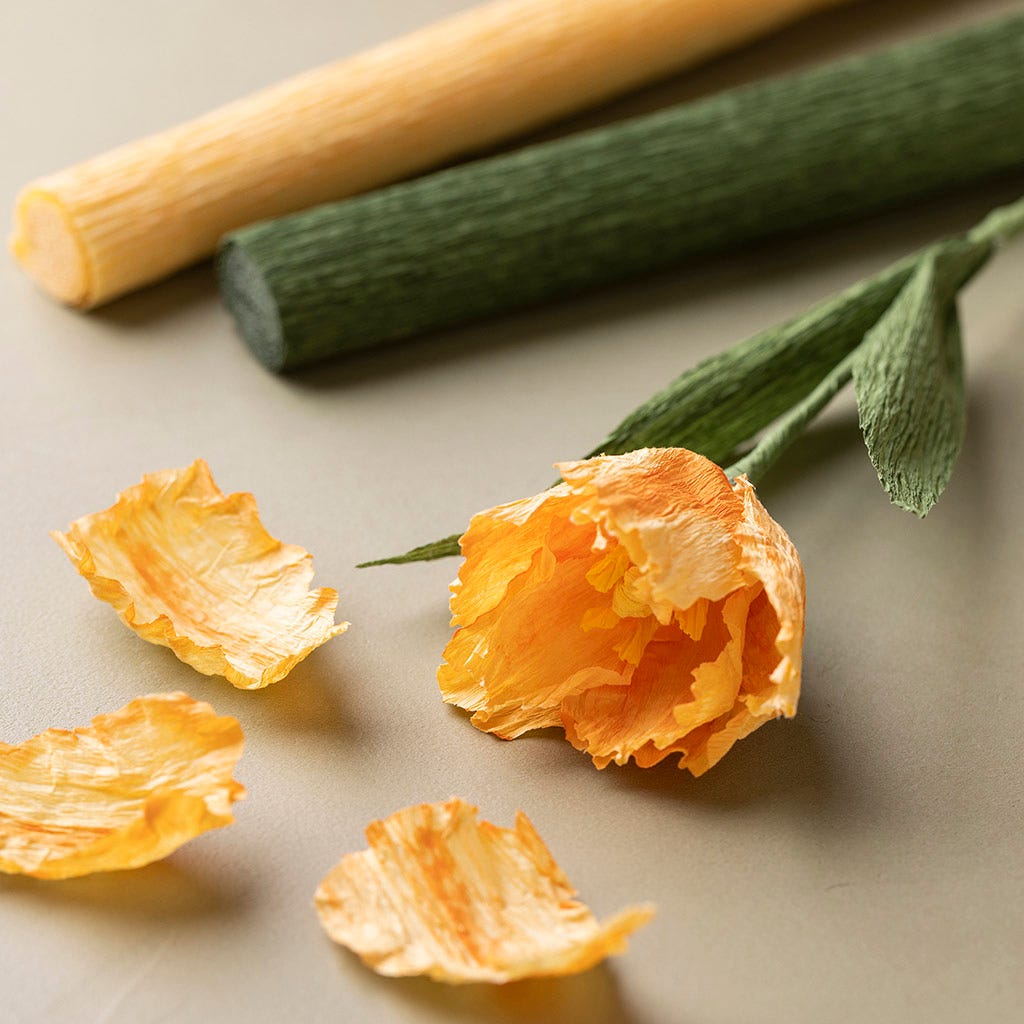
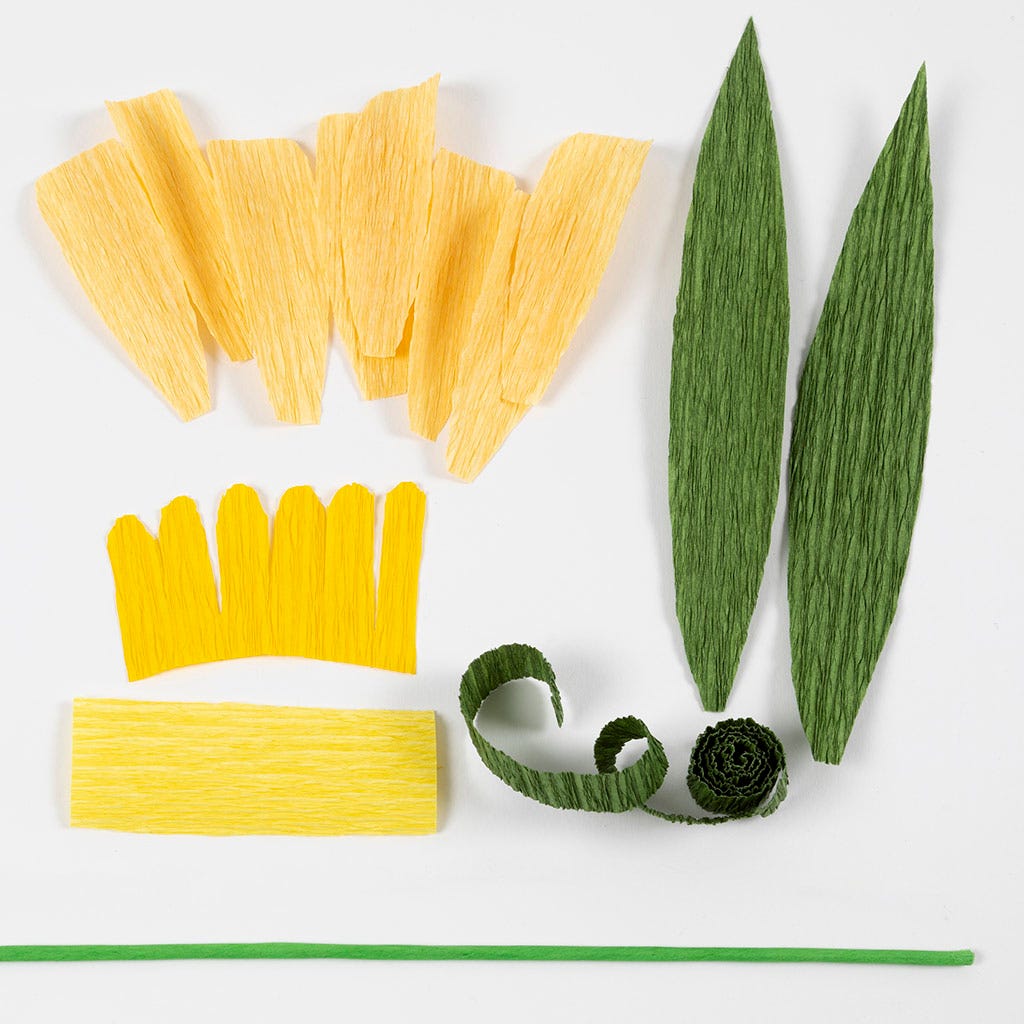
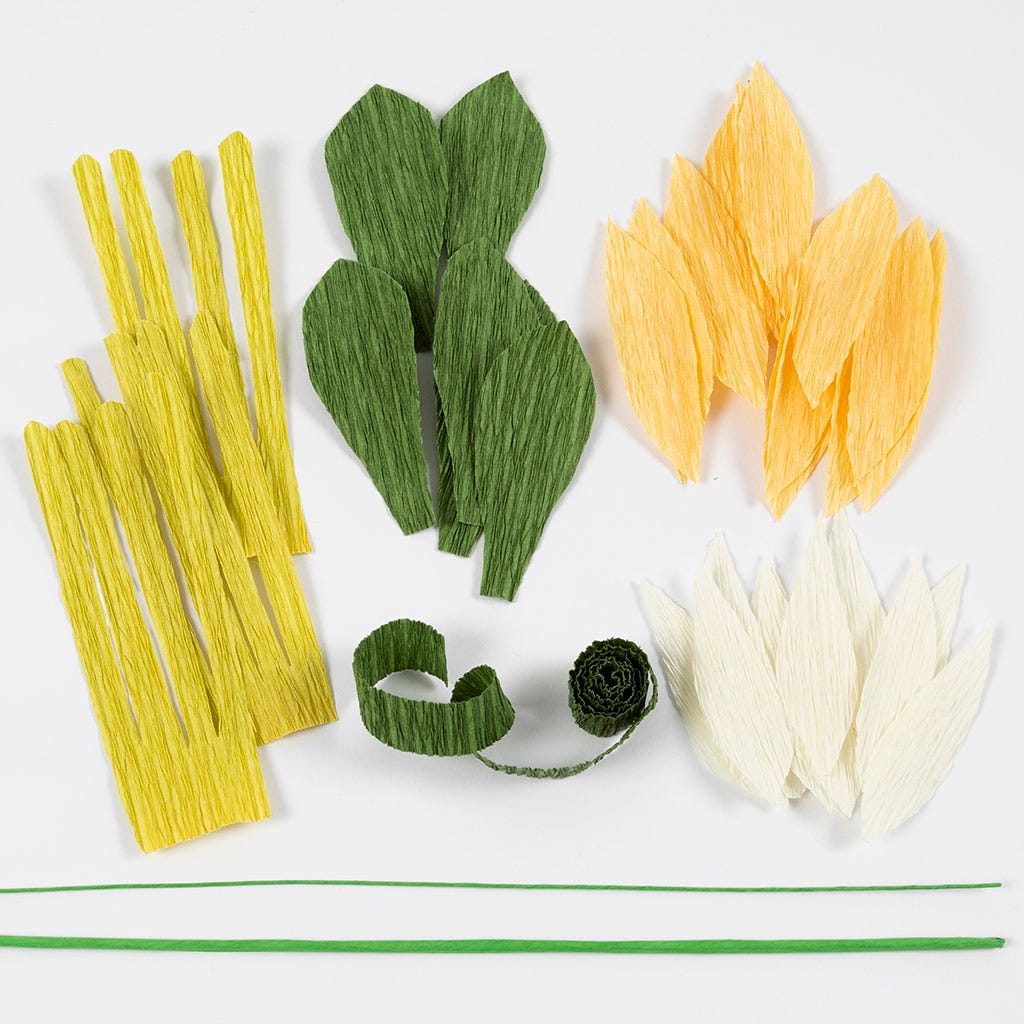
1 Print the template which is available as a PDF file for this idea. Cut out all the parts for the daffodil. Remember to cut according to the stretch direction shown on each template. Cut two leaves and a 1 x 25 cm strip of green crepe paper for covering the floral stem wire.

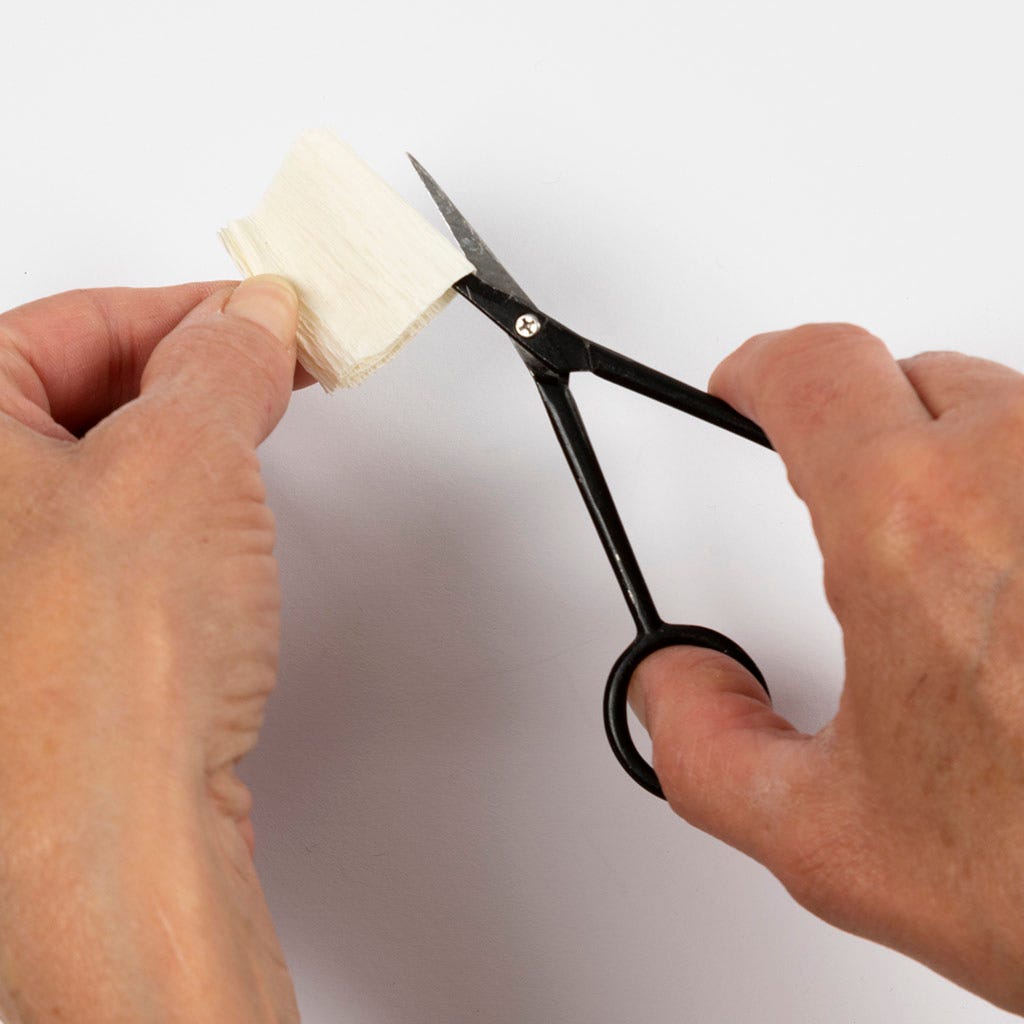
2 Start by cutting off one end of five stamens. Attach the five stamens onto one end of a floral stem wire.
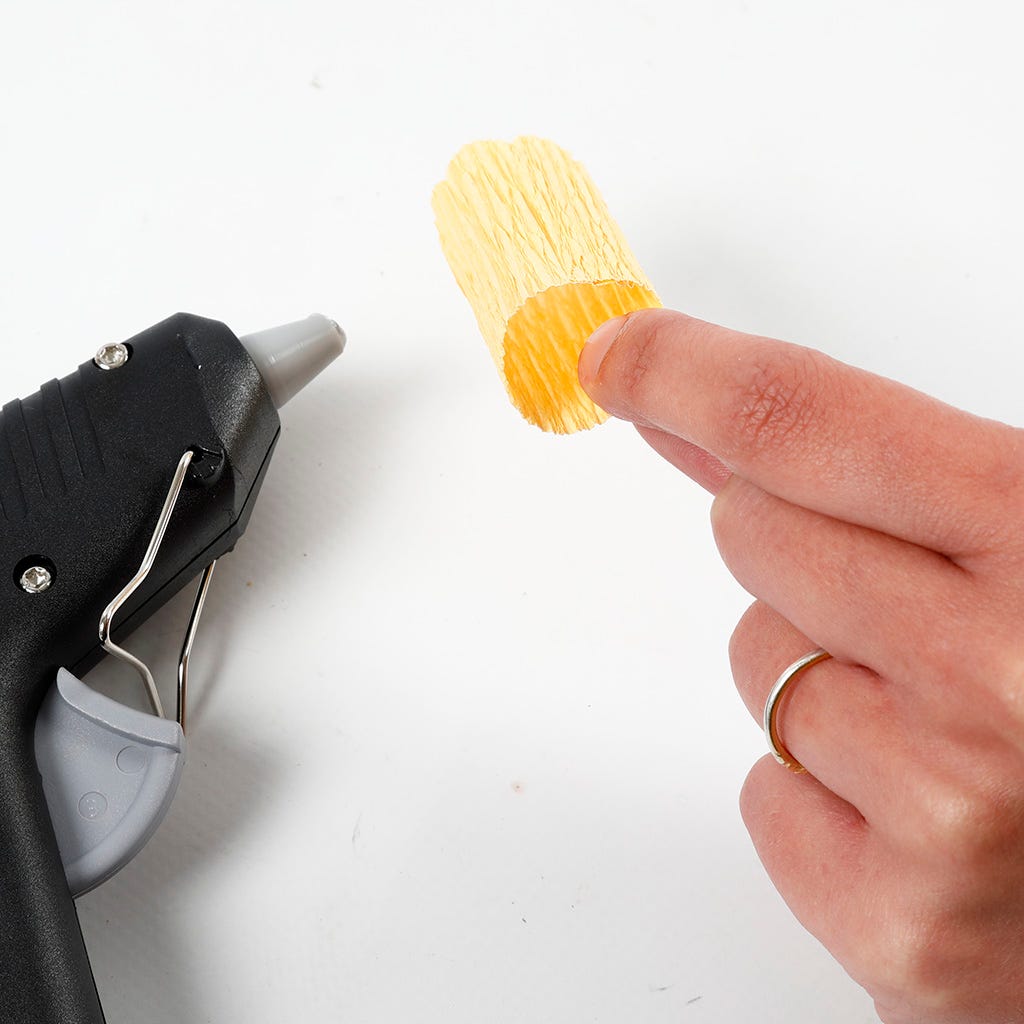
3 Use the glue gun for gluing the centre of the daffodil. Glue one side of the crepe paper square against the opposite side, forming a tube.
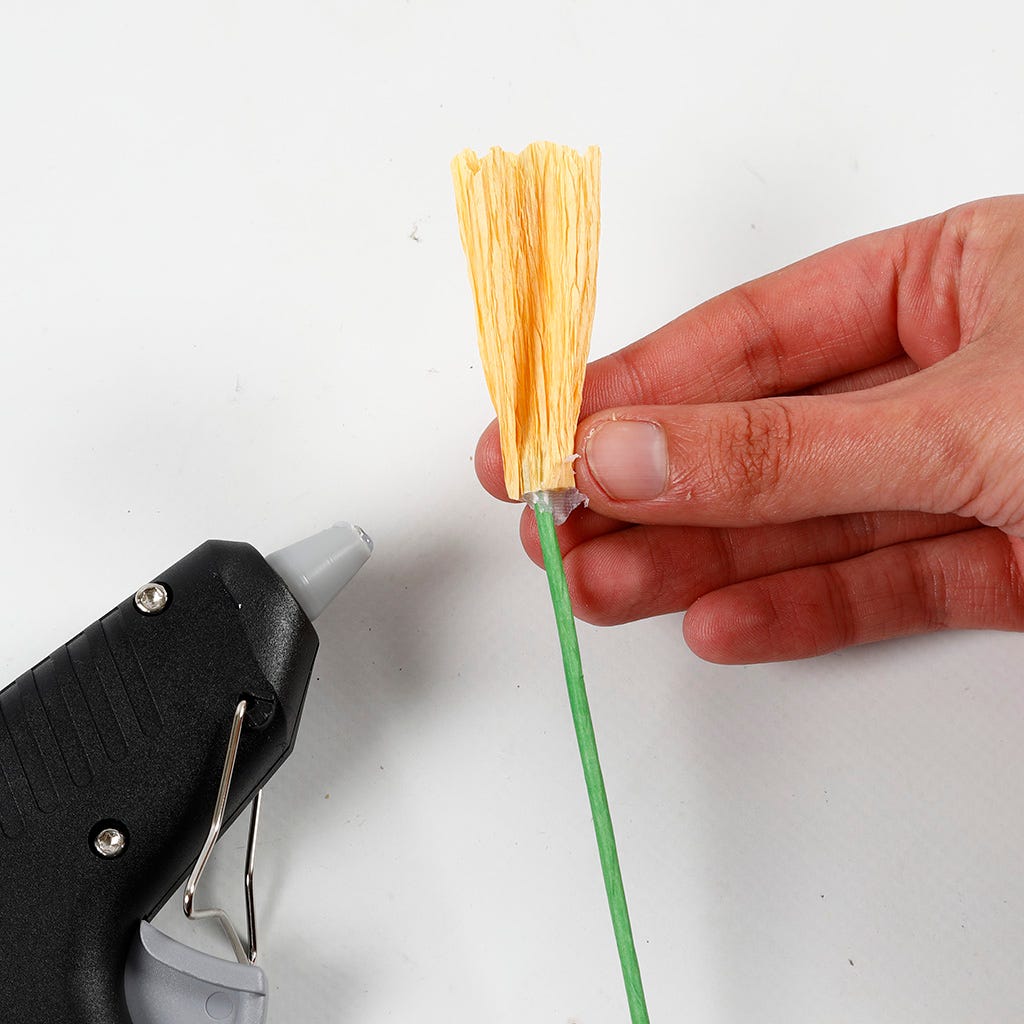
4 Squeeze one end of the tube around one end of the floral stem wire, ensuring that the stamens are inside the tube. Make sure that the crepe paper is gathered around the floral stem wire.
5 Shape the tube into a bell-shaped flower middle. Stretch the crepe paper at the bottom with a forefinger inside the tube and a thumb on the outside of the tube. Lightly bend the top edge of the tube all the way around whilst stretching the crepe paper as you go along, making wrinkles.

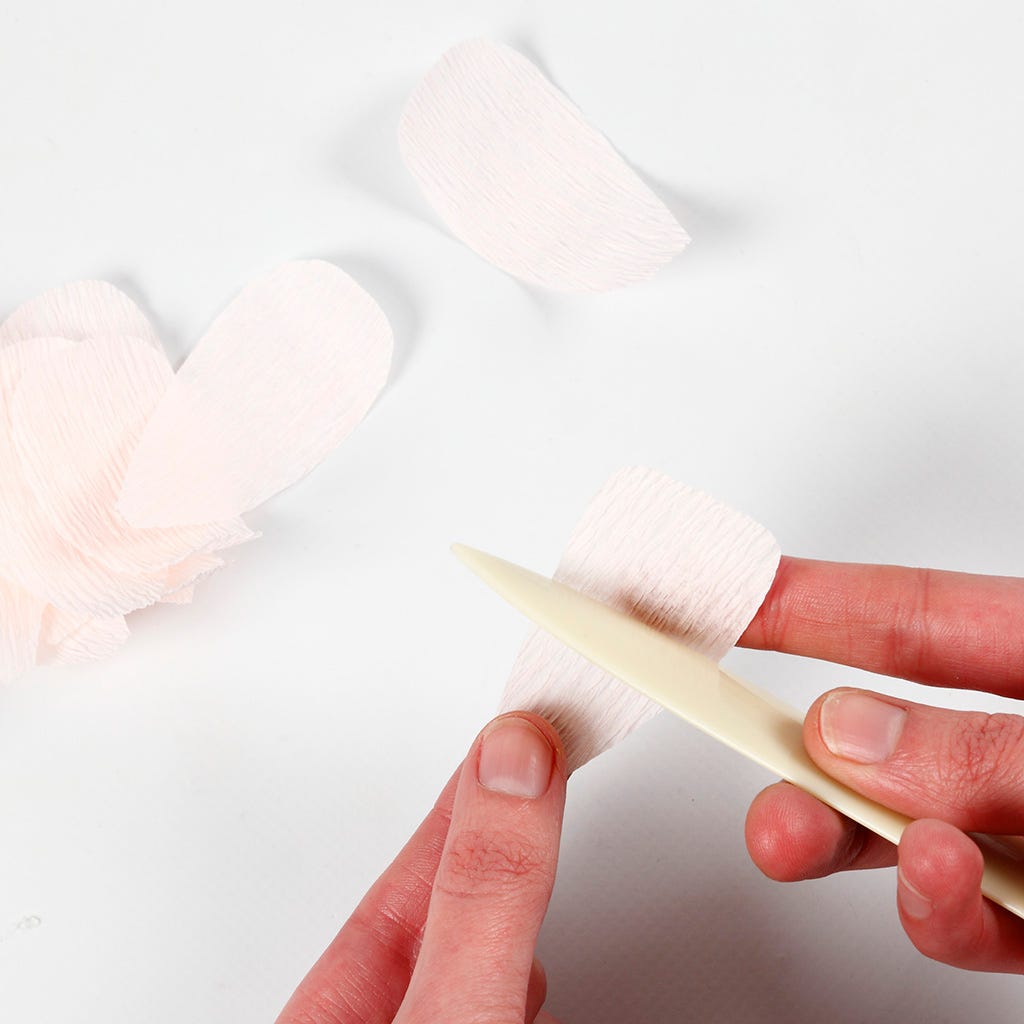
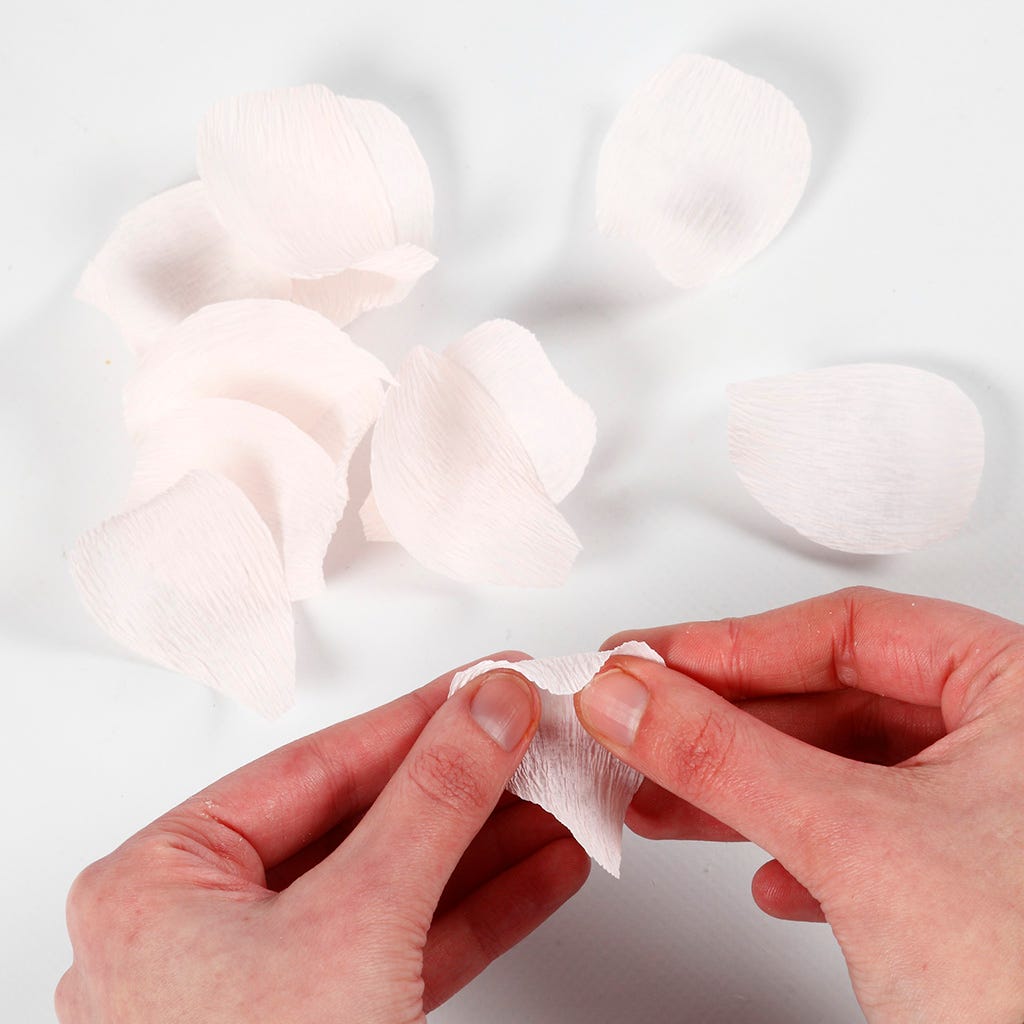
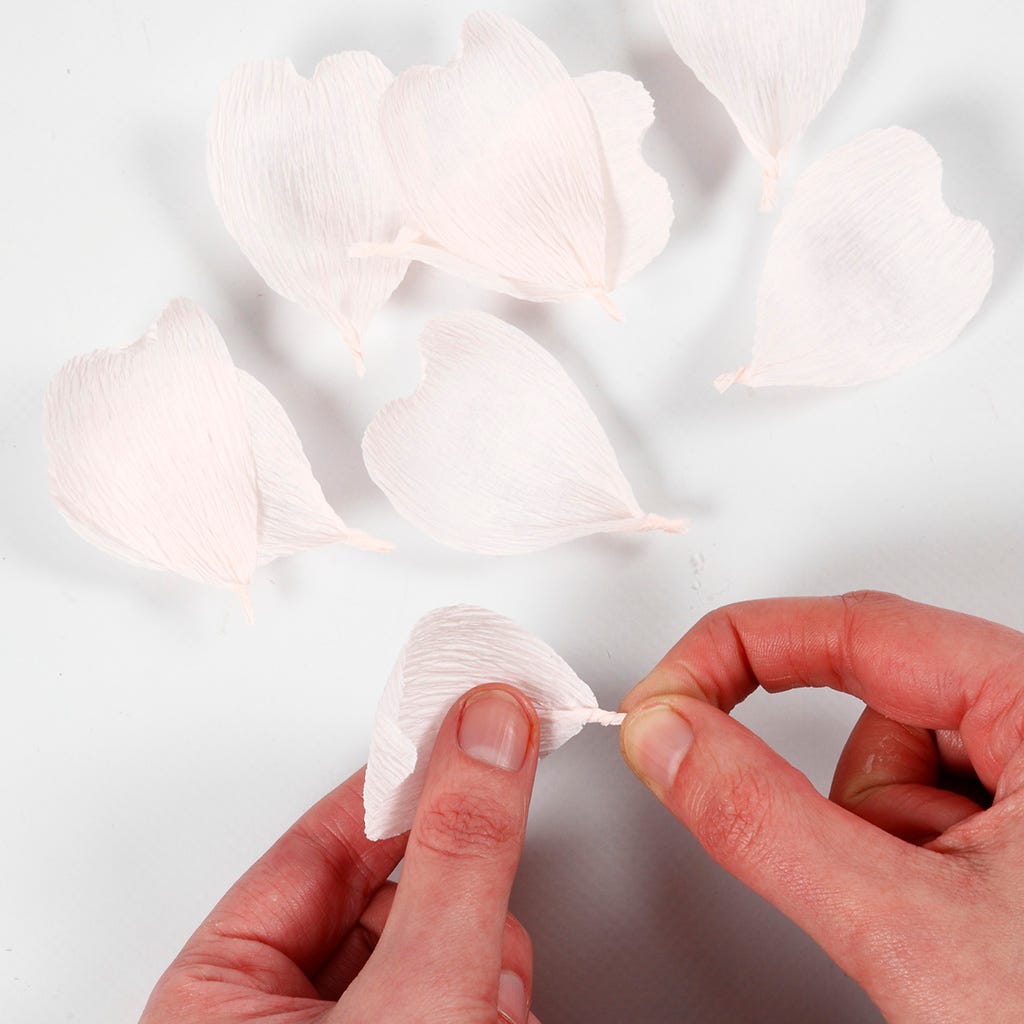
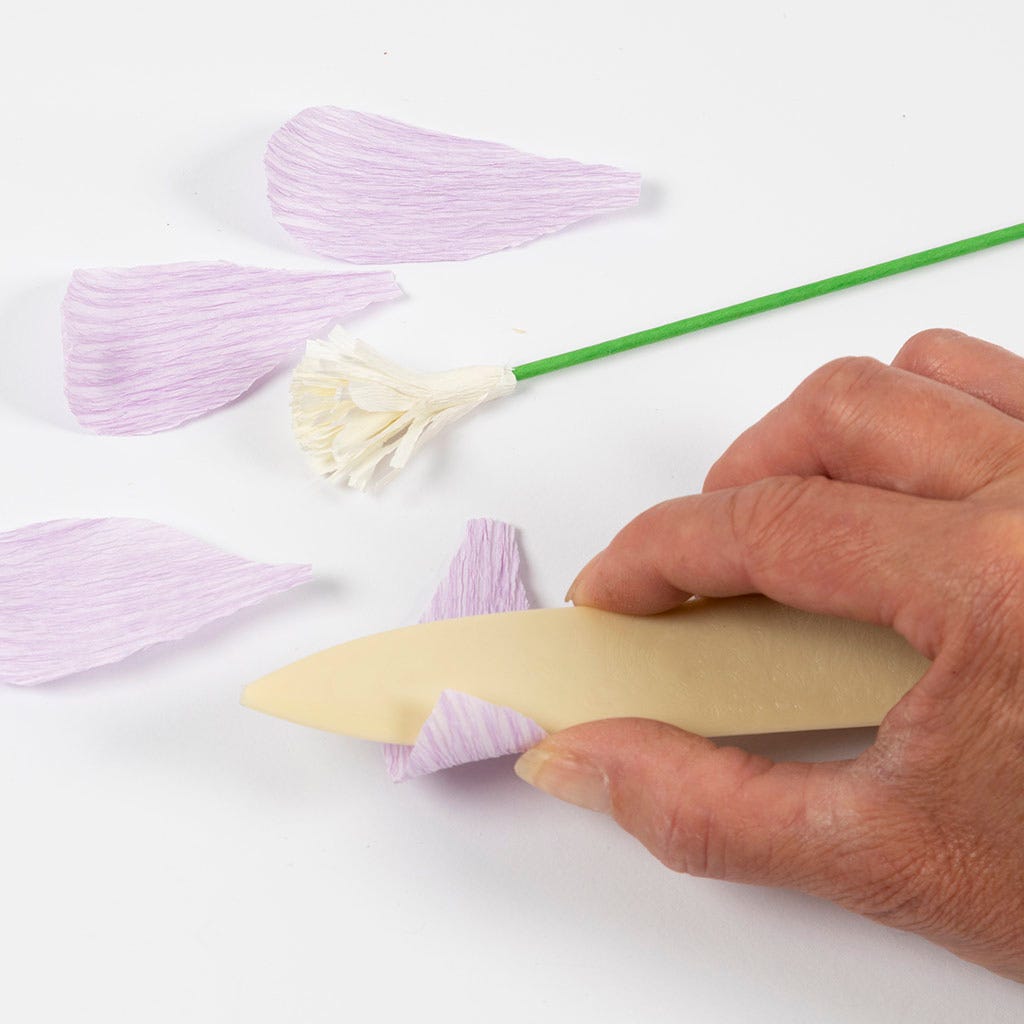
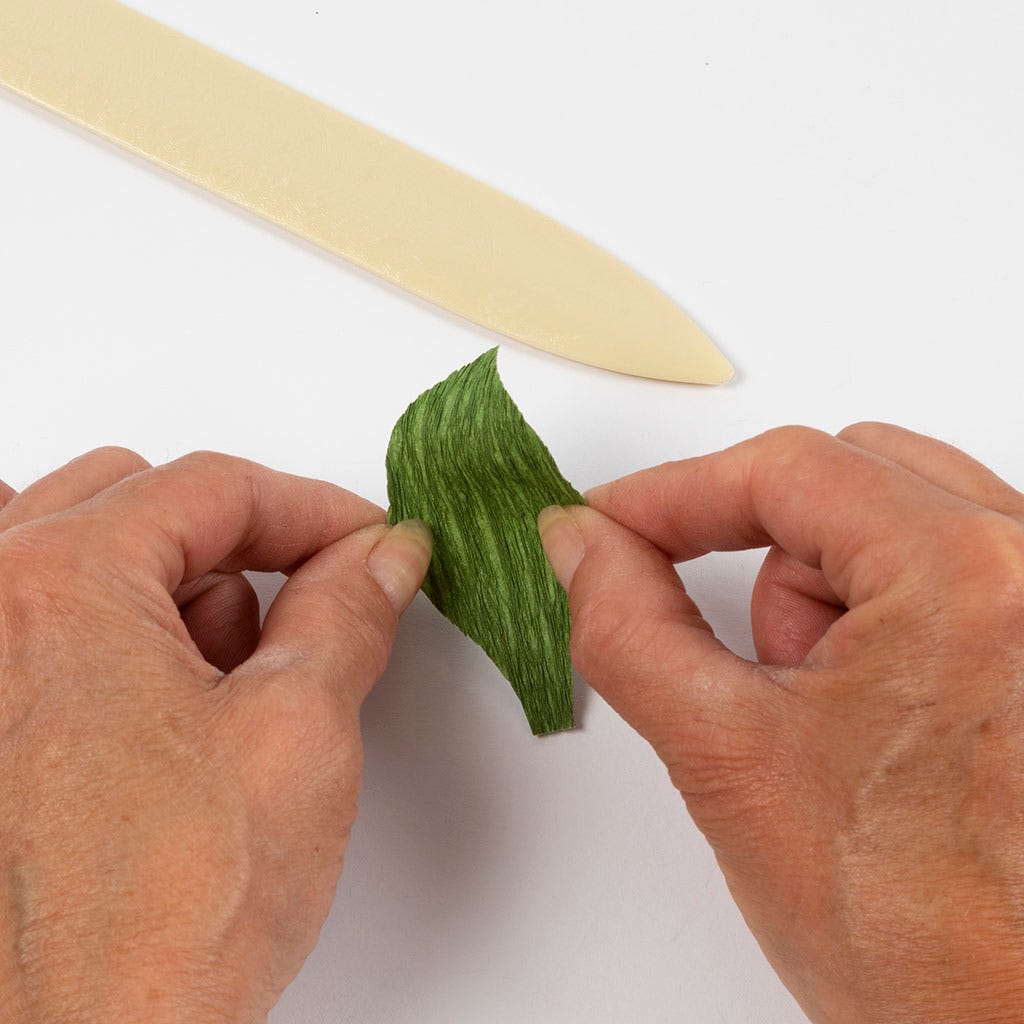
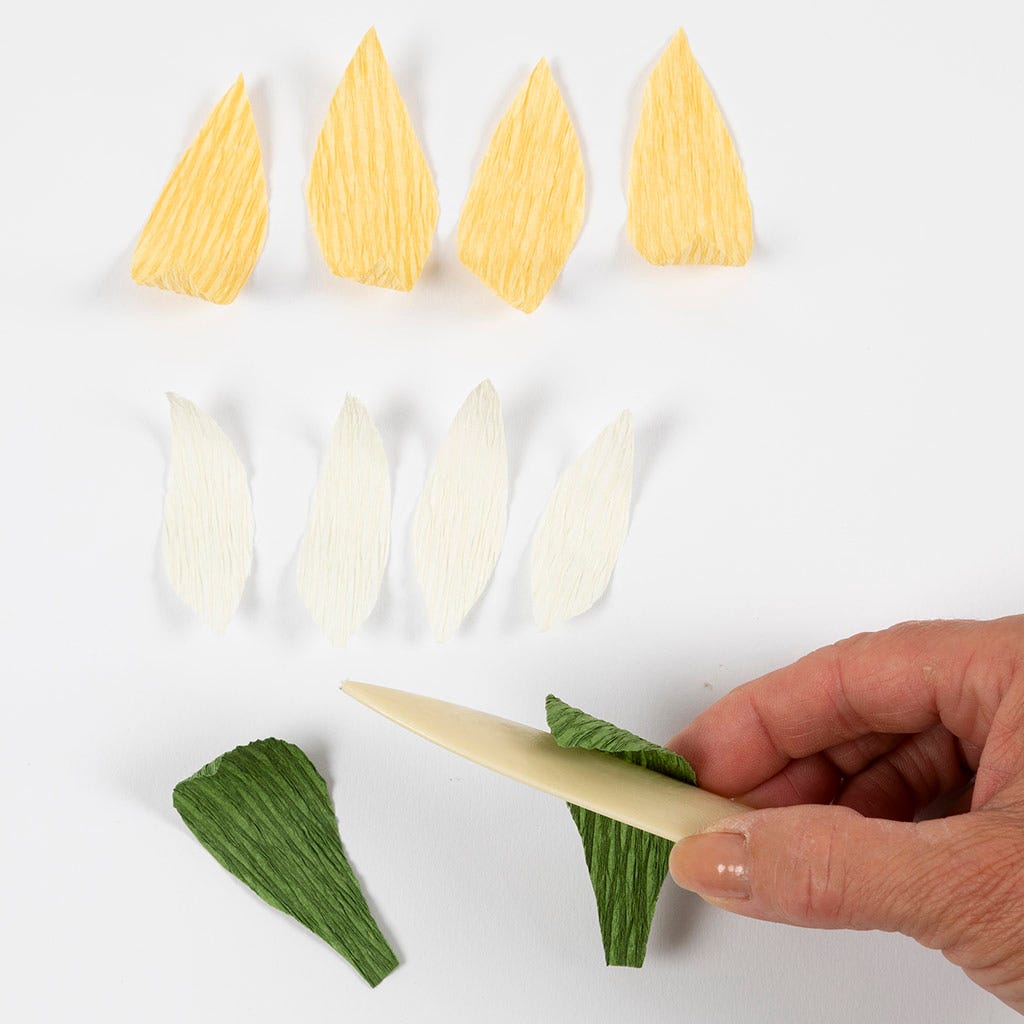
6 Round each petal with a bone folder by pulling the petal between the bone folder and your thumb; the same technique as curling a ribbon with scissors.
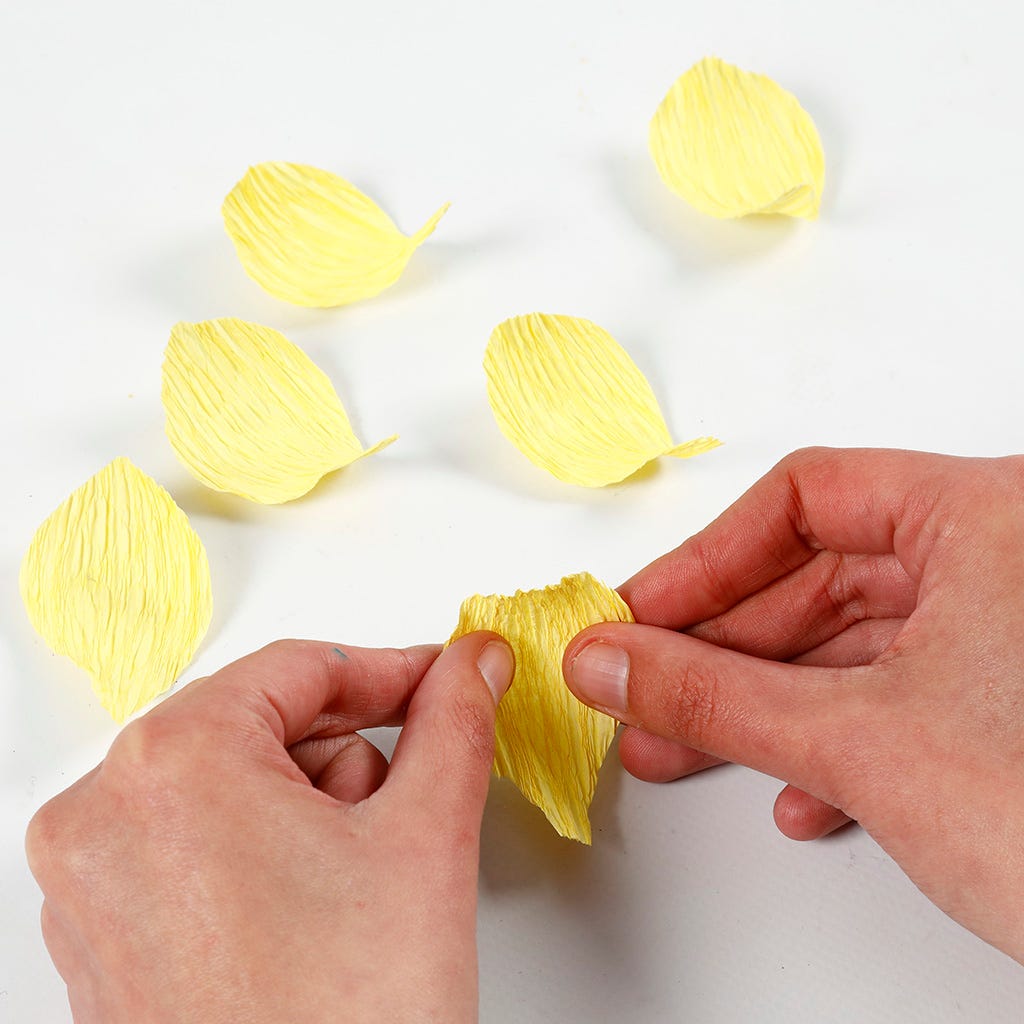
7 Shape the petal by stretching the middle of it, so that it becomes round. Repeat this procedure with all the petals.

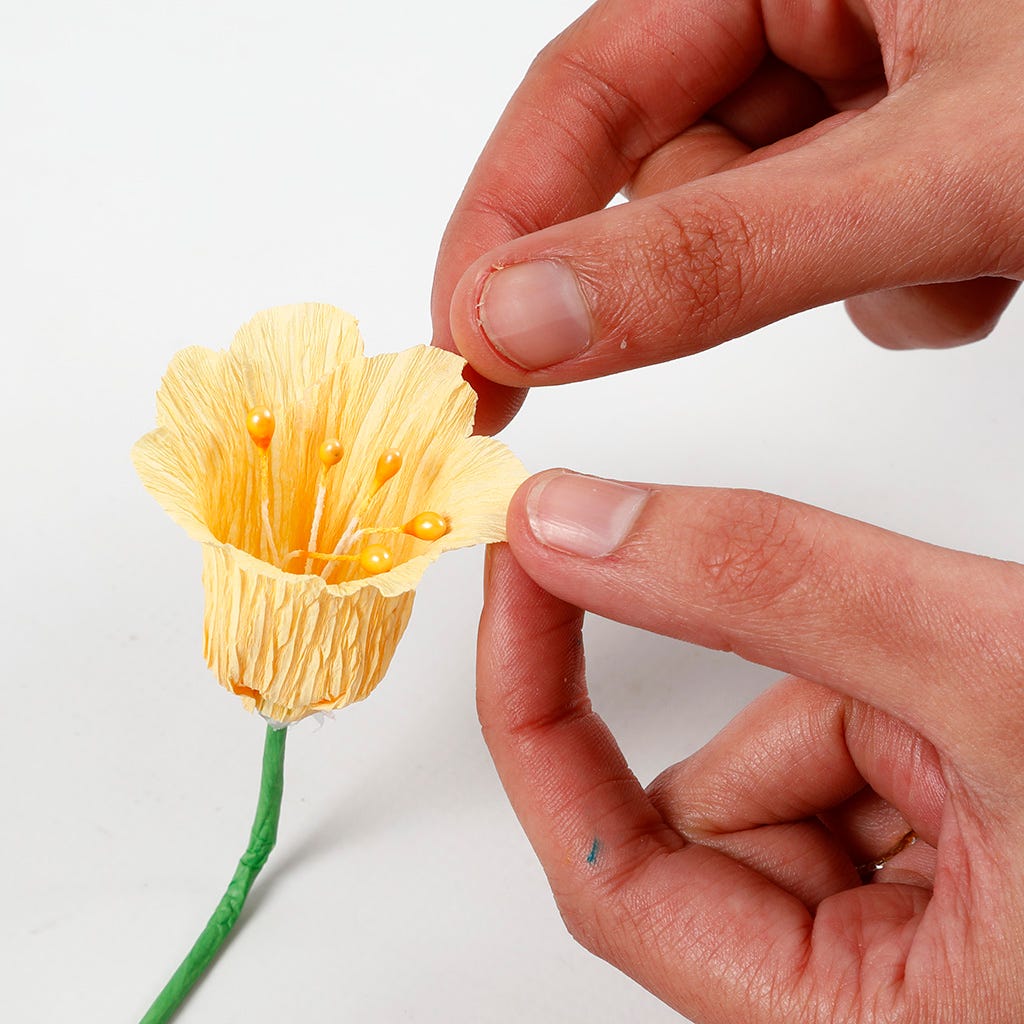
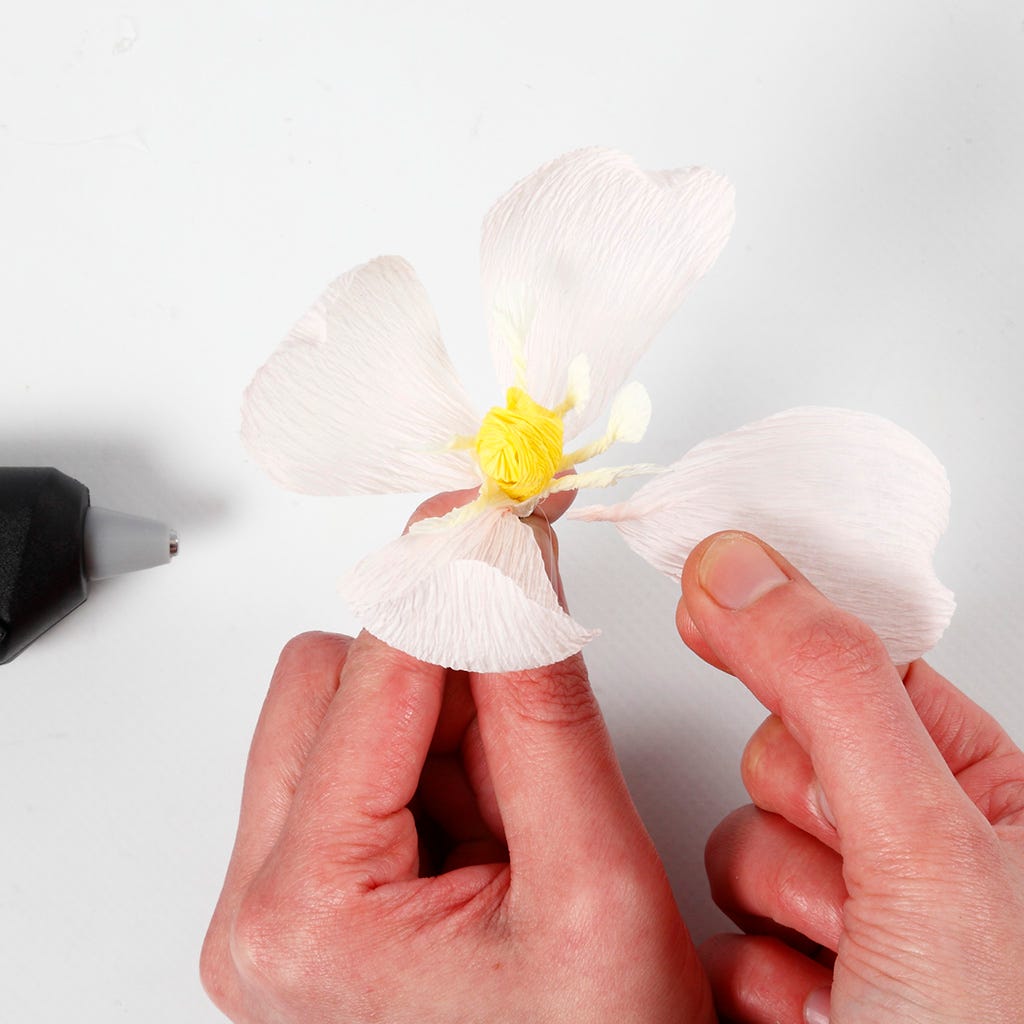
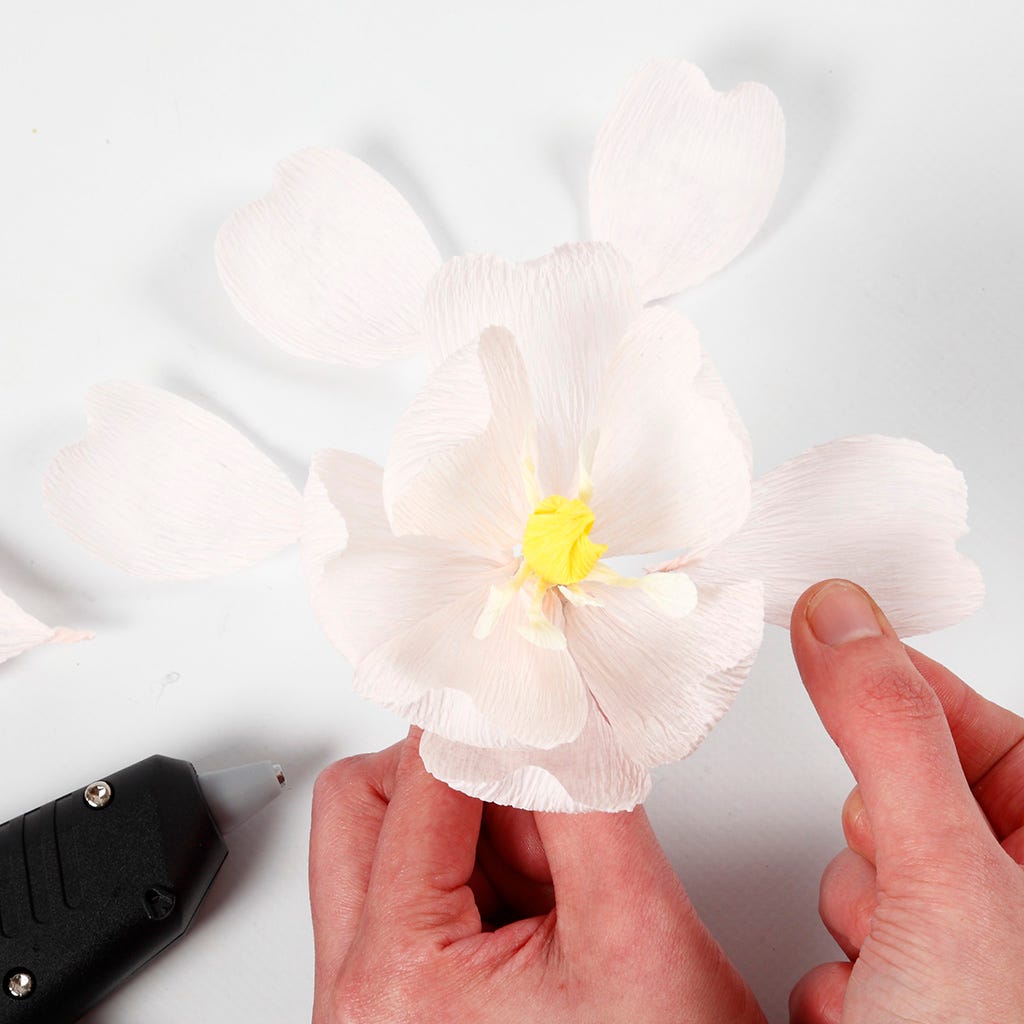
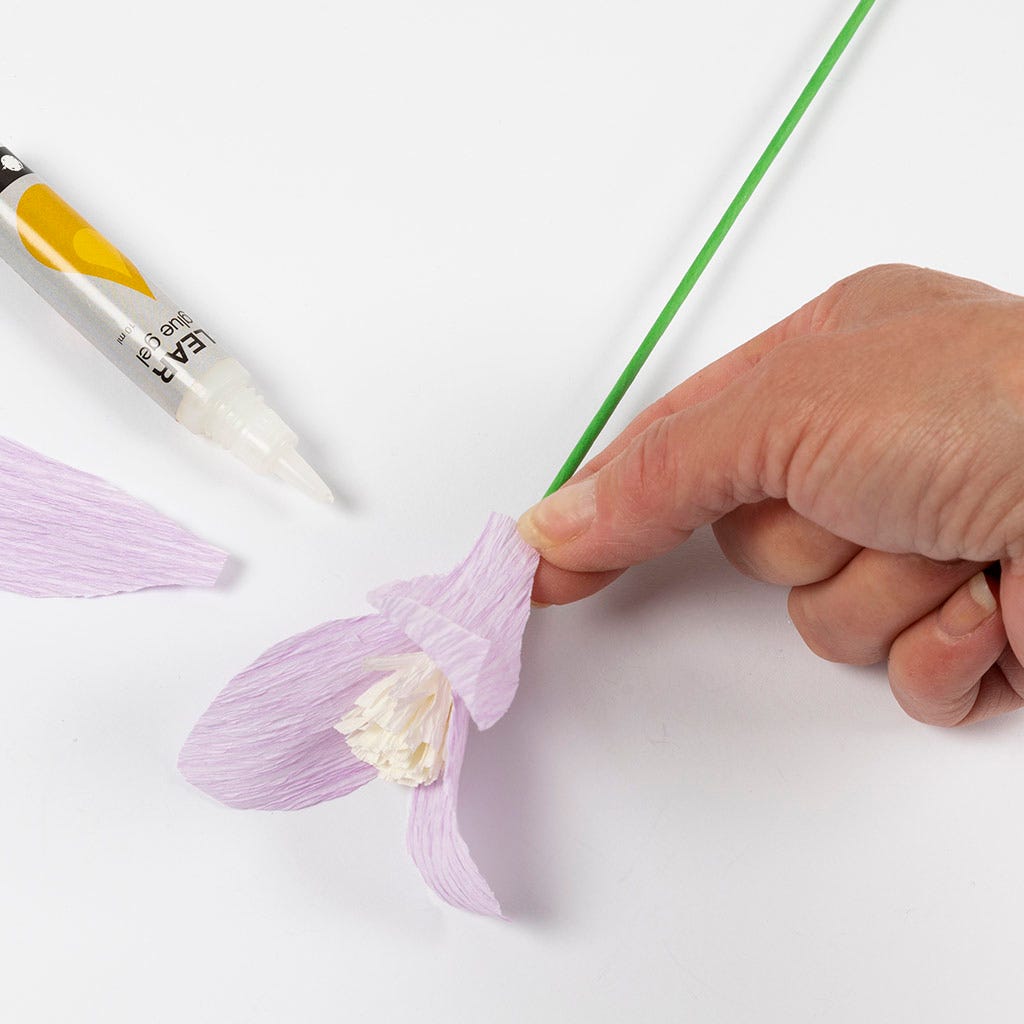
8 Attach the first petal onto the floral stem wire with a blob of glue from the glue gun. Attach another three petals in a staggered fashion.
9 Attach another three petals between the first three petals.
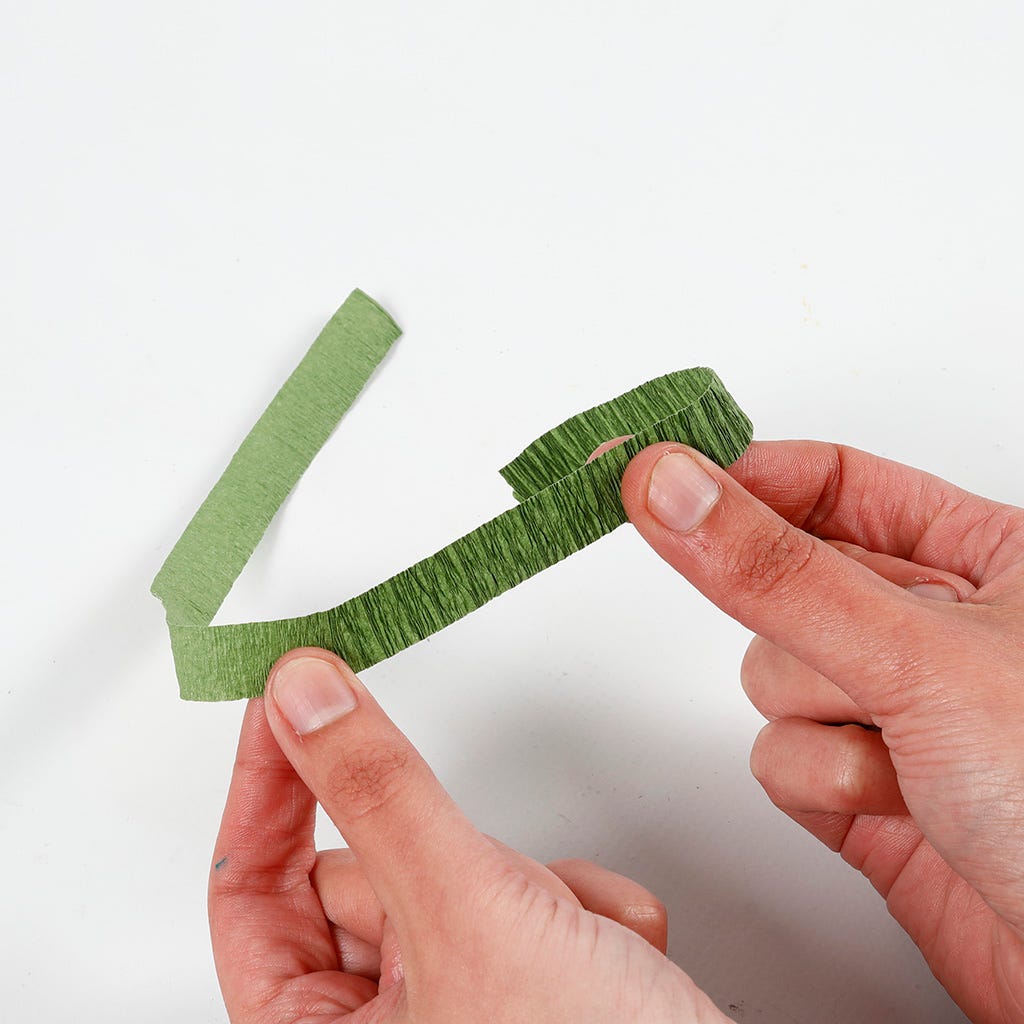
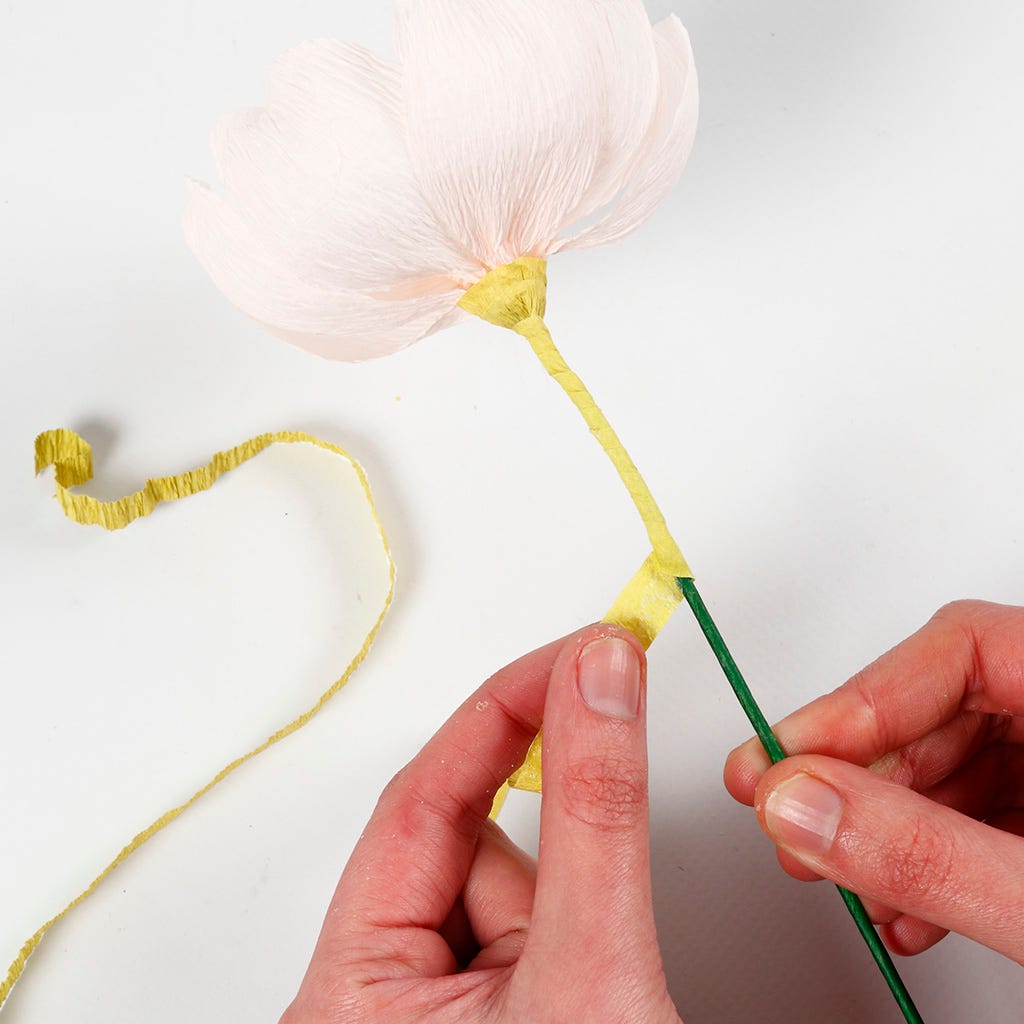
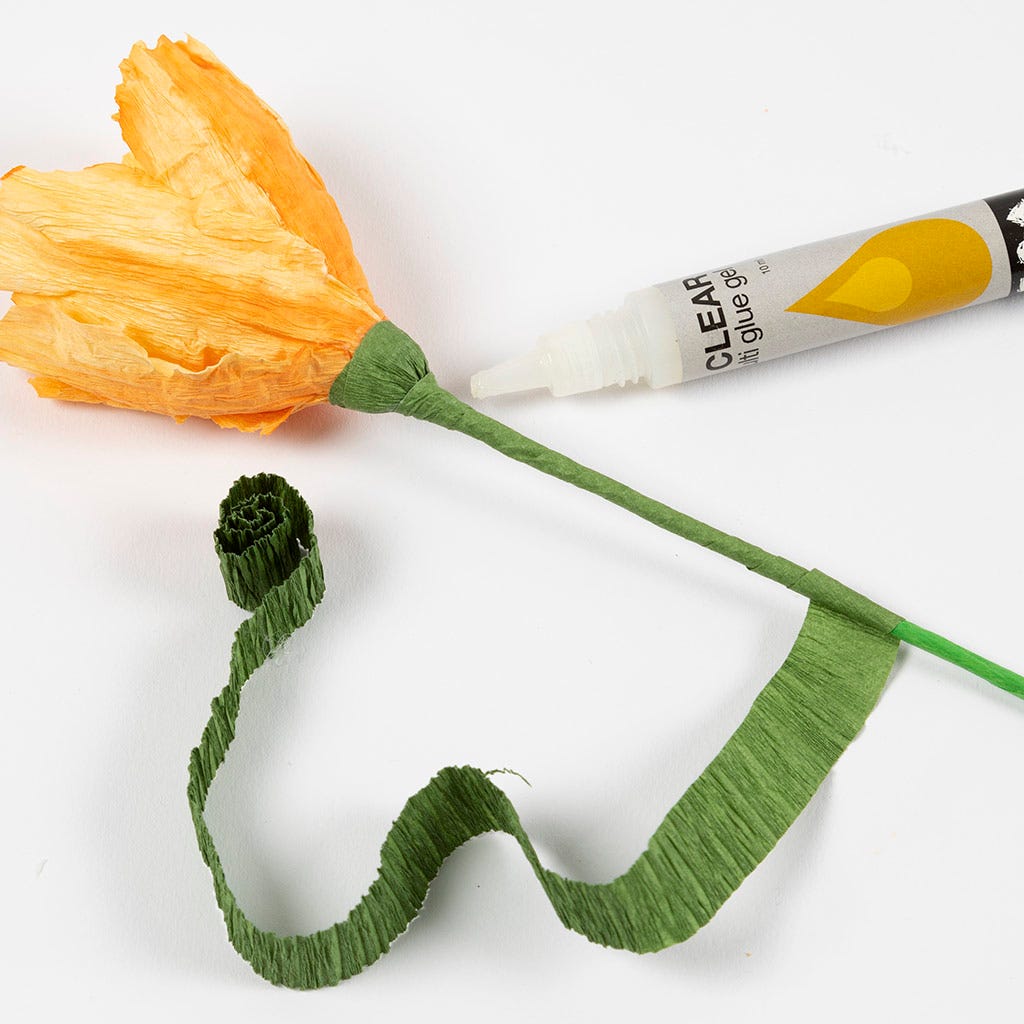
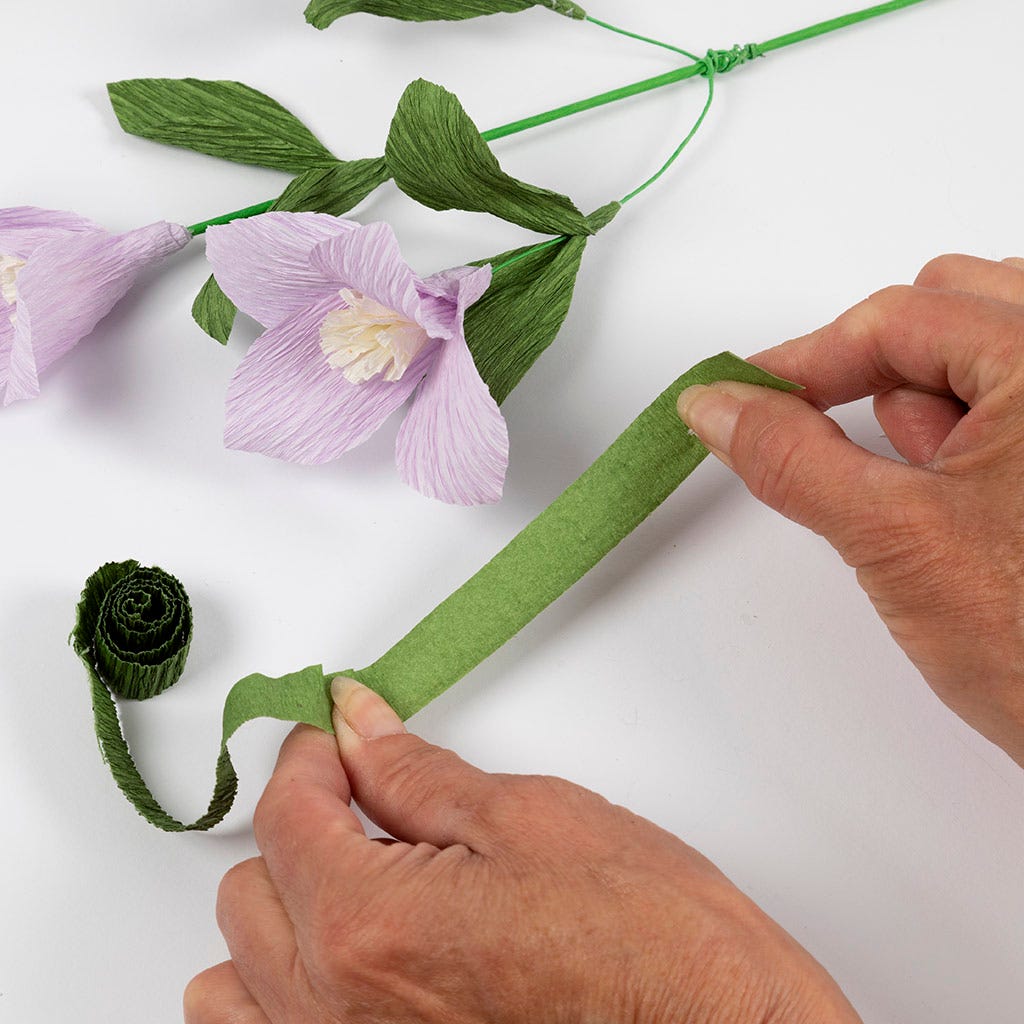
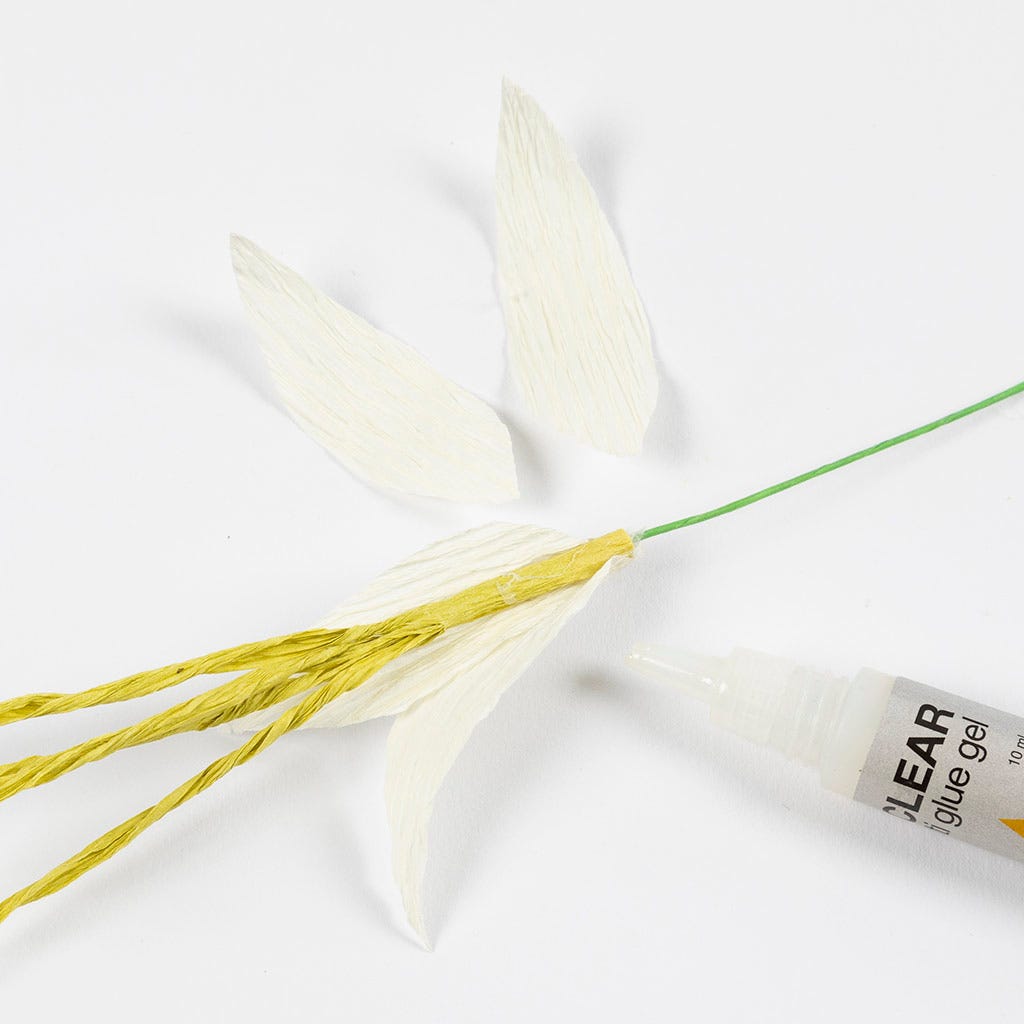
10 Stretch out the long thin piece of green crepe paper.

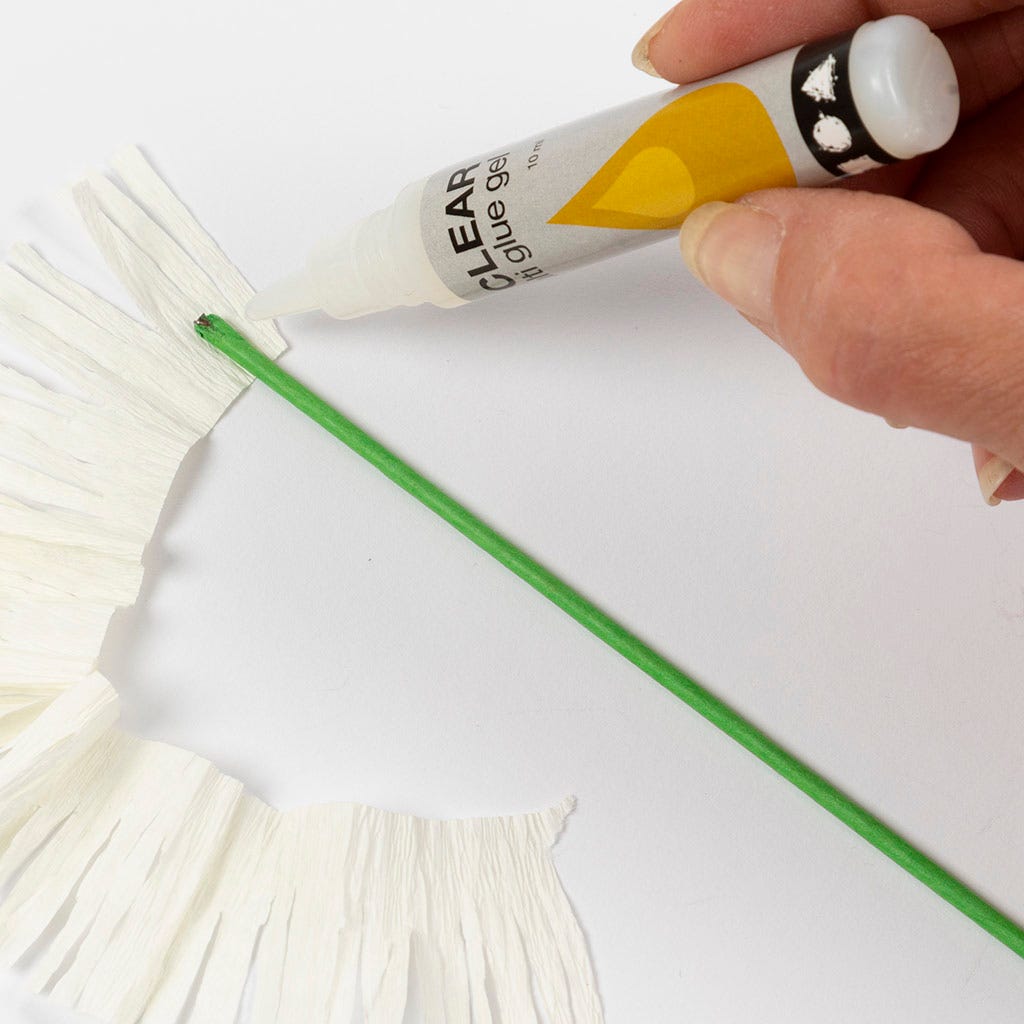
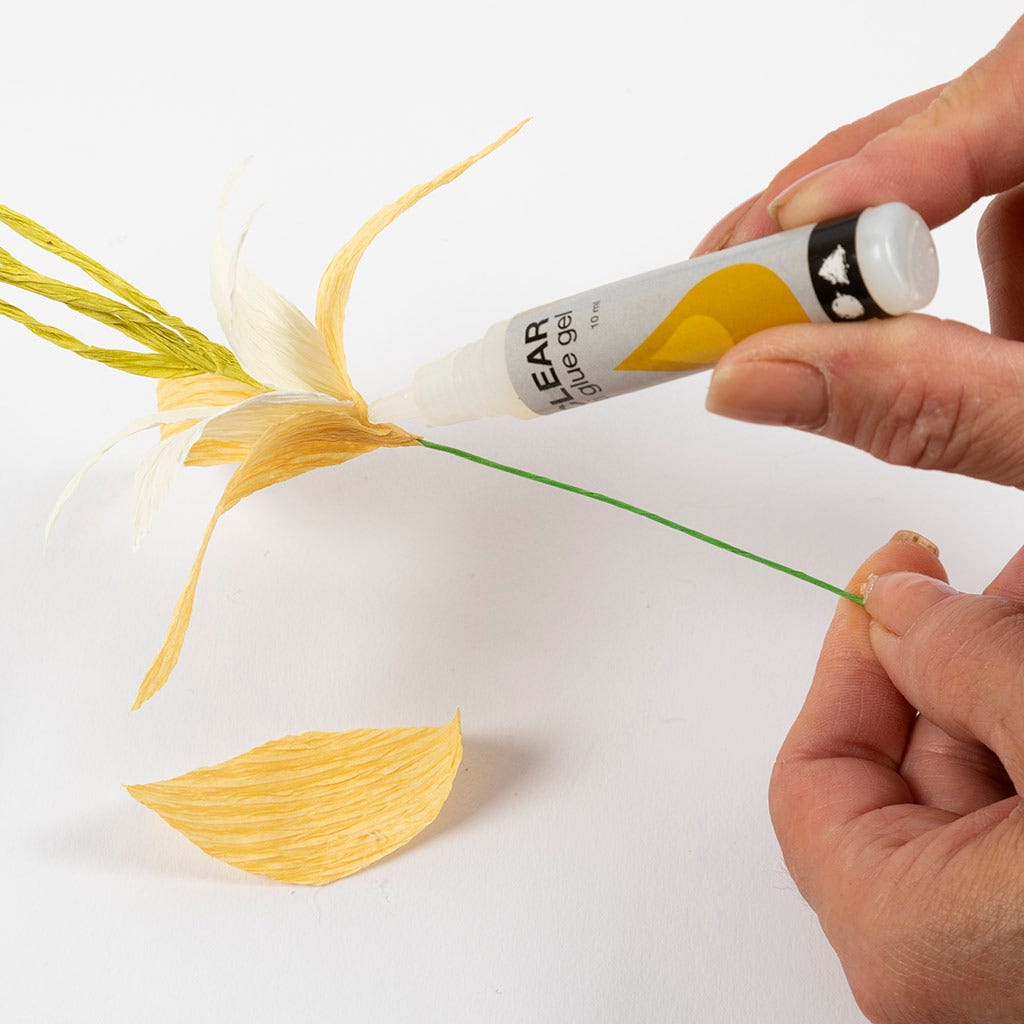
11 Fasten one end of the crepe paper onto the bottom part of the petals on the daffodil, hiding the bottom part of the petals.
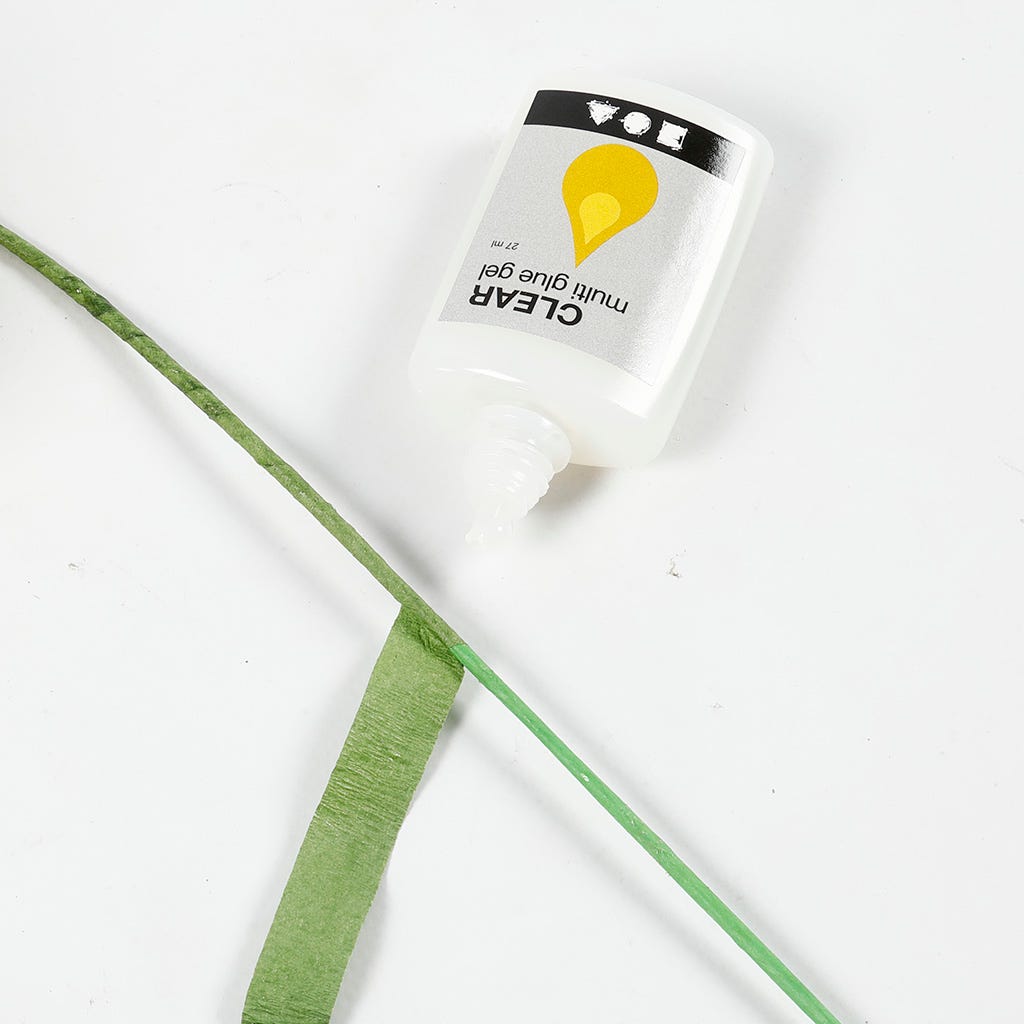
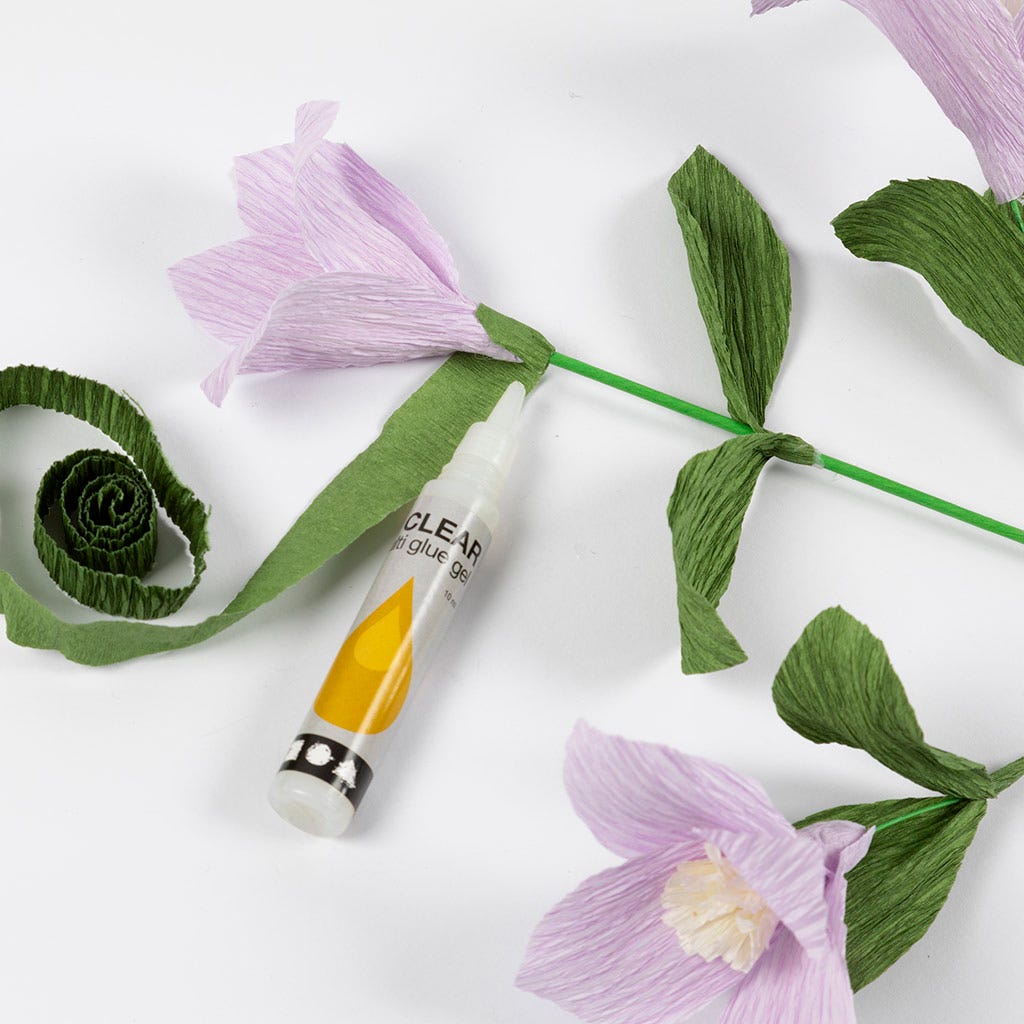
12 Cover the floral stem wire by wrapping the crepe paper at an angle around the floral stem wire, securing with Multi Glue as you go along.
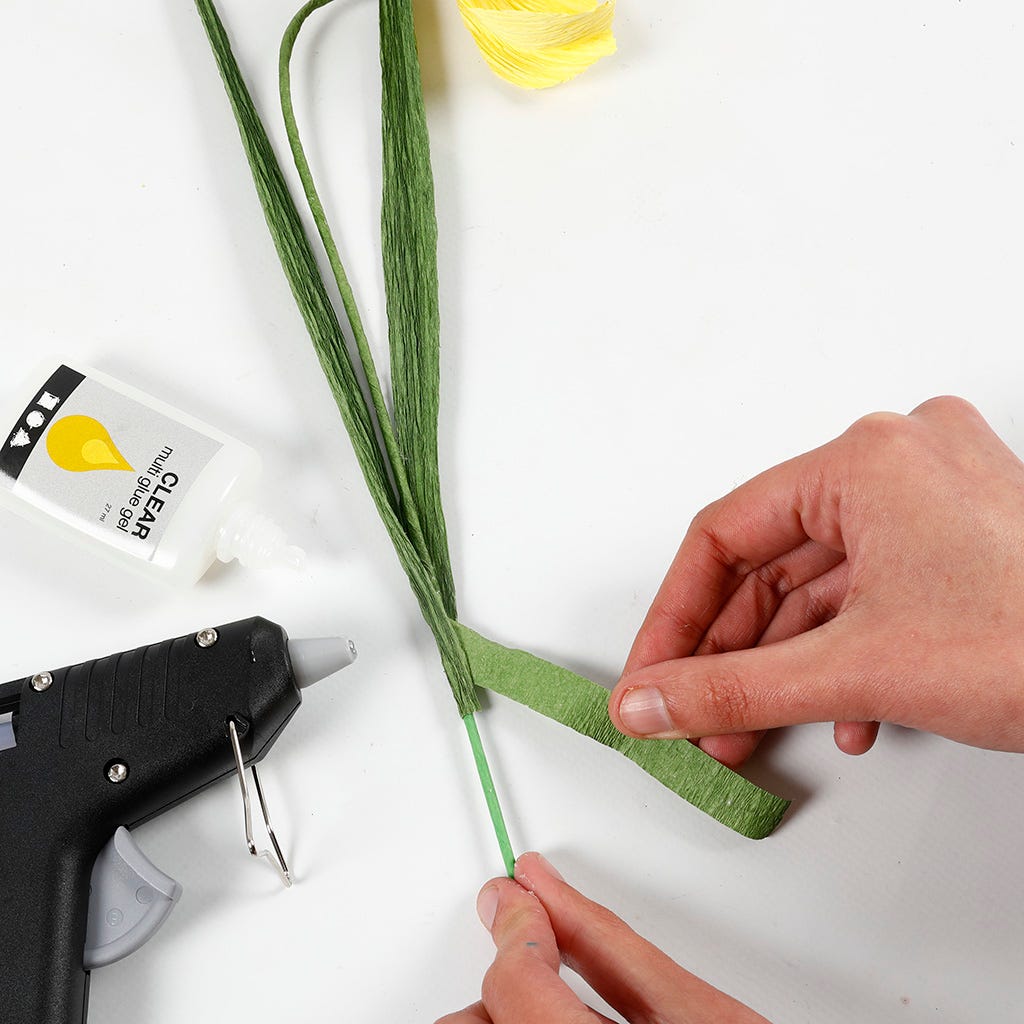
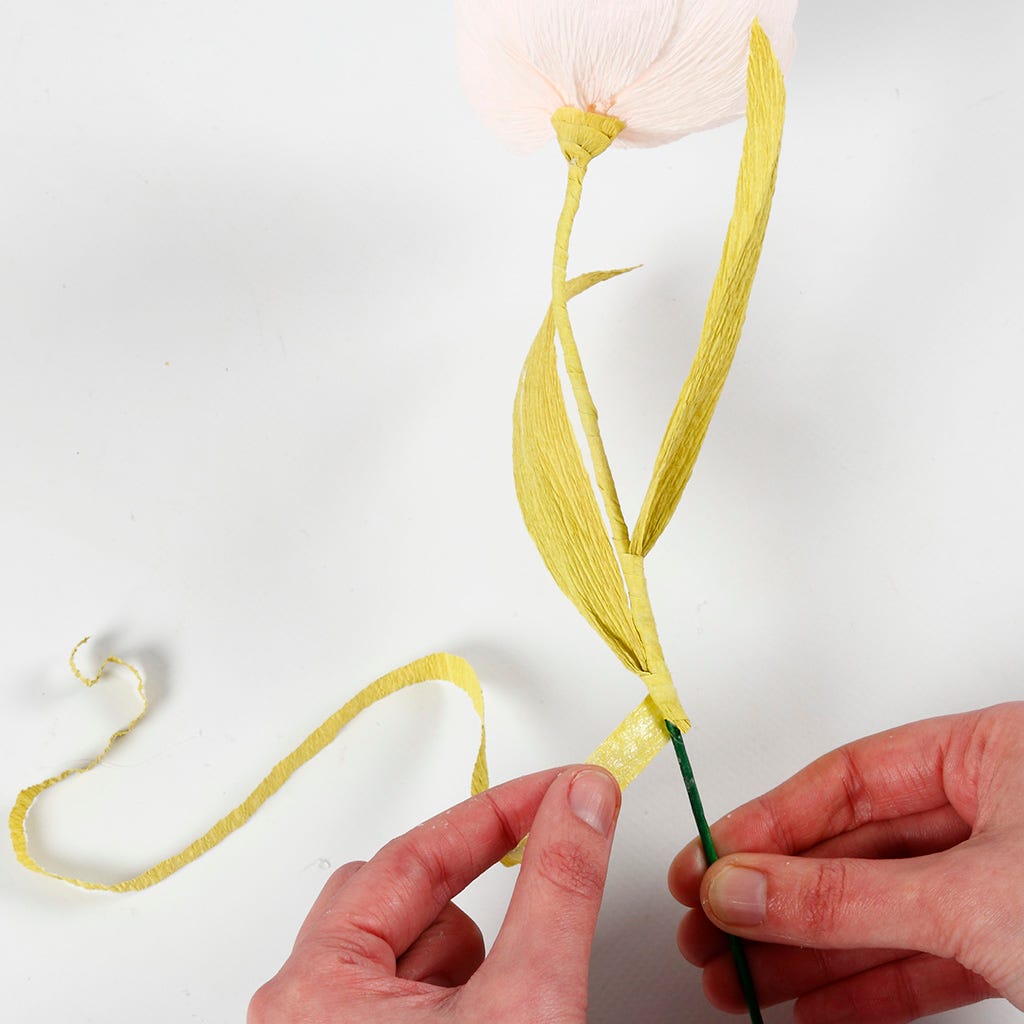
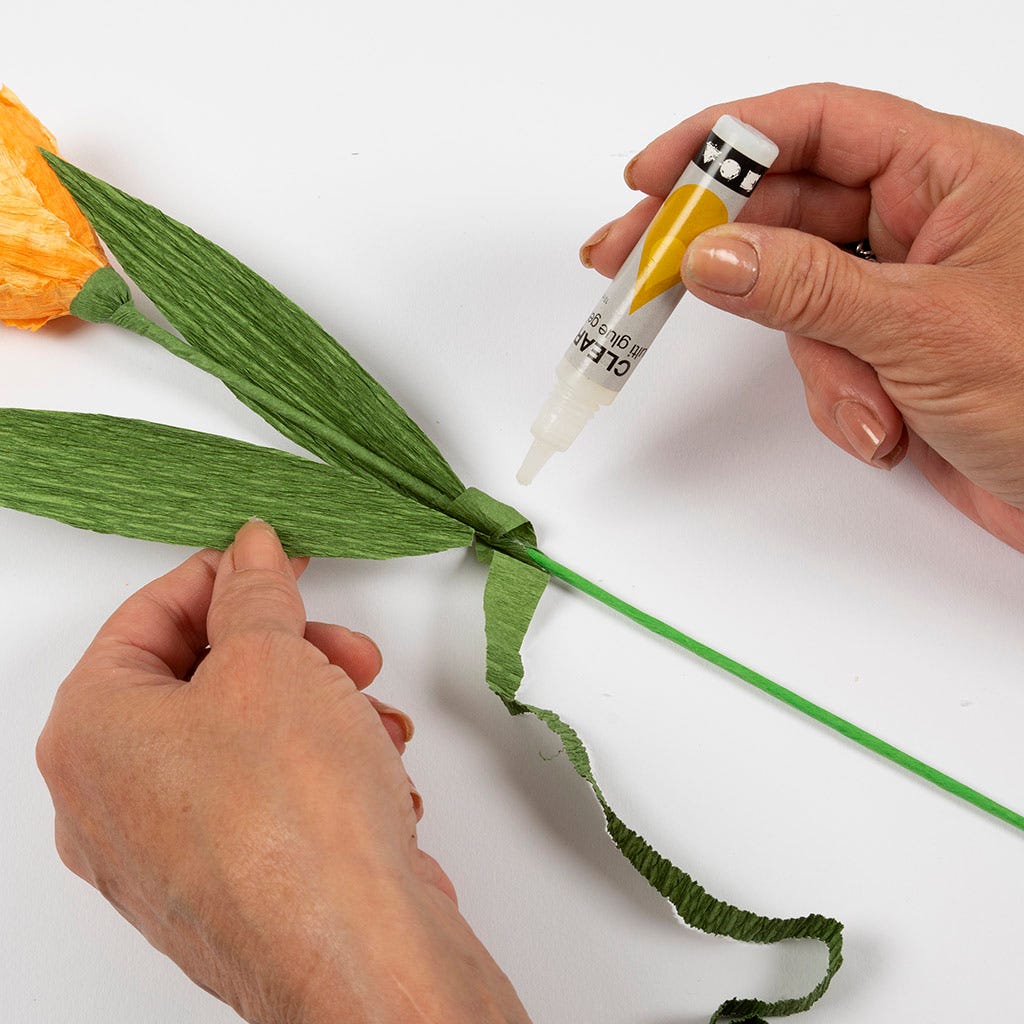
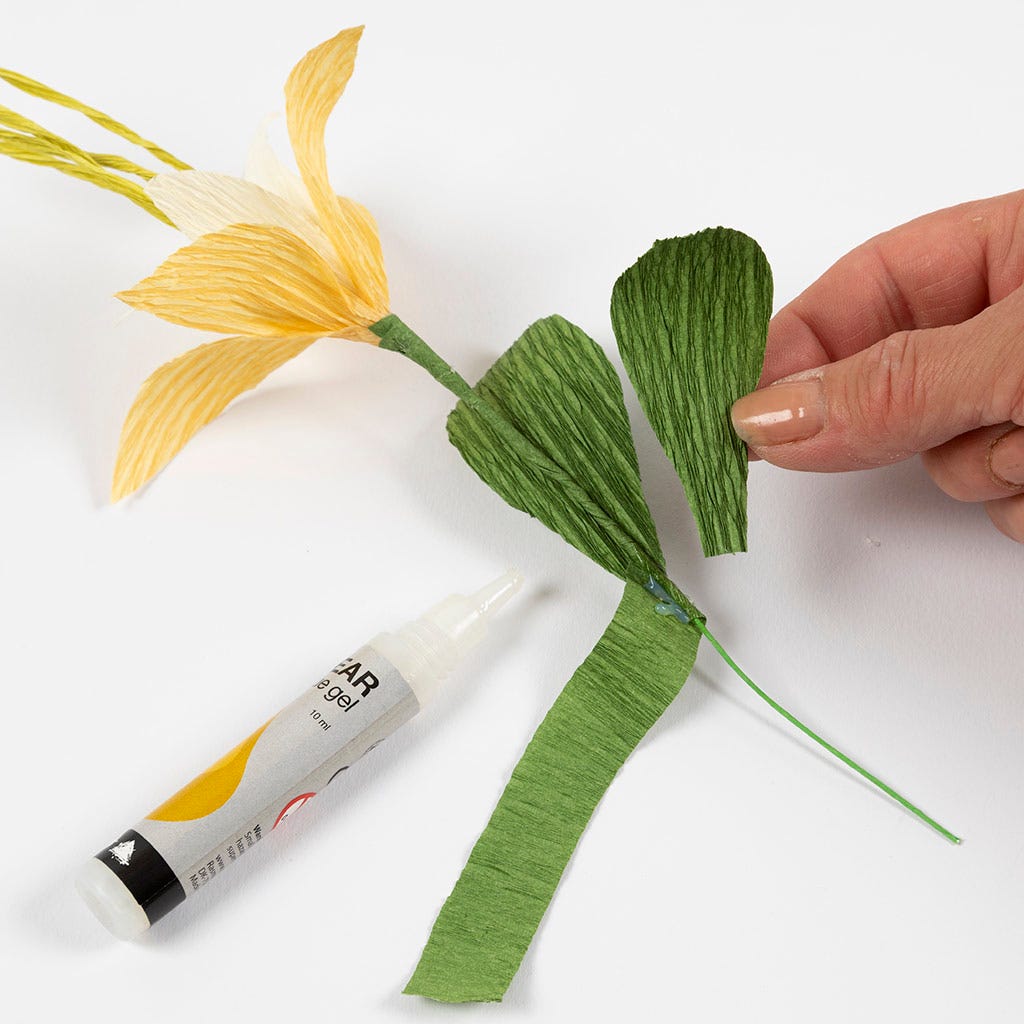
13 Attach the daffodil's green leaves onto the floral stem wire using a glue gun. Place the two leaves approx. 5 and 10 cm from the other end of the floral stem wire. Continue covering the floral stem wire, hiding the ends of the leaves. Finish the covering of the floral stem wire once you have reached the end. Tear off the excess crepe paper strip. Secure with a blob of glue.

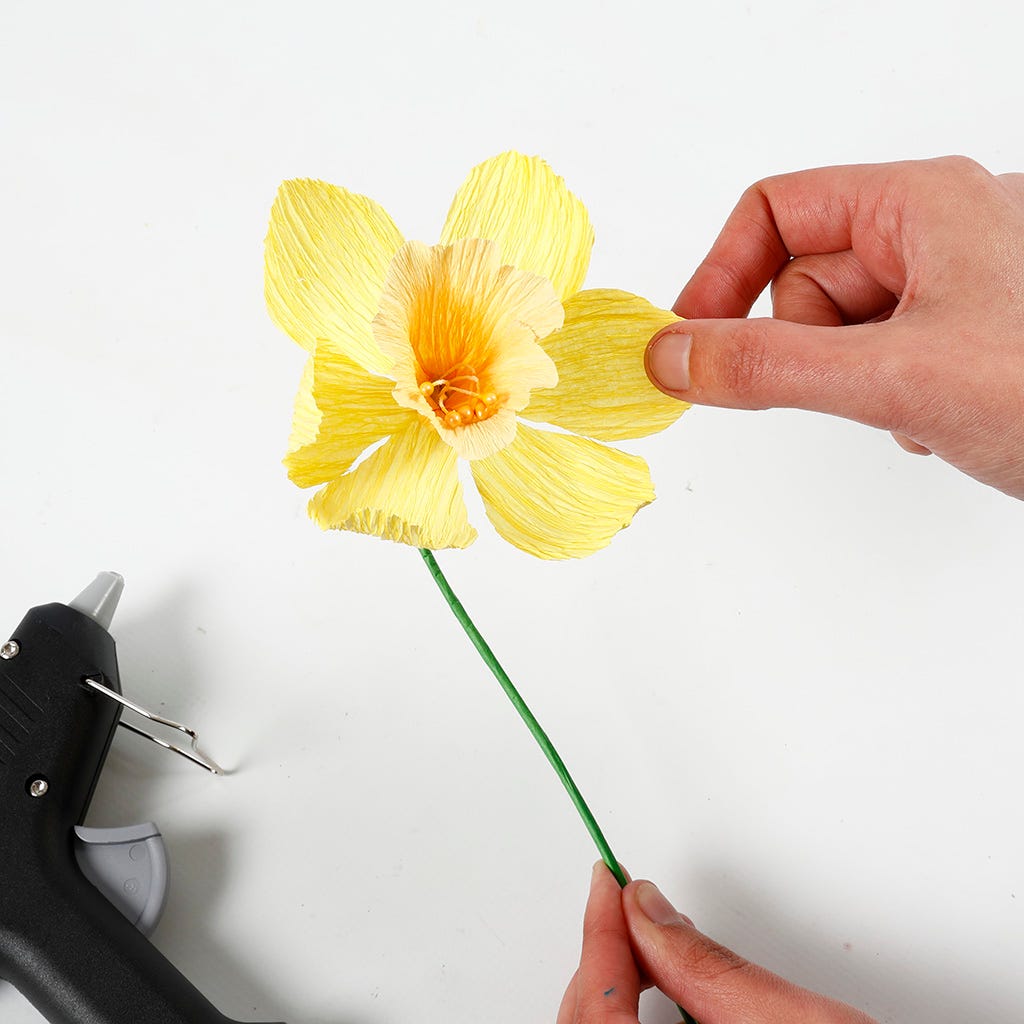
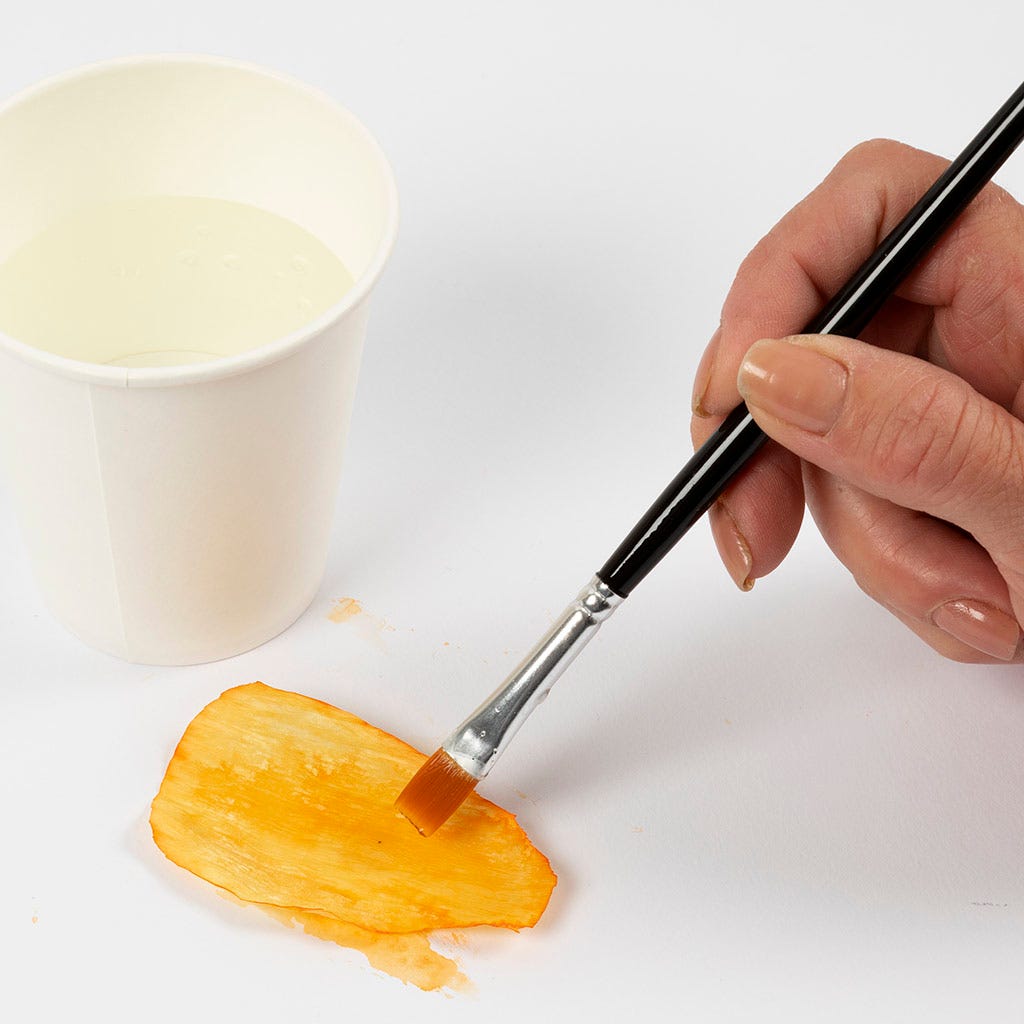
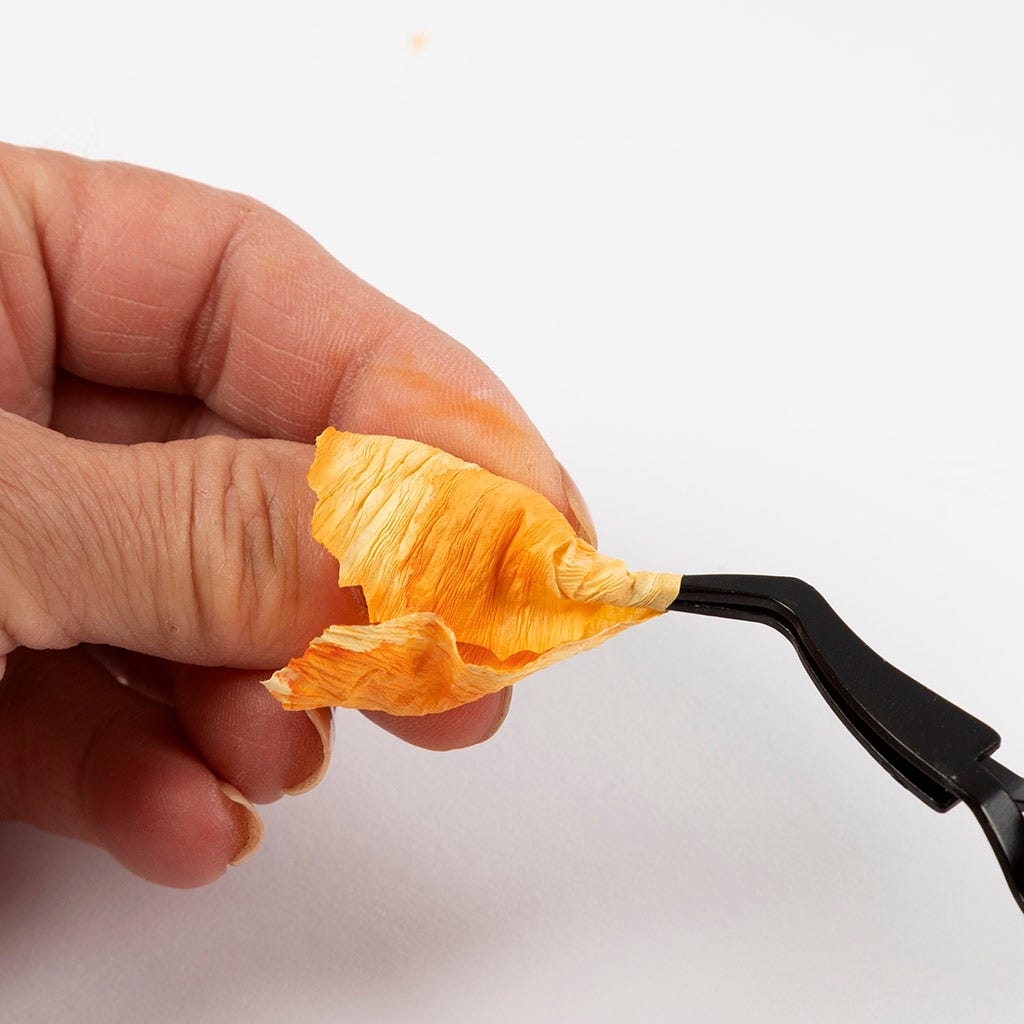
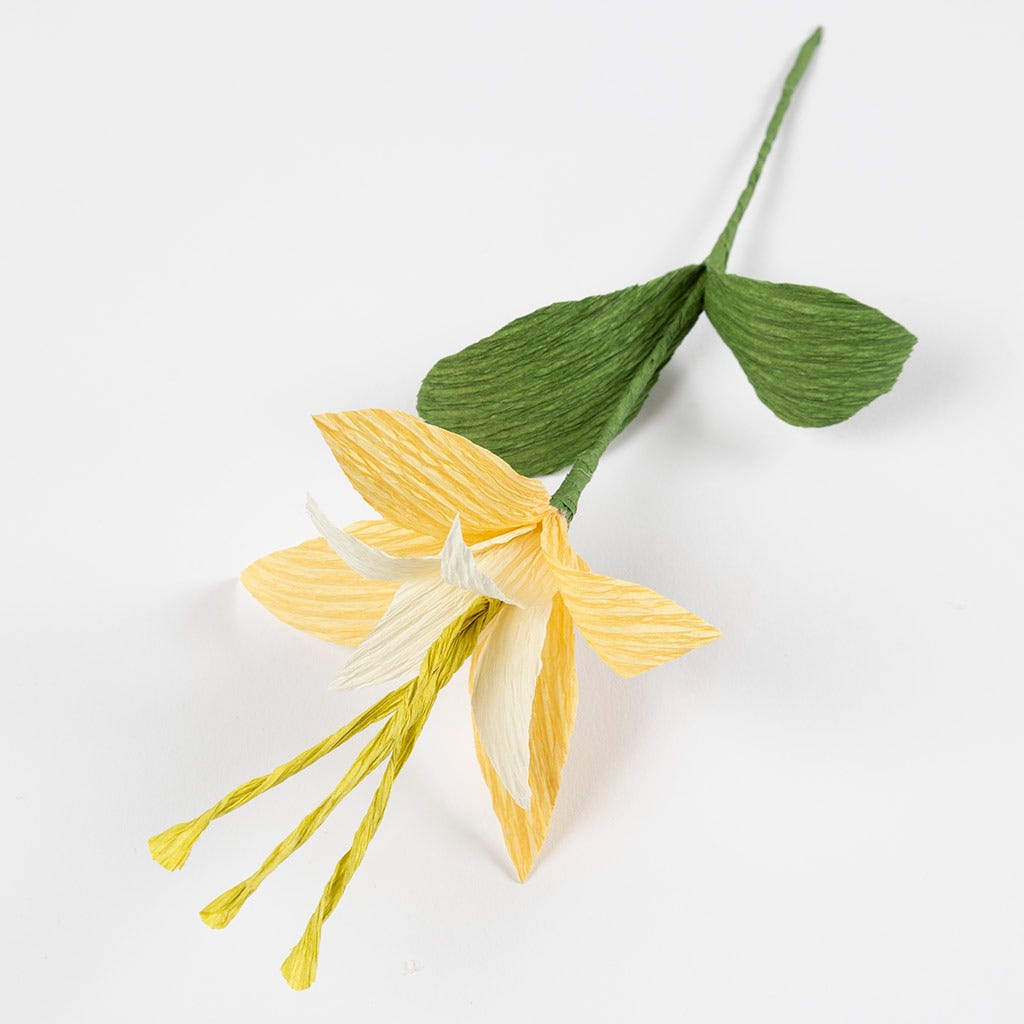
14 Add details onto the daffodil with watercolour markers to give it a bit of life. Paint onto the edge of the daffodil petals as shown in the photo.
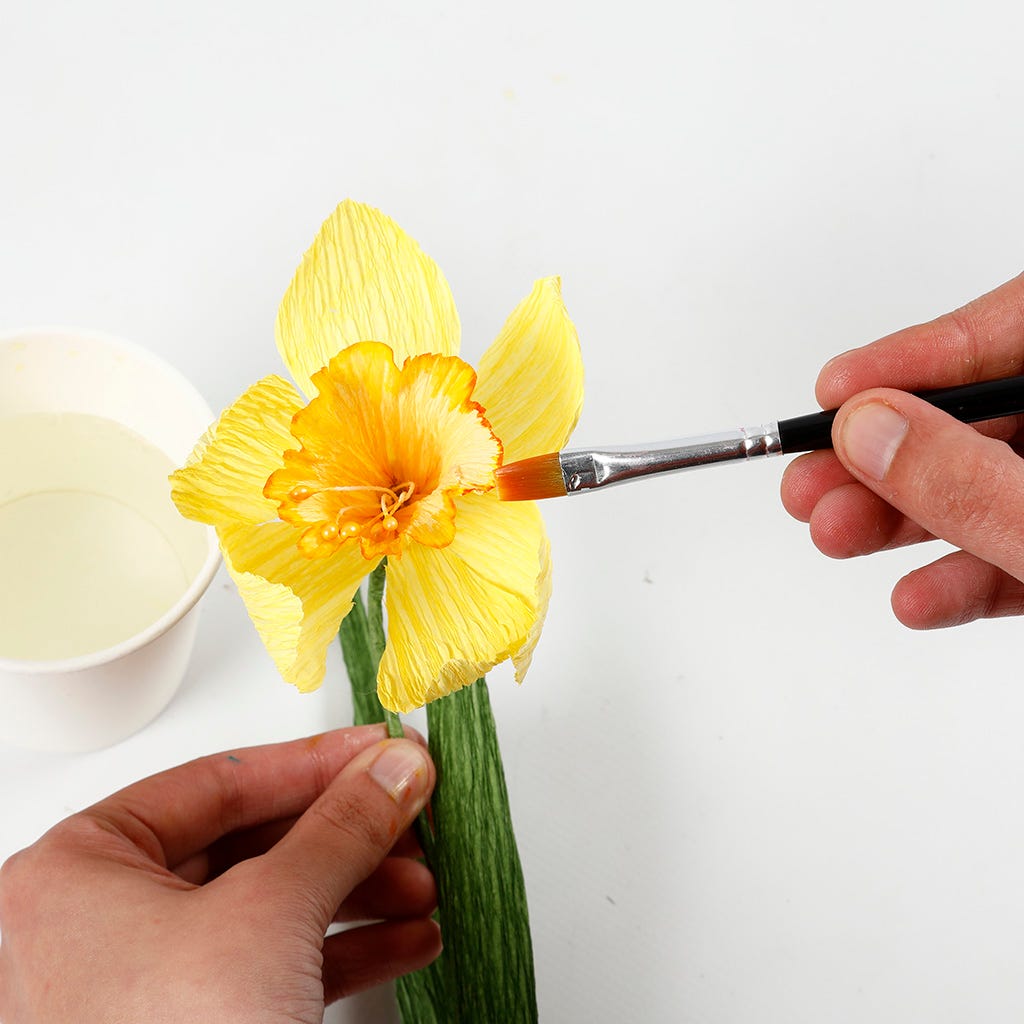
15 Spread the colour by using a wet brush.

16 Make a small spring bouquet by putting the daffodils together with crepe paper tulips.

Tulip – make 2 pcs. Click here for instructions.
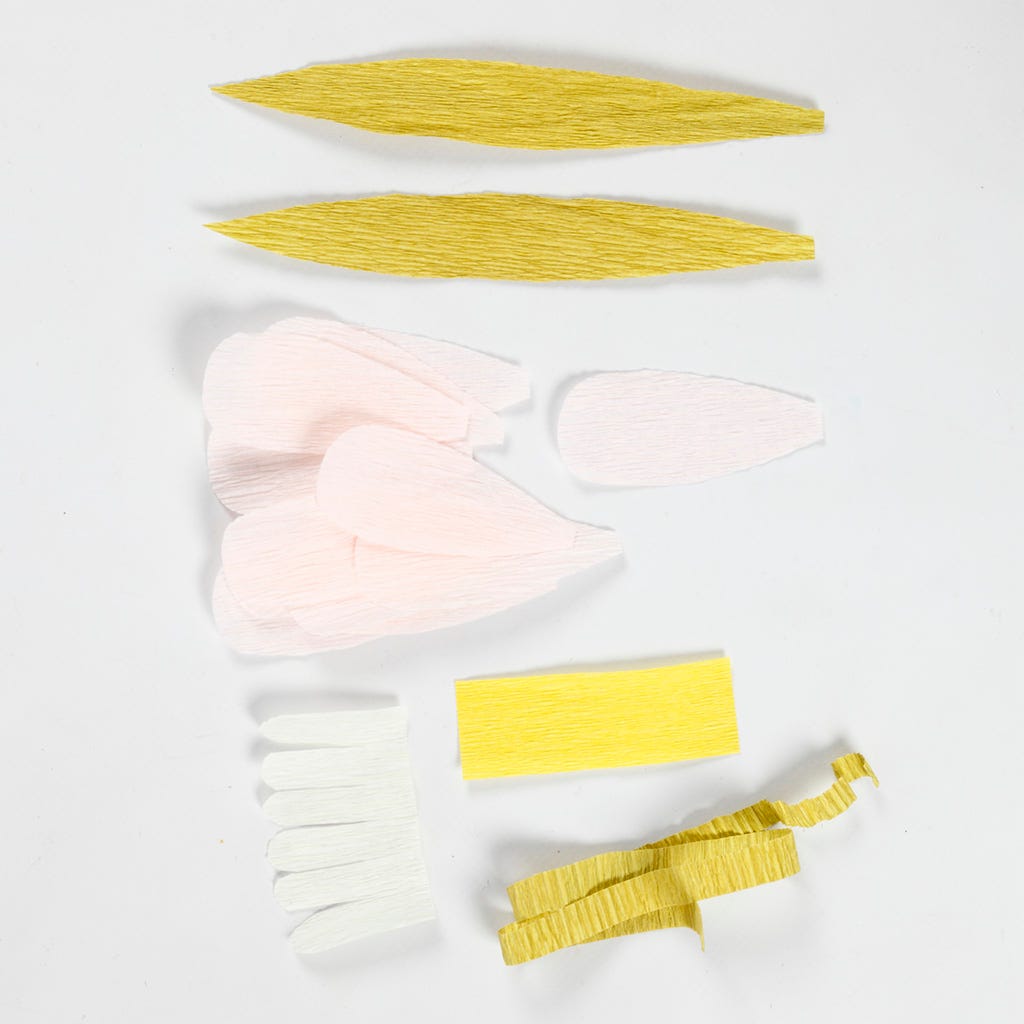
1 Print and cut out the template available as a PDF file at the bottom. Cut out all the parts for the flower. Remember to follow the stretch direction shown on the template. Cut a 1 x 20 cm piece of green crepe paper for covering the florist stem wire.
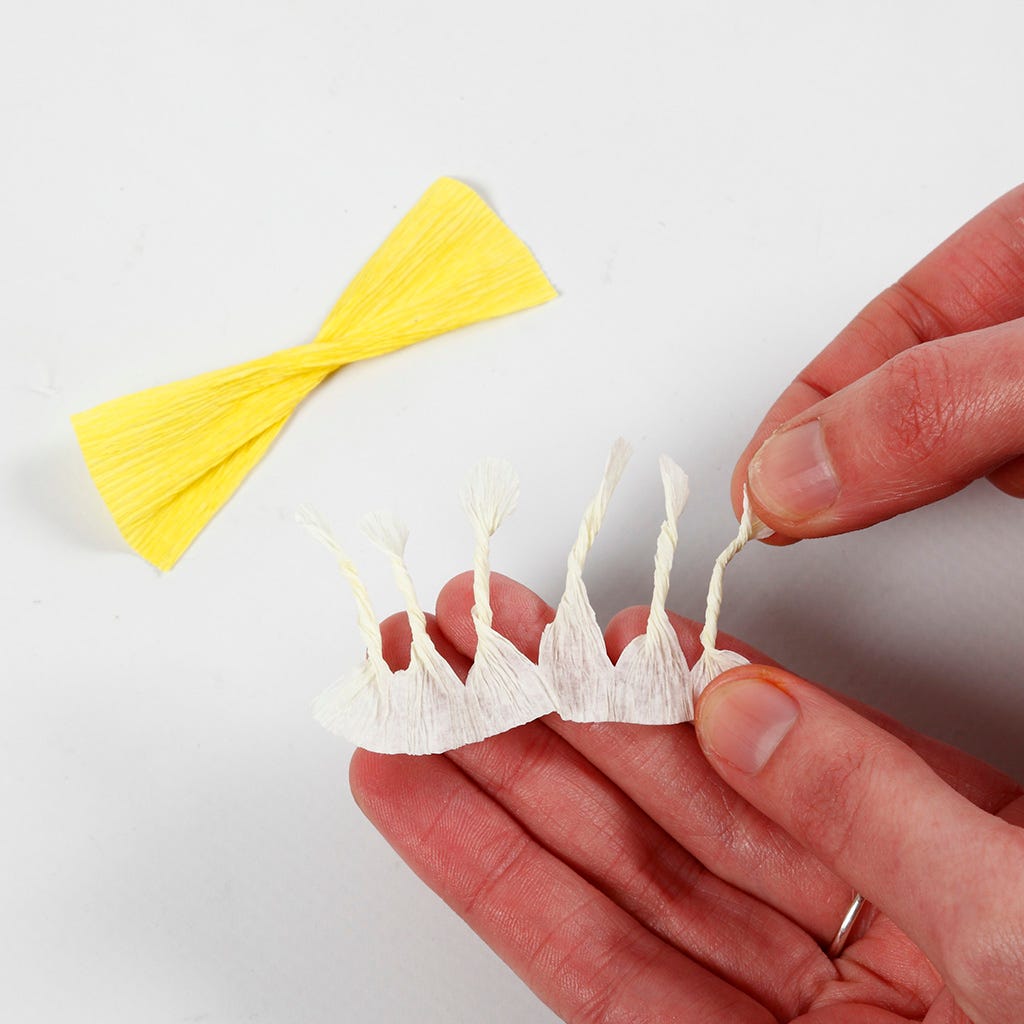
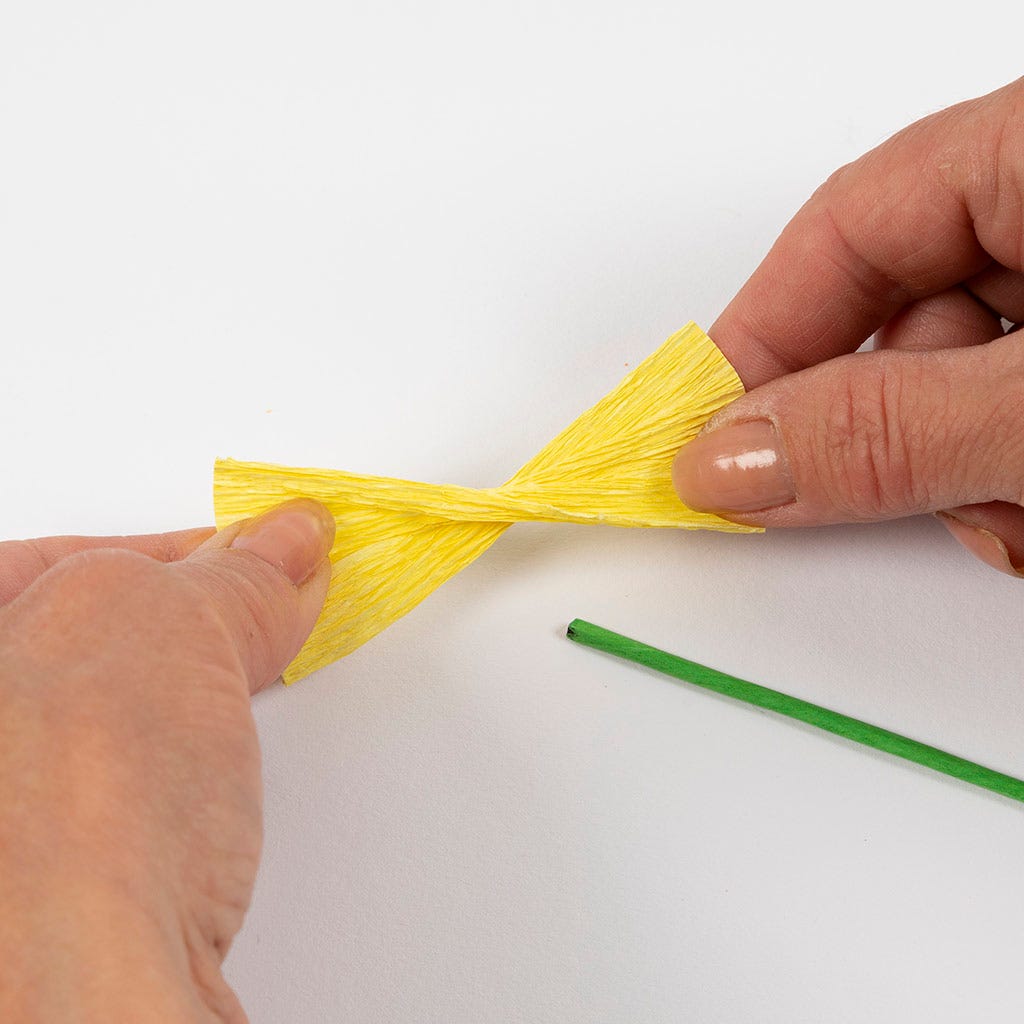
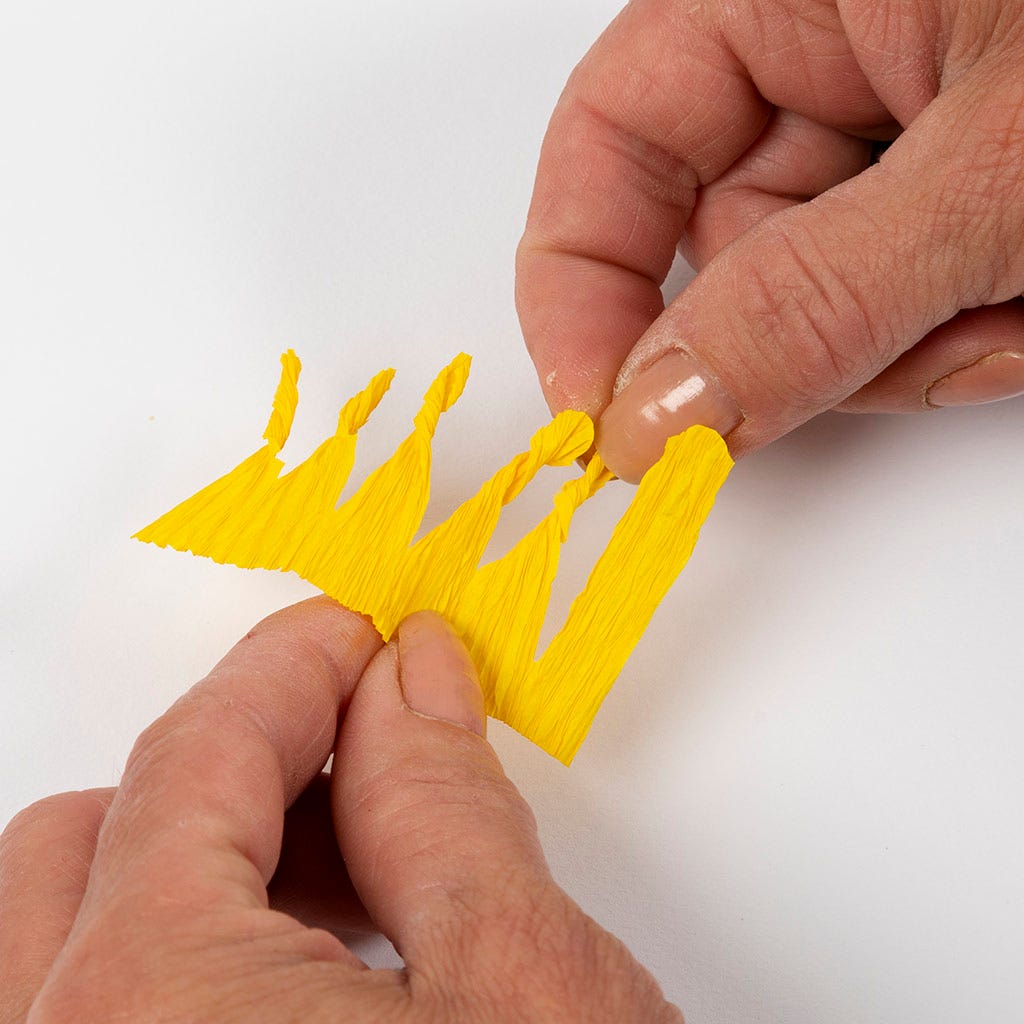
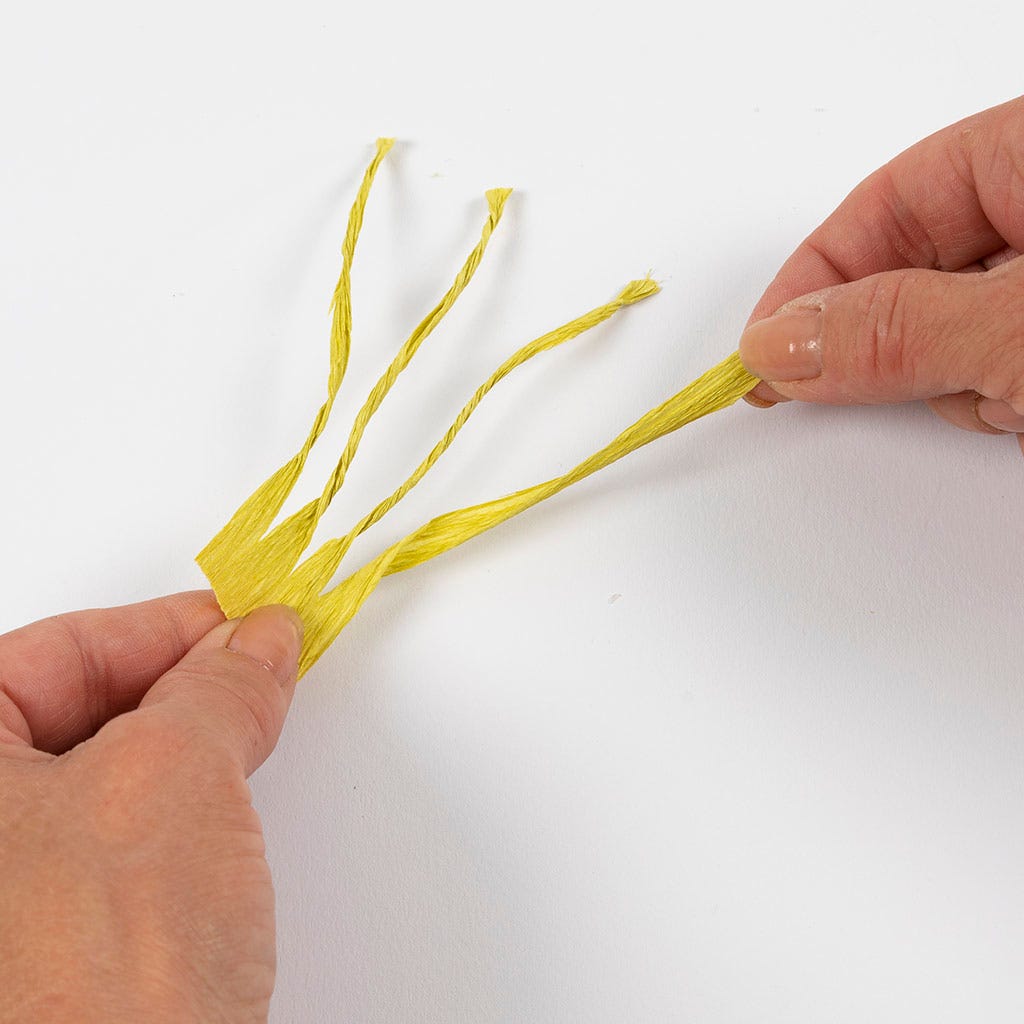
2 Twist the piece of yellow crepe paper forming the middle of the tulip. Twist the pins for the stamen one by one as shown on the white piece of crepe paper in the photo.
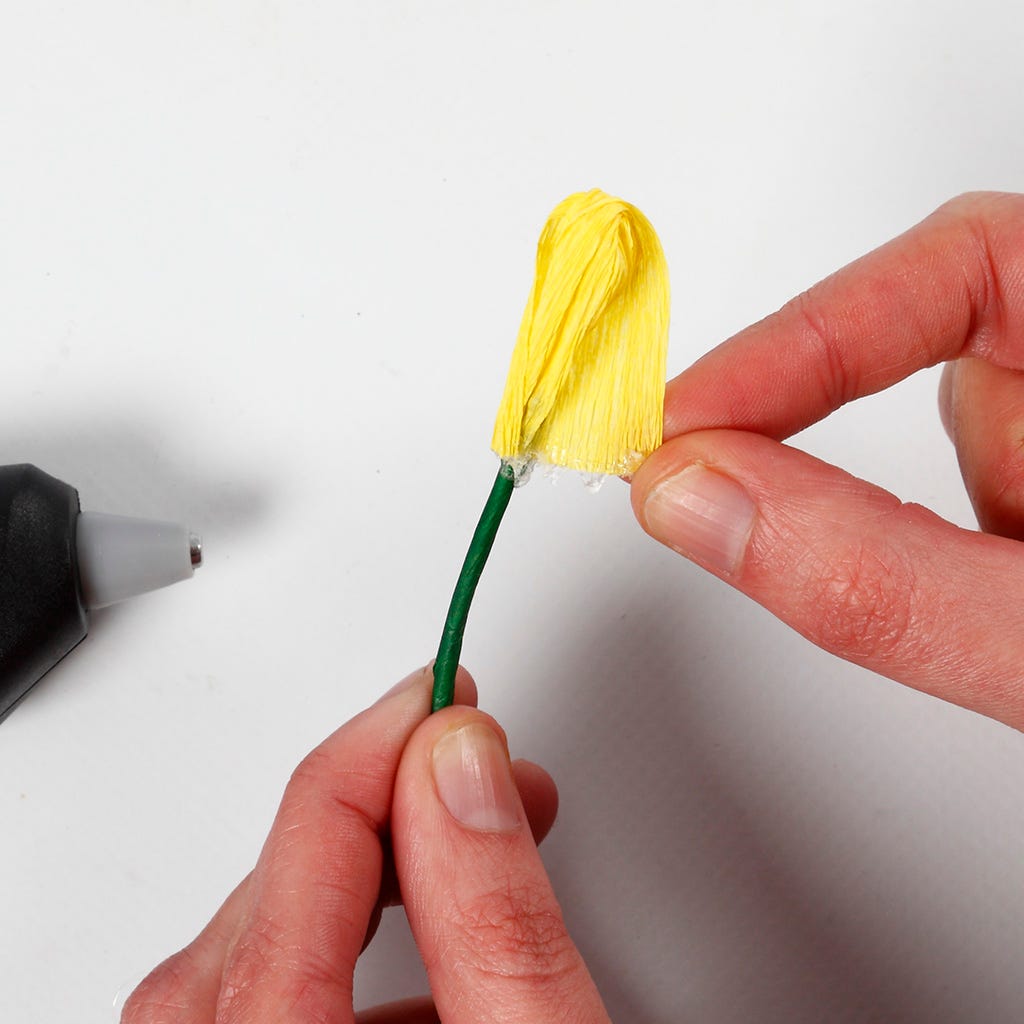
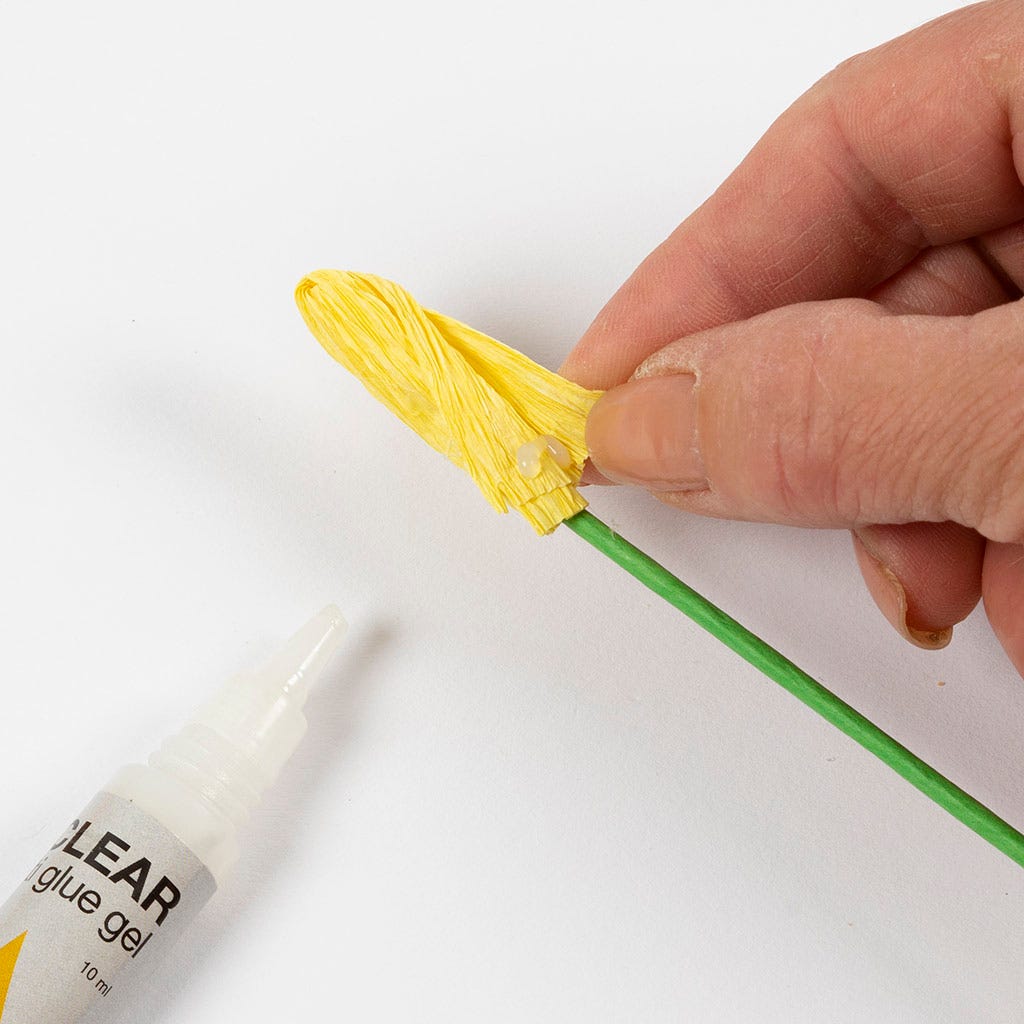
3 Attach the yellow piece of crepe paper (the tulip's middle) onto one end of the florist stem wire; attach one end onto the florist stem wire and then the other end, so that the twisted middle section is situated on top of the florist stem wire.
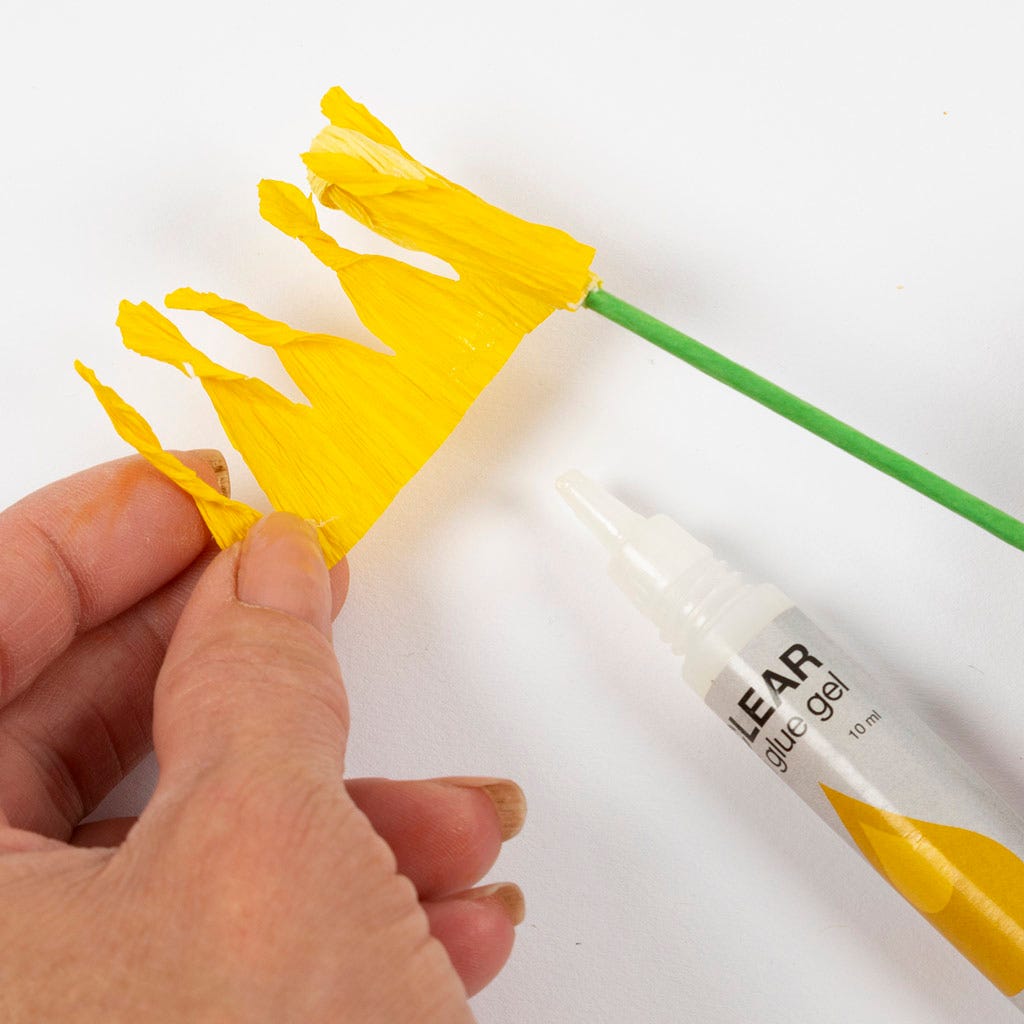
4 Attach the section with the stamen around the bottom part of the glued-on yellow crepe paper using a glue gun at a low temperature.
5 Round each petal with a bone folder by pulling the petal between the bone folder and your thumb; the same technique as curling a ribbon with scissors.
6 Shape the petal by stretching the middle of it, so that it becomes round. Repeat this procedure with all the petals.
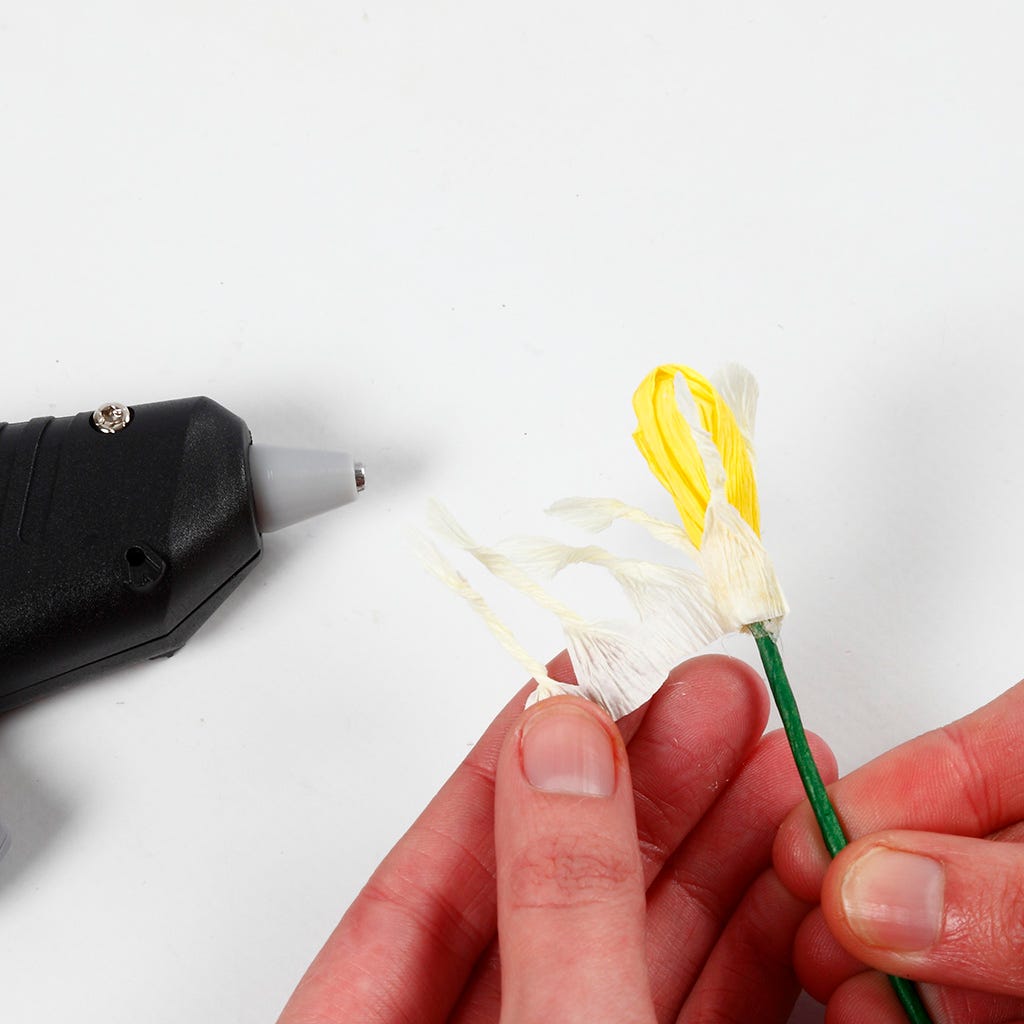
7 Twist one end of the petals to make them narrow and pointed.
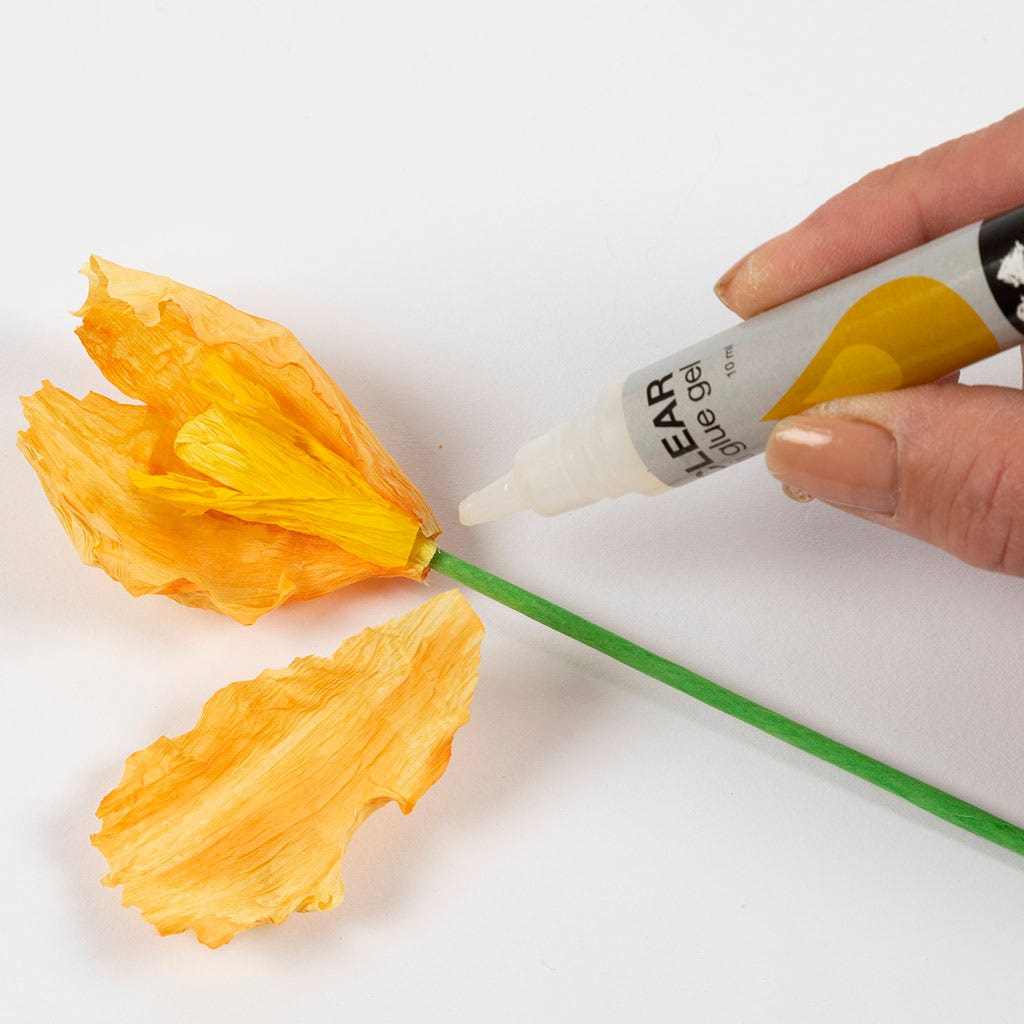
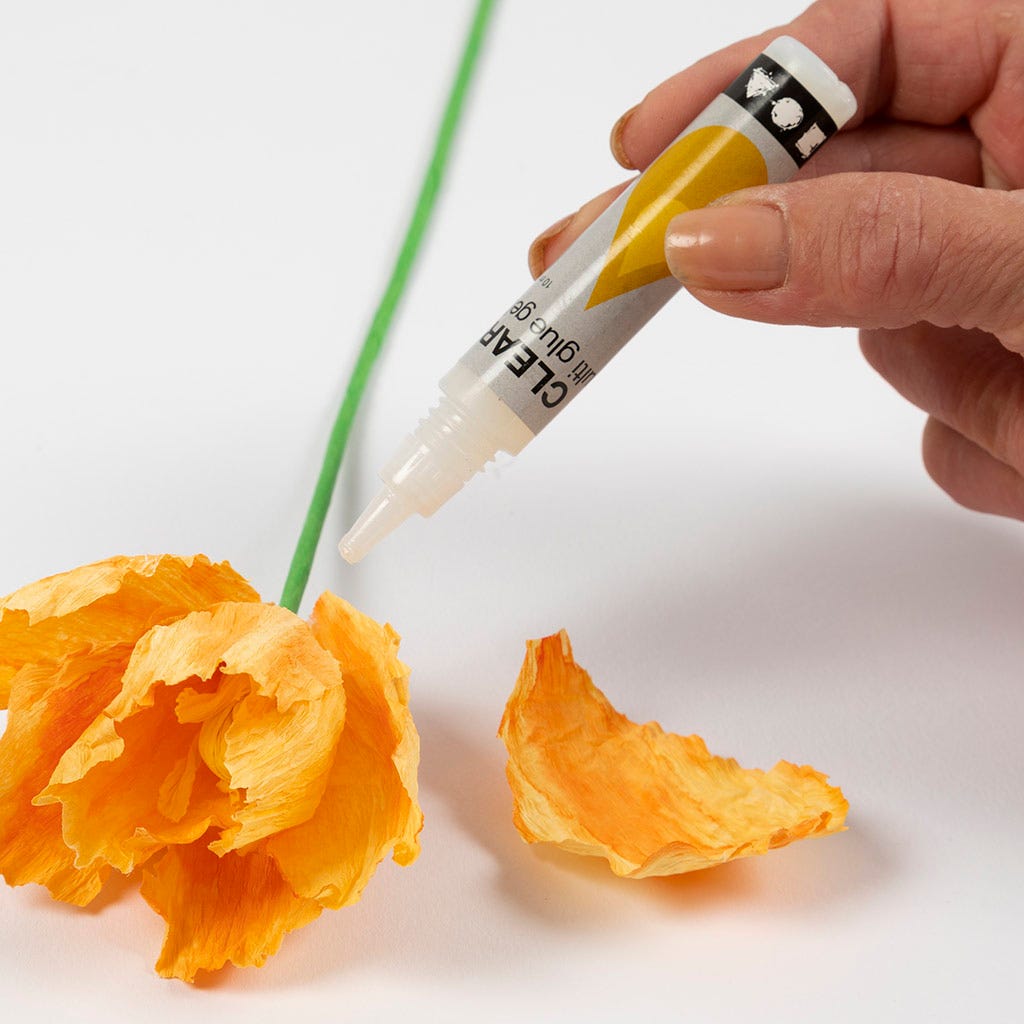
8 Attach the petals onto the lower part of the stamen. Attach four petals staggered around the stamen.
9 Attach another four petals between the first four petals. Attach the remaining four petals in the same fashion.
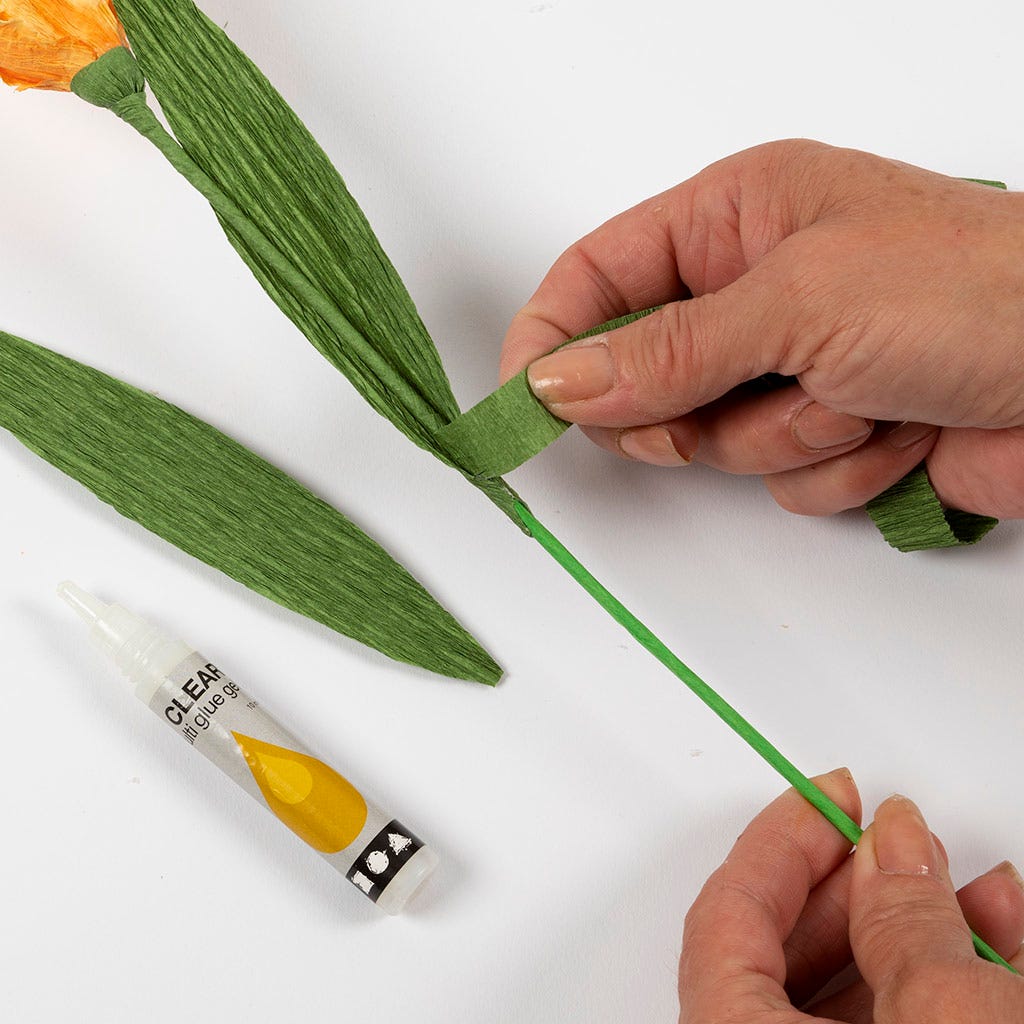
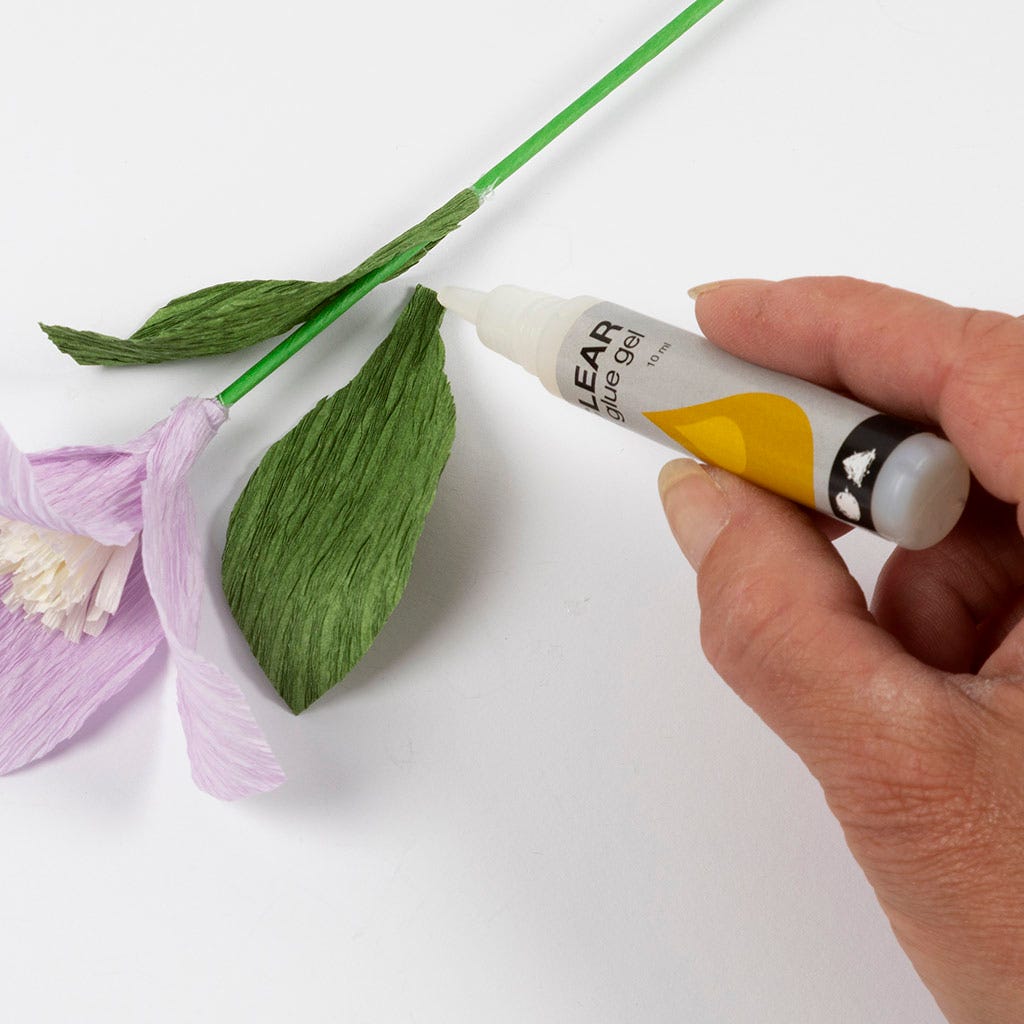
10 Stretch out the long thin piece of green crepe paper for covering the florist stem wire. Fasten one end onto the bottom part of the leaves. Cover the floral stem wire by wrapping the crepe paper at an angle around the floral stem wire, securing with Multi Glue as you go along.
11 Secure the leaves with a glue gun whilst continuing covering the floral stem wire with the green crepe paper, hiding the ends of the leaves.
Parrot tulip – make 2 pcs. Click here for instructions.
1 Print out the corresponding template and cut out the parts.

2 Lightly colour in the leaves with a watercolour marker – both on the edges and in the middle.
3 Moisten the leaves with a little water to blend the colour. Then allow to dry completely.
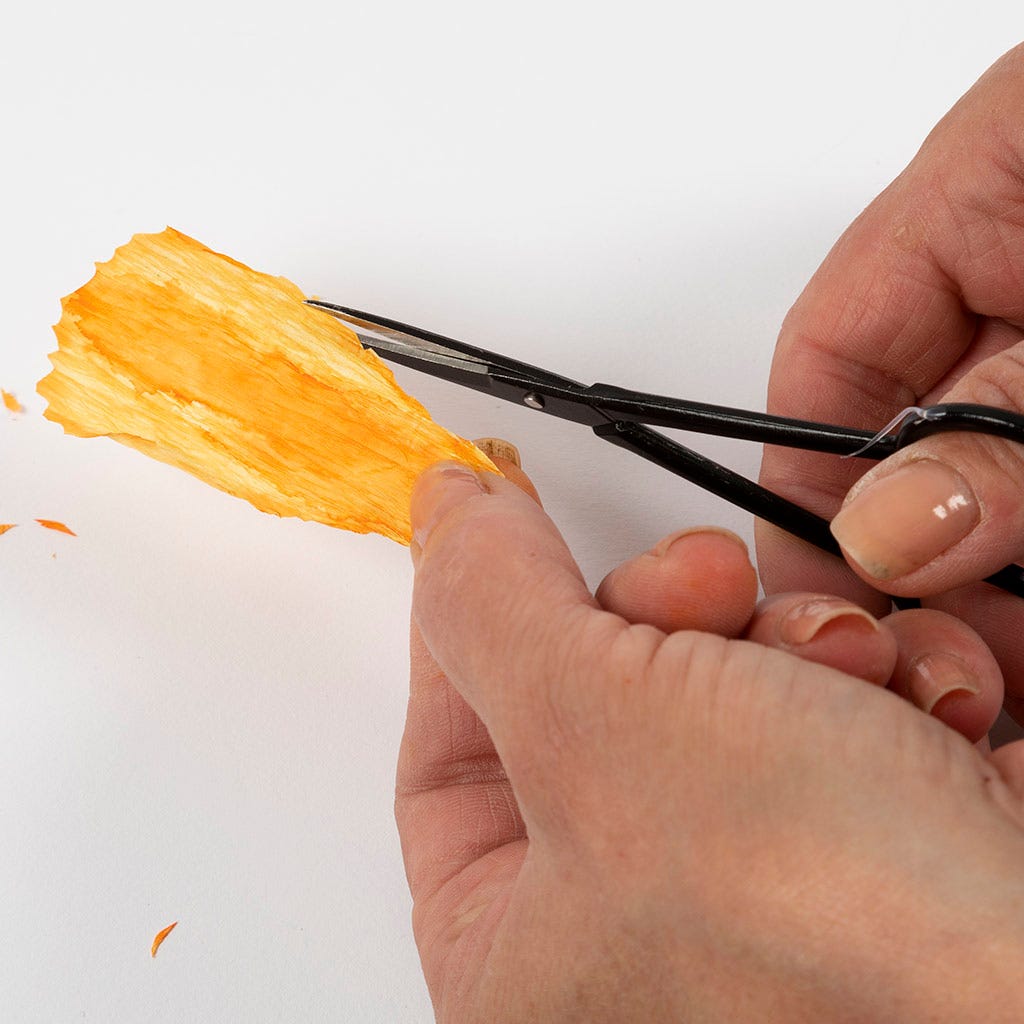
4 Cut out small serrations on the leaf.
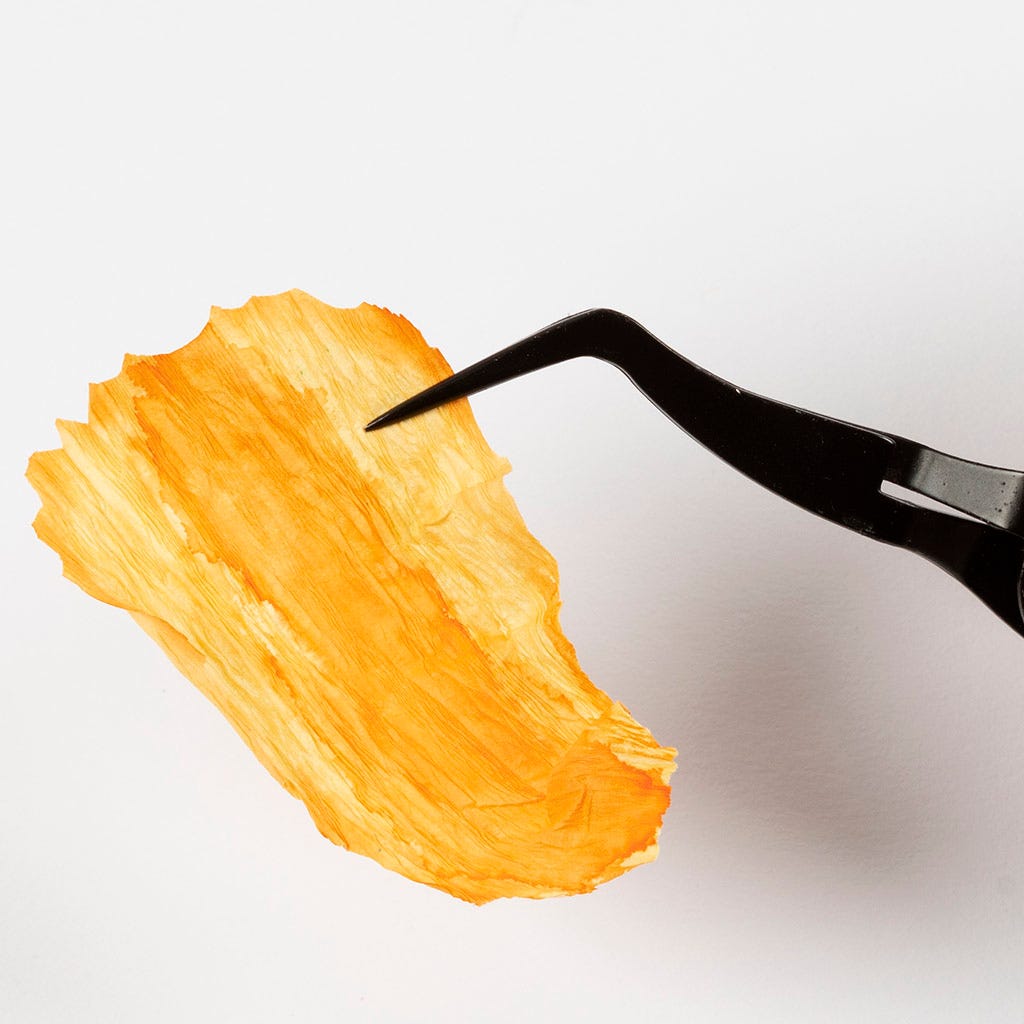
5 Curl the leaves with a pair of tweezers. Position the tweezers approximately ½ cm inside the leaf.
6 Keeping the tweezers firmly in place around the leaf, turn it around. Then loosen the tweezers and carefully pull the leaf out. Repeat this process all around the leaf. Turn in the same direction all around the leaf.

7 Shape the leaves by gently pulling in the direction of the crepe paper's stretch. If you like, try practising on some small pieces of crepe paper first and see how they turn out.
8 Turn the inner piece (the seed pod) around so that it forms a pod shape.
9 Glue the seed pod around the stem.
11 Glue the stamens around the seed pod.
10 Twist them around the piece so they look like stamens.
12 Glue on three leaves so that they overlap each other.
13 Glue on the last five leaves and let them overlap each other.
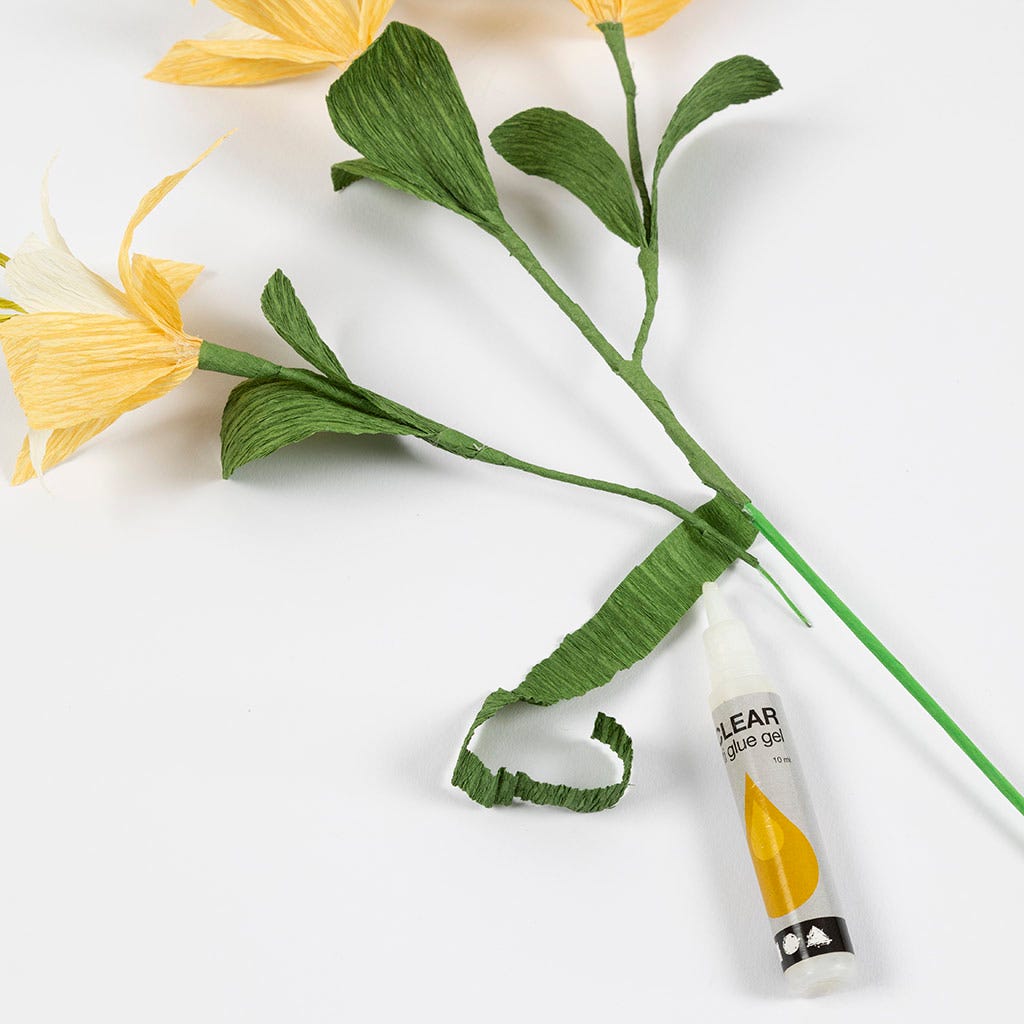
15 Glue the two leaves onto the piece you have just twisted around the stem, one on each side, placing them approx. 10 cm down the stem.
16 Continue twisting the whole stem until the end, gluing as you go.
14 Use the 1 x 30 cm piece to wrap around the flower stem. Glue the end around the flower head and then wrap the piece downwards around the stem. Apply a little glue as you go.
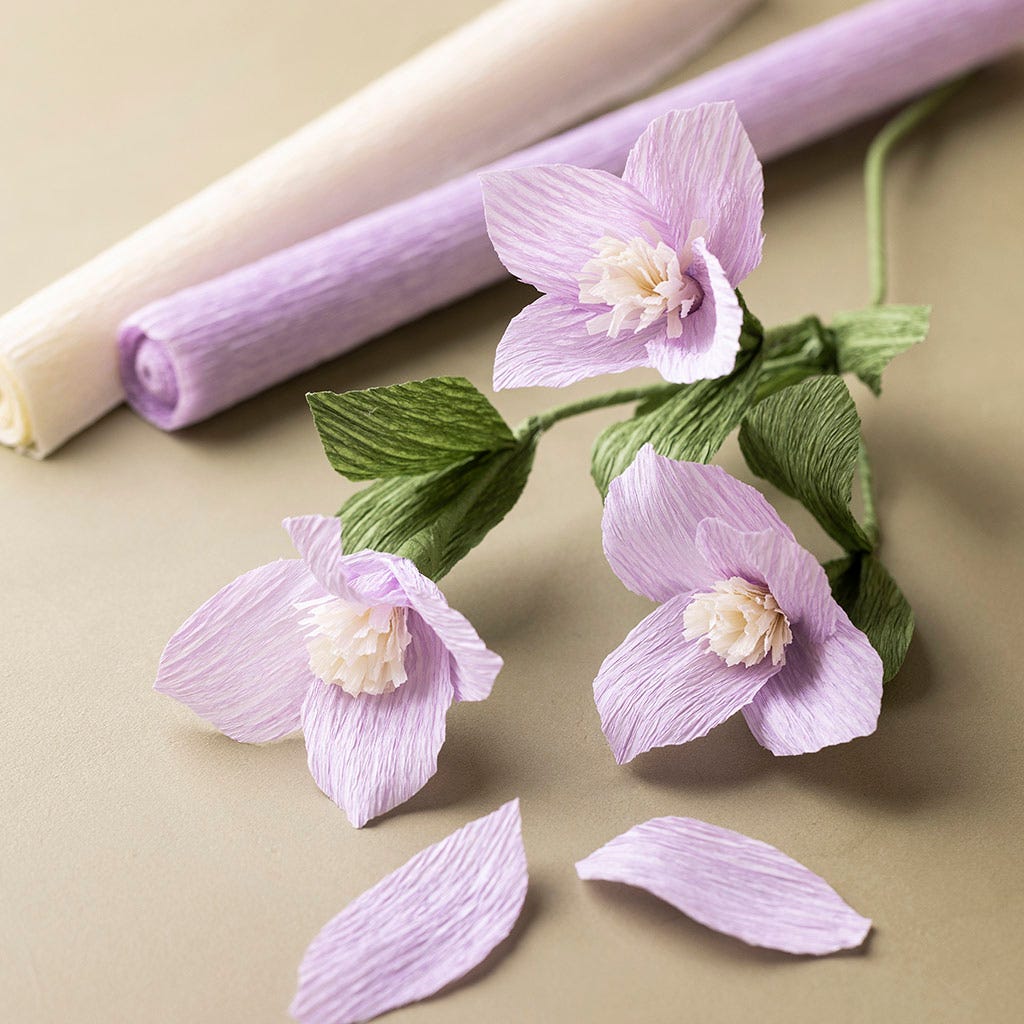
Clematis – make two branches Click here for instructions.
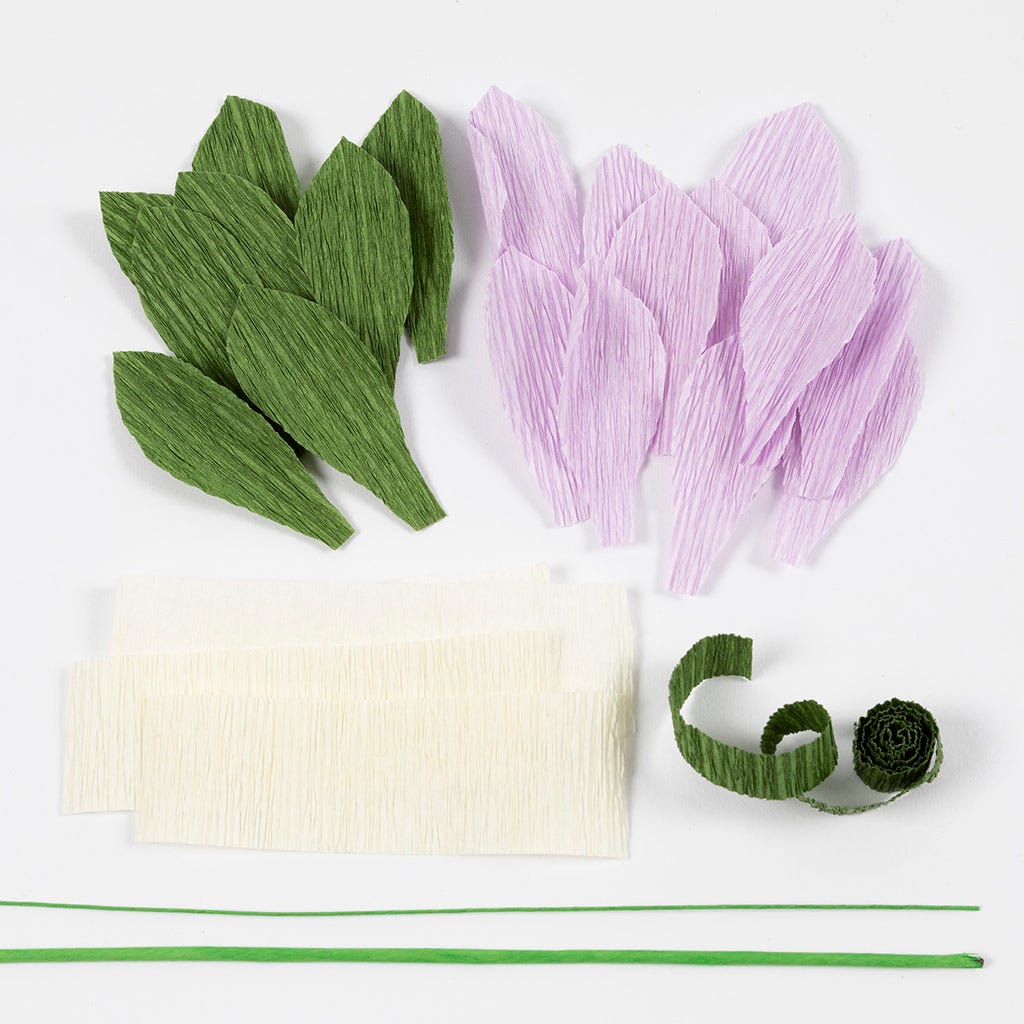
1 Print out the template and cut out the pieces.

2 Stretch out the piece for the stamens.
3 Fold twice and cut out notches according to the template.
5 Shape the leaves with a bone folder.
4 Glue the stamens around the stem.
6 Glue two leaves so they sit on top of each other and then glue the other two leaves in the same way.
7 Shape the leaves by stretching them out carefully.
9 Cut the thin stem in half and then make two flowers in the same way as the first one. Wrap the two finished flowers around the thick stem.
10 Stretch out the 1 x 30 cm piece and wrap it around the stems.
11 Glue on the piece and start at the top of the flower.

12 Wrap the piece downwards around the stem and between the leaves. Apply a little glue as you go.
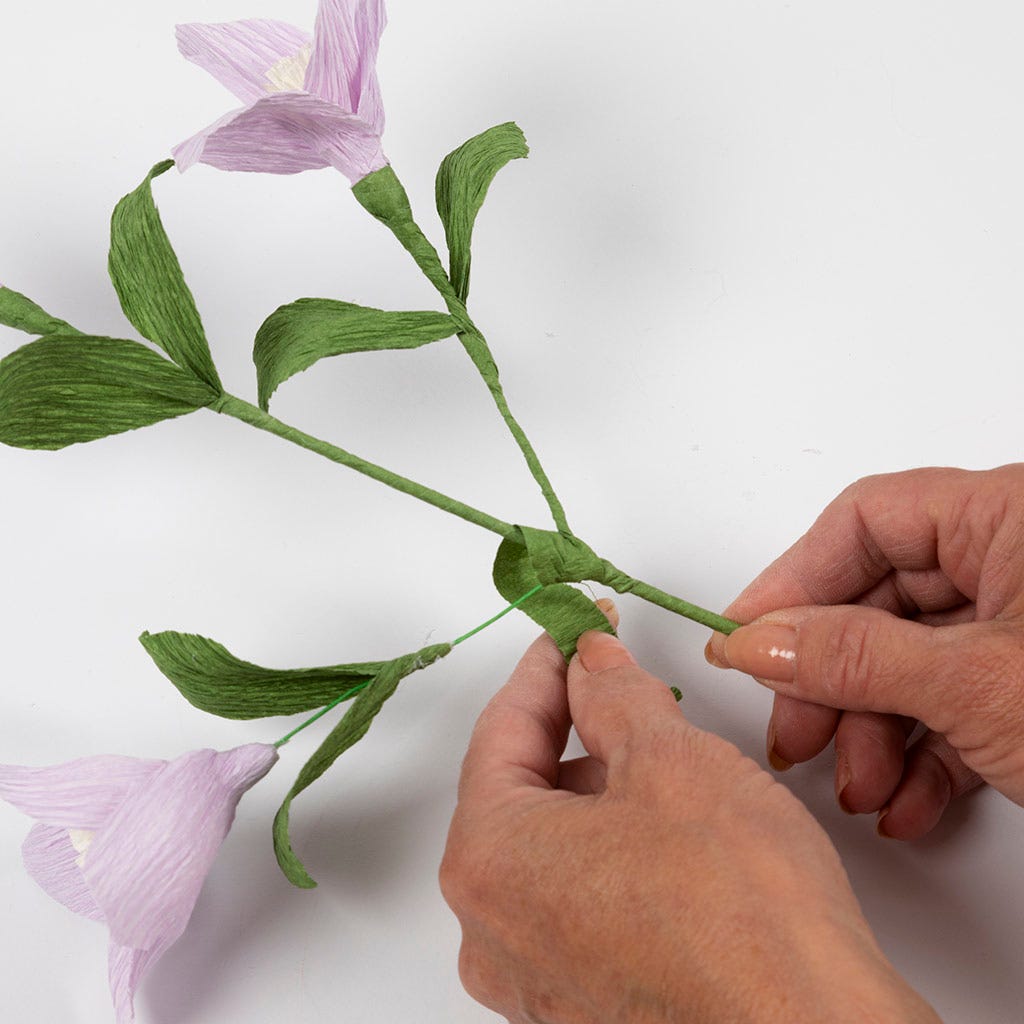
13 Repeat for the two flower branches.
8 Glue the leaves onto the stem.
Double clematis – make two branches Click here for instructions.
1 Cut out all the pieces according to the template.
2 Bend the leaves gently using a bone folder. Shape the leaves by gently pulling in the direction of the crepe paper's stretch.
3 Twist the piece around the stamens.
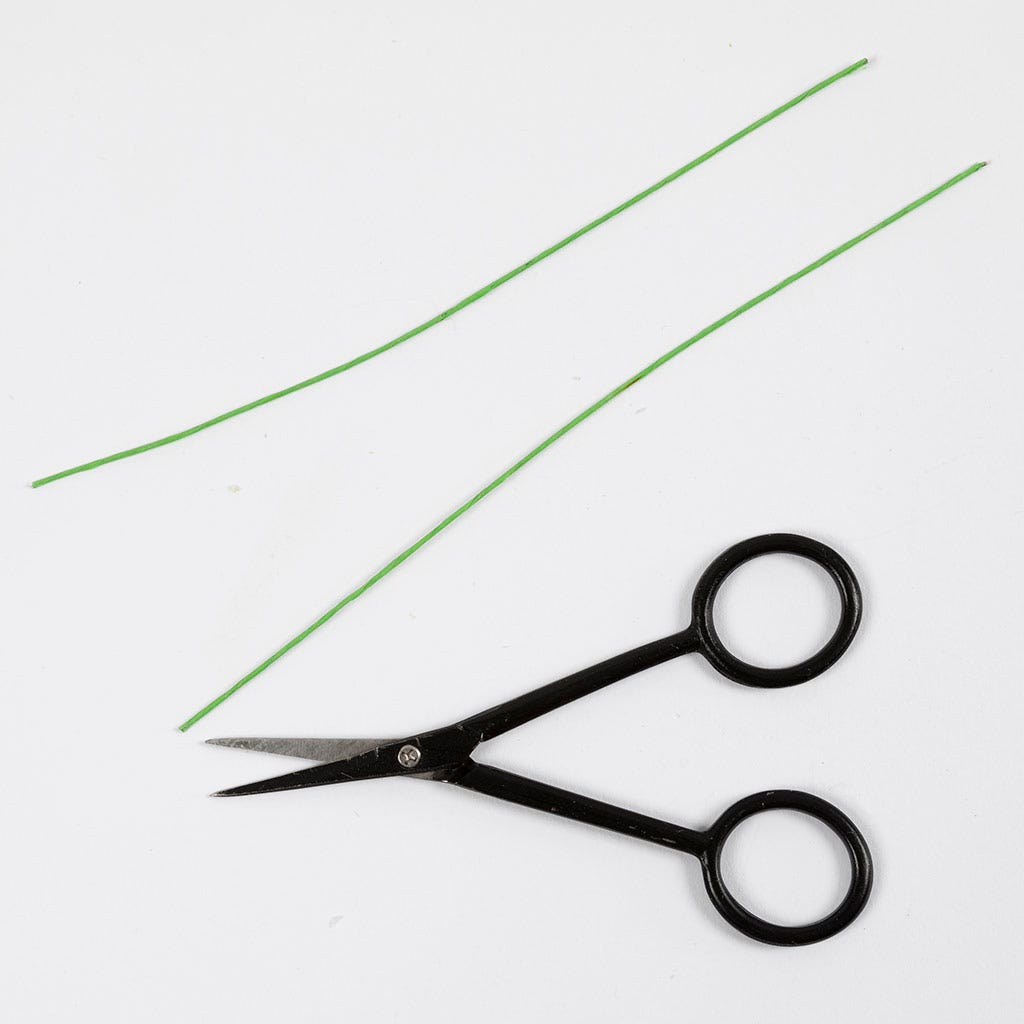
4 Divide the thin wire into two pieces.

5 Glue on the stamens: apply glue to the stem and twist the stamens around it, gluing as you go.
6 Now attach the light-coloured petals. Glue two leaves onto the stem and place them on top of each other – do the same with the next two leaves, so that the flower has a uniform appearance.
7 Now glue on the yellow petals. Again, glue two leaves on top of each other so that they are offset from the lighter-coloured leaves.
8 Use the 1 x 30 cm piece to wrap around the flower stem. Glue the end around the flower head and then wrap the piece downwards around the stem. If necessary, apply a little glue as you go. Glue the two leaves onto the piece you have just twisted around the stem, one on each side, placing them approx. 5 cm down the stem. Now twist the stem all the way to the end.
9 Make two of these flower stems on the thin wire.
10 Make the flower on the thick stem in the same way. Wrap the two thin flower stems around the thick stem and glue them on so they are slightly staggered. Continue wrapping until the end and the branch is finished.
Already signed up? Download the template
Also go exploring in
