
New
Creative idea
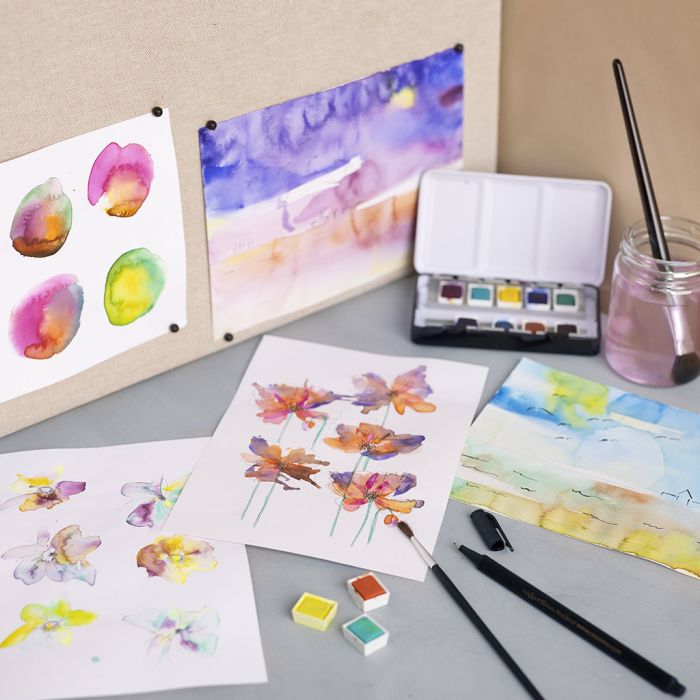
Watercolour flowers and landscapes
#v17004
Learn different colouring techniques that you can then use to create wonderful pictures. Paint beautiful flowers or tranquil landscapes, and experience how the colours merge to create new shades and harmonies. It's like pure magic.
#v17004
How to do it Download the templates/recipes
1 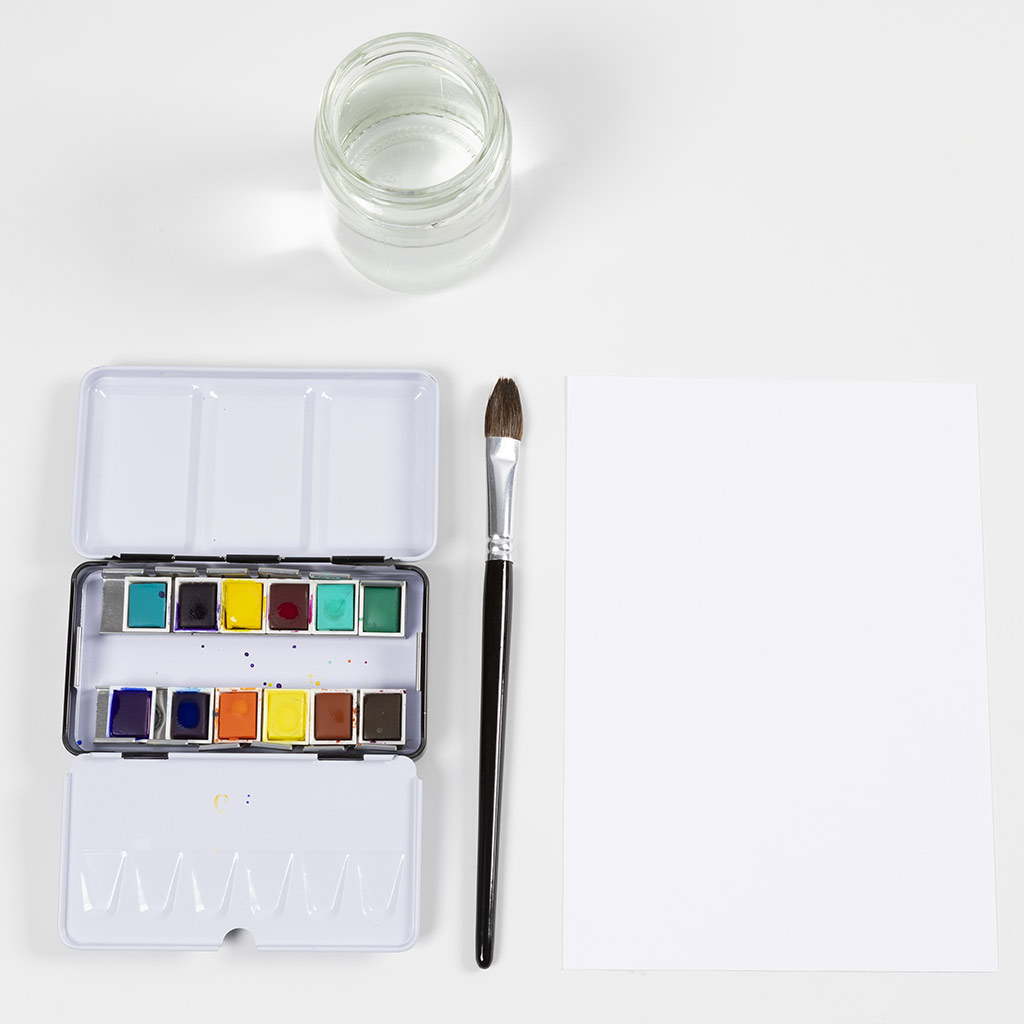 We are now going to make colour circles. Colour circles let you to experiment with how the colours flow into each other. This is good to know when colouring flowers or painting landscapes. Prepare everything you will need, as shown in the picture.
We are now going to make colour circles. Colour circles let you to experiment with how the colours flow into each other. This is good to know when colouring flowers or painting landscapes. Prepare everything you will need, as shown in the picture.2 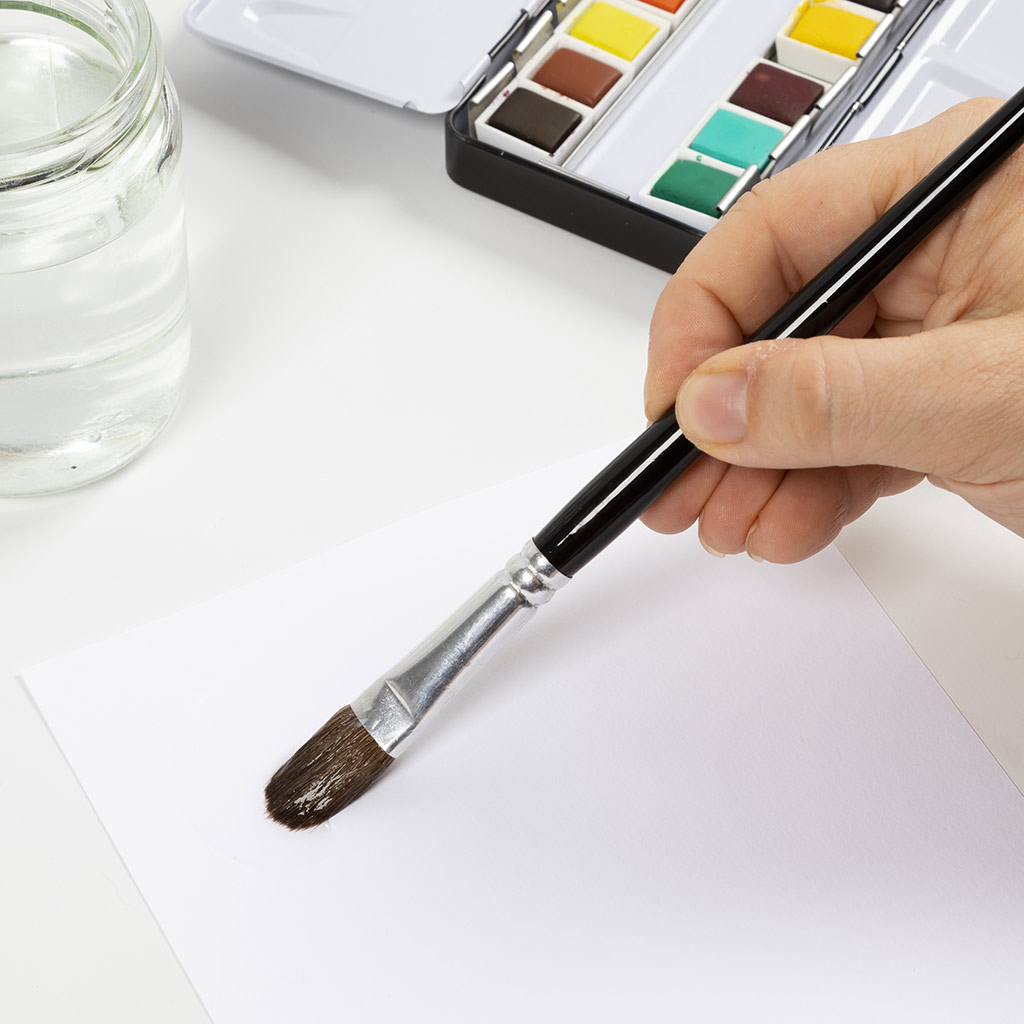 Dip the brush into water and paint a circle of water on the paper.
Dip the brush into water and paint a circle of water on the paper.3 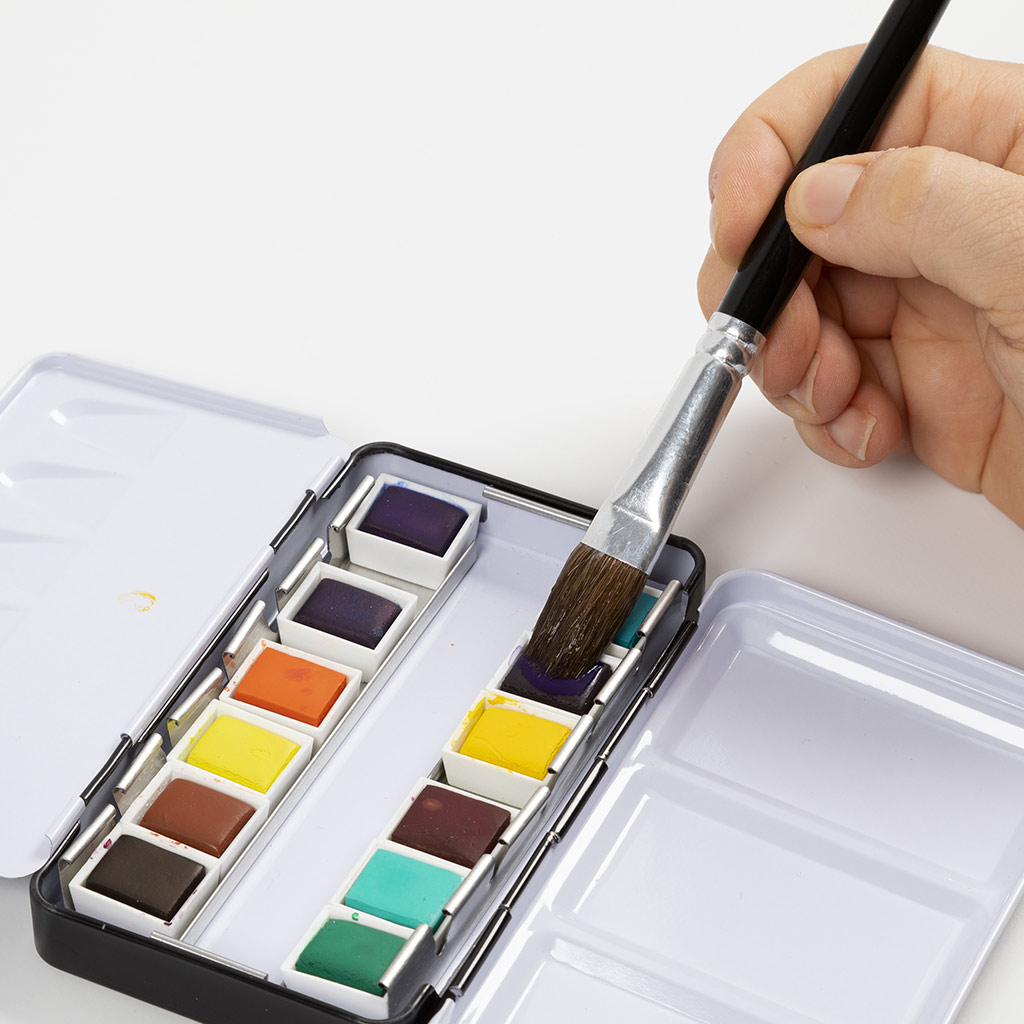 Now dip the brush in the desired colour. Colour 34 violet is used here.
Now dip the brush in the desired colour. Colour 34 violet is used here.4 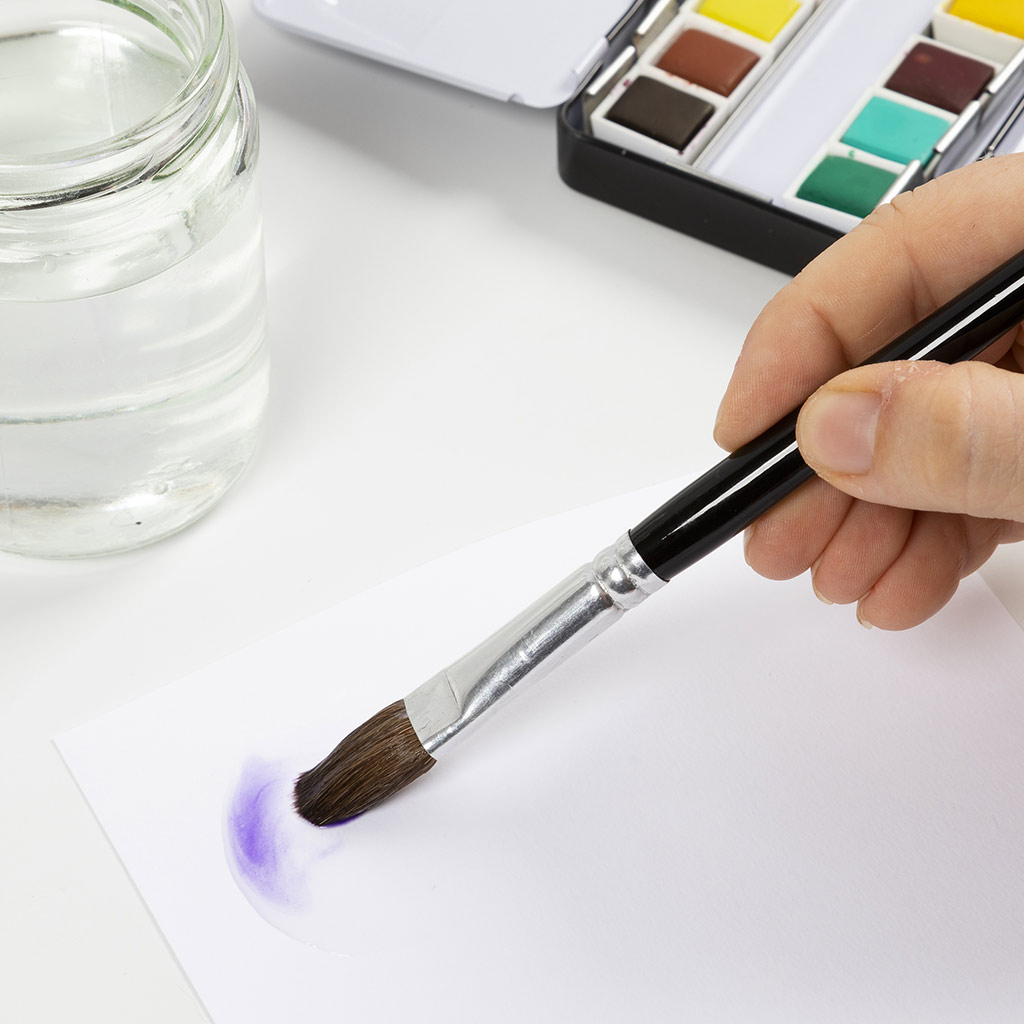 Paint 1/3 of the circle.
Paint 1/3 of the circle.5  Wash the brush.
Wash the brush.6 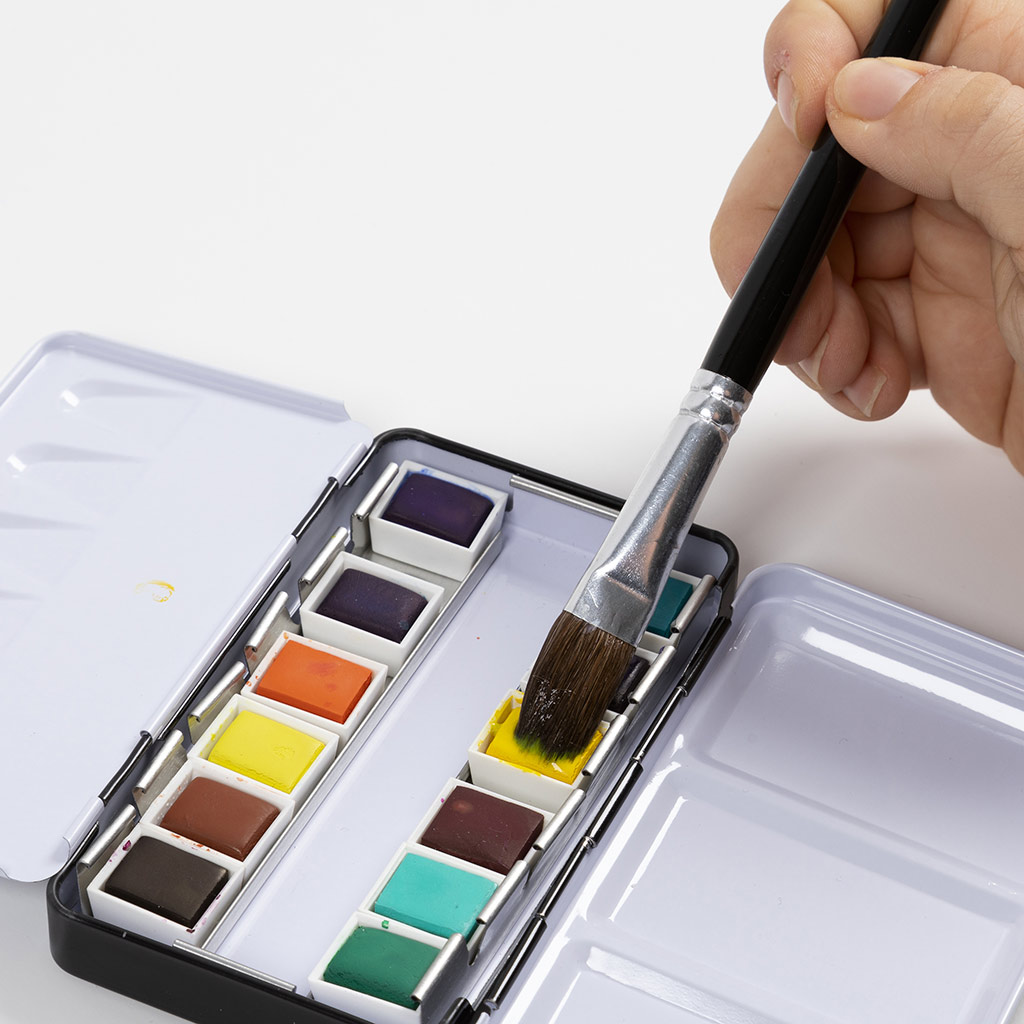 Dip the brush in another colour. The colour 03 brilliant yellow is used here.
Dip the brush in another colour. The colour 03 brilliant yellow is used here.7  Paint another 1/3 of the circle and let the colours flow together slightly for a smooth transition.
Paint another 1/3 of the circle and let the colours flow together slightly for a smooth transition.8  Wash the brush.
Wash the brush.9 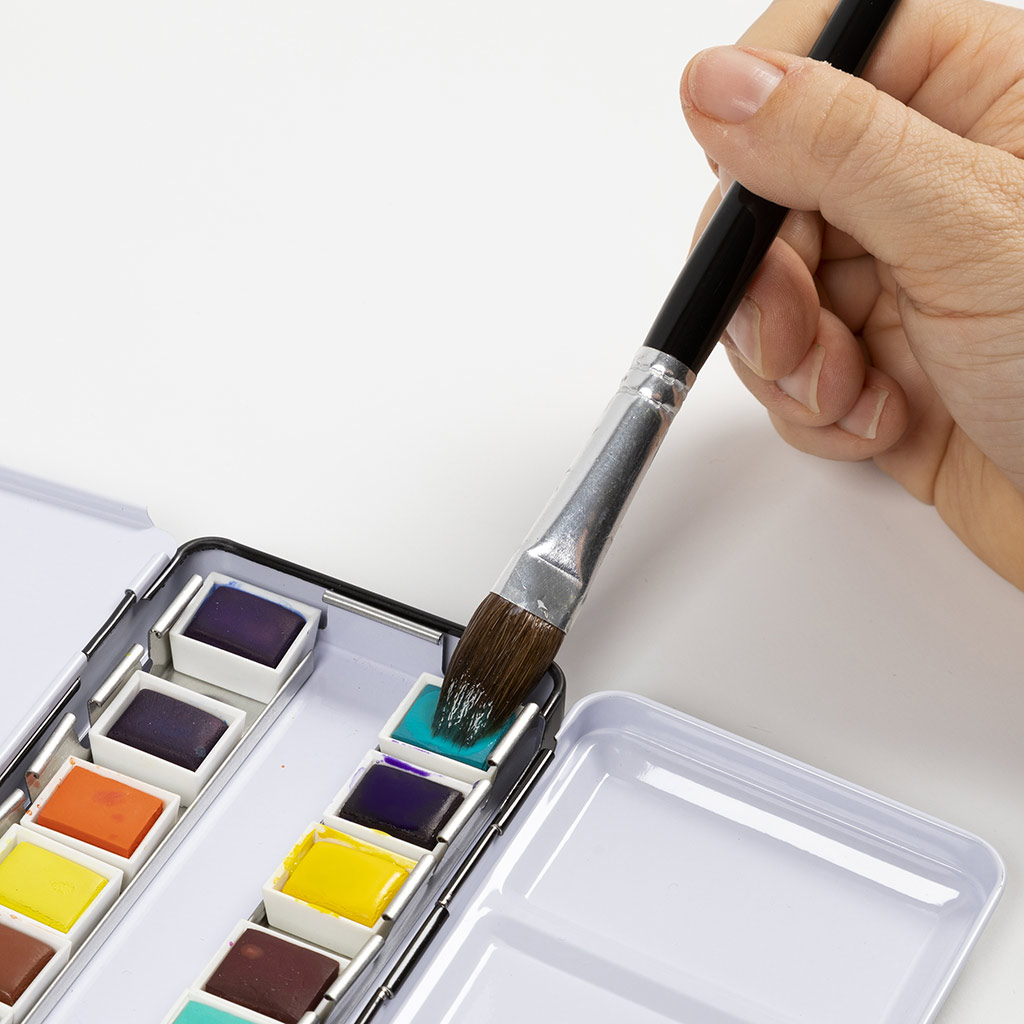 Dip the brush in another colour. The colour 28 lake blue is used here.
Dip the brush in another colour. The colour 28 lake blue is used here.10 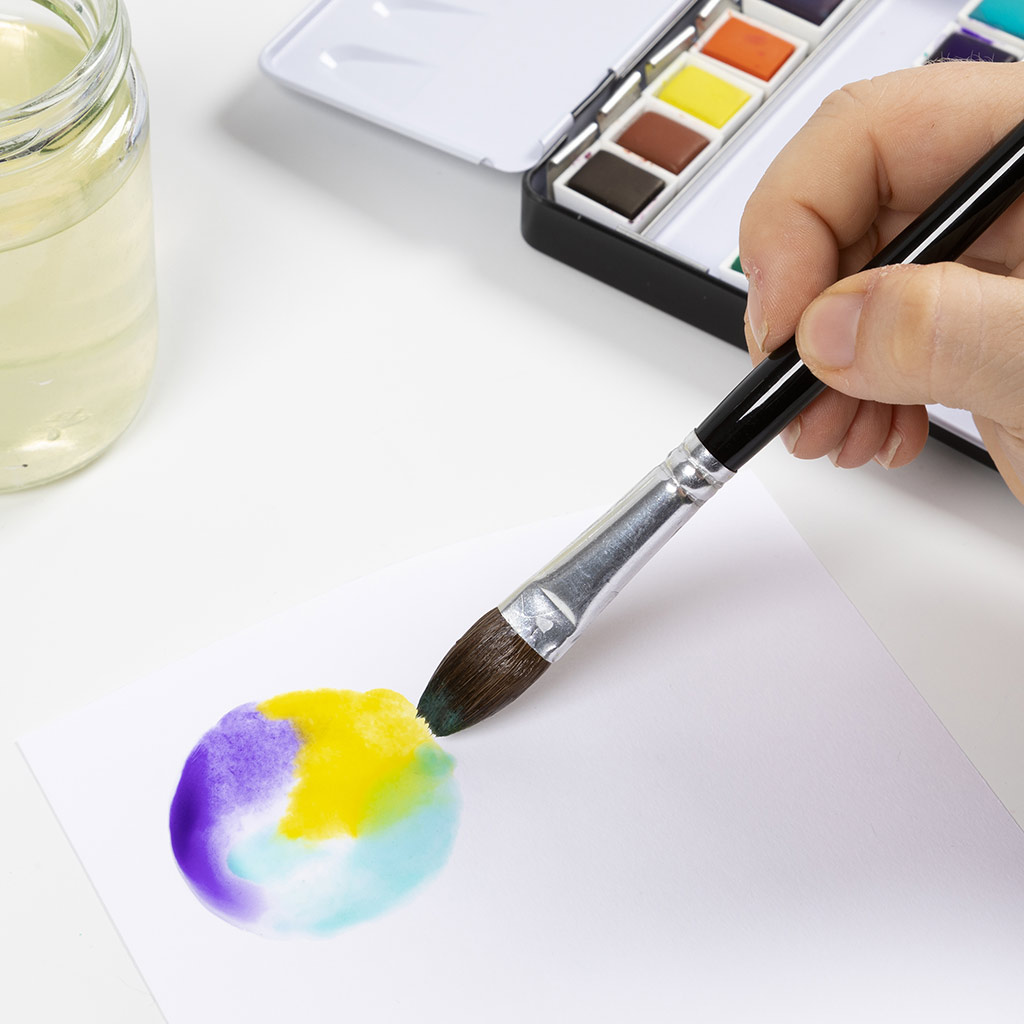 Paint the last third of the circle.
Paint the last third of the circle.11 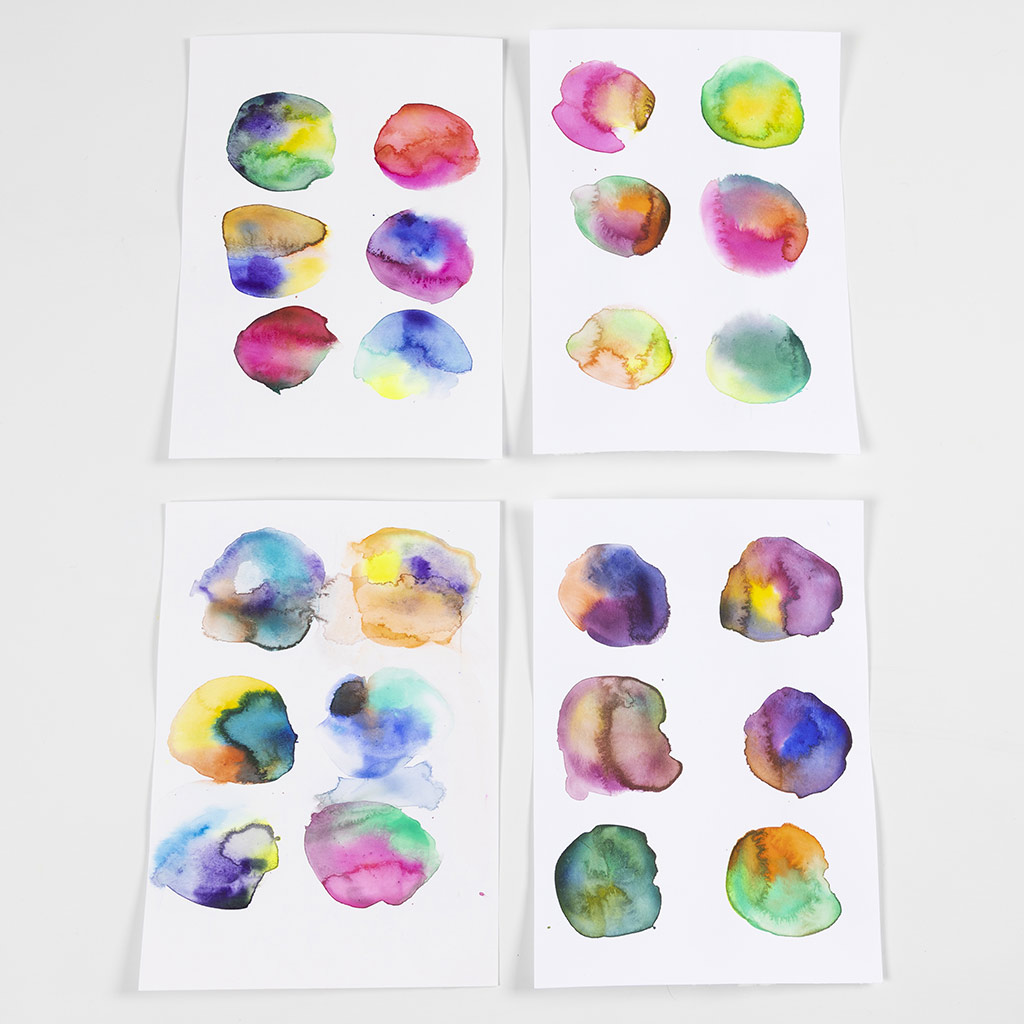 Experiment with other colour combinations. The picture here shows different examples of colour blending.
Experiment with other colour combinations. The picture here shows different examples of colour blending.12 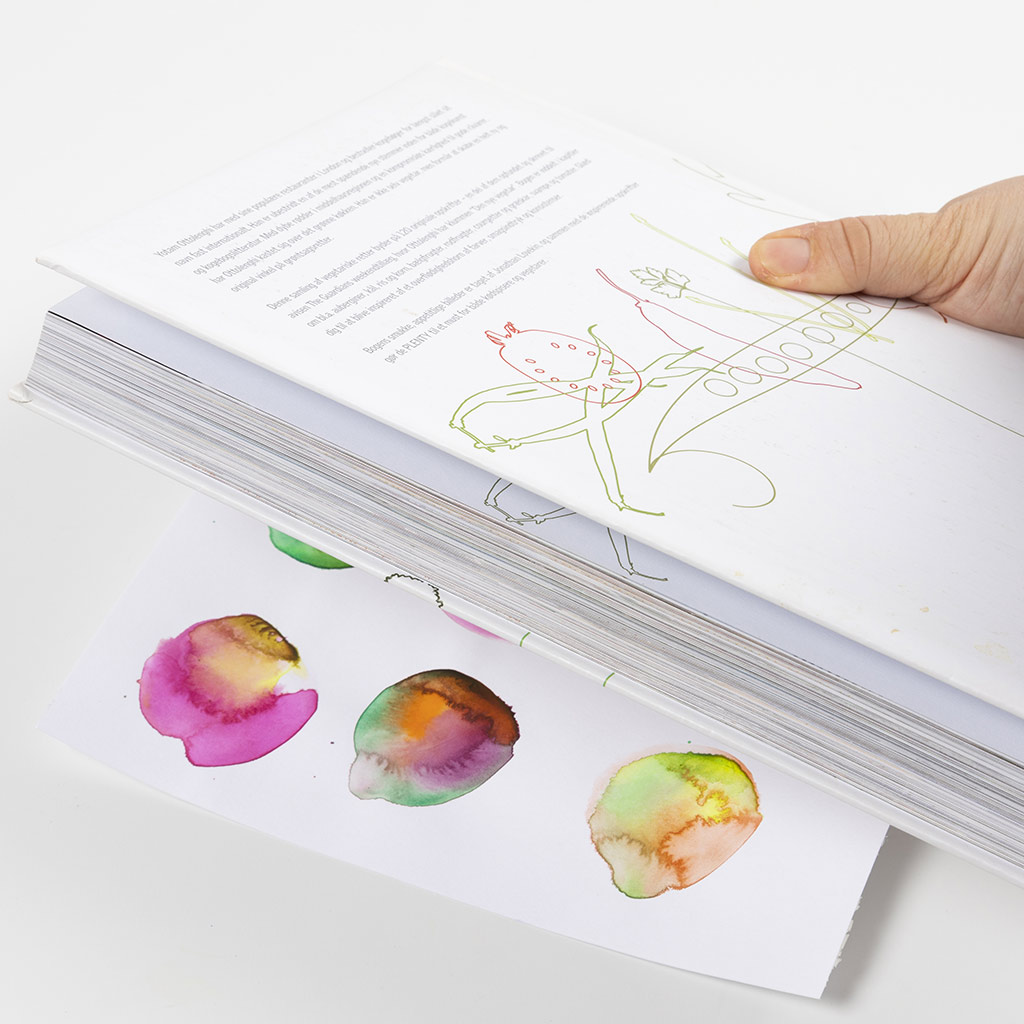 Once the paint is dry, the painting can be placed under a book or other heavy item because it can wrinkle slightly when using the wet-on-wet technique.
Once the paint is dry, the painting can be placed under a book or other heavy item because it can wrinkle slightly when using the wet-on-wet technique.13 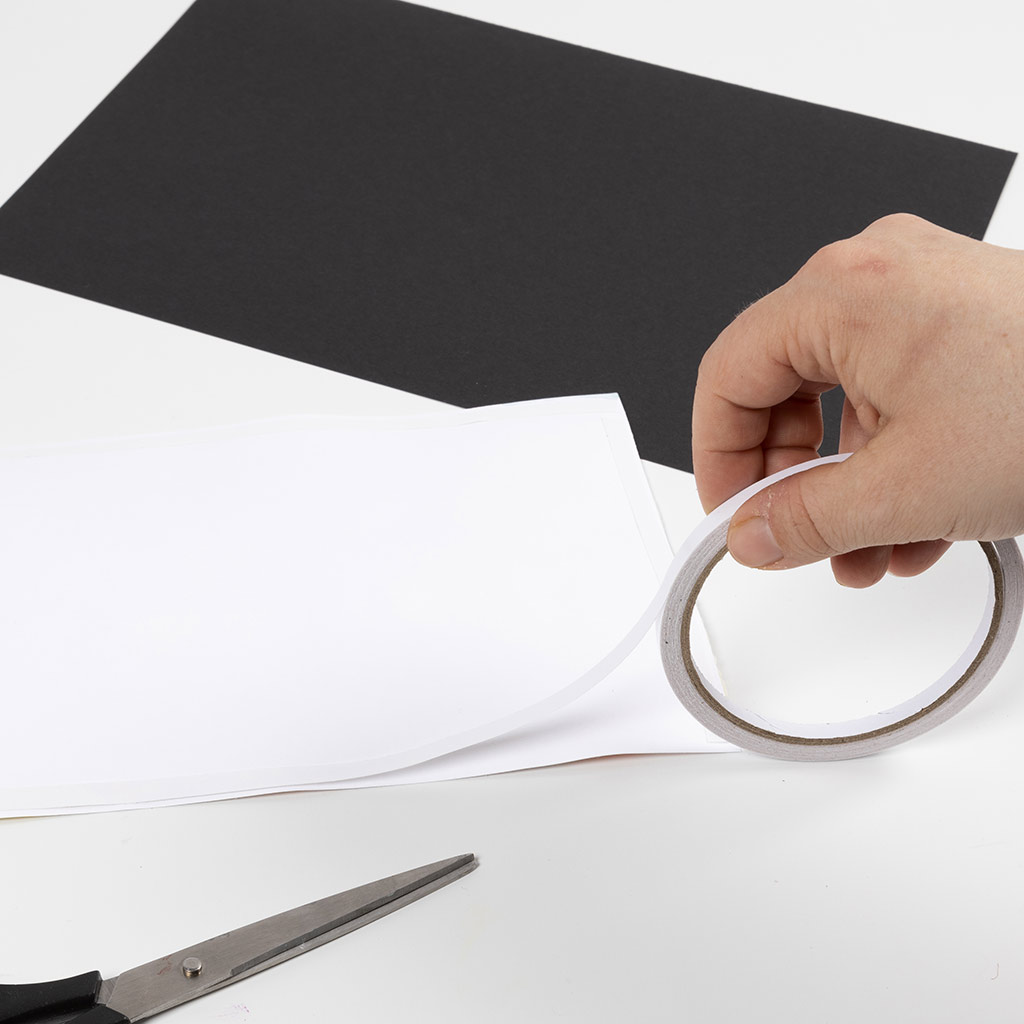 Place tape along the edges of the paper.
Place tape along the edges of the paper.14 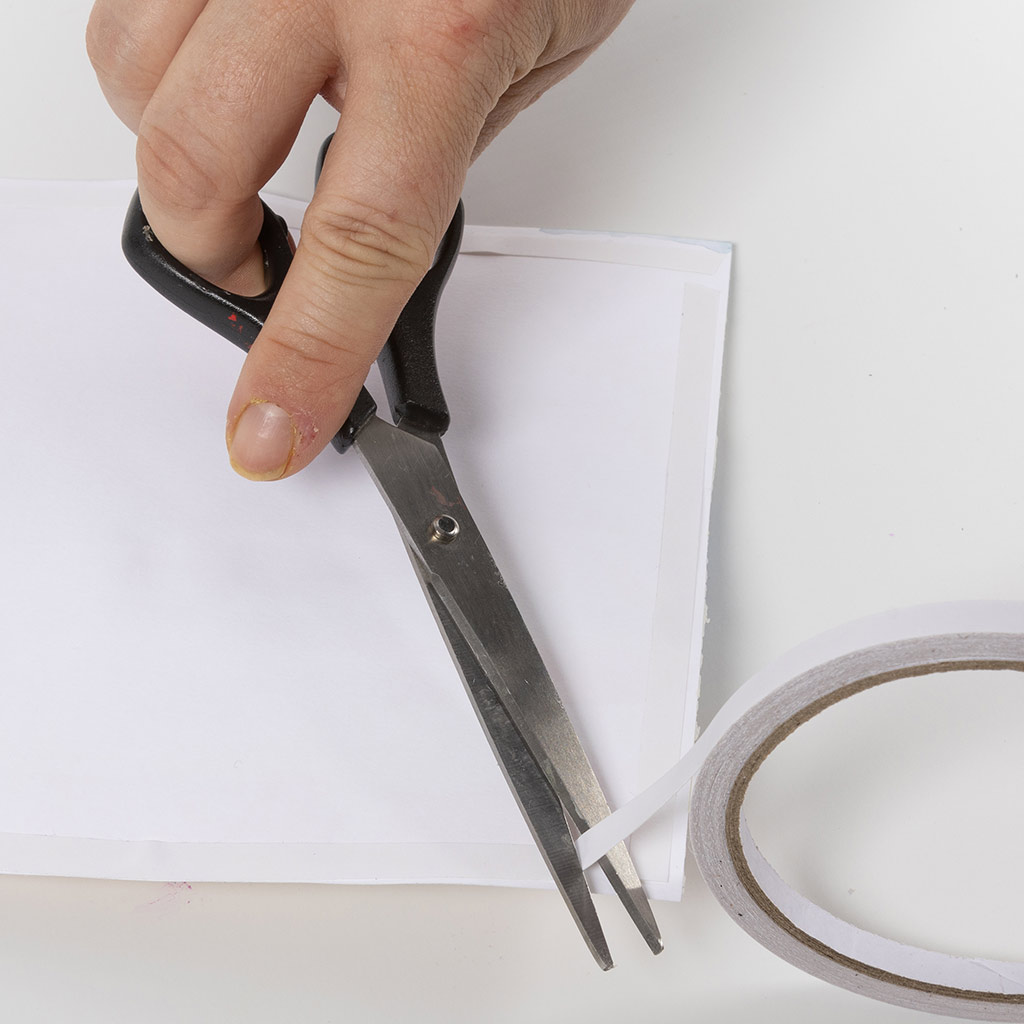 Cut to size.
Cut to size.15 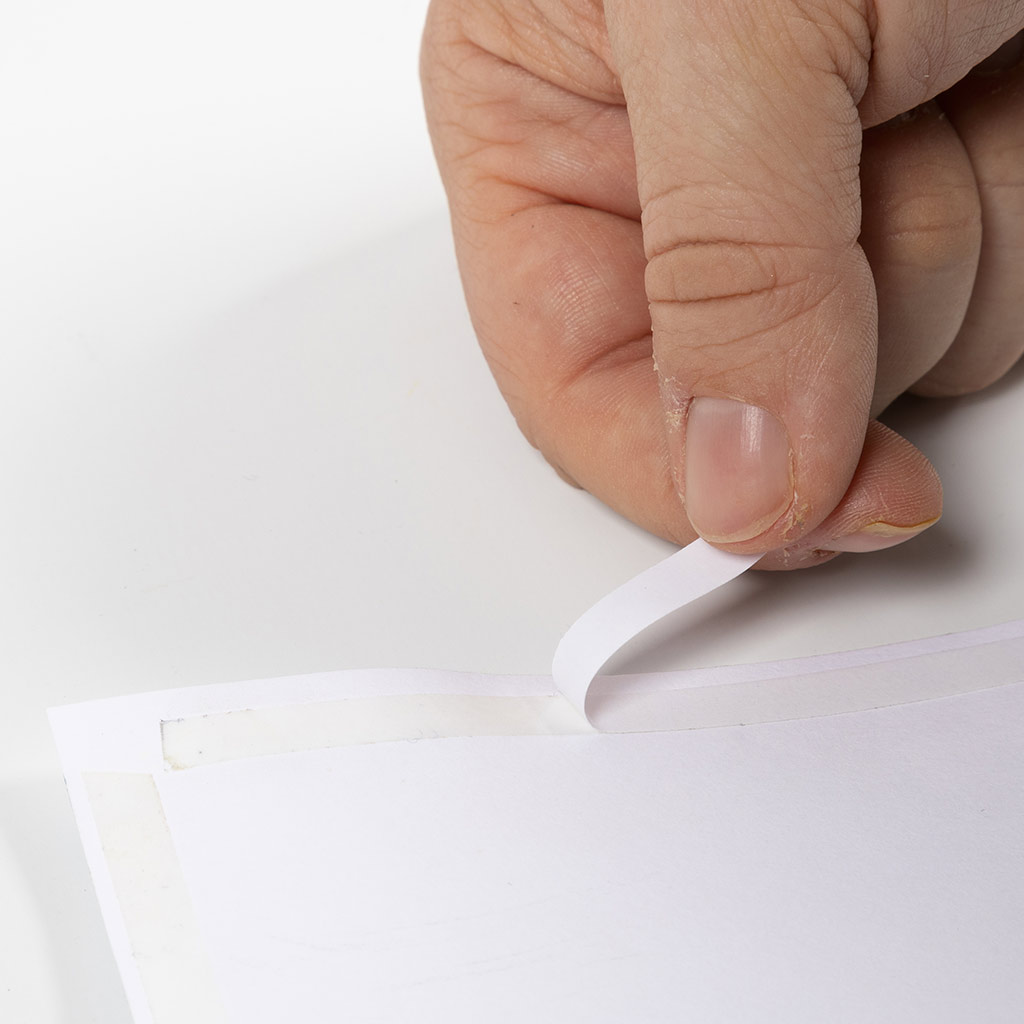 Peel off the plastic wrap to expose the adhesive.
Peel off the plastic wrap to expose the adhesive.16 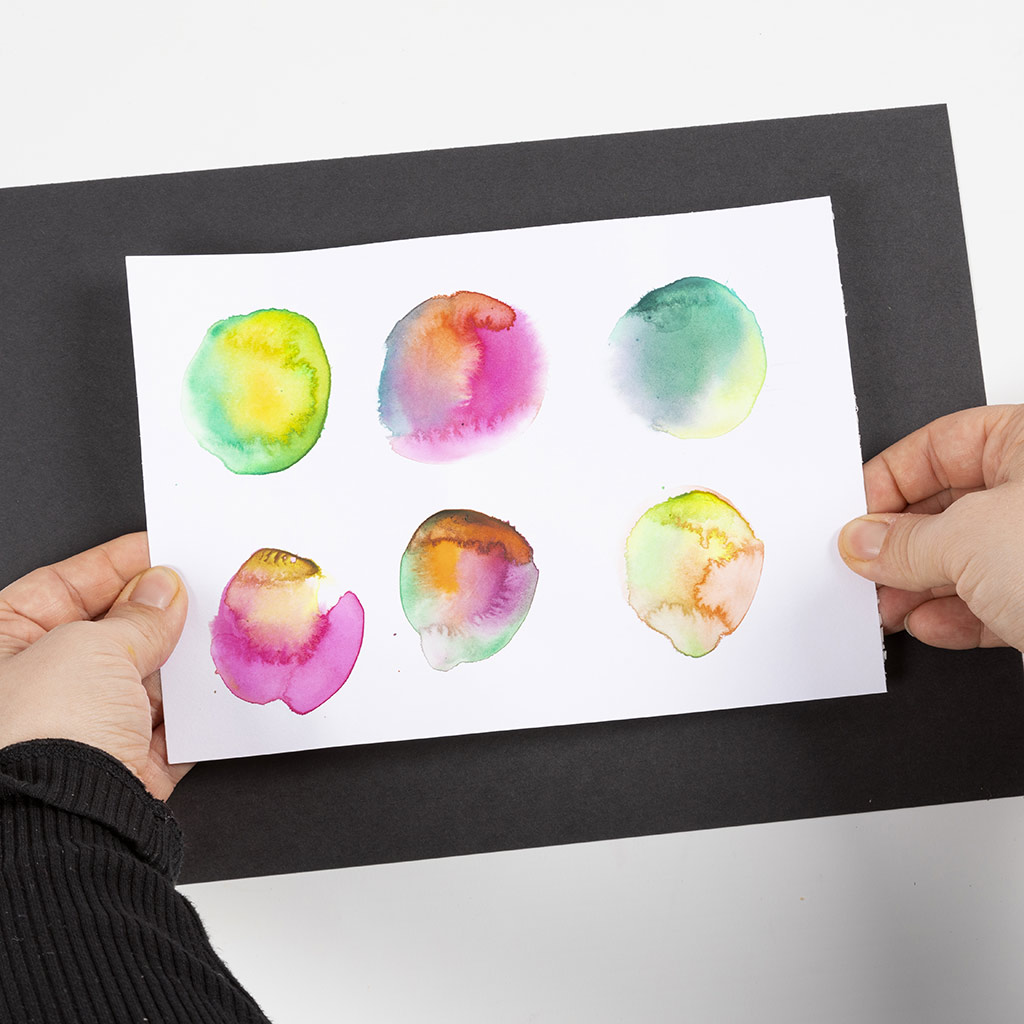 Place the paper with the circles in the middle of the black A4 cardboard paper.
Place the paper with the circles in the middle of the black A4 cardboard paper.17 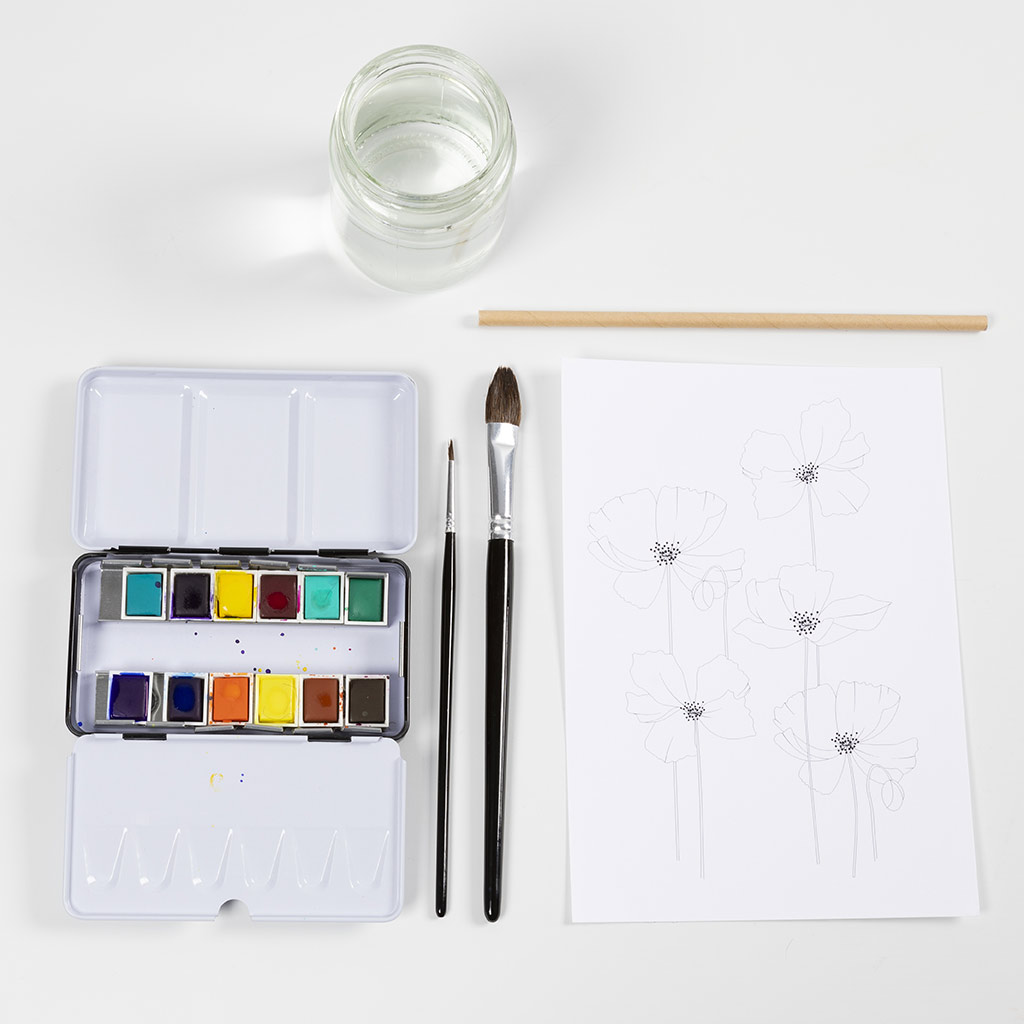 We are now going to paint the flowers. Use the colour circles to choose the colour combinations for your flowers. If you want to achieve the same result as in the example, the instructions will tell you which colours to use. Prepare everything you will need, as shown in the picture.
We are now going to paint the flowers. Use the colour circles to choose the colour combinations for your flowers. If you want to achieve the same result as in the example, the instructions will tell you which colours to use. Prepare everything you will need, as shown in the picture.18 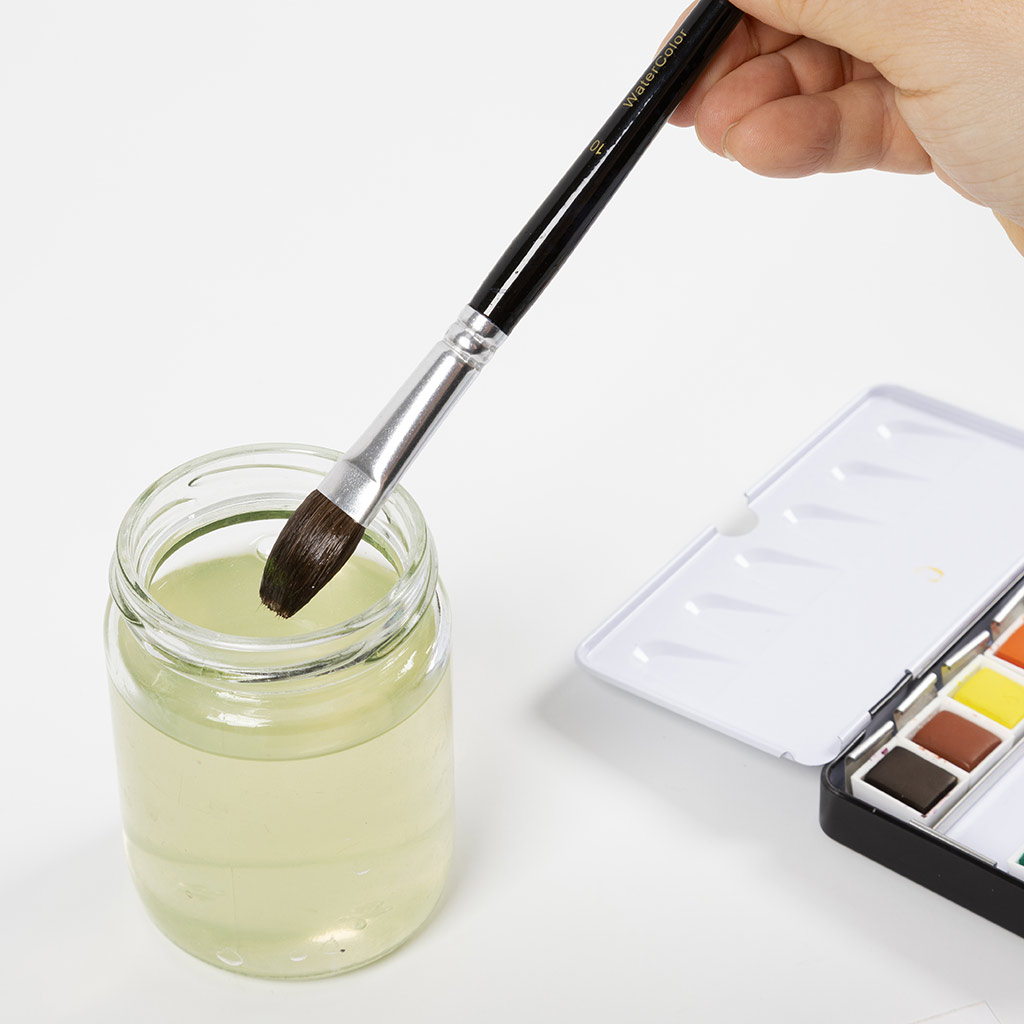 Dip the brush into the water.
Dip the brush into the water.19 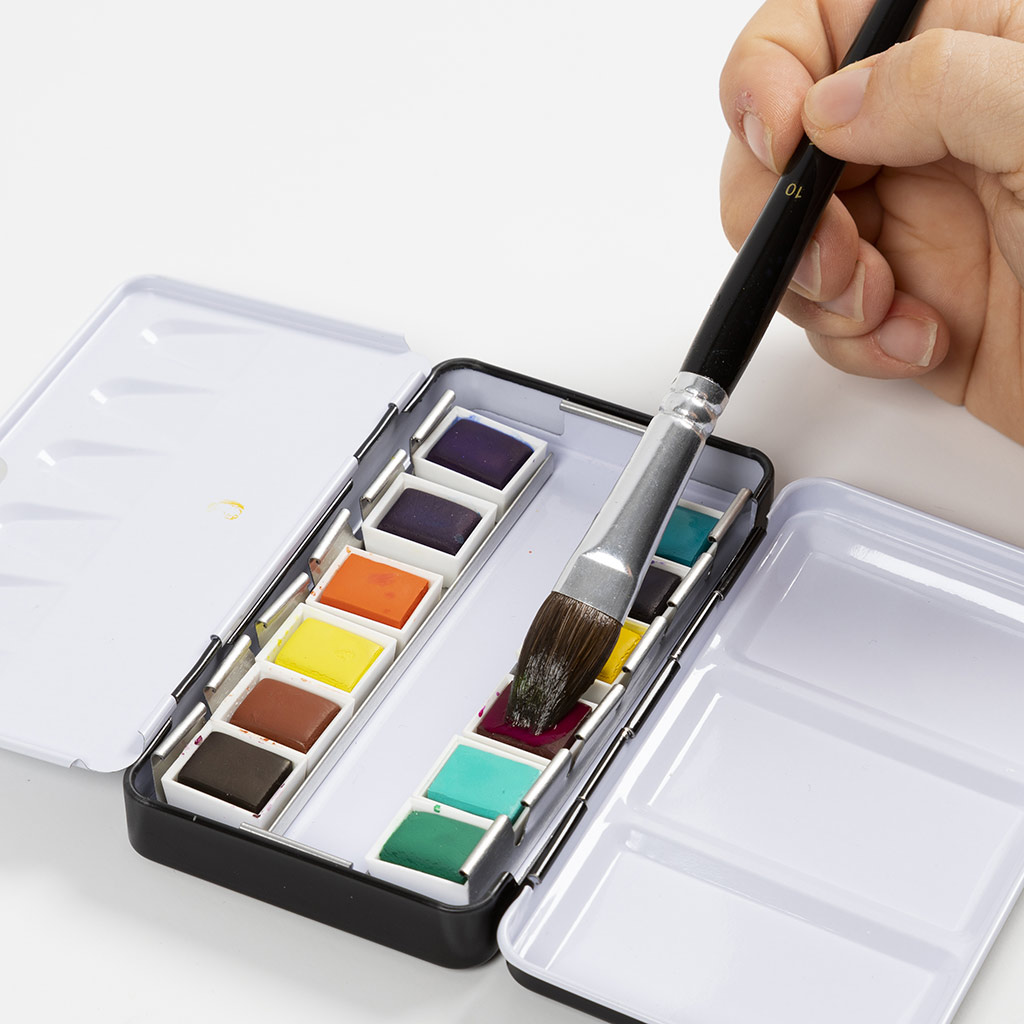 Now dip the brush in the desired colour. The colour 22 cerise is used here.
Now dip the brush in the desired colour. The colour 22 cerise is used here.20 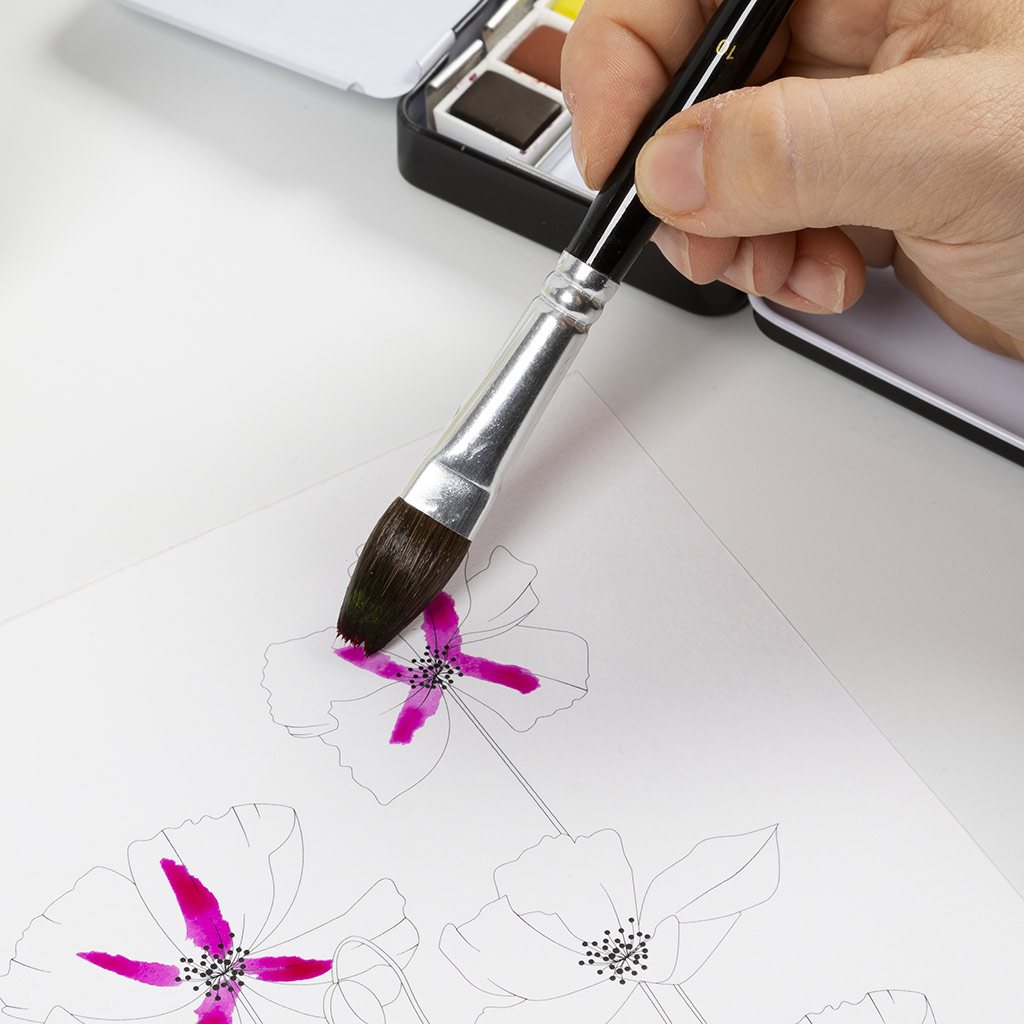 Now paint lines from the centre outwards, as shown in the picture. You do not have to paint within the lines.
Now paint lines from the centre outwards, as shown in the picture. You do not have to paint within the lines.21  Wash the brush.
Wash the brush.22  Dip the brush in another colour. The colour 10 orange is used here.
Dip the brush in another colour. The colour 10 orange is used here.23 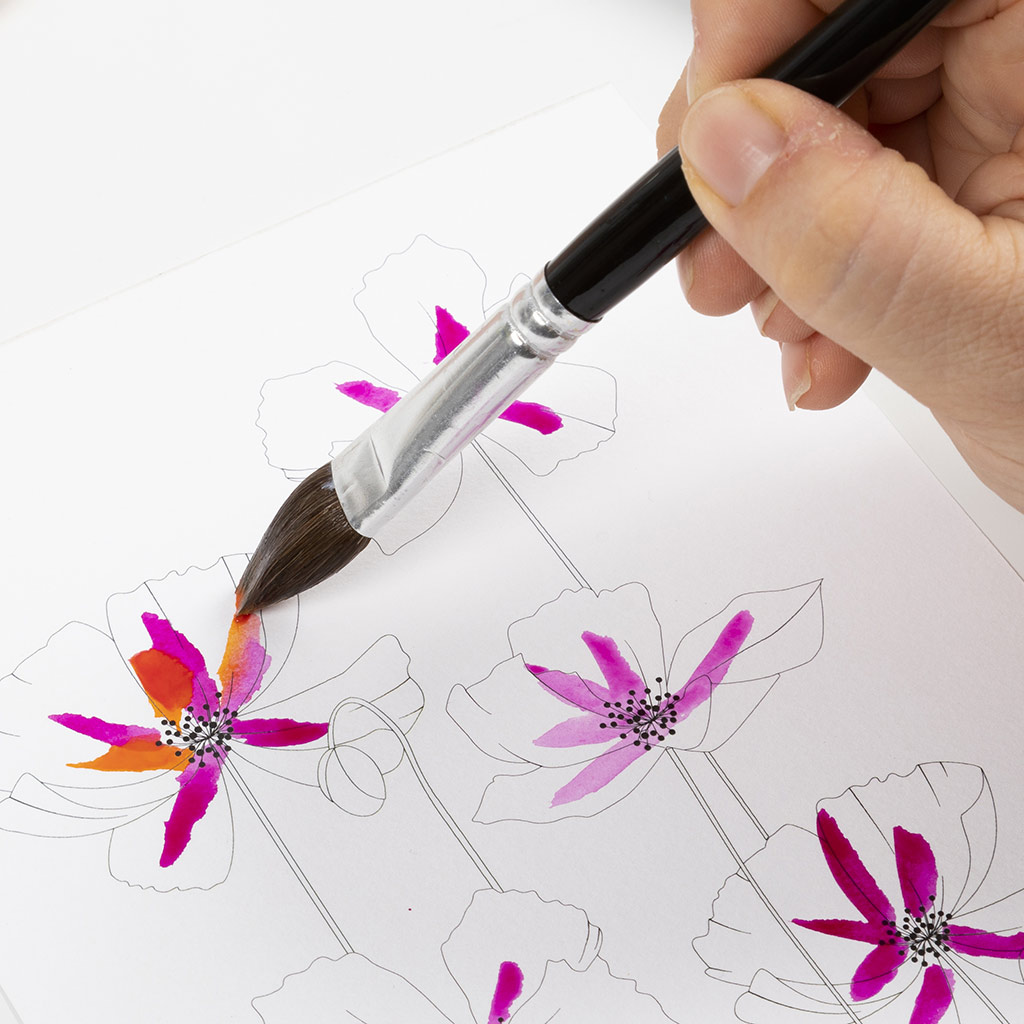 Now paint from the centre outwards with the new colour. The colours may blend together.
Now paint from the centre outwards with the new colour. The colours may blend together.24 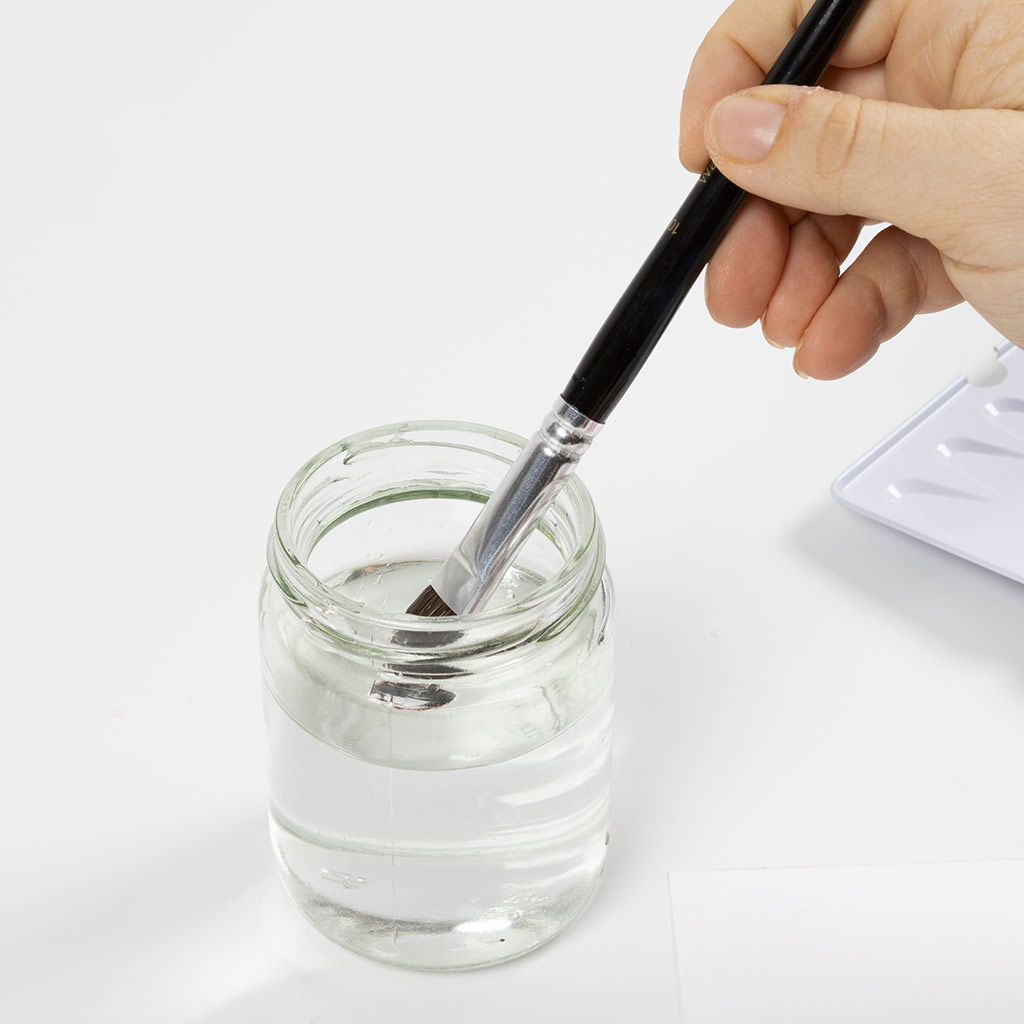 Wash the brush thoroughly and dip it in a glass of clean water because we will now use the water to blend the colours even more.
Wash the brush thoroughly and dip it in a glass of clean water because we will now use the water to blend the colours even more.25 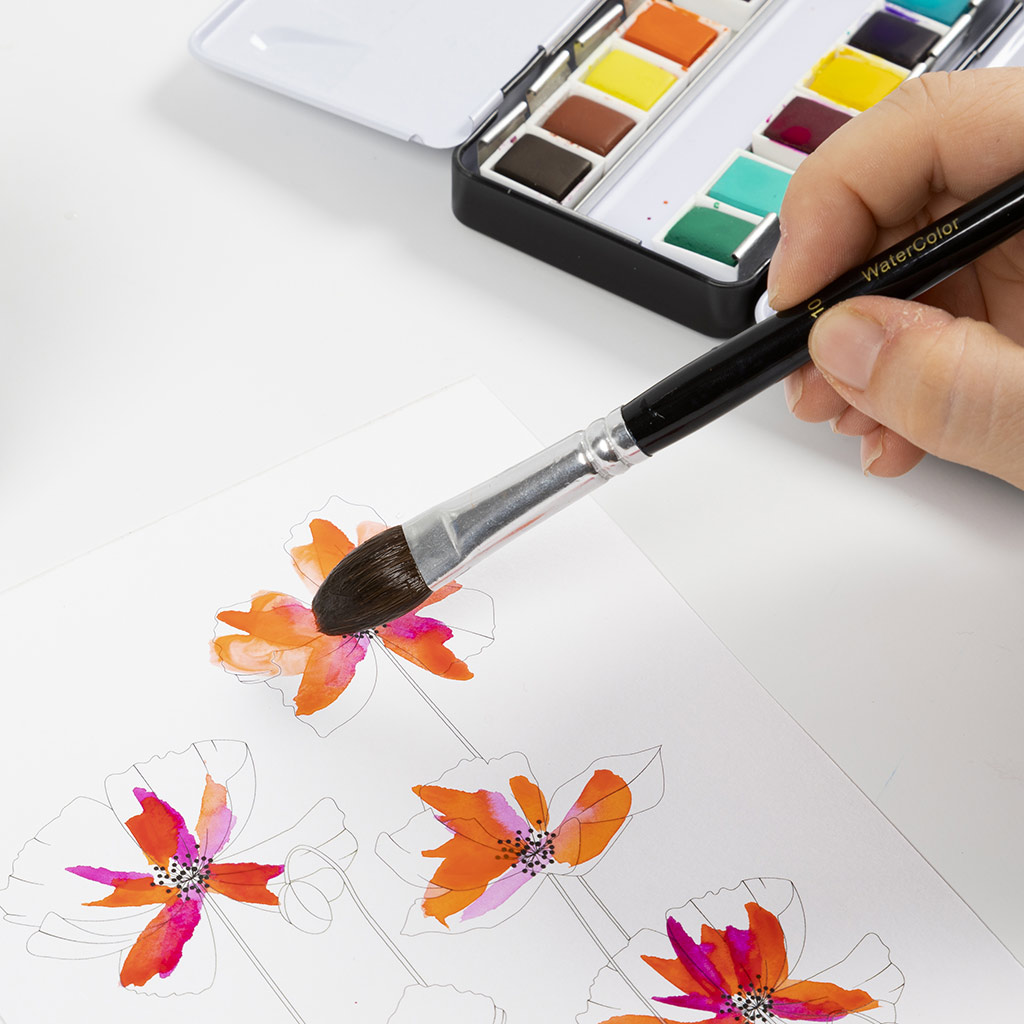 Blend the colours together with water.
Blend the colours together with water.26  Wash the brush.
Wash the brush.27 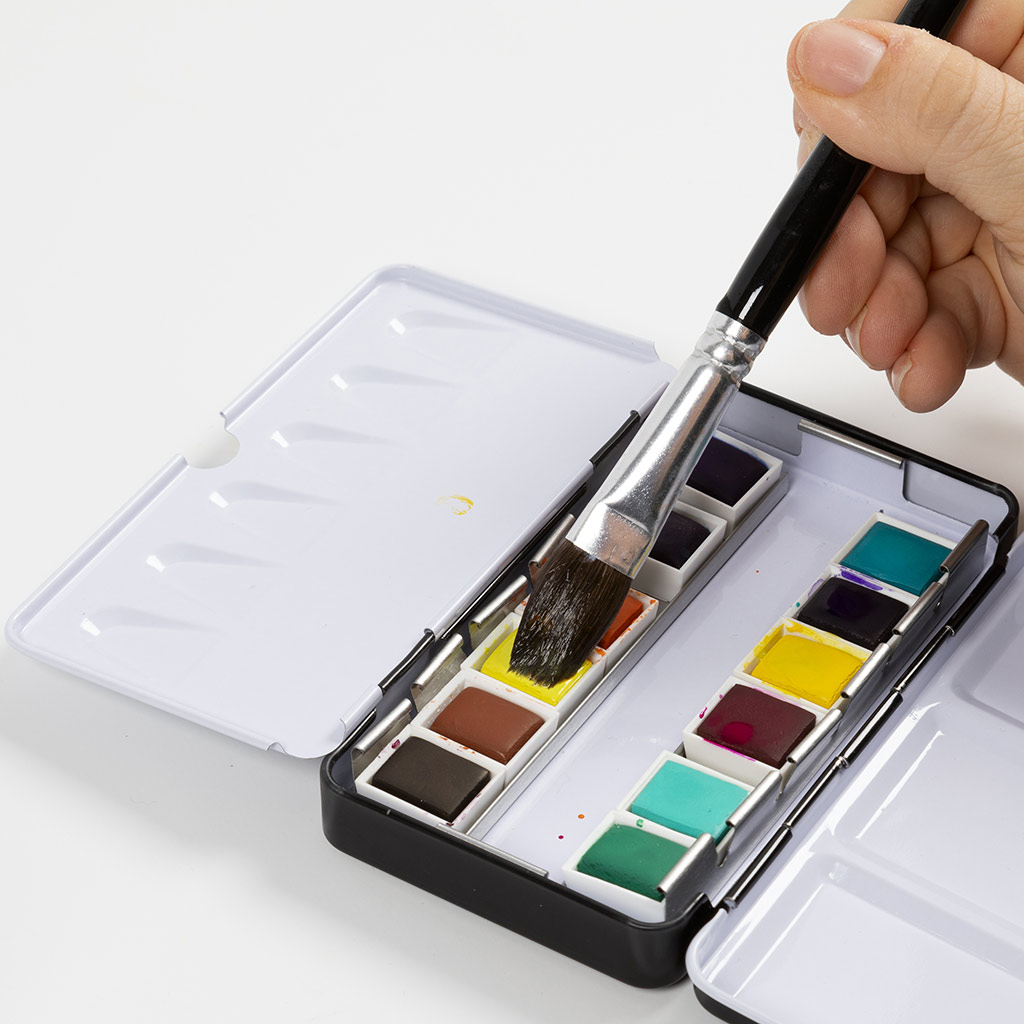 Dip the brush in a new colour. The colour 01 lemon yellow is used here.
Dip the brush in a new colour. The colour 01 lemon yellow is used here.28 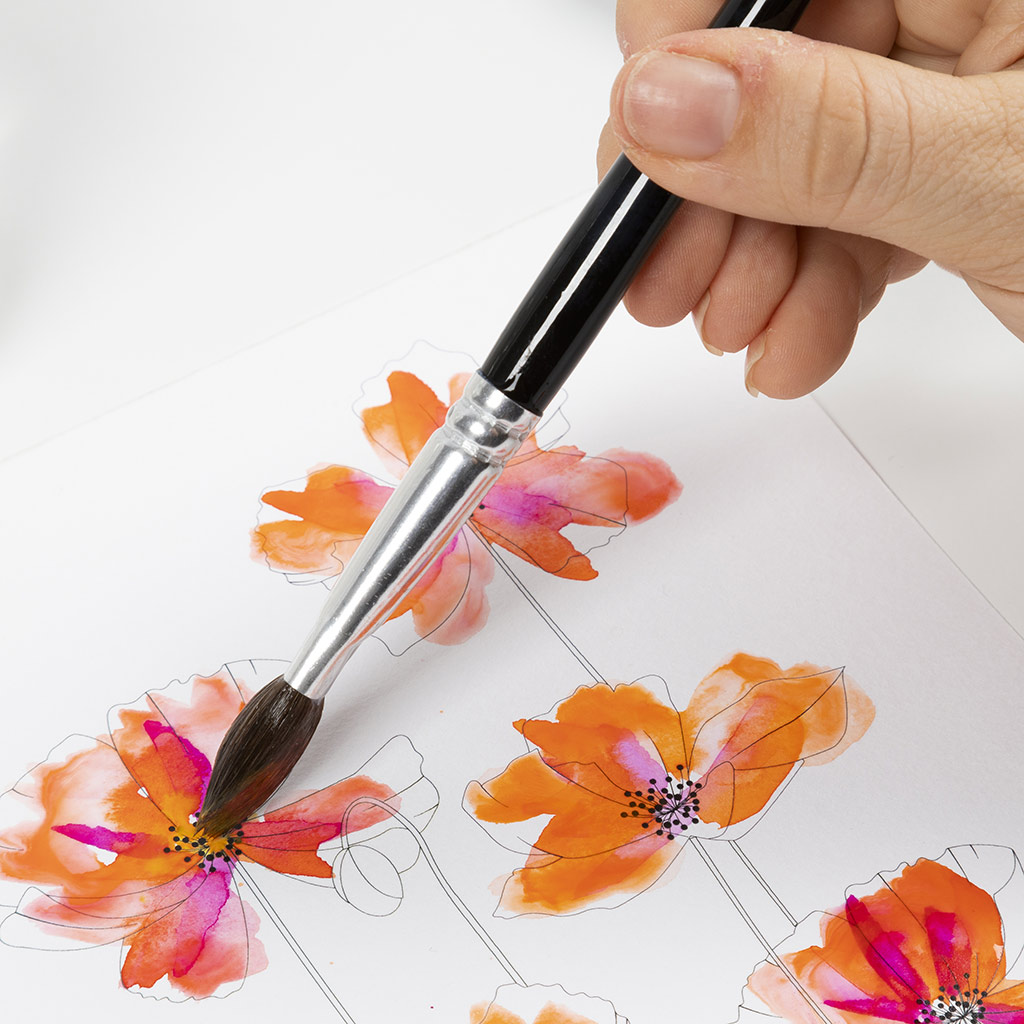 Paint the rest of each flower with this colour.
Paint the rest of each flower with this colour.29  Wash the brush.
Wash the brush.30 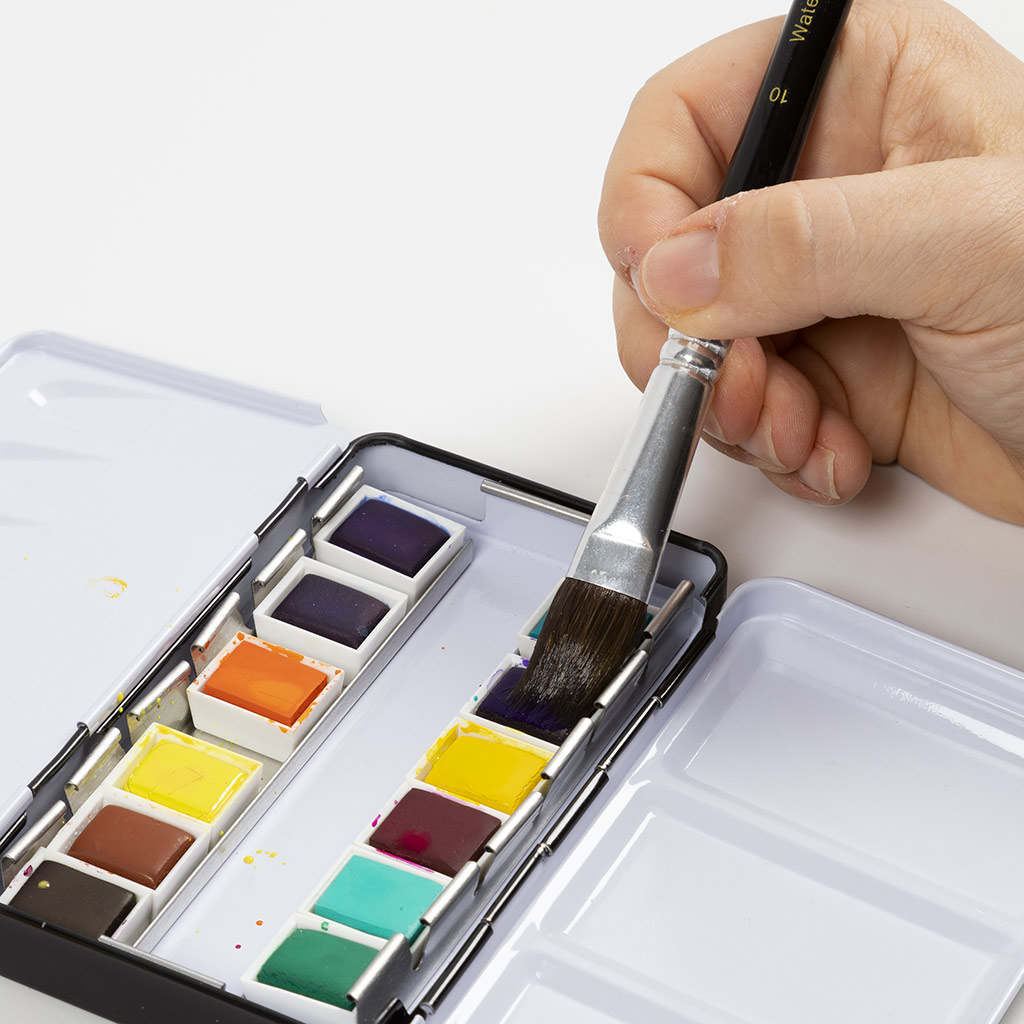 Dip the brush in another colour. The colour 34 violet is used here.
Dip the brush in another colour. The colour 34 violet is used here.31 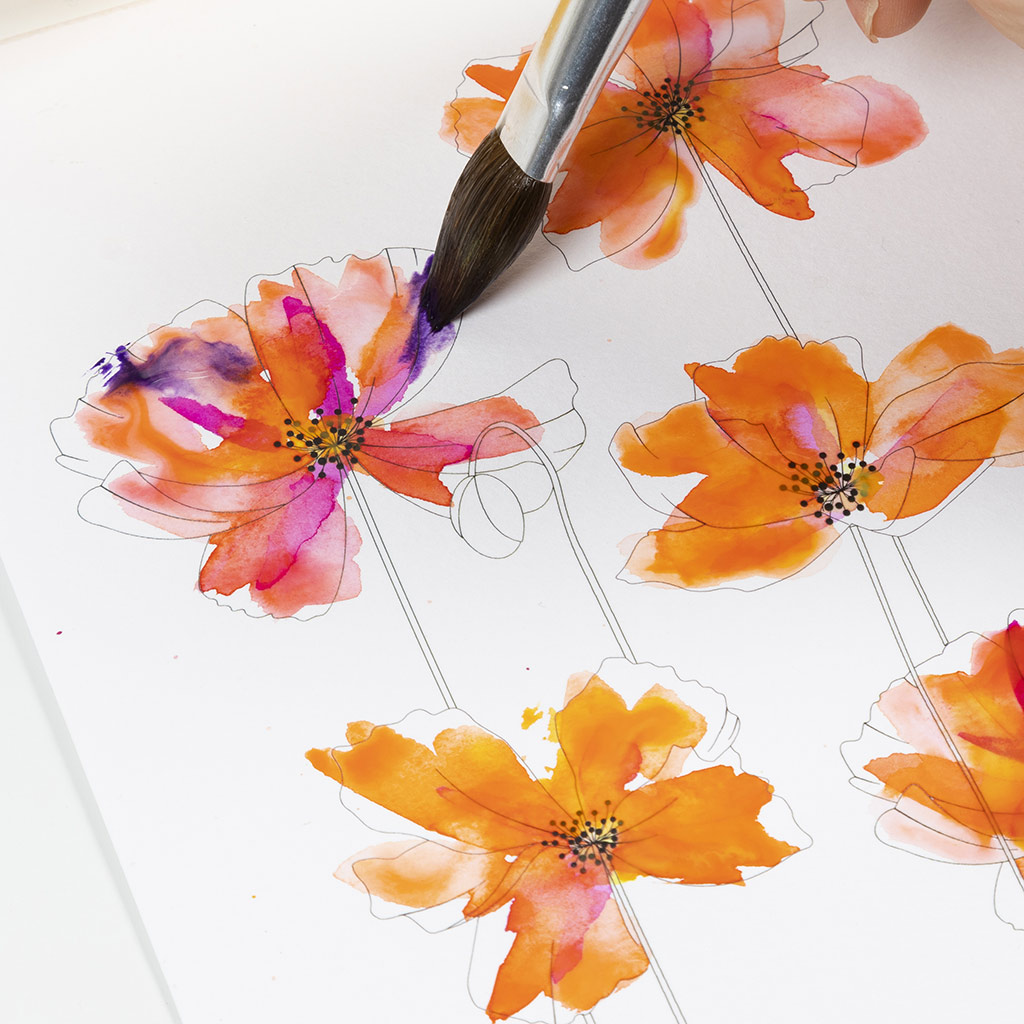 Randomly paint small dots along the edges of the petals, as shown in the picture.
Randomly paint small dots along the edges of the petals, as shown in the picture.32 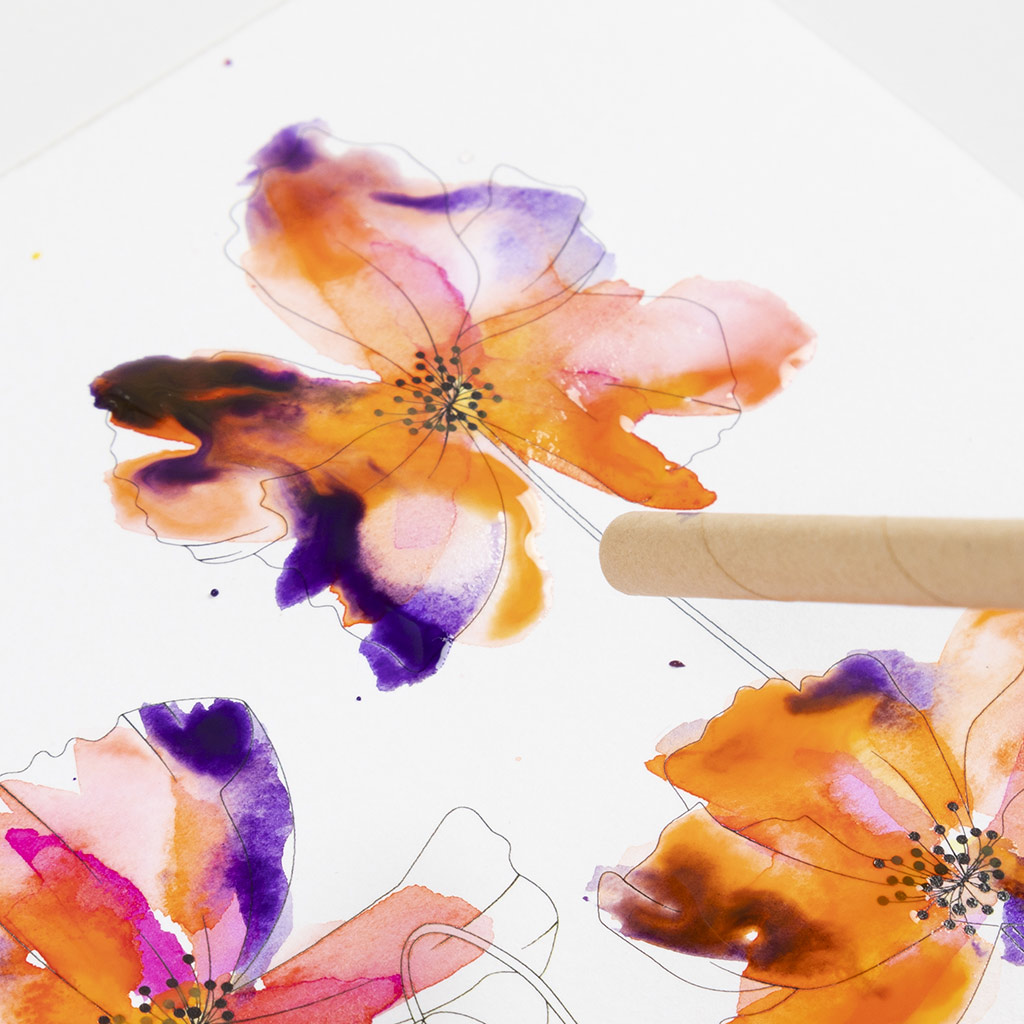 Use a straw to gently blow on the colours to blend them together.
Use a straw to gently blow on the colours to blend them together.33 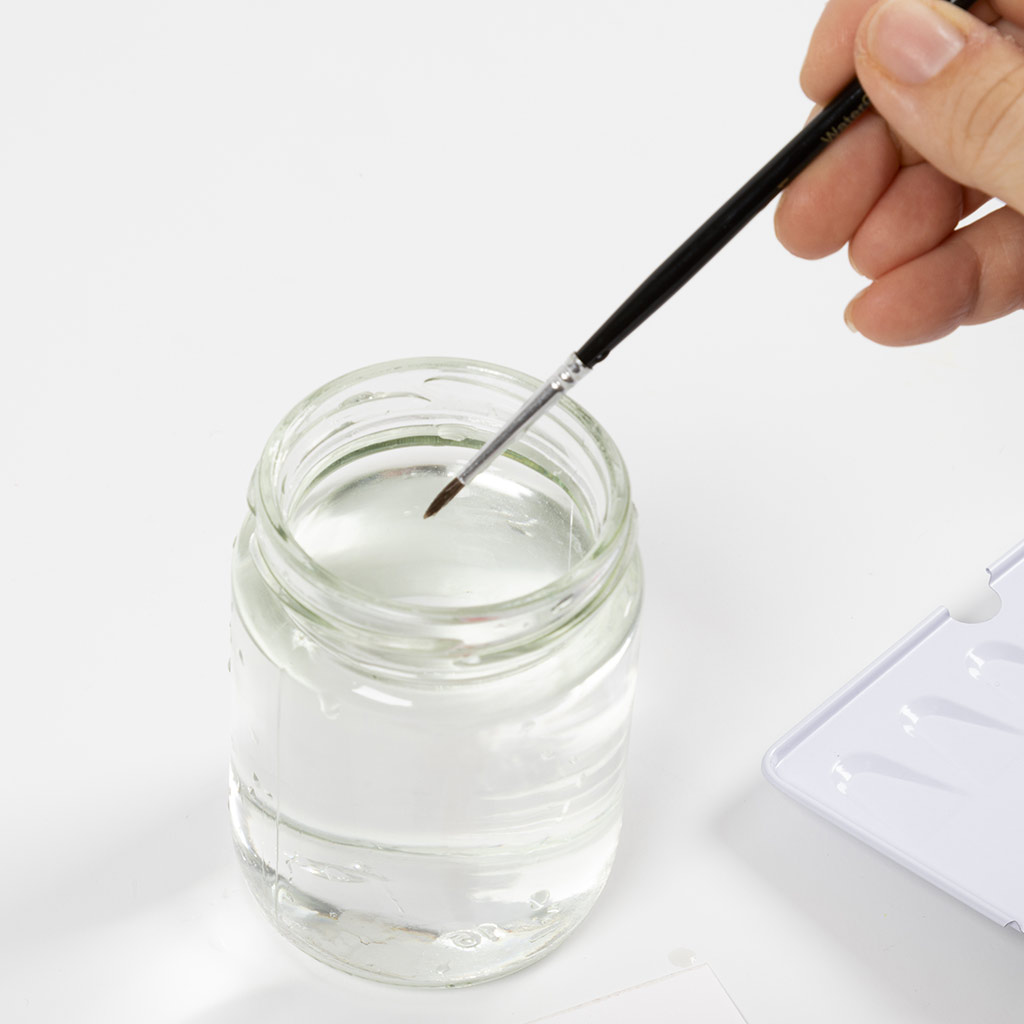 The stems are painted next. Dip the thin brush into water.
The stems are painted next. Dip the thin brush into water.34 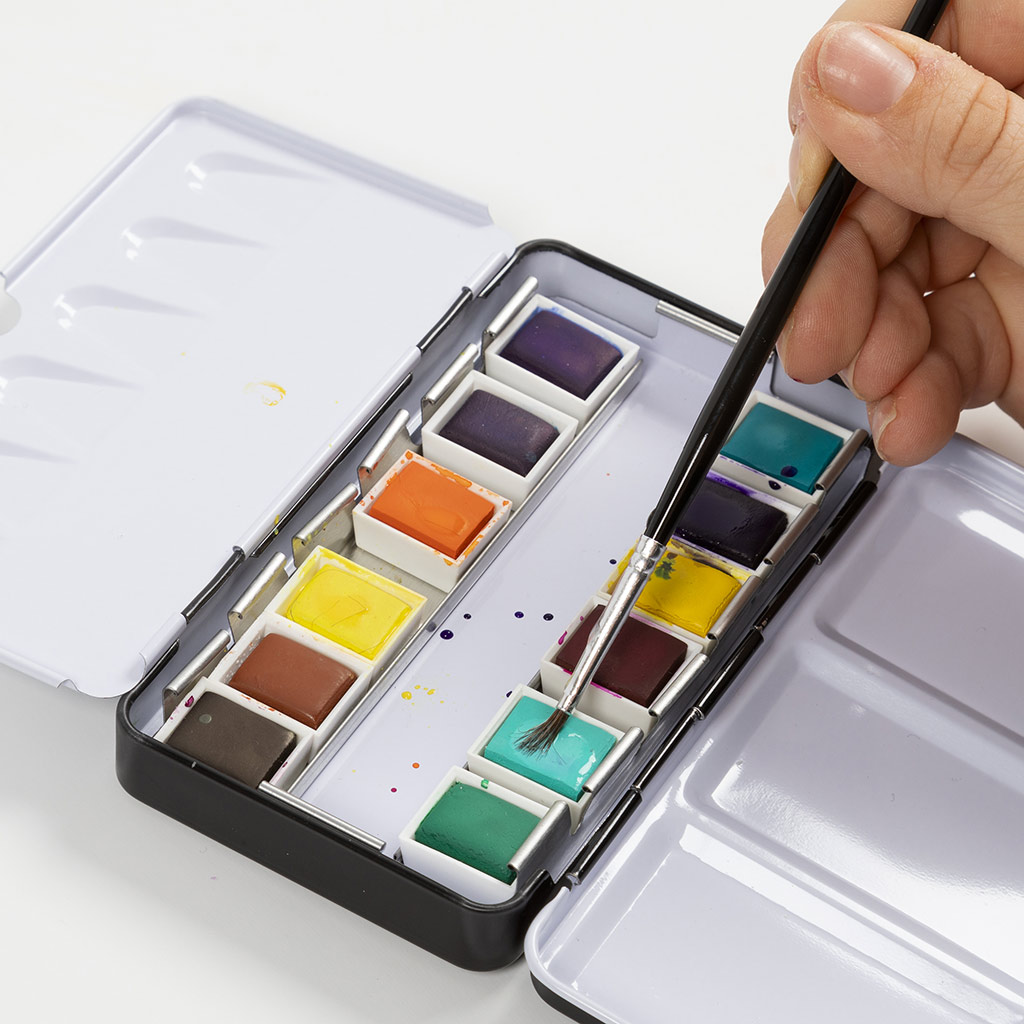 Dip in whichever colour you want for the stems. The colour 35 light green is used here.
Dip in whichever colour you want for the stems. The colour 35 light green is used here.35 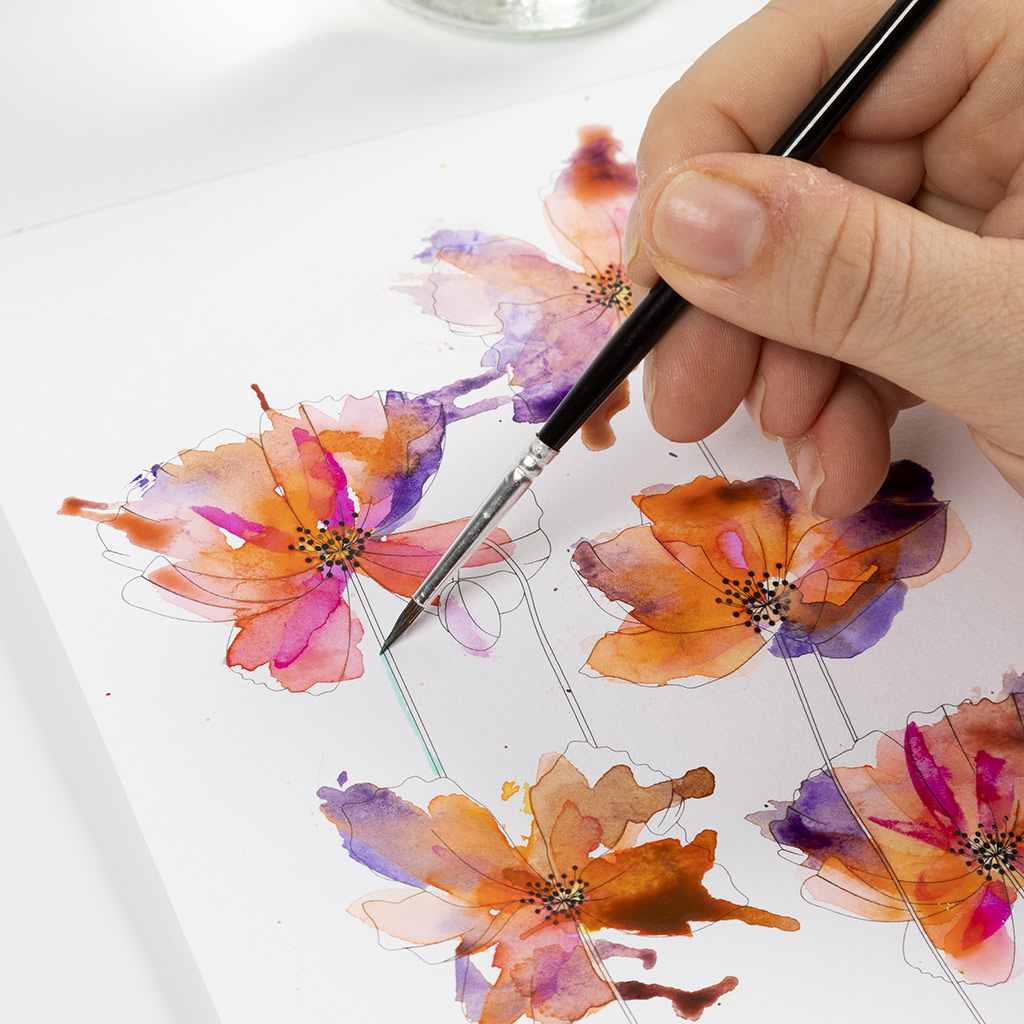 Paint the stems and allow to dry. Repeat steps 12-16.
Paint the stems and allow to dry. Repeat steps 12-16.36 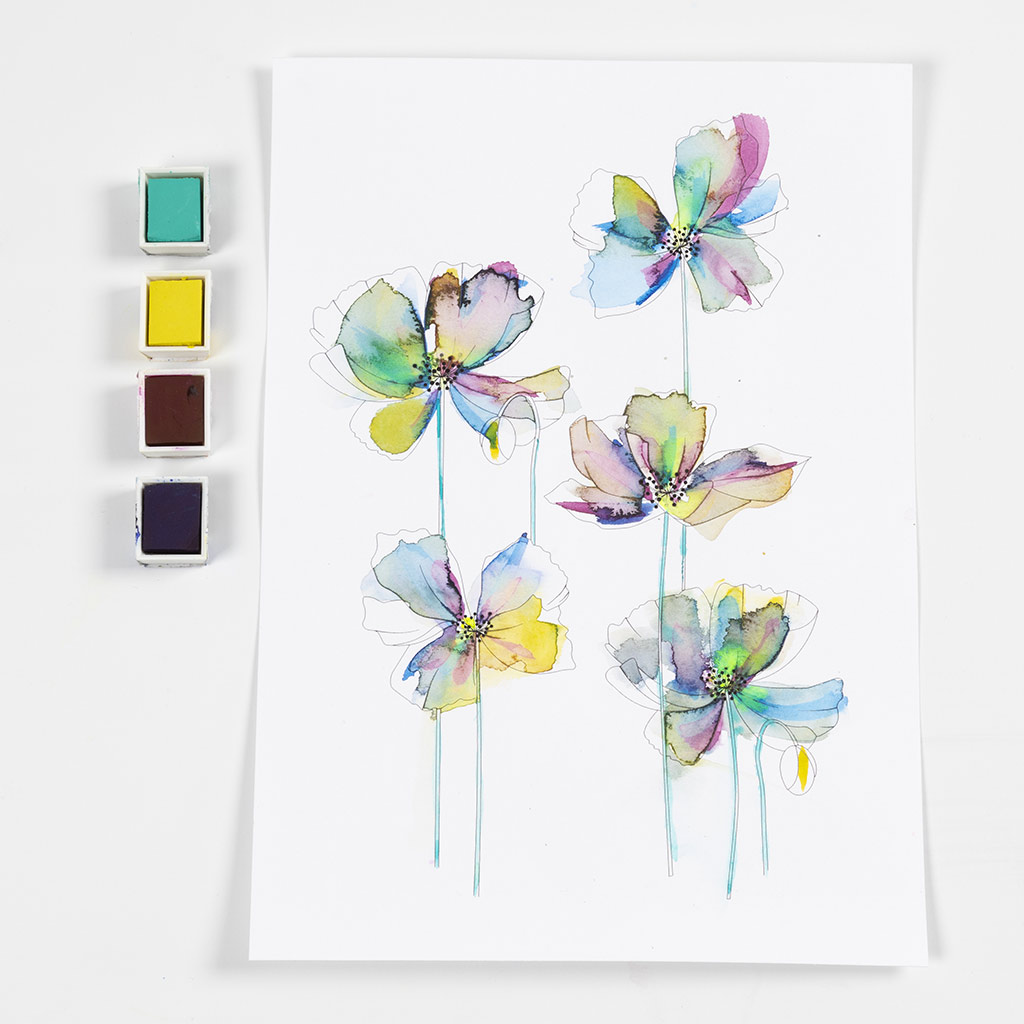 The picture here shows other possible colour combinations. The colours 35 light green, 03 brilliant yellow, 22 cerise and 33 prussian blue have been used here.
The picture here shows other possible colour combinations. The colours 35 light green, 03 brilliant yellow, 22 cerise and 33 prussian blue have been used here.37 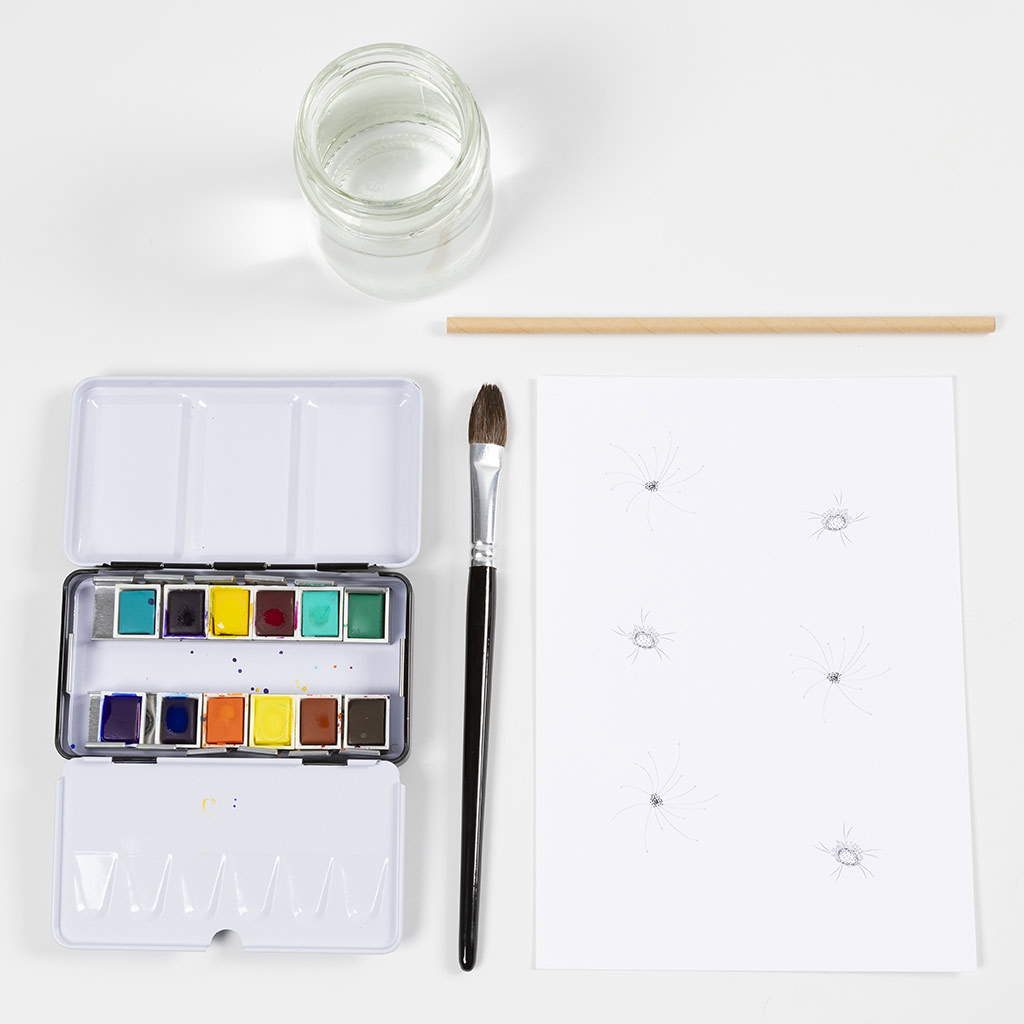 Prepare everything you will need, as shown in the picture.
Prepare everything you will need, as shown in the picture.38 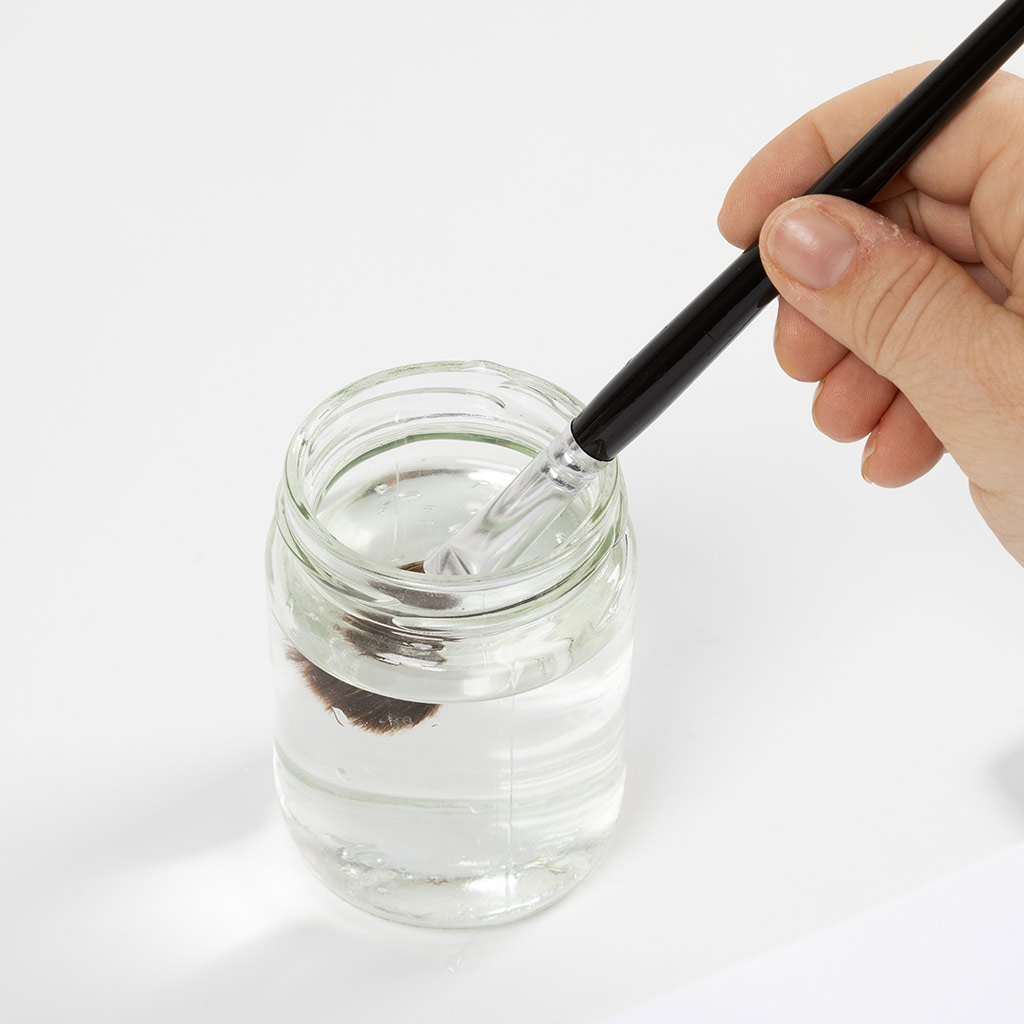 Dip the brush into clean water.
Dip the brush into clean water.39 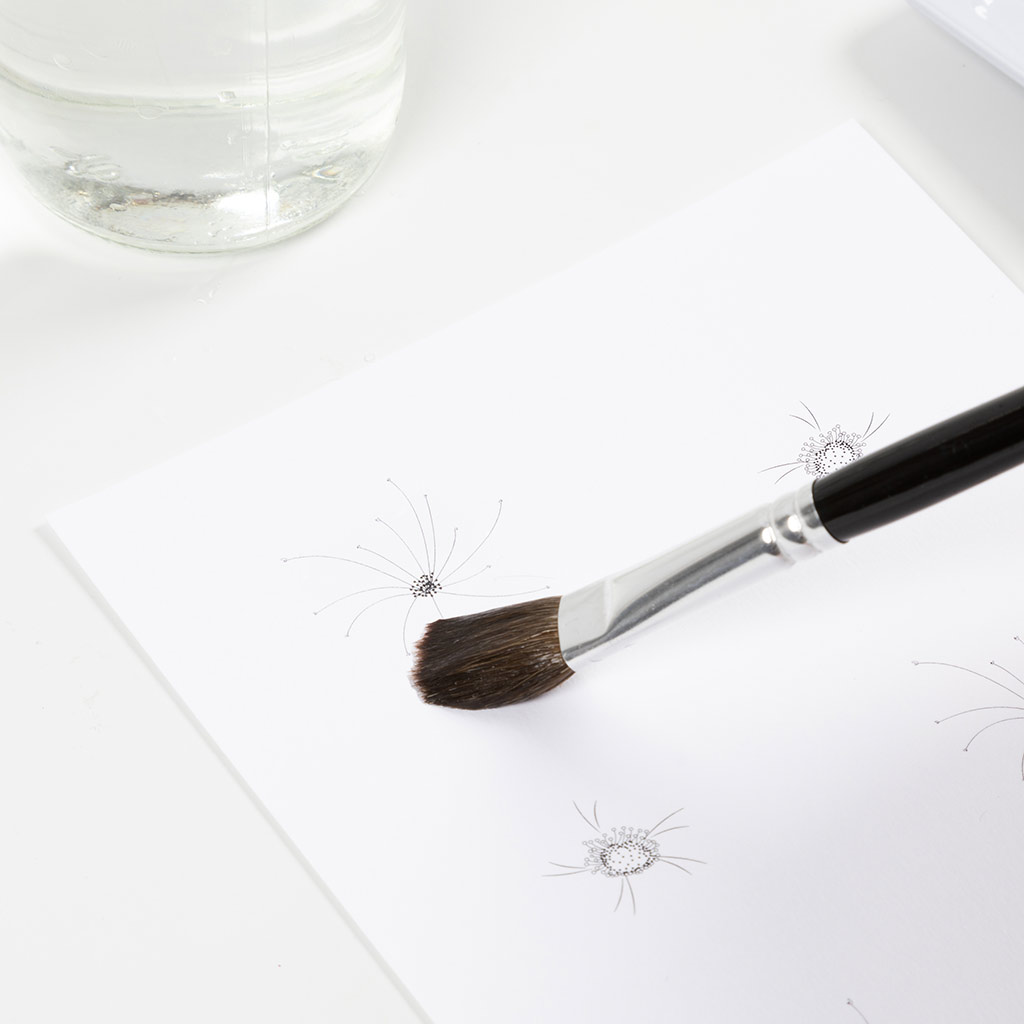 Paint with water around each flower bud.
Paint with water around each flower bud.40  Dip the brush in another colour. The colour 35 light green is used here.
Dip the brush in another colour. The colour 35 light green is used here.41 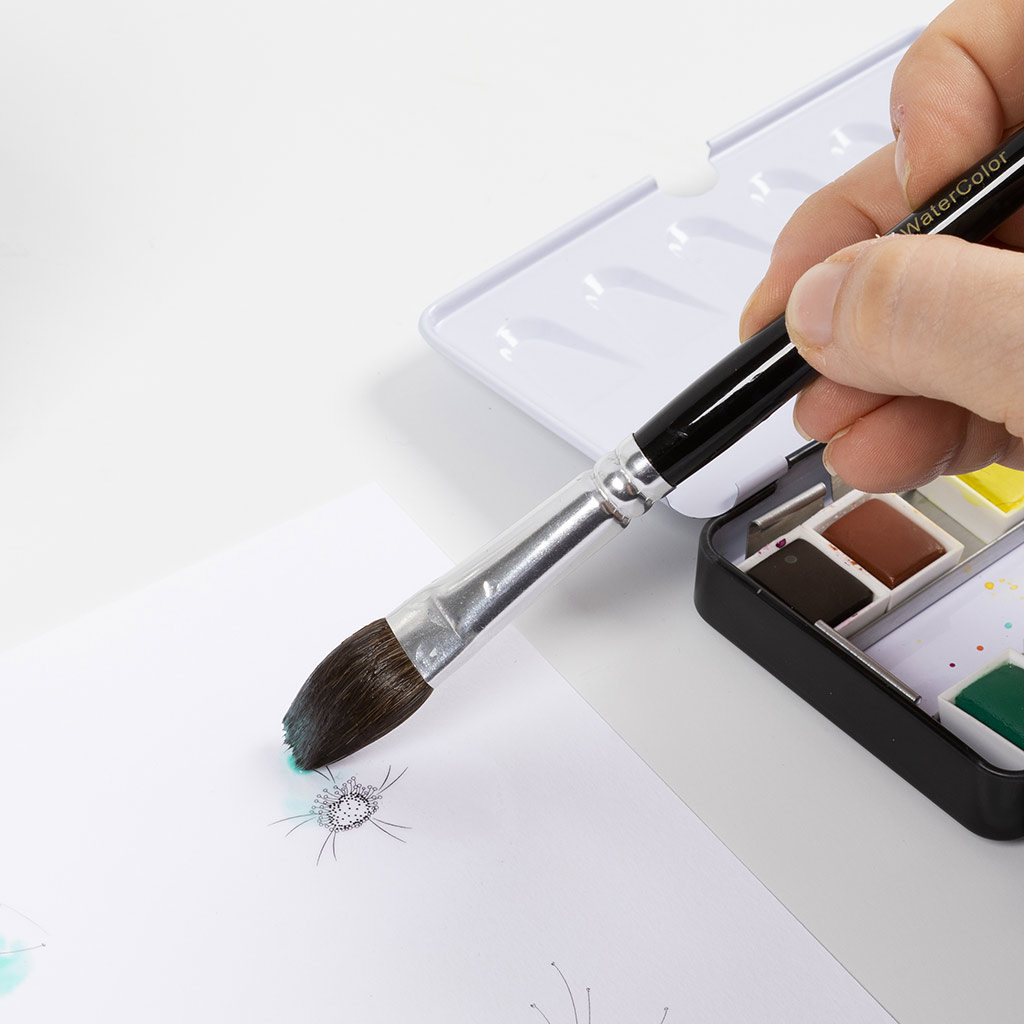 Paint the different flowers as shown in the picture.
Paint the different flowers as shown in the picture.42  Wash the brush.
Wash the brush.43  Dip the brush in another colour. The colour 22 cerise is used here.
Dip the brush in another colour. The colour 22 cerise is used here.44 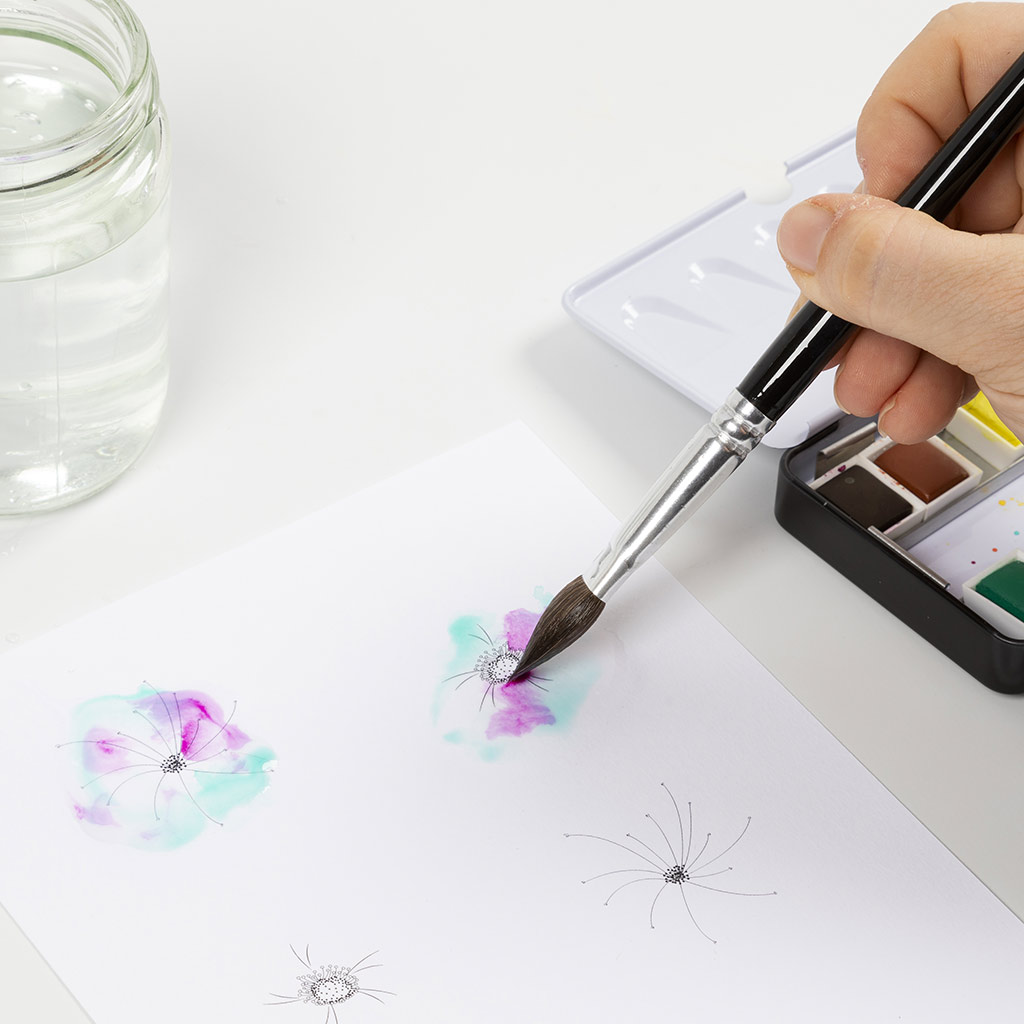 Paint the petals again as shown in the picture and let the colours flow together.
Paint the petals again as shown in the picture and let the colours flow together.45  Wash the brush.
Wash the brush.46 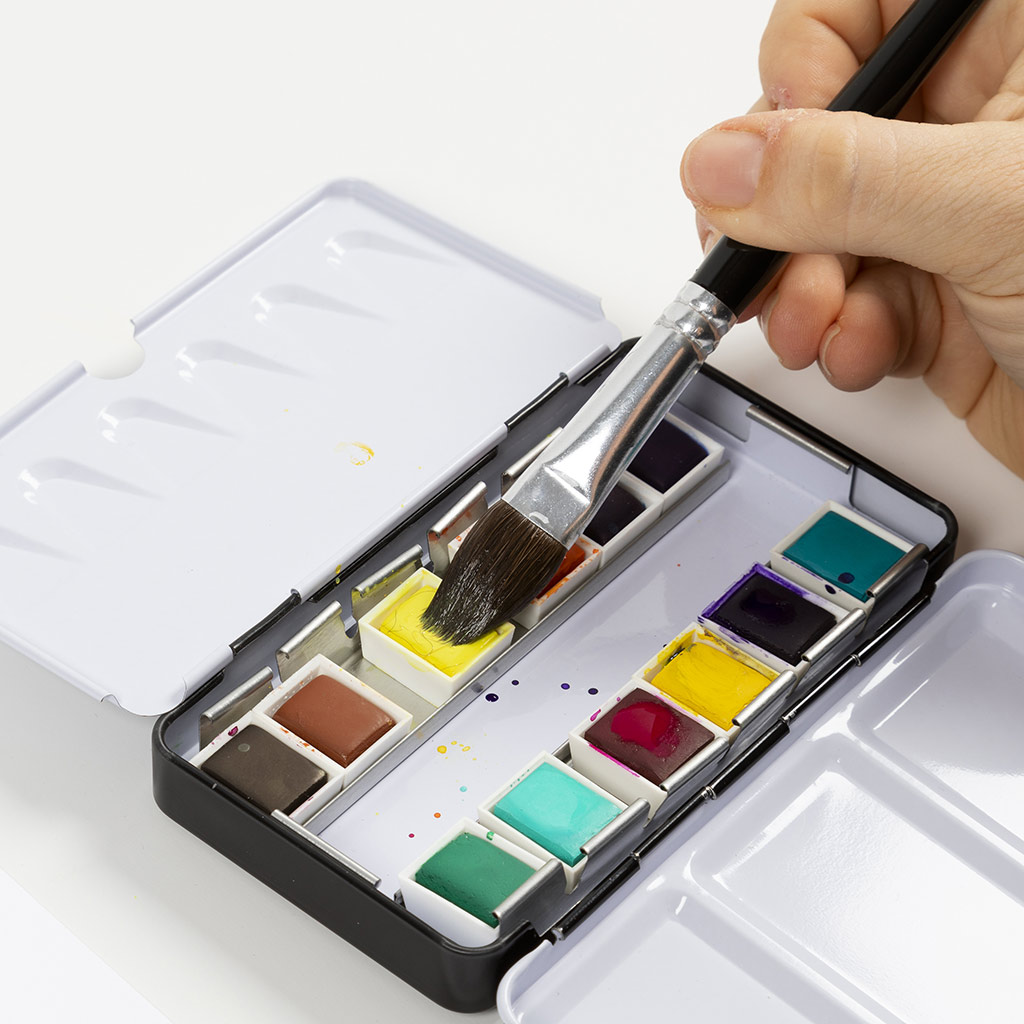 Dip the brush in another colour. The colour 01 lemon yellow is used here.
Dip the brush in another colour. The colour 01 lemon yellow is used here.47 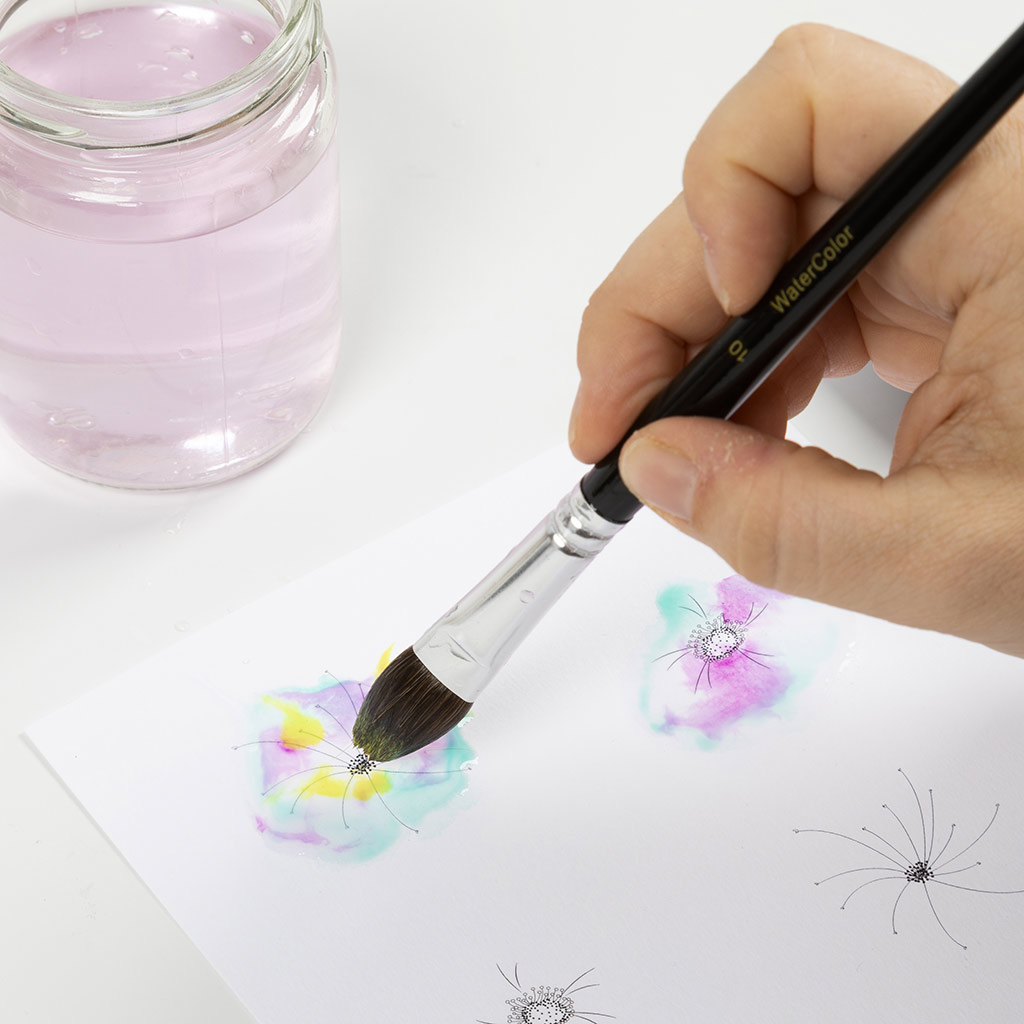 Now paint the centre of each flower.
Now paint the centre of each flower.48 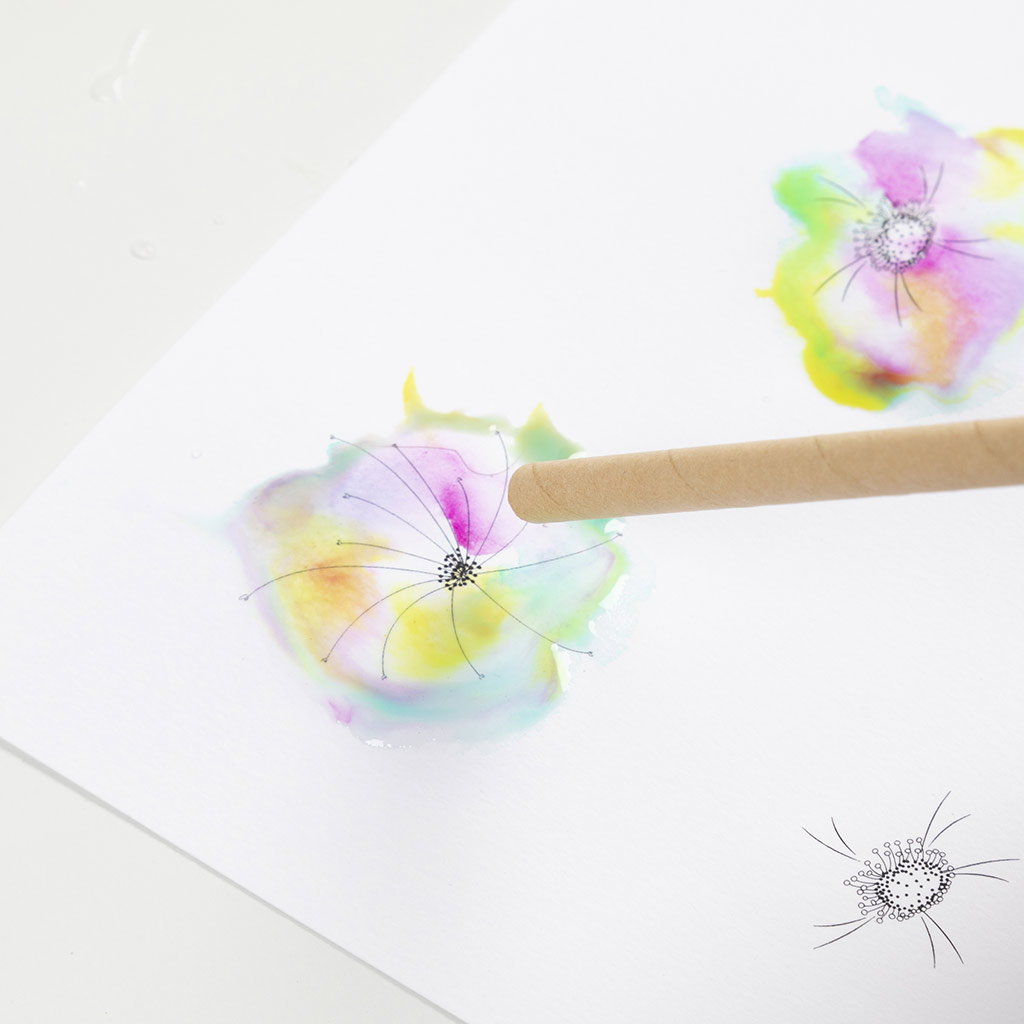 Use a straw to gently blow on the paint to blend the colours together. Allow to dry and repeat steps 12-16.
Use a straw to gently blow on the paint to blend the colours together. Allow to dry and repeat steps 12-16.49 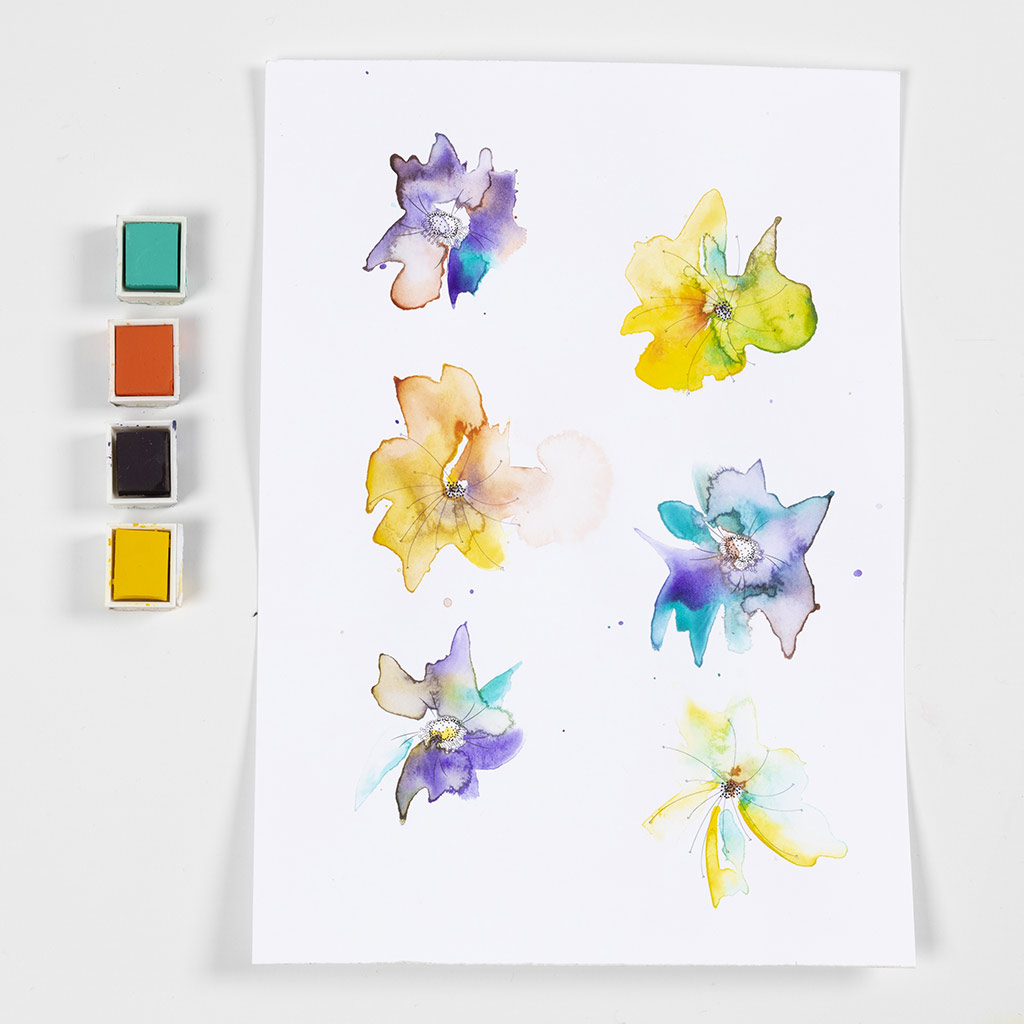 In the example shown here, the colours 35 light green, 10 orange, 34 violet and 03 brilliant yellow have been used.
In the example shown here, the colours 35 light green, 10 orange, 34 violet and 03 brilliant yellow have been used.50 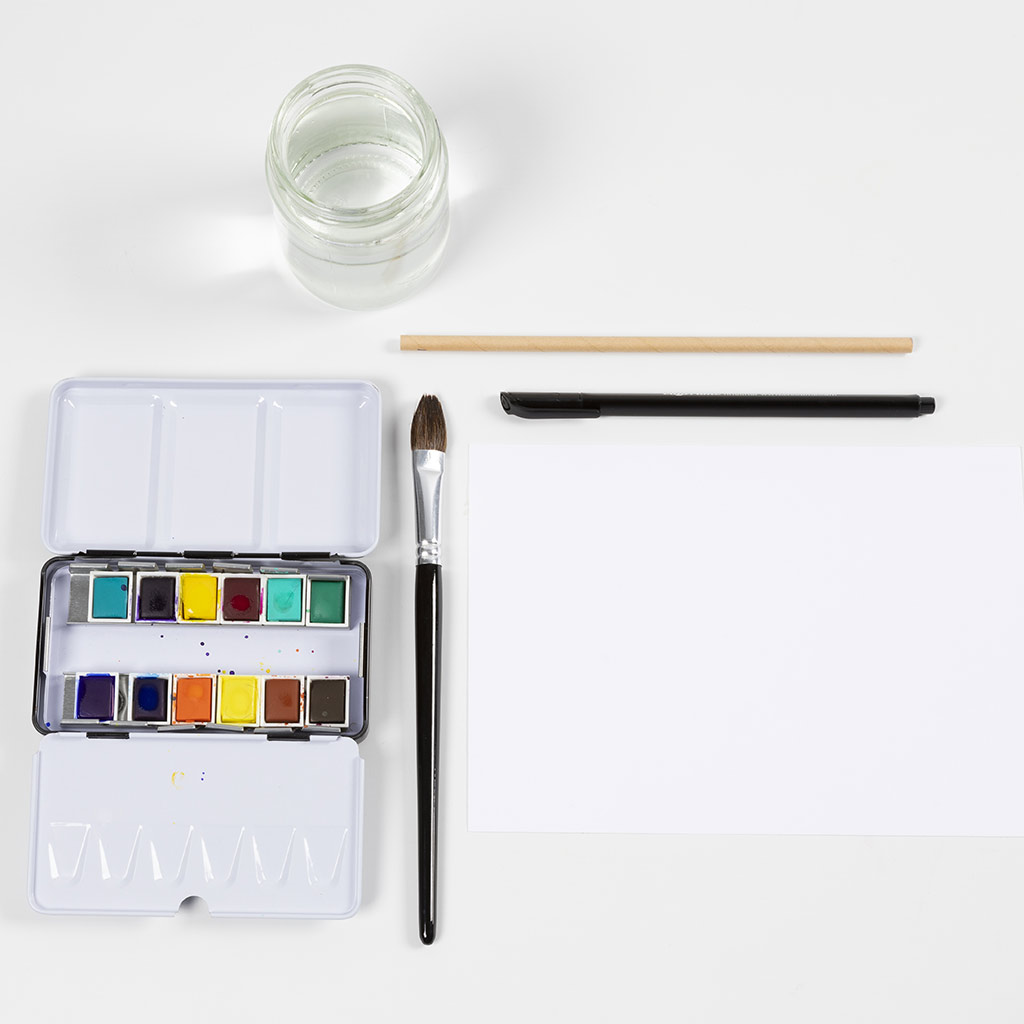 You will now learn how to paint abstract landscapes. Prepare everything you will need, as shown in the picture.
You will now learn how to paint abstract landscapes. Prepare everything you will need, as shown in the picture.51 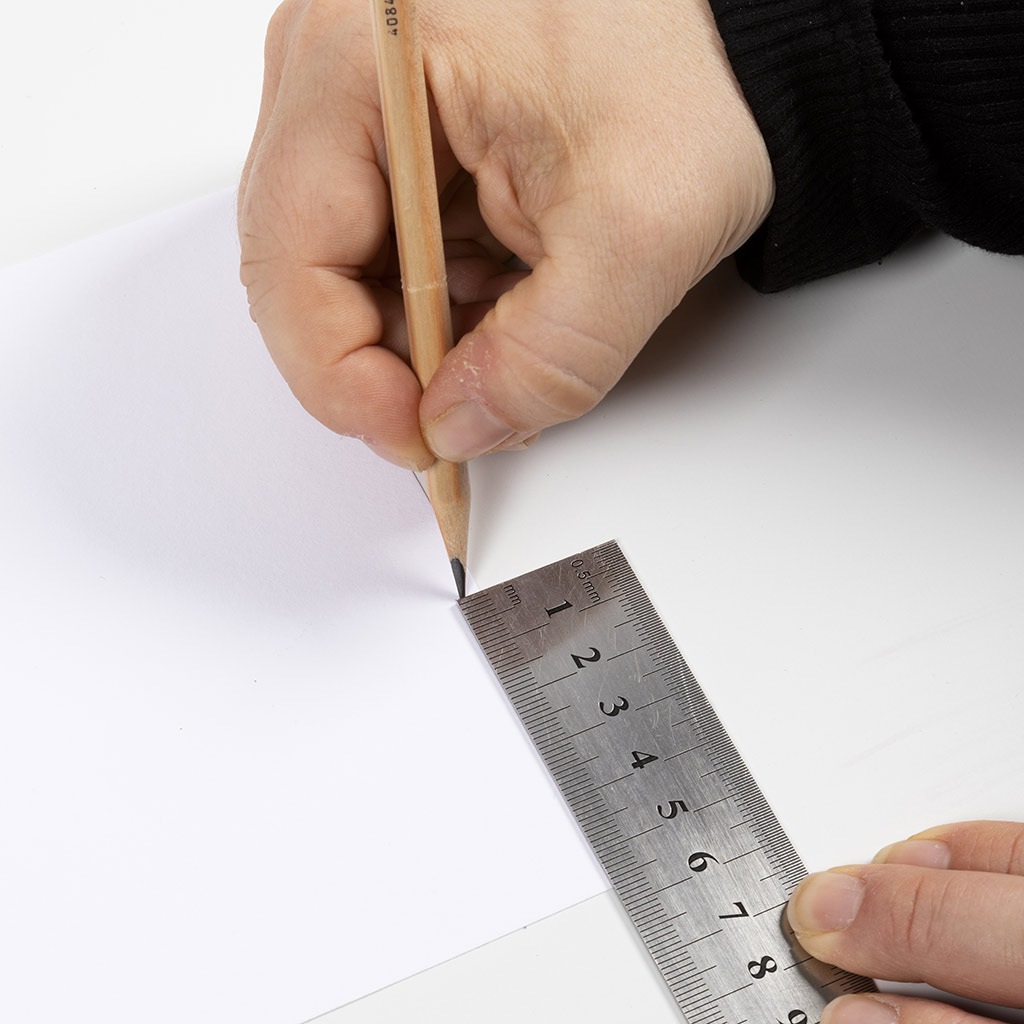 We now mark the golden ratio with a pencil. To find the golden ratio, measure the length of the picture in centimetres, divide by eight and then multiply by three. On this A5 sheet, it is calculated as follows: 14.8 cm/8 x 3 = 5.6 cm. Mark the golden ratio point on the paper.
We now mark the golden ratio with a pencil. To find the golden ratio, measure the length of the picture in centimetres, divide by eight and then multiply by three. On this A5 sheet, it is calculated as follows: 14.8 cm/8 x 3 = 5.6 cm. Mark the golden ratio point on the paper.52 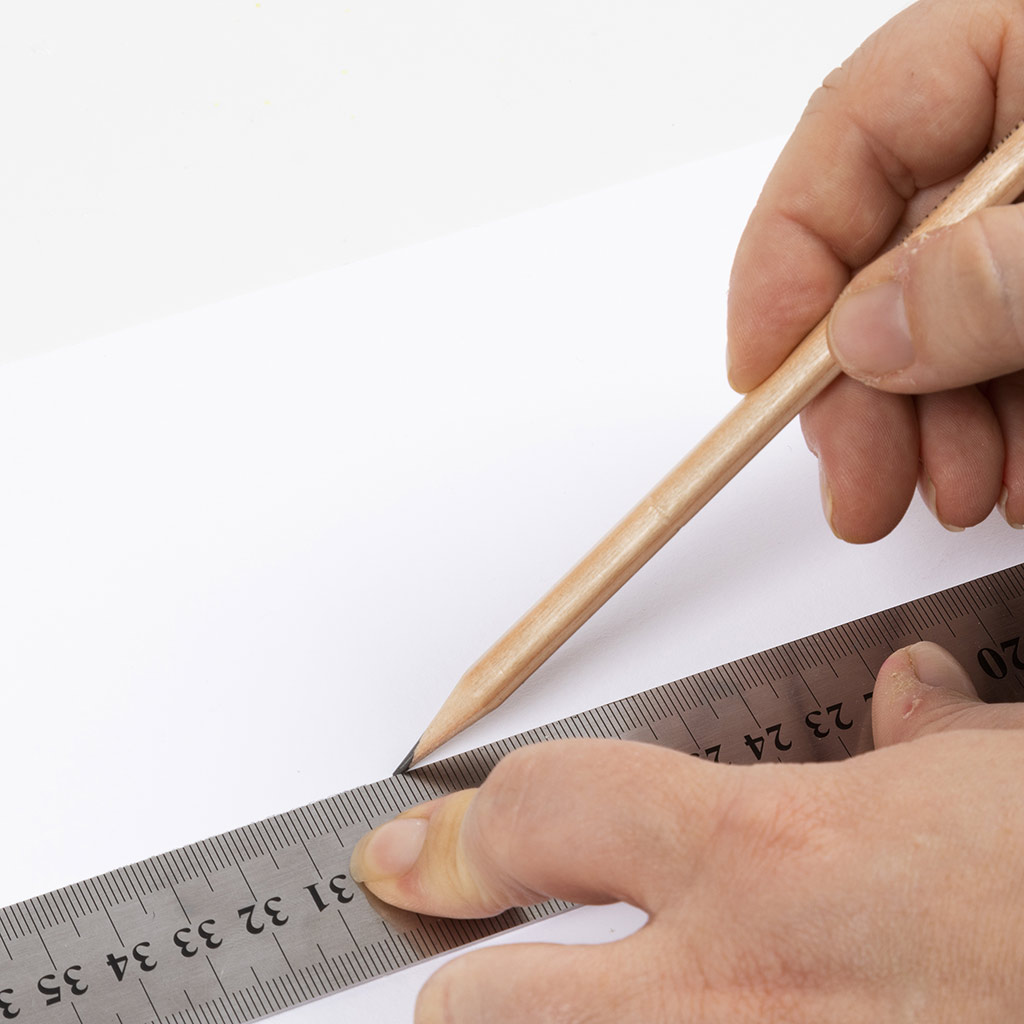 Draw a straight horizontal line.
Draw a straight horizontal line.53 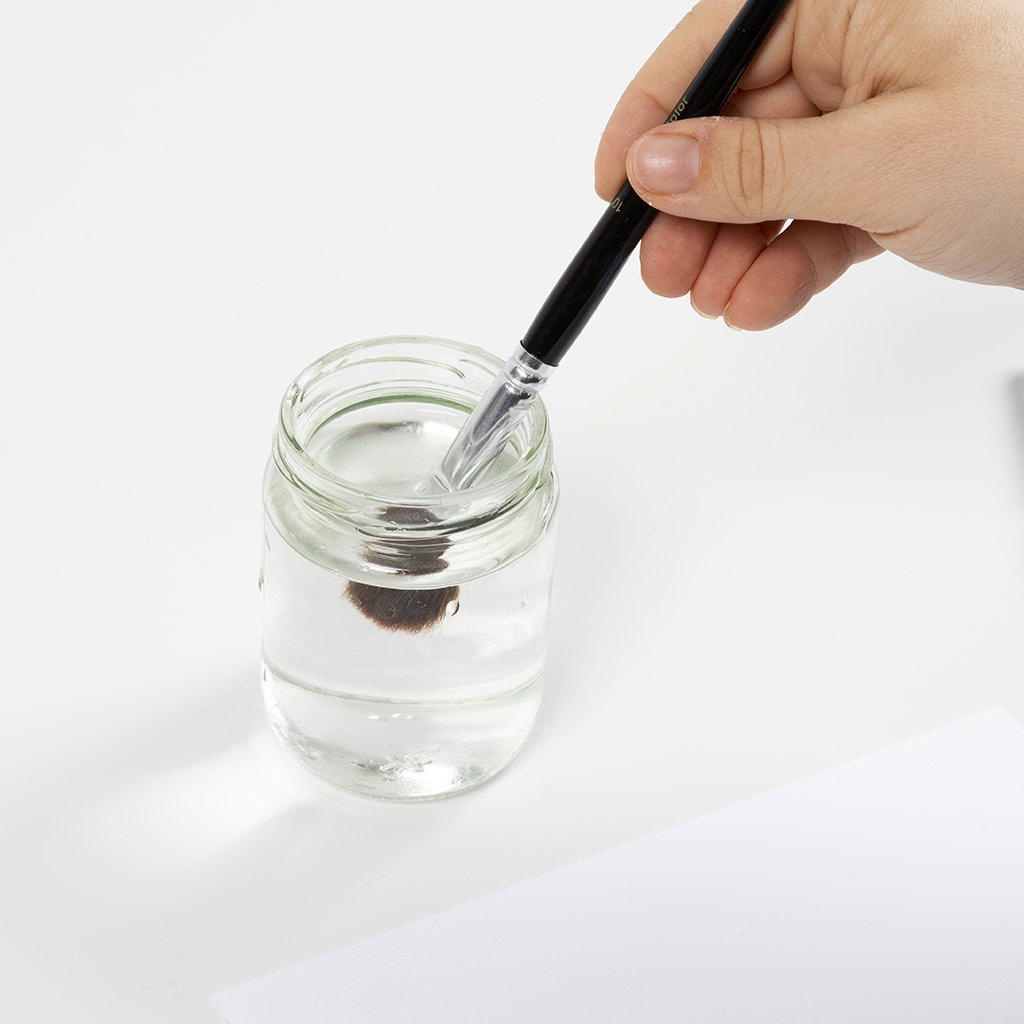 Dip the brush into the water.
Dip the brush into the water.54 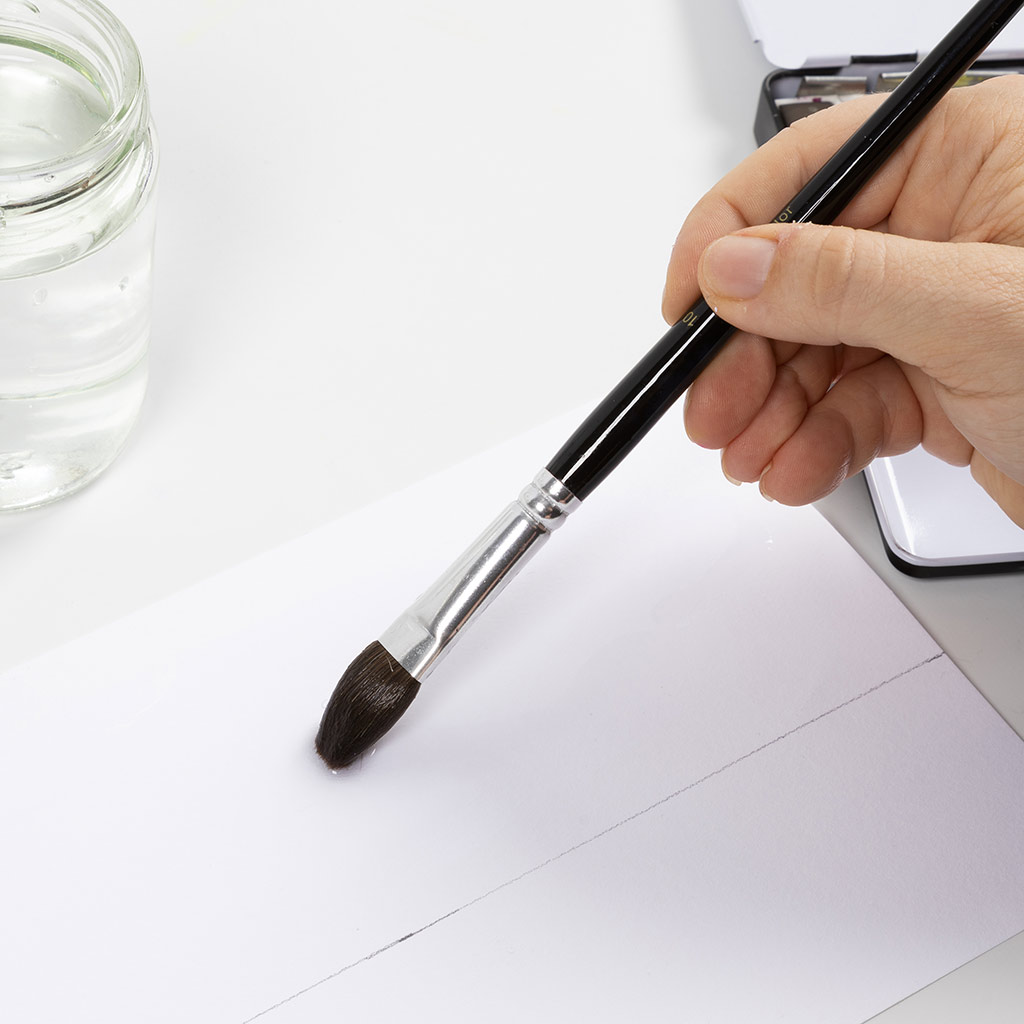 Use the large brush to paint horizontal lines above the horizon line in water only. Leave a narrow edge along the line dry, as well as a few small areas of the paper.
Use the large brush to paint horizontal lines above the horizon line in water only. Leave a narrow edge along the line dry, as well as a few small areas of the paper.55 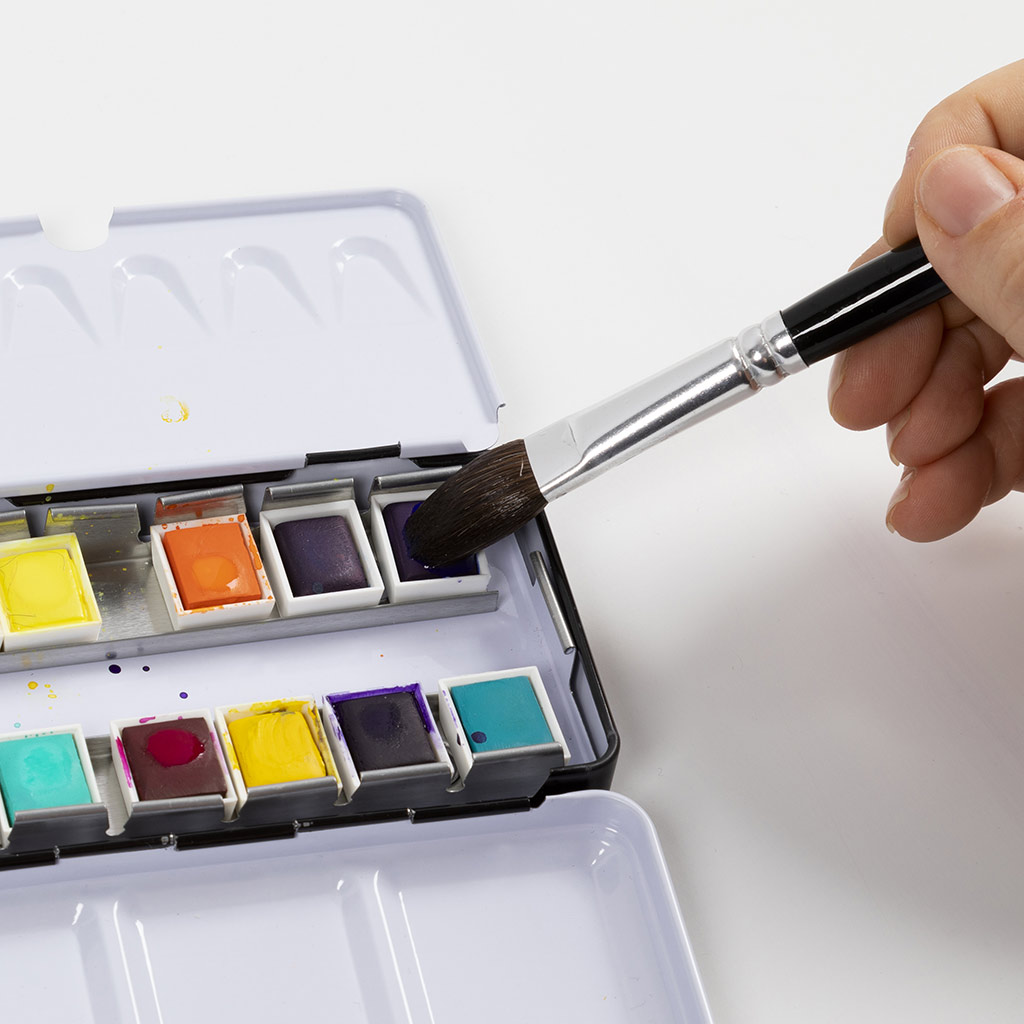 Dip the brush in whichever colour you want for the horizon. The colour 31 ultramarine is used here.
Dip the brush in whichever colour you want for the horizon. The colour 31 ultramarine is used here.56 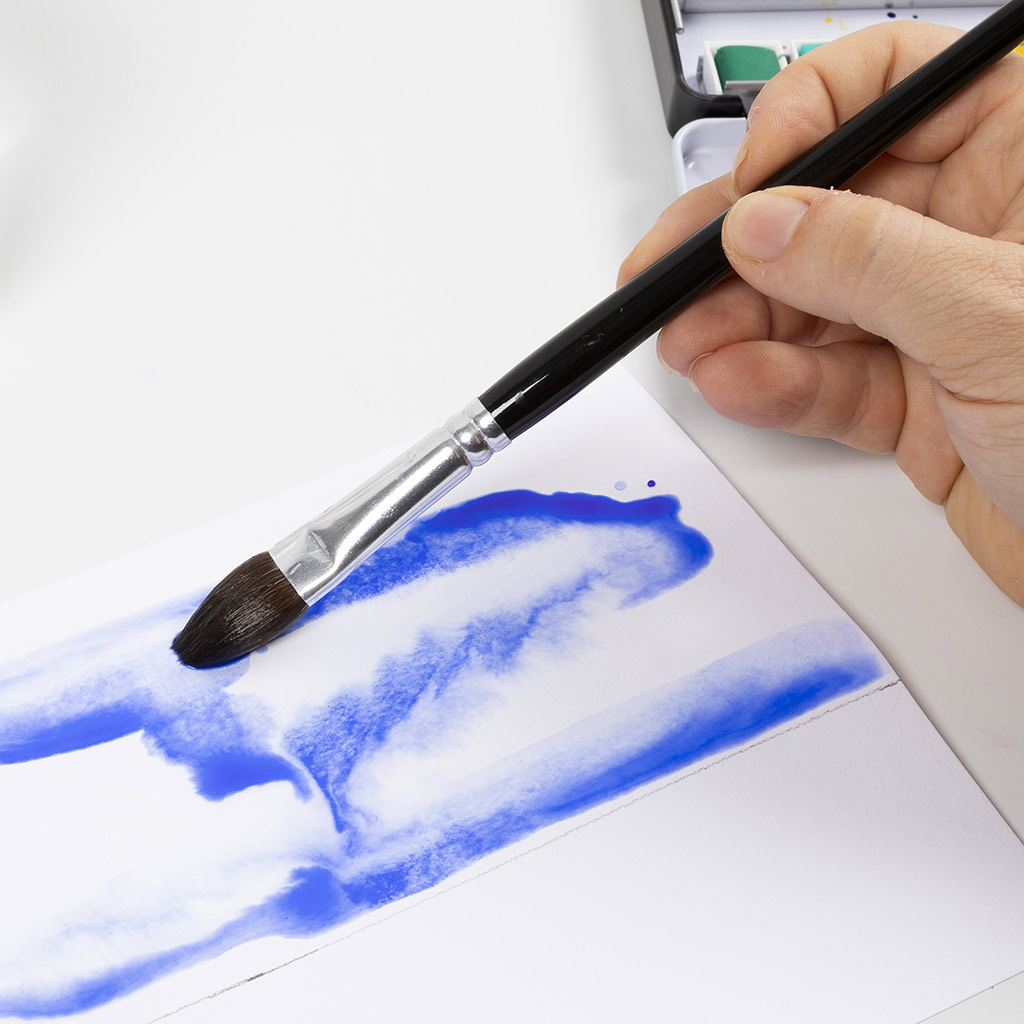 Now paint horizontal brushstrokes along the horizon, as shown in the picture.
Now paint horizontal brushstrokes along the horizon, as shown in the picture.57  Wash the brush.
Wash the brush.58 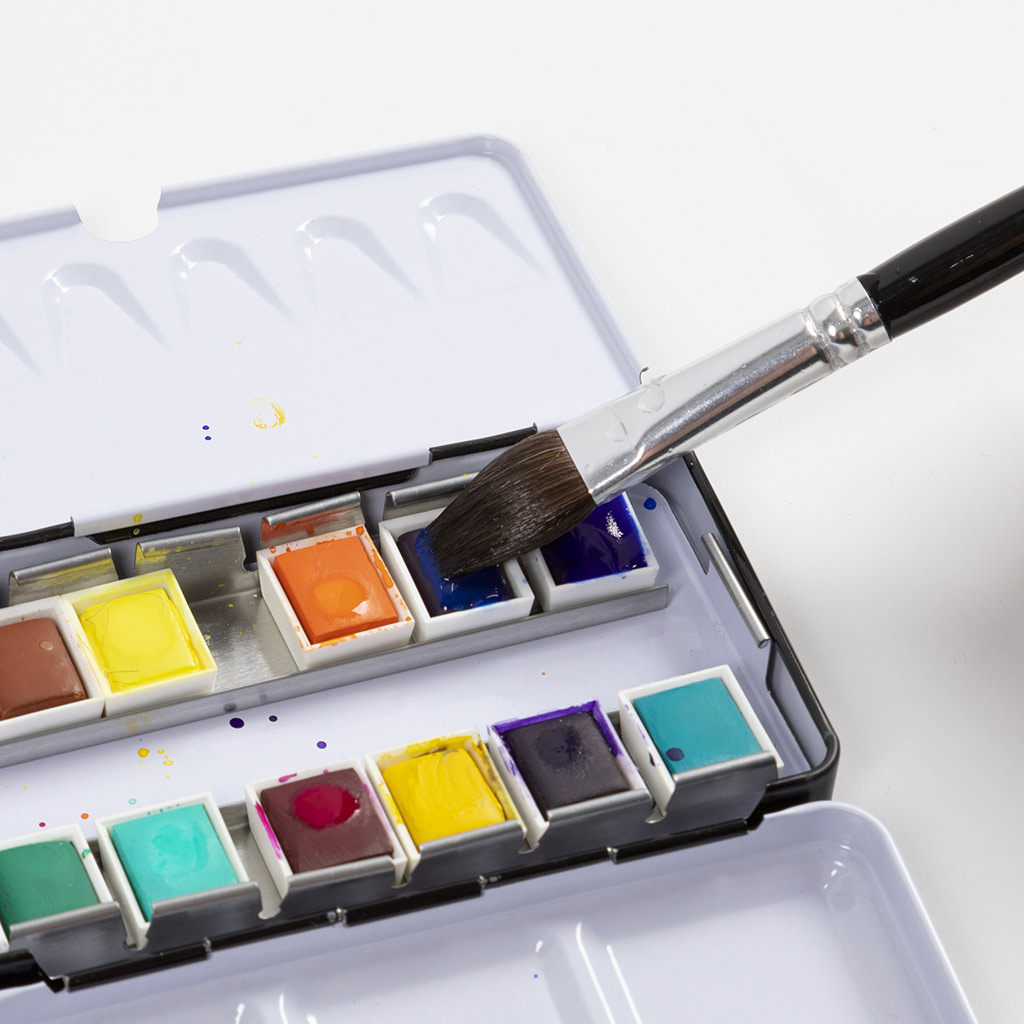 Now dip the brush in another colour you want to use for the horizon. The colour 33 Prussian blue is used here.
Now dip the brush in another colour you want to use for the horizon. The colour 33 Prussian blue is used here.59  Now paint the horizon with this colour.
Now paint the horizon with this colour.60  Wash the brush.
Wash the brush.61 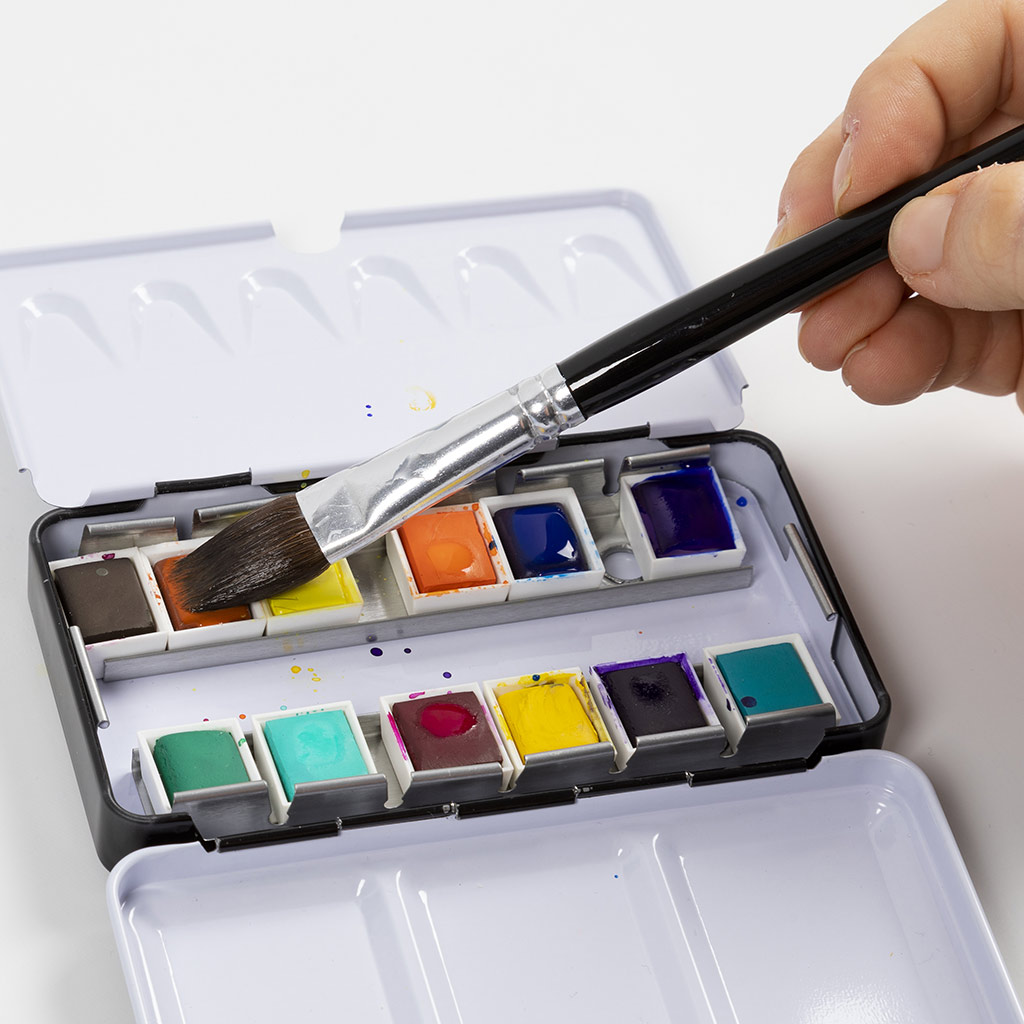 Dip in whichever colour you want for the ground. The colour 53 burnt sienna is used here.
Dip in whichever colour you want for the ground. The colour 53 burnt sienna is used here.62 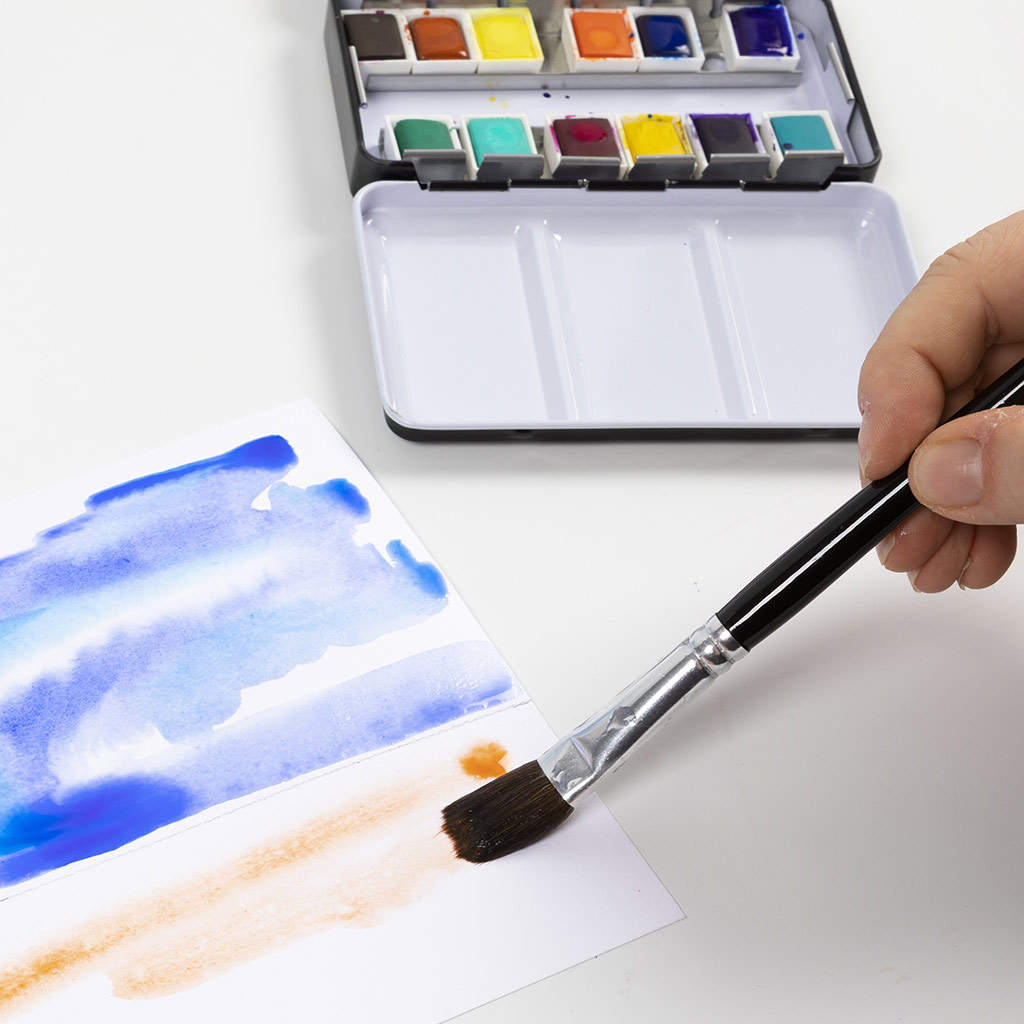 Paint the ground with horizontal brush strokes.
Paint the ground with horizontal brush strokes.63 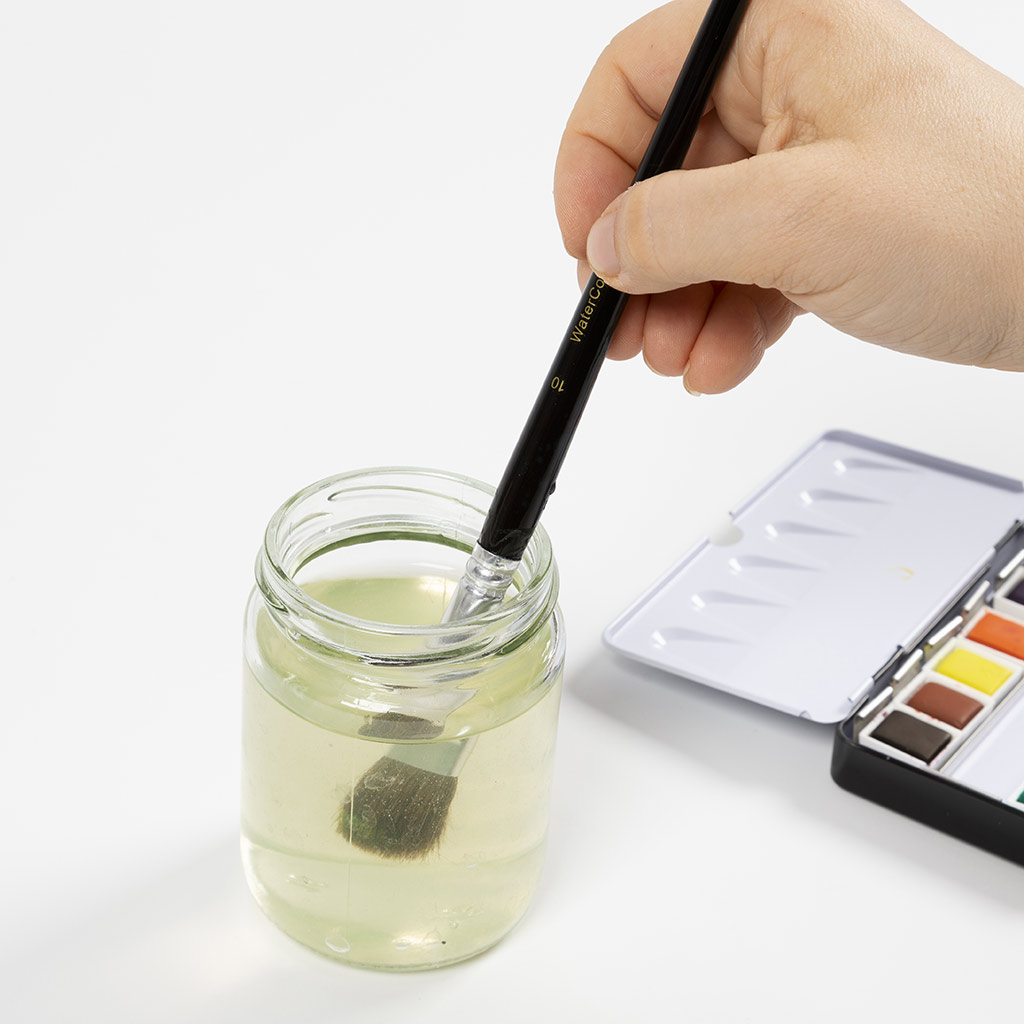 Wash the brush.
Wash the brush.64 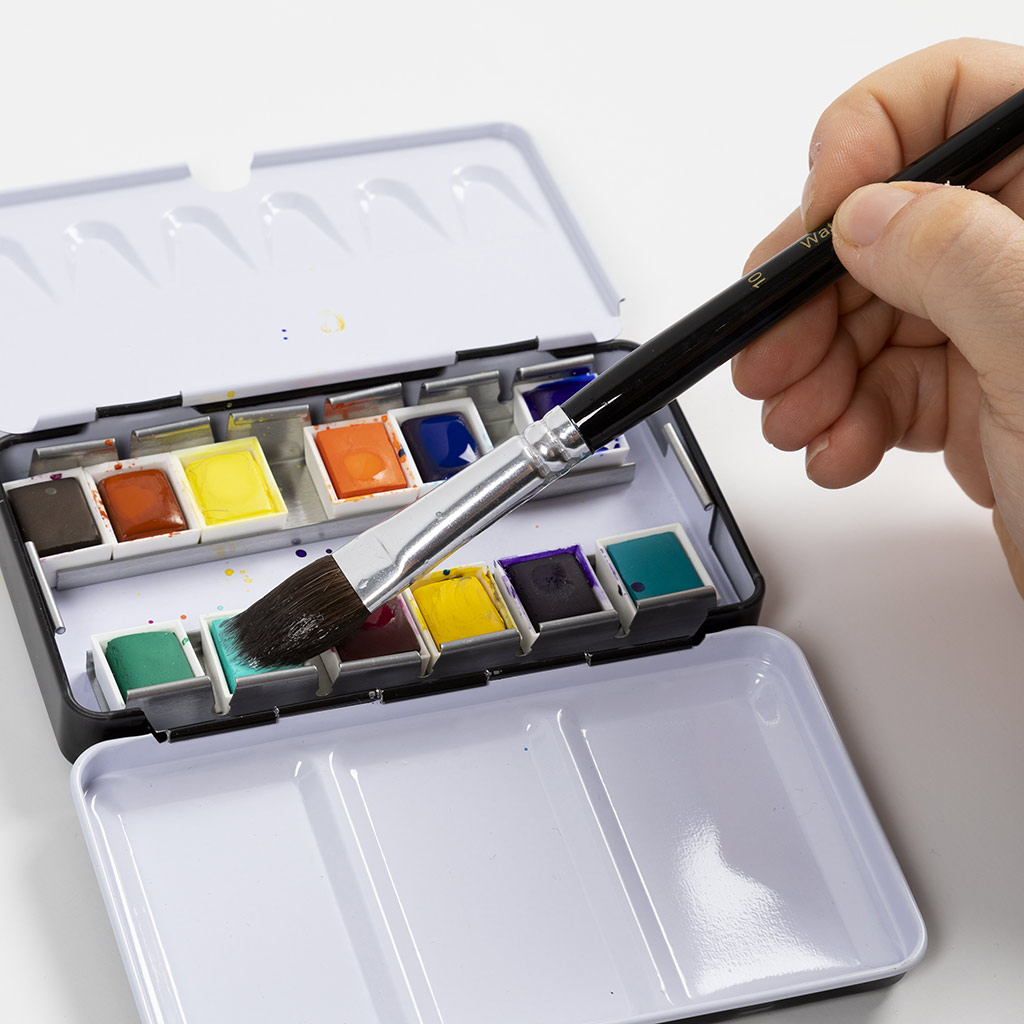 Dip in whichever other colour you want for the ground. The colour 35 light green is used here.
Dip in whichever other colour you want for the ground. The colour 35 light green is used here.65 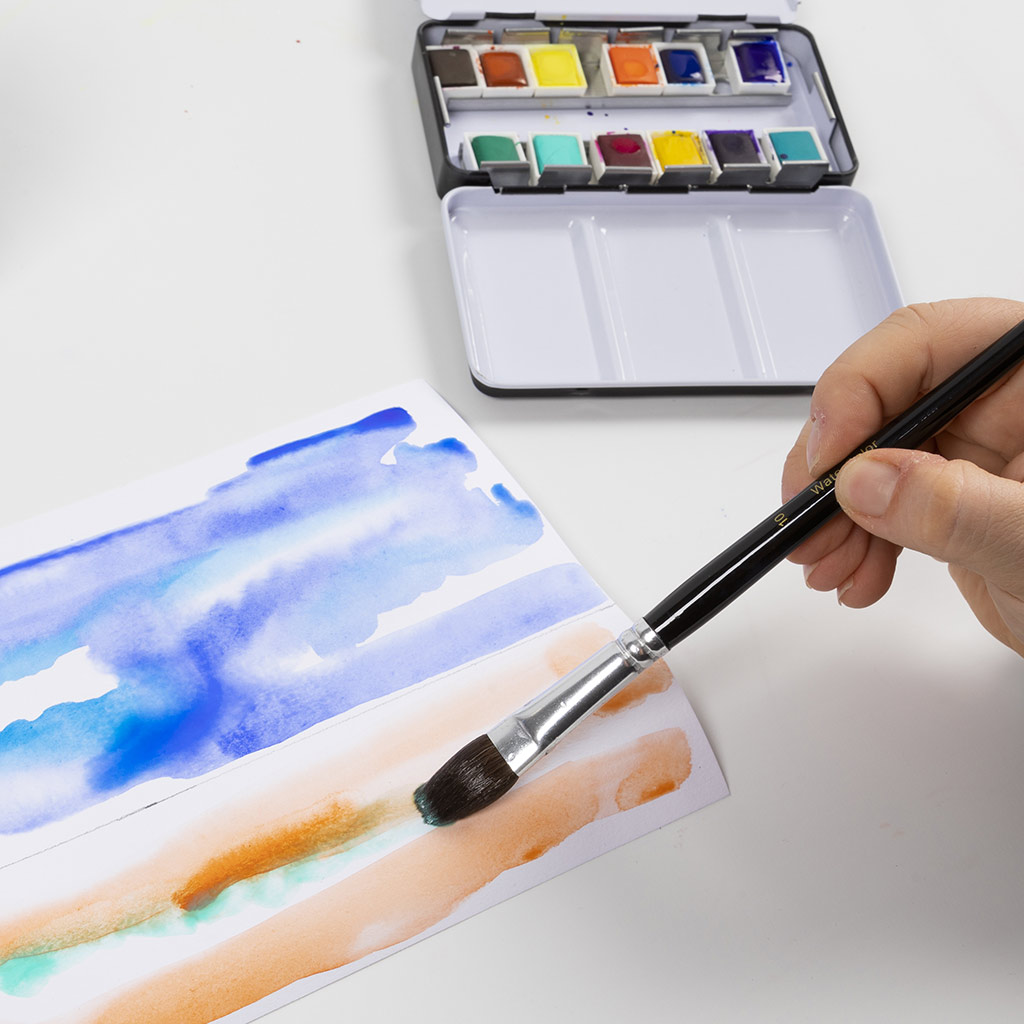 Paint small areas of the ground with this colour, as shown in the picture.
Paint small areas of the ground with this colour, as shown in the picture.66  Wash the brush.
Wash the brush.67 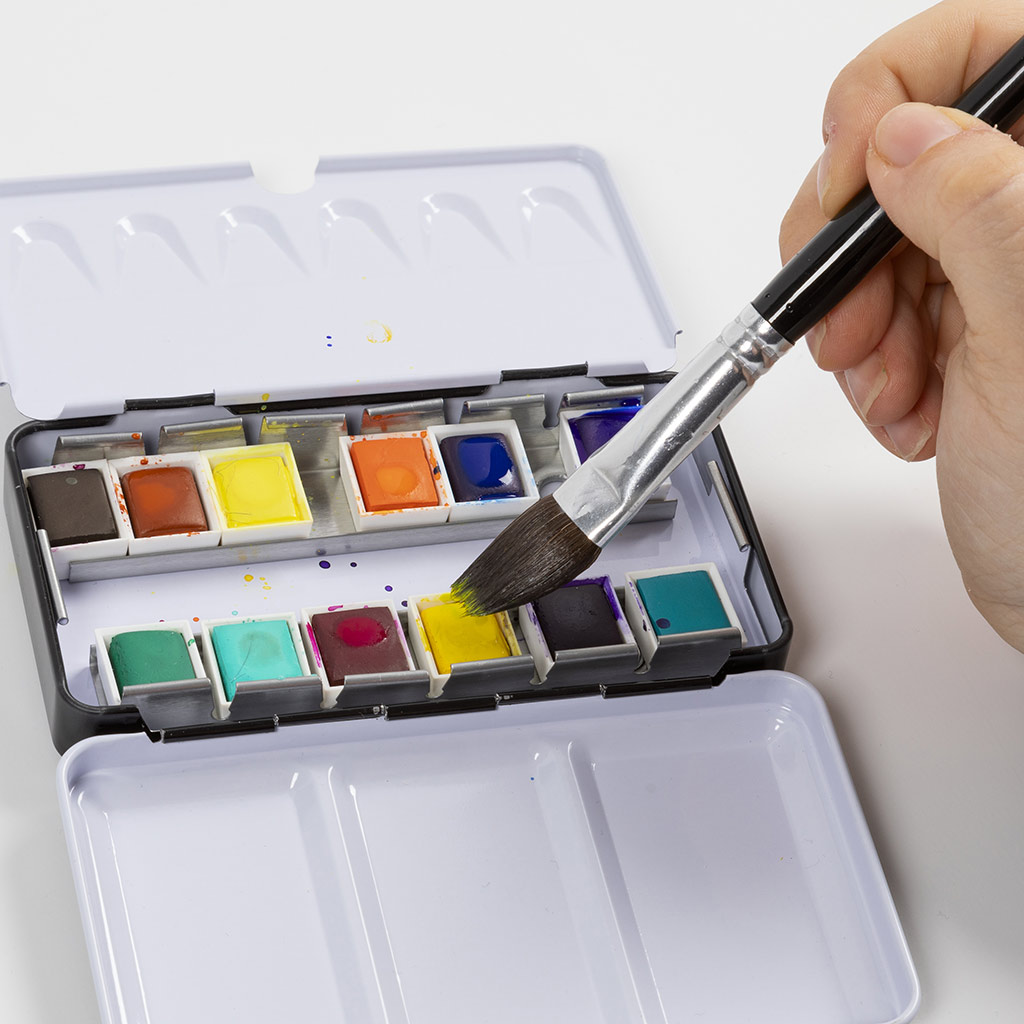 Dip in whichever colour you want for the ground and horizon. The colour 03 brilliant yellow is used here.
Dip in whichever colour you want for the ground and horizon. The colour 03 brilliant yellow is used here.68 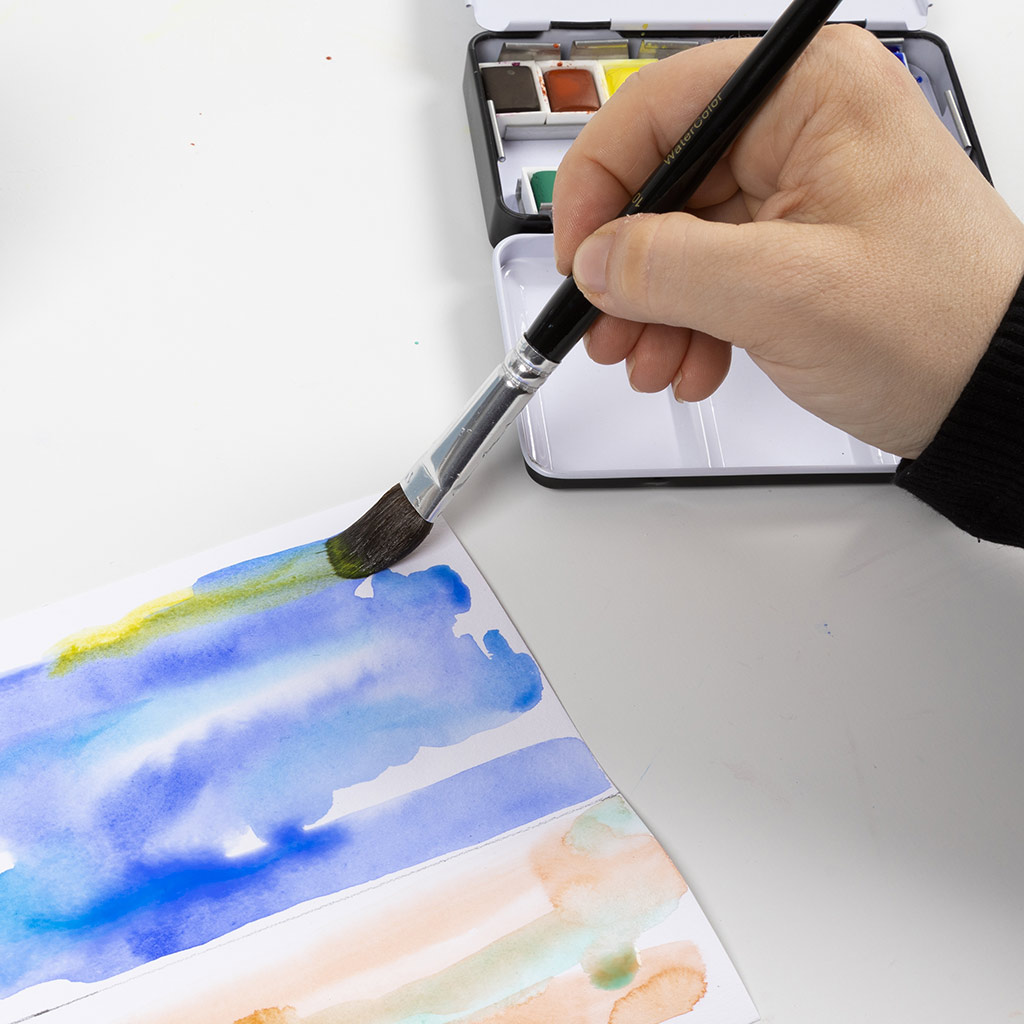 Paint a little with this colour first on the horizon.
Paint a little with this colour first on the horizon.69 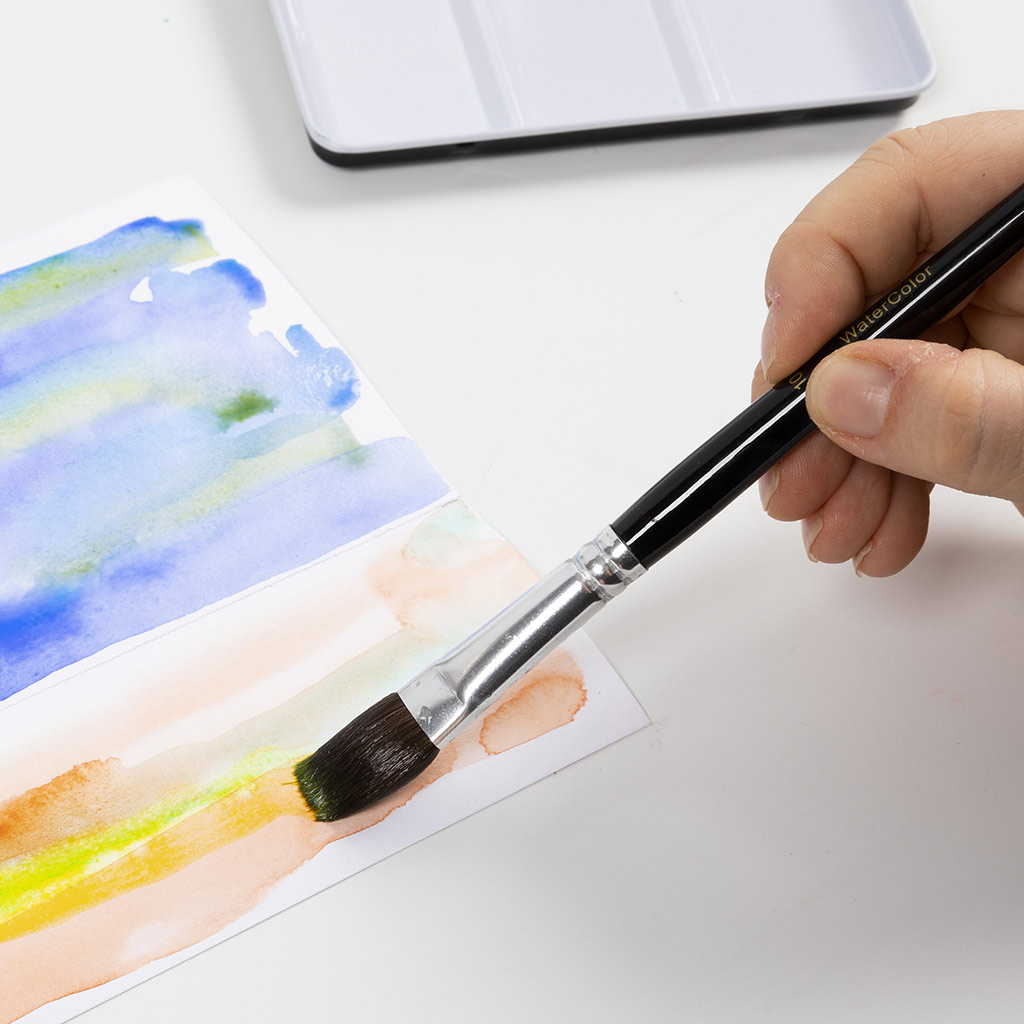 Paint the ground afterwards.
Paint the ground afterwards.70 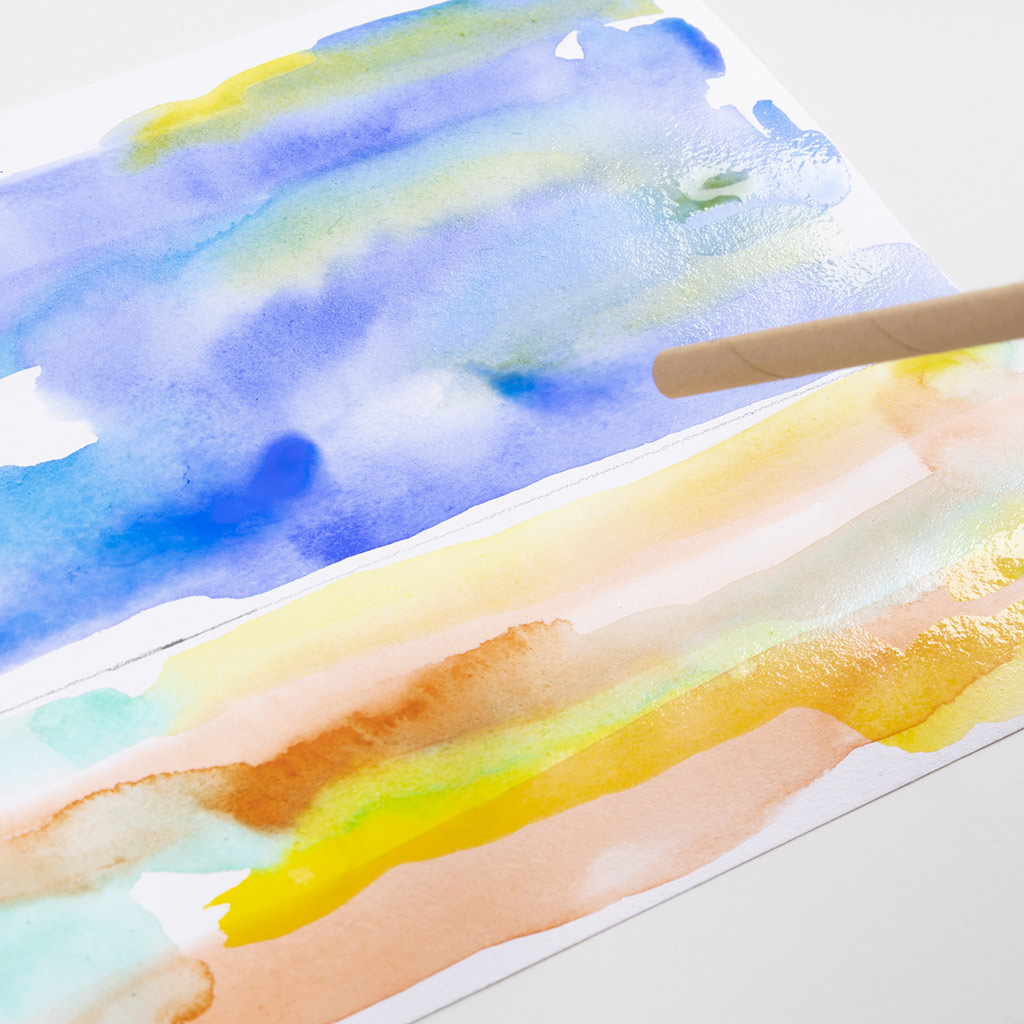 Use a straw to gently blow on the paint to blend the colours a little more. Allow the paint to dry.
Use a straw to gently blow on the paint to blend the colours a little more. Allow the paint to dry.71 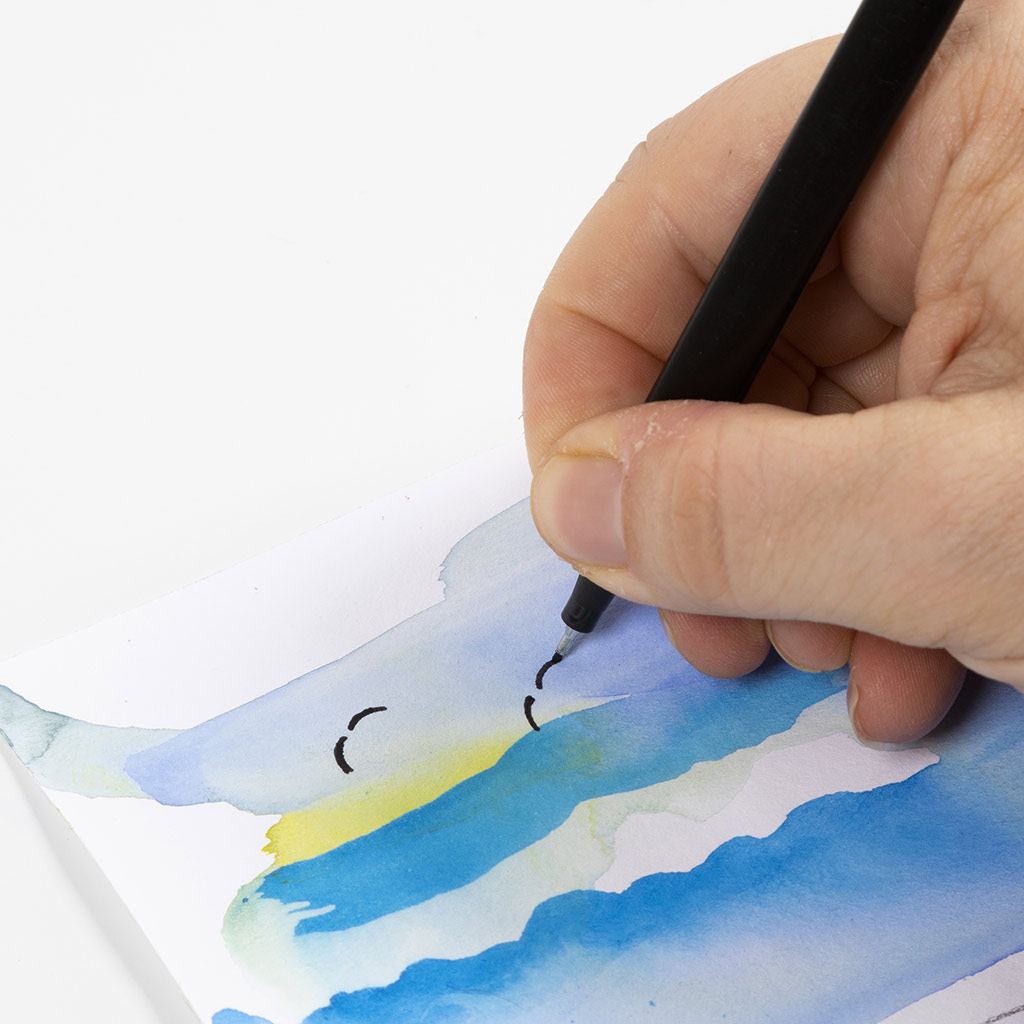 After the paint has dried, birds can be drawn, for example.
After the paint has dried, birds can be drawn, for example.72 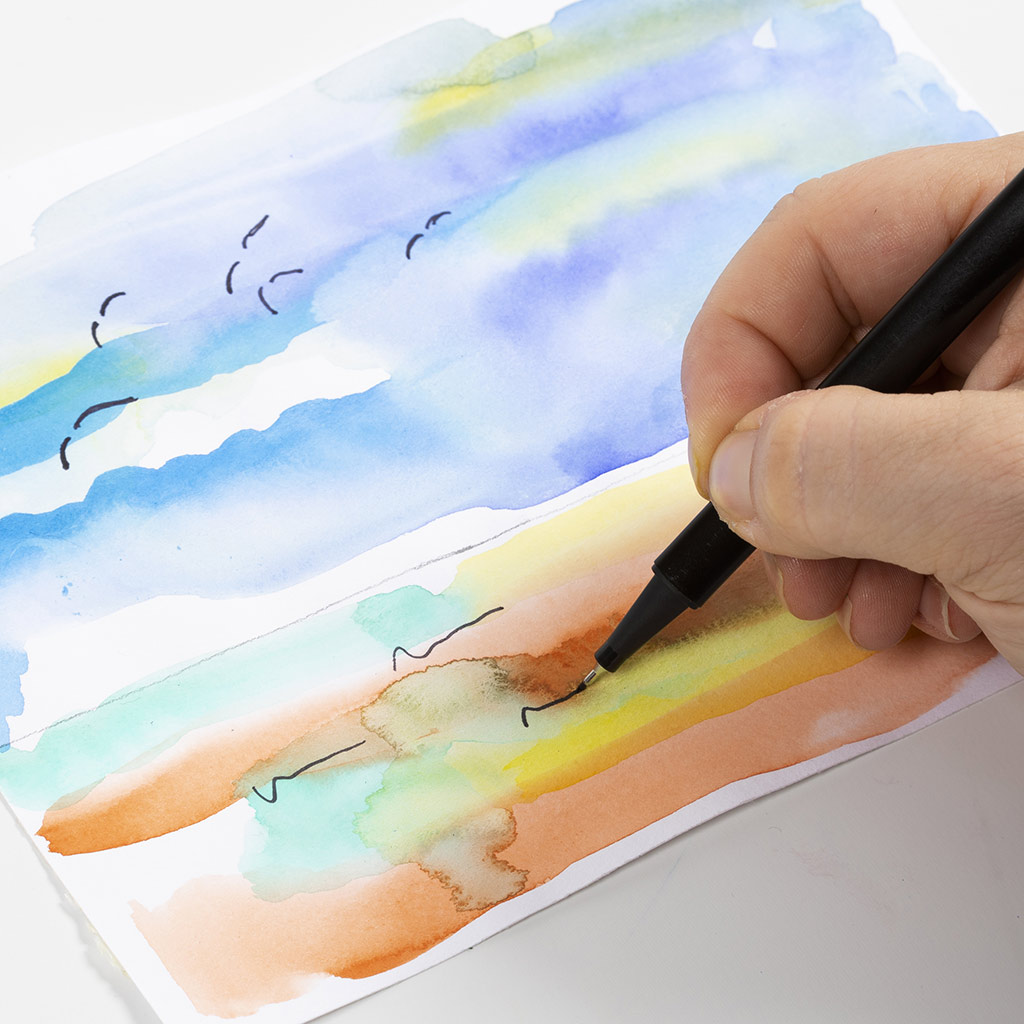 And blades of grass.
And blades of grass.73 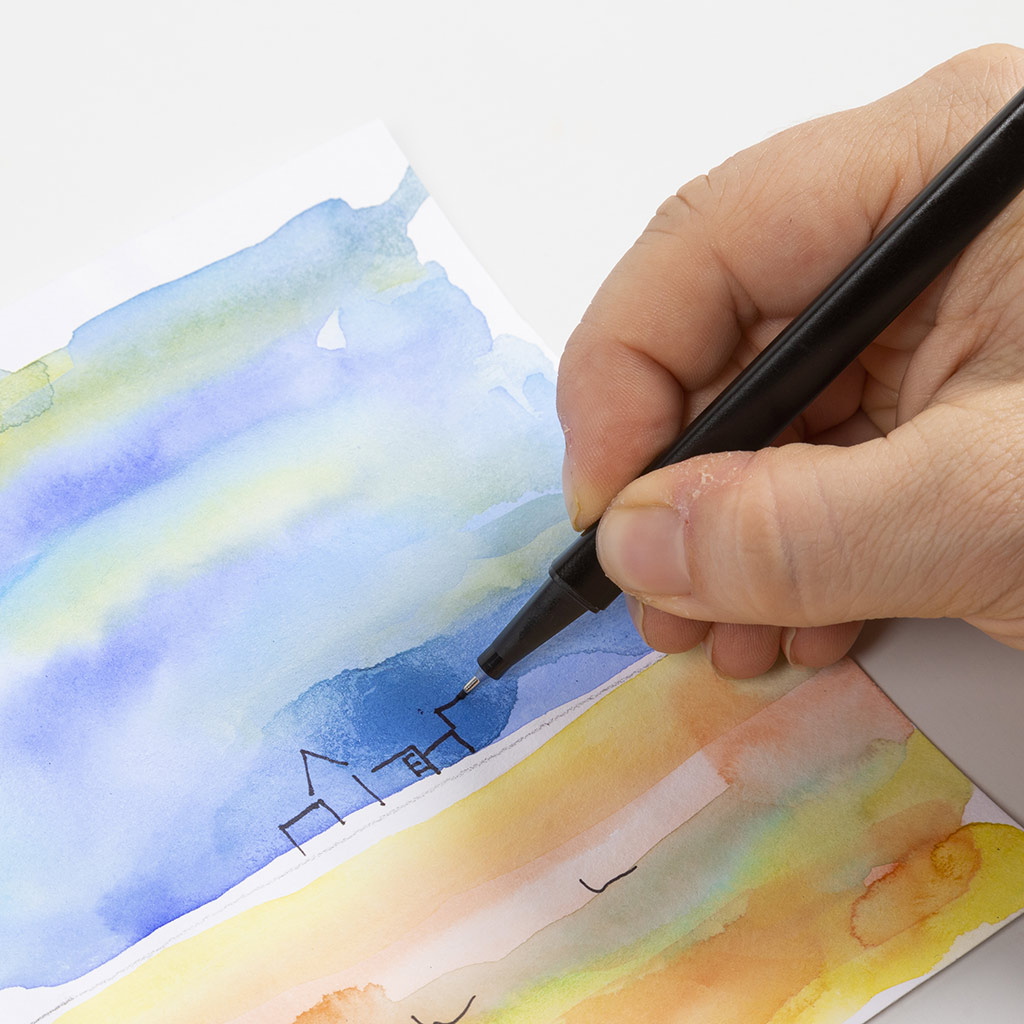 And houses. When you are done drawing, repeat steps 12-16.
And houses. When you are done drawing, repeat steps 12-16.74 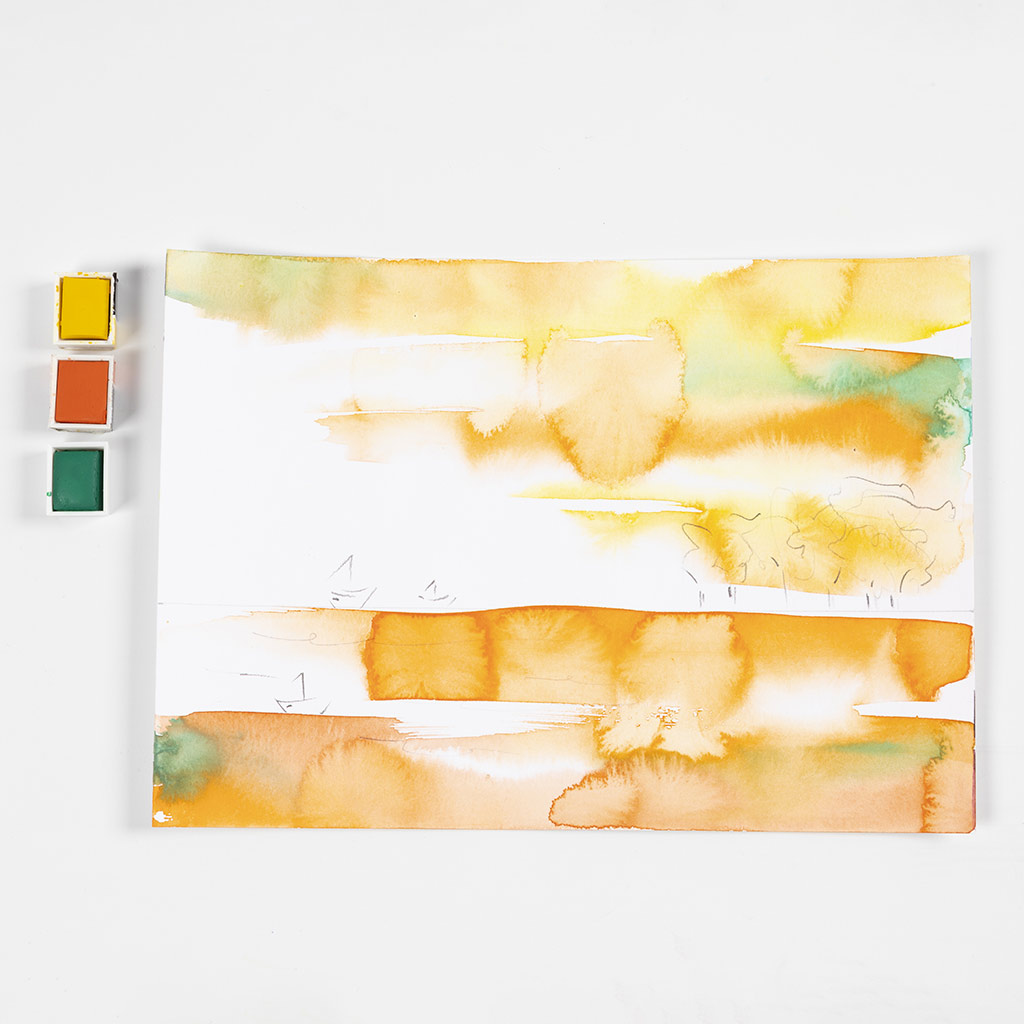 In this example, the colours 03 brilliant yellow, 10 orange and 42 peak green have been used.
In this example, the colours 03 brilliant yellow, 10 orange and 42 peak green have been used.75 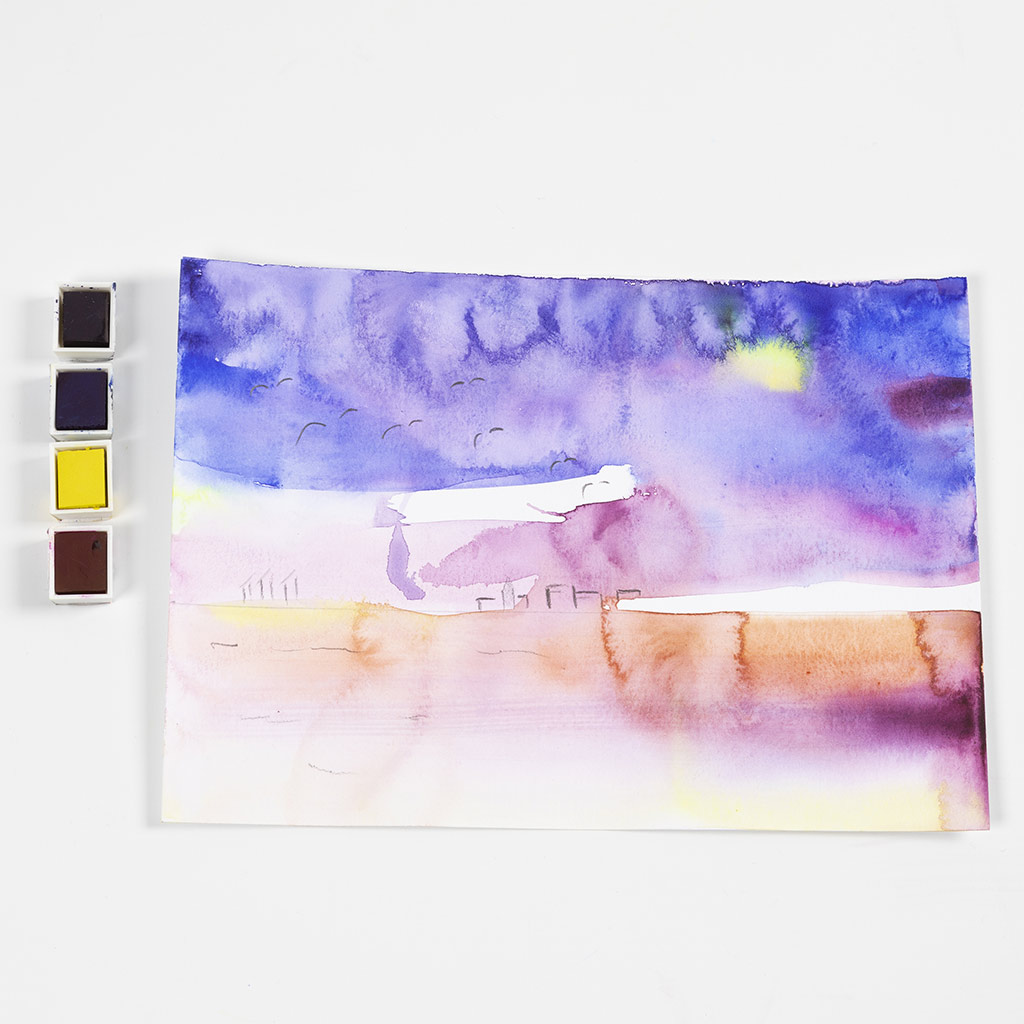 In this example, the colours 34 violet, 31 ultra marine, 03 brilliant yellow and 22 cerise have been used.
In this example, the colours 34 violet, 31 ultra marine, 03 brilliant yellow and 22 cerise have been used.76 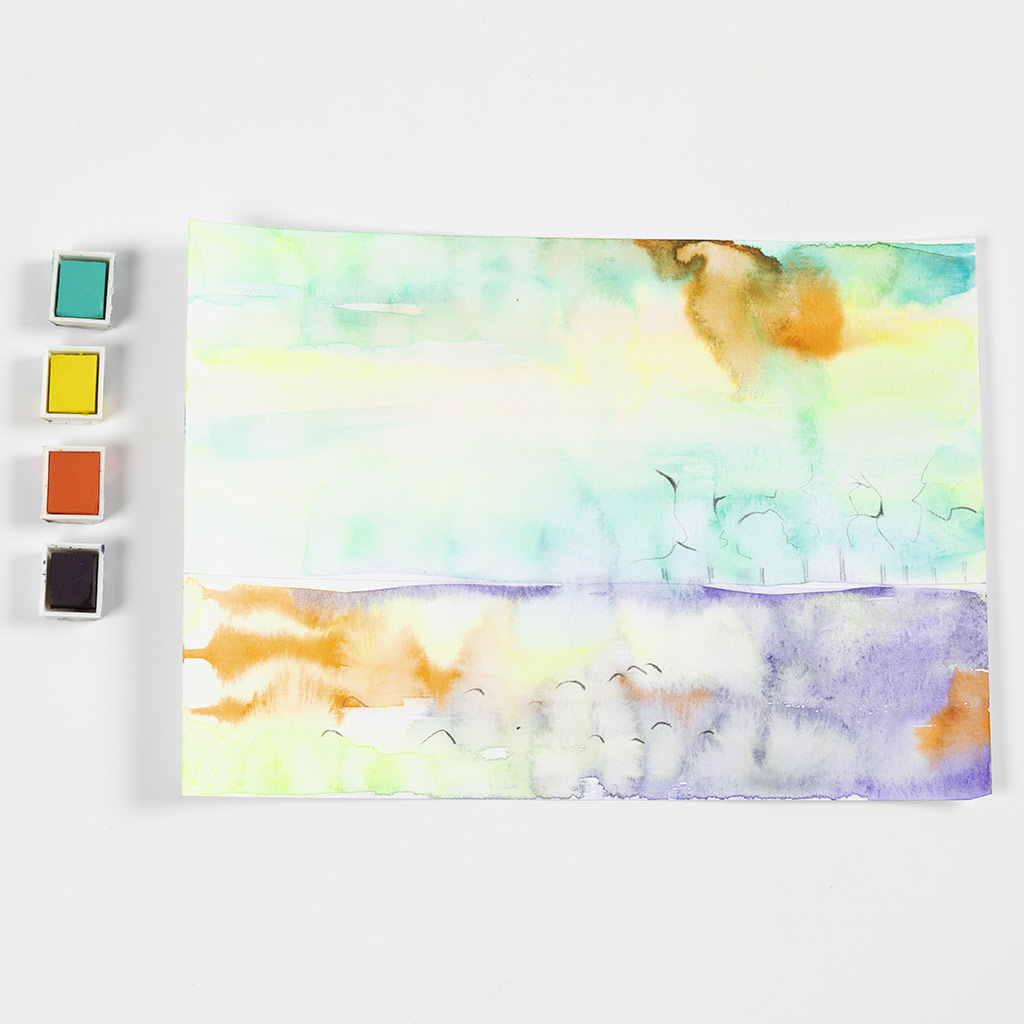 In this example, the colours 35 light green, 03 brilliant yellow, 10 orange and 34 violet have been used.
In this example, the colours 35 light green, 03 brilliant yellow, 10 orange and 34 violet have been used.Already signed up? Download the template
Also go exploring in
