
5576b62ccc7af.jpg)
A Card Series with a Satin Waist Band and Handmade Paper Inserts
#v13415
This invitation is a tri-fold cover with inside pockets, made from patterned Color Bar paper, decorated with rhinestone half-pearls and satin ribbon for two handmade paper inserts with text. Use Color Bar card for the menu and place card.
#v13415
How to do it Download the templates/recipes
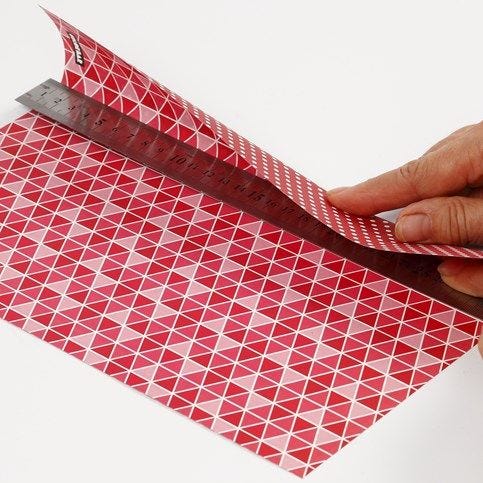
1. Invitation – the tri-fold cover: fold a piece of A4 Color Bar paper horizontally, 5.7cm from the edge. Unfold.
2. Make a 9.5cm wide section from each vertical side. These folded sections need to be very precise. Unfold.
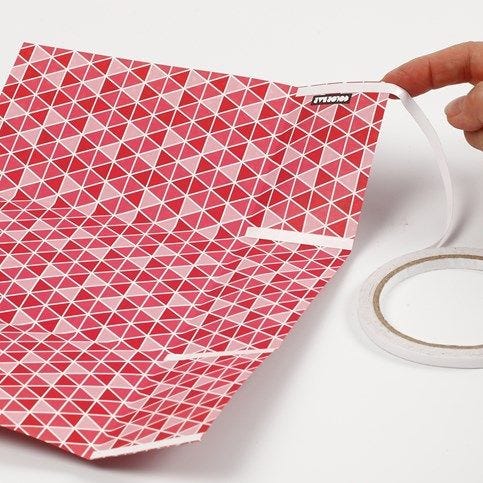
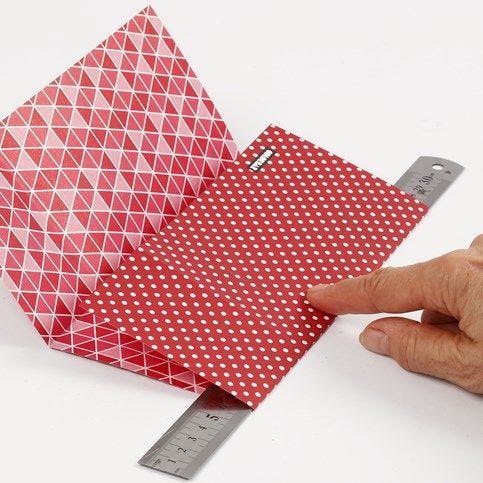
3. Attach double-sided adhesive tape at the bottom and both sides of each section. Fold the lower half of the card upwards and secure. Now a “pocket” has been created.
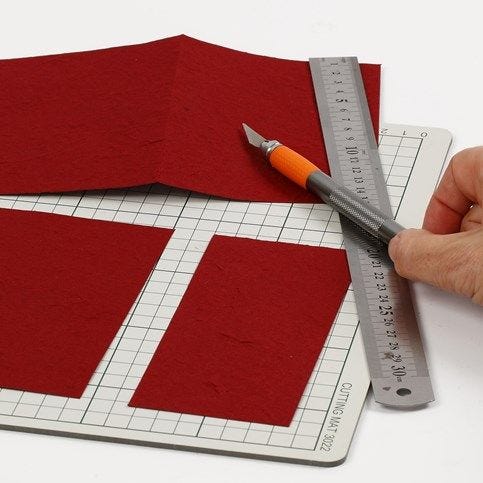
4. From the red handmade greeting card cut – from each side – two pieces with a width of 10 and 7cm respectively. Use these pieces as inserts in the tri-fold card.
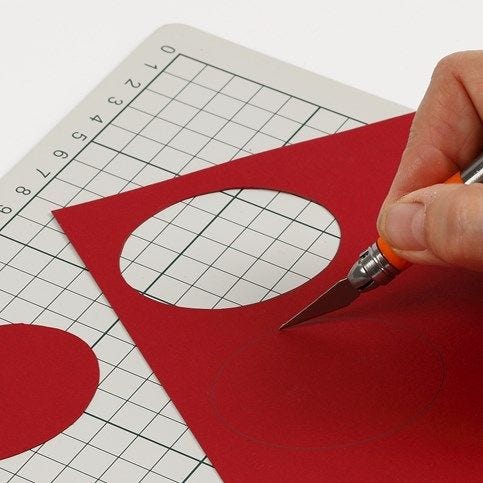
5. Print out the template, which is available as a separate PDF file for this idea. Cut out and transfer onto a piece of red Color Bar card. Cut out two large ovals using an art knive.
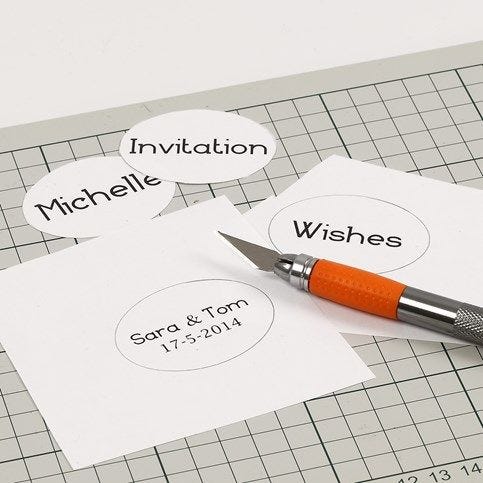
6. Use the small oval as a template when cutting out the printed headings on white paper.

7. Attach a piece of white paper (intended for writing the text) onto each of the red card inserts using double-sided adhesive tape. Adjust the white pieces of paper to a slightly smaller size (see photo) to fit onto the inserts. Use double-sided adhesive tape for attaching the red card ovals at the top of the inserts.
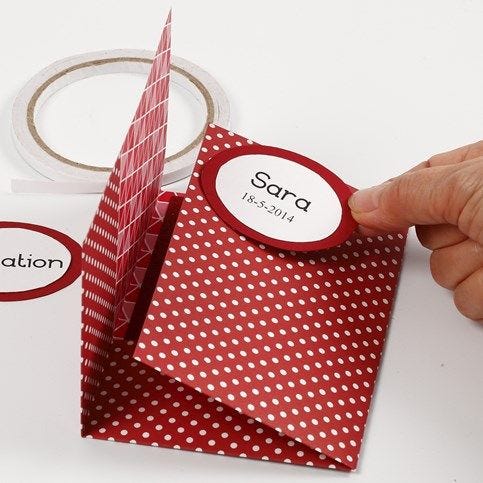
8. Make another two red card ovals with headings printed on white paper. Attach one of the ovals onto the front of the right handside section of the tri-fold card. Attach the other oval onto the very front cover of the tri-fold card. (NB: in that way the paper's logo remains covered up).

9. Decorate the front of the tri-fold card with adhesive rhinestone half-pearls. Tie a piece of satin ribbon around the card as a “waist band”.
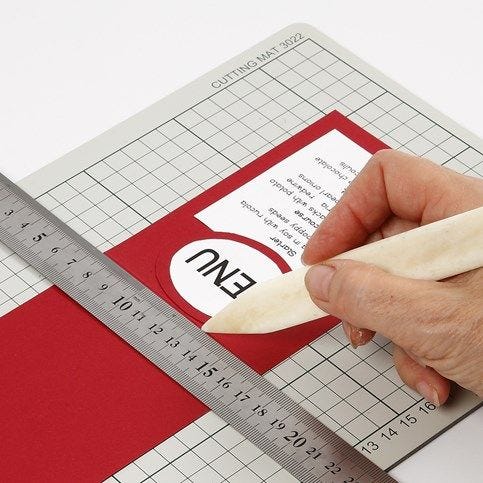
10. Menu card: cut a 9.5 x 26cm piece of card and score across the middle using a bone folder. Cut out the card oval together with the printed heading and menu. Attach these to the front of the menu card using double-sided adhesive tape.
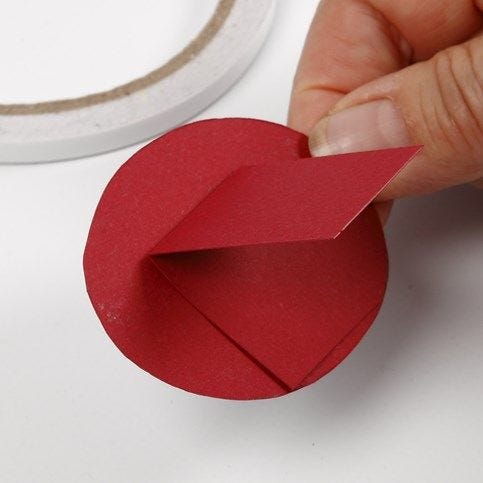
11. Place card: Cut out a large card oval. Use double-sided adhesive tape to attach the printed name. Cut out slightly smaller than the red card oval. Make a stand from a rectangular doubled-over piece of card. Attach to the card oval.
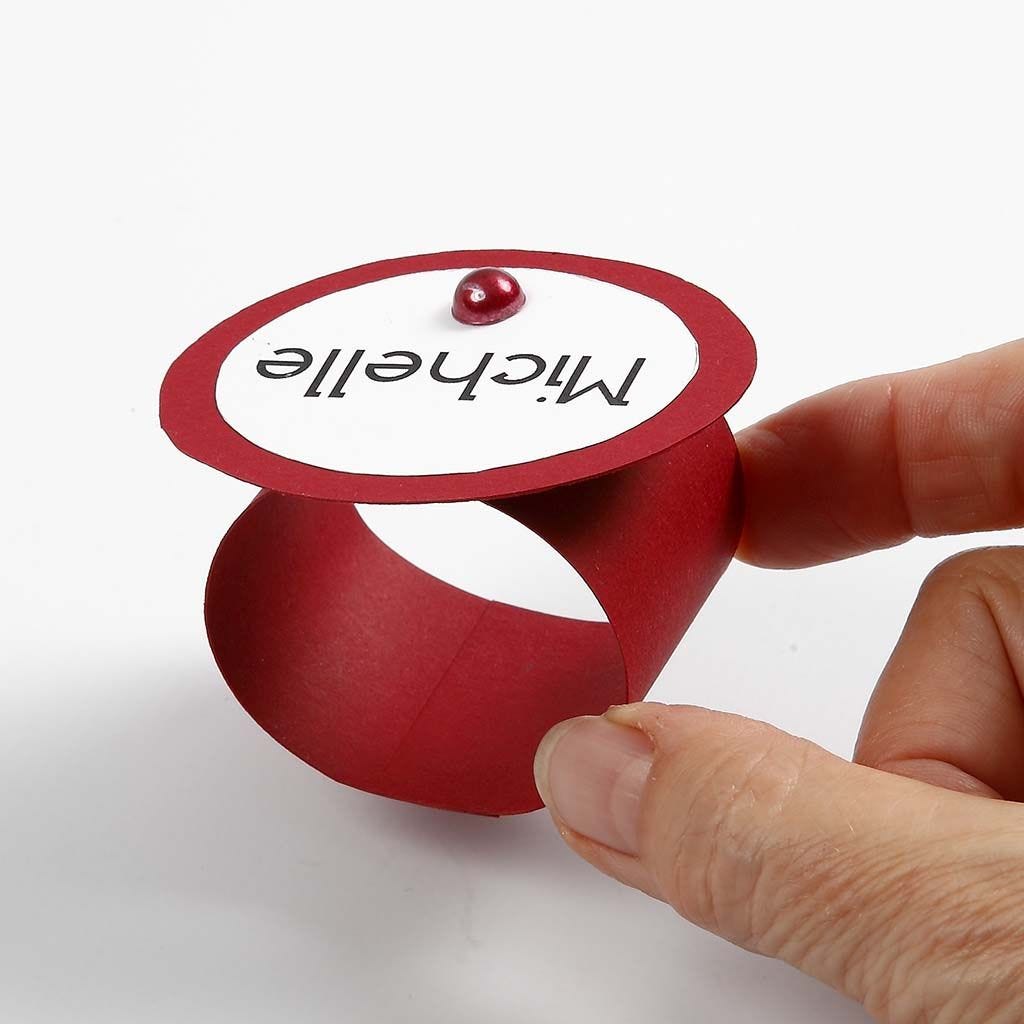
12. As an alternative you may make a napkin ring from a 3.5 x 16cm piece of red card. Attach the oval with the text onto the assembled napkin ring.

Already signed up? Download the template
Also go exploring in
