
New
Creative idea
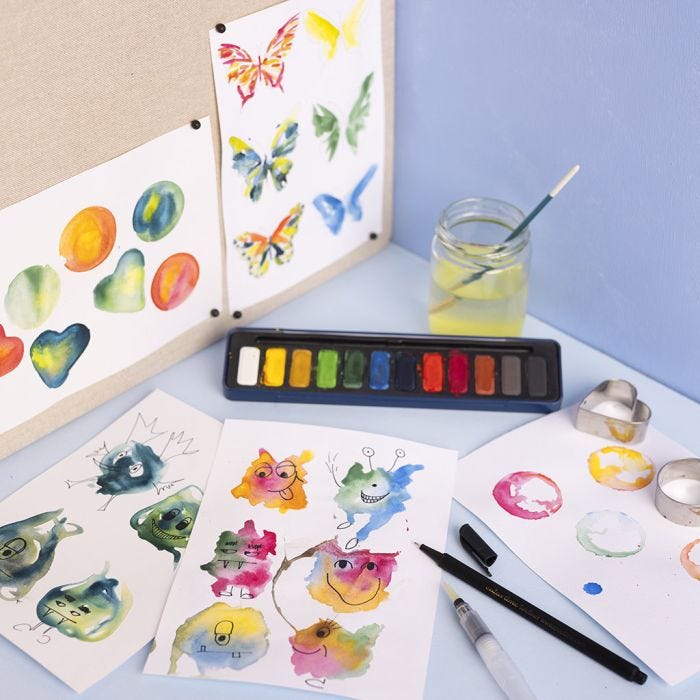
Paint imaginary figures and butterflies with watercolours
#v17005
Learn to paint with watercolours using a wet-on-wet technique to blend the colours together. You can then use the technique to create unique imaginary figures and beautiful butterflies. You also learn how to use cutters to make bubbles and hearts.
#v17005
How to do it
1 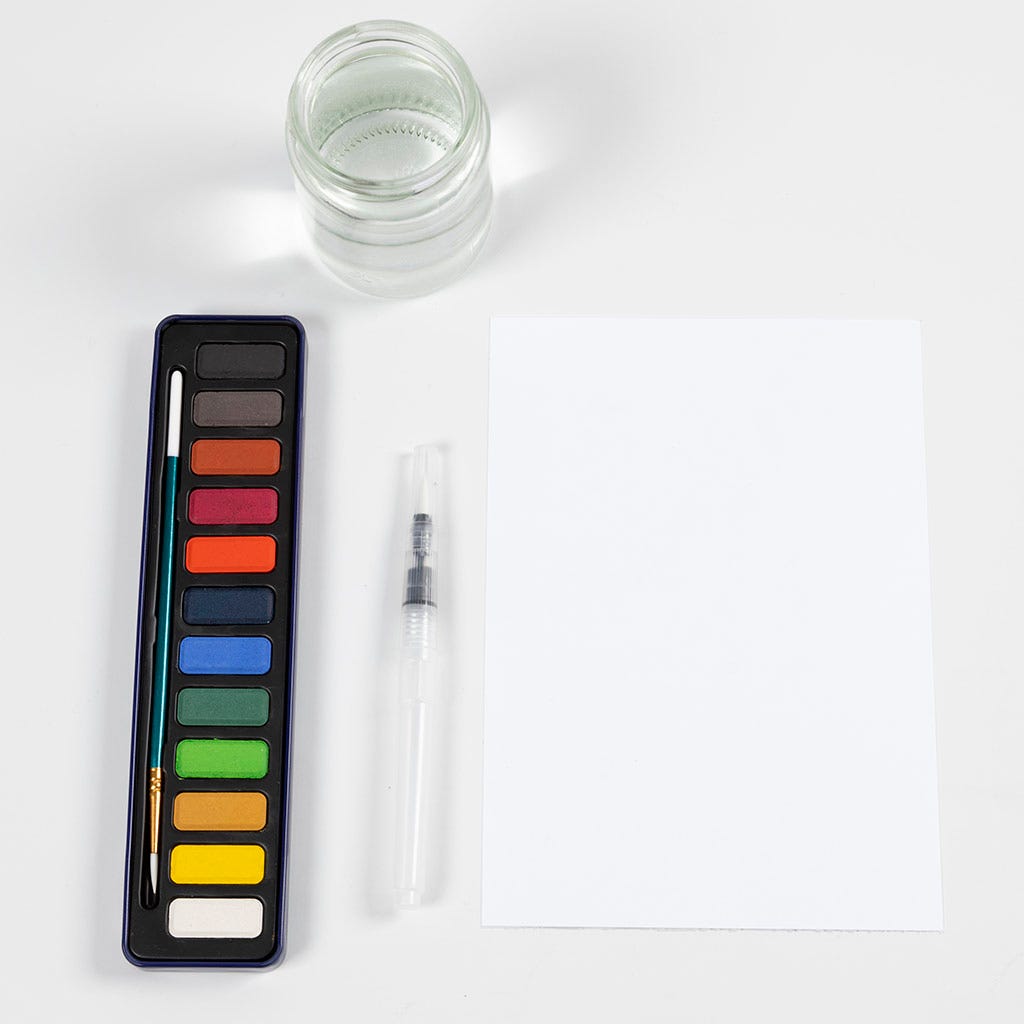 Prepare everything you need as shown in the picture. We are now going to make colour circles. Colour circles are used to experiment with how different colours 'work' together.
Prepare everything you need as shown in the picture. We are now going to make colour circles. Colour circles are used to experiment with how different colours 'work' together.2 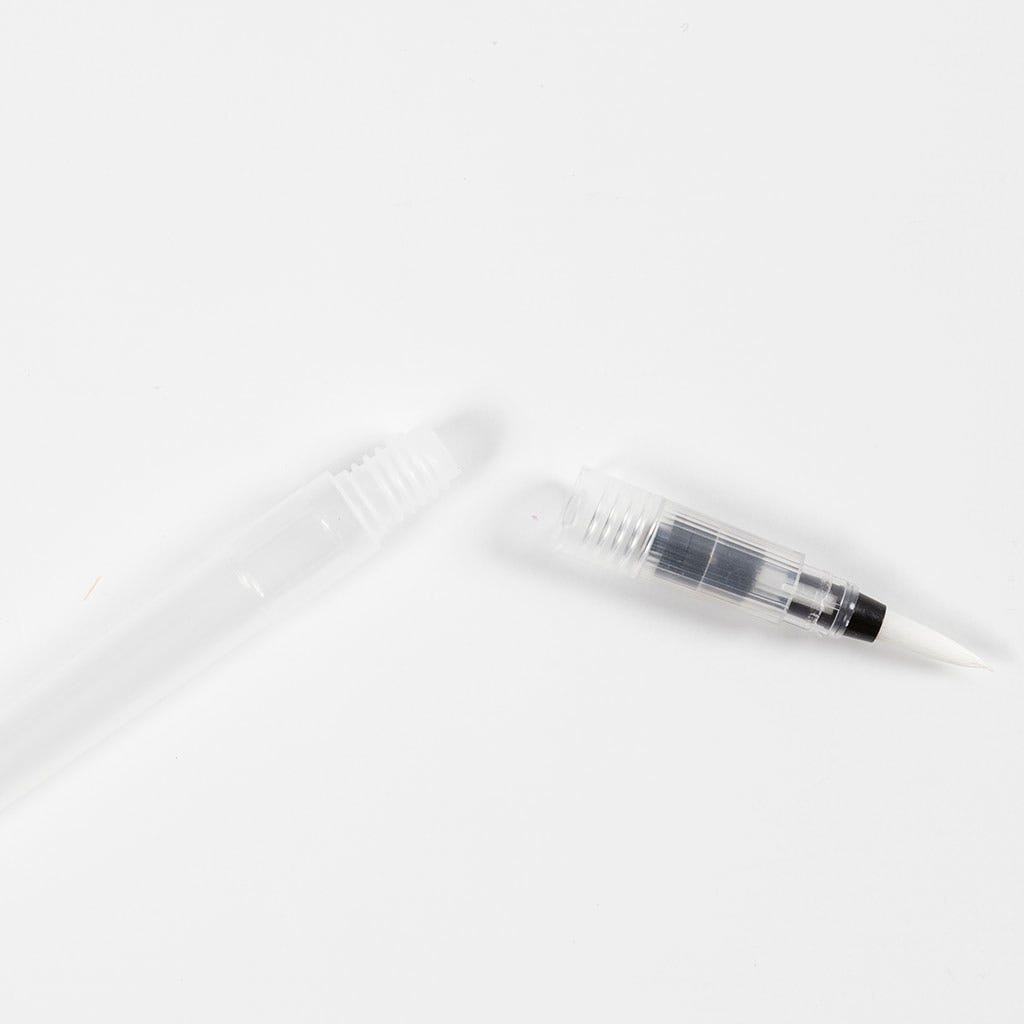 Unscrew the lid of the water brush as shown in the picture and fill the brush with water.
Unscrew the lid of the water brush as shown in the picture and fill the brush with water.3  Squeeze water out of the brush and paint a circle with water.
Squeeze water out of the brush and paint a circle with water.4 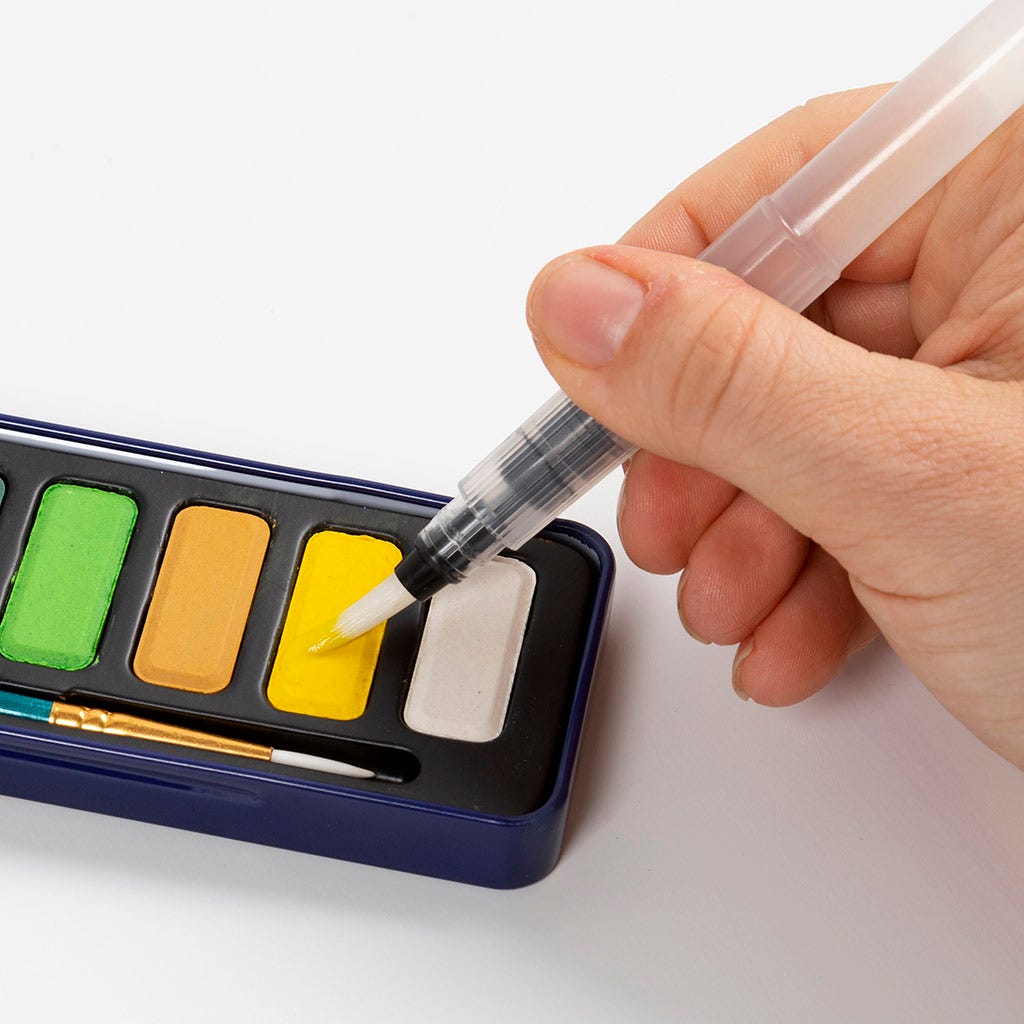 Dip the brush in a colour.
Dip the brush in a colour.5 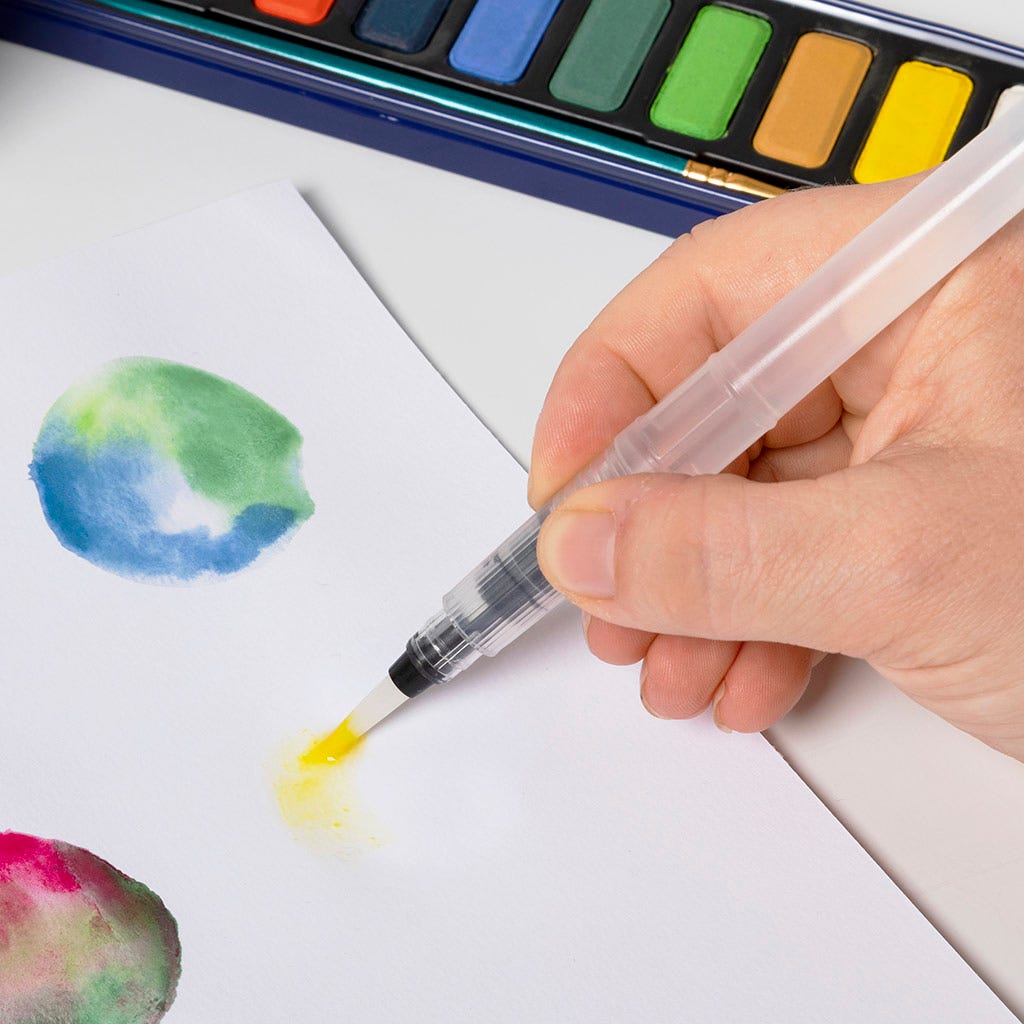 Now paint 1/3 of the water circle you just made.
Now paint 1/3 of the water circle you just made.6  Clean the brush.
Clean the brush.7 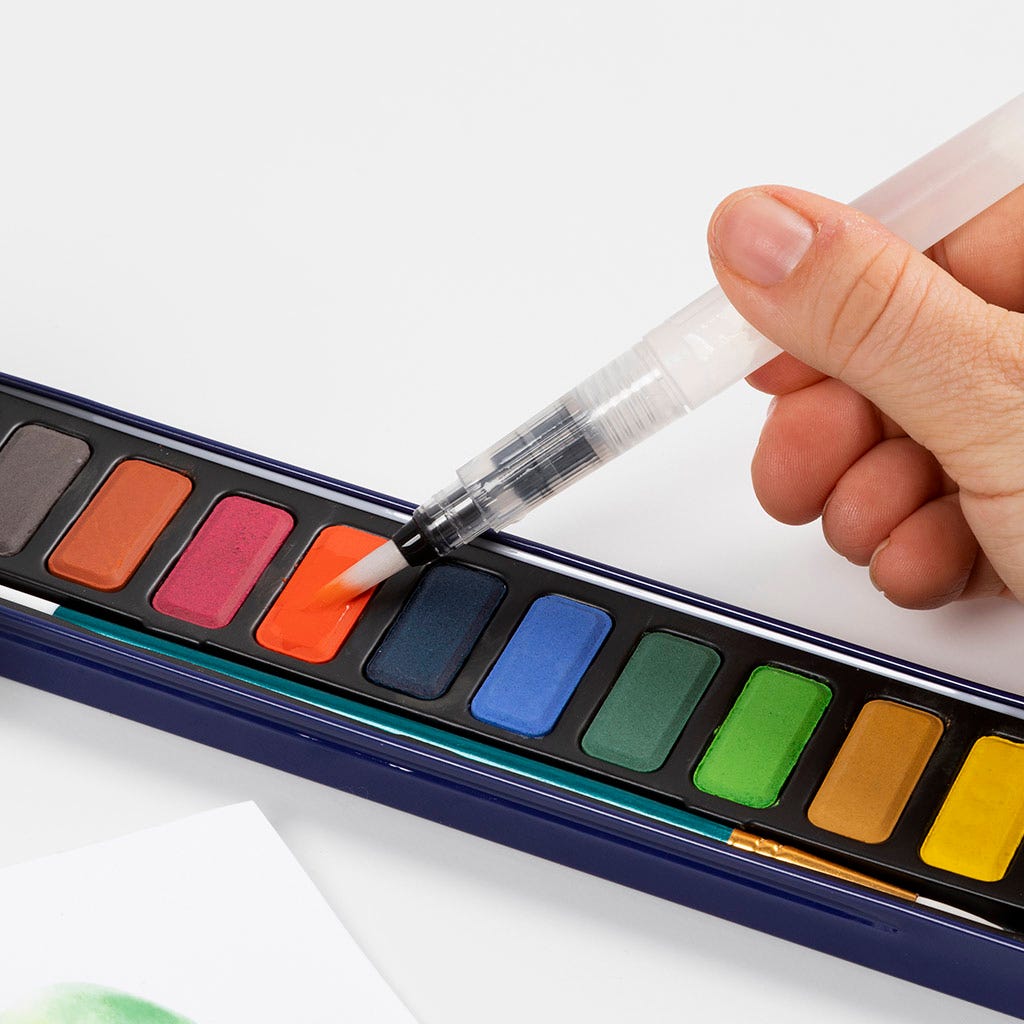 Dip the brush in a colour. Orange is used here.
Dip the brush in a colour. Orange is used here.8 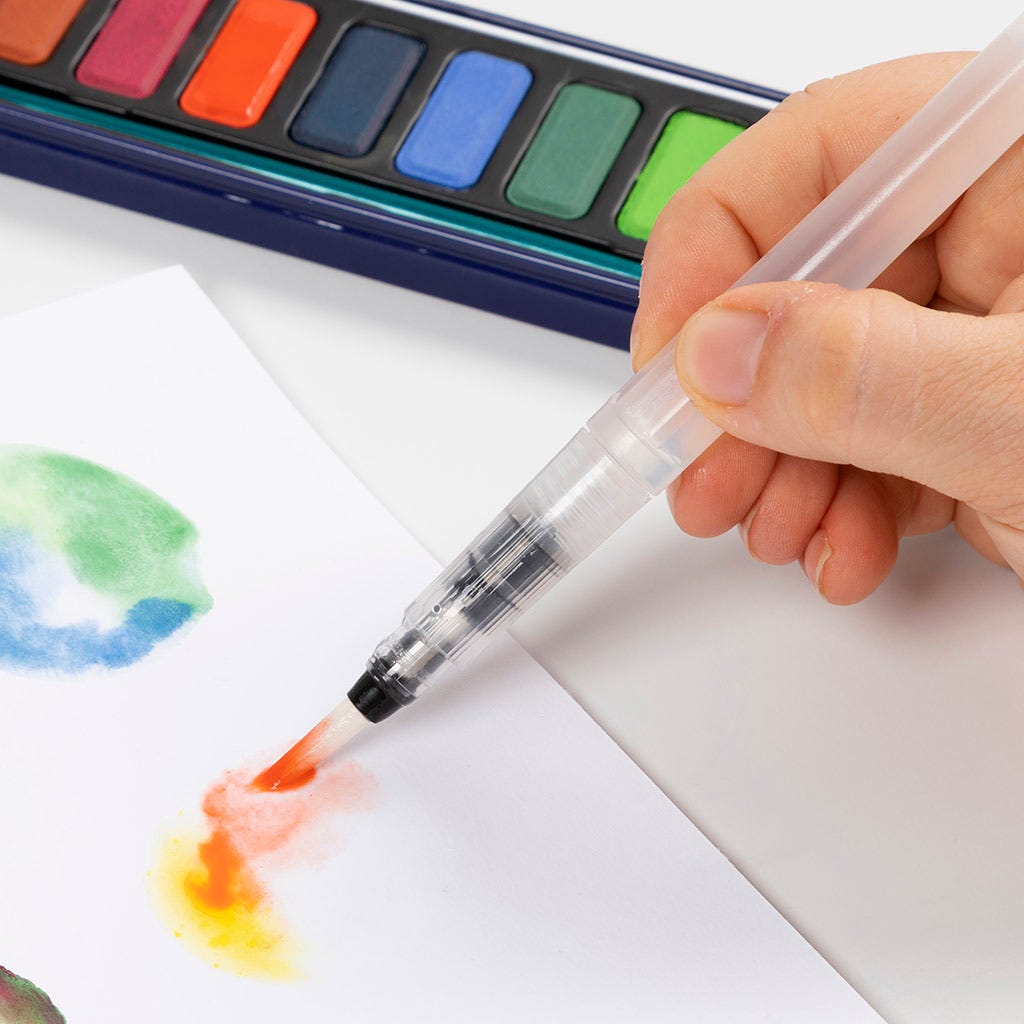 Paint 1/3 of the circle with that colour.
Paint 1/3 of the circle with that colour.9 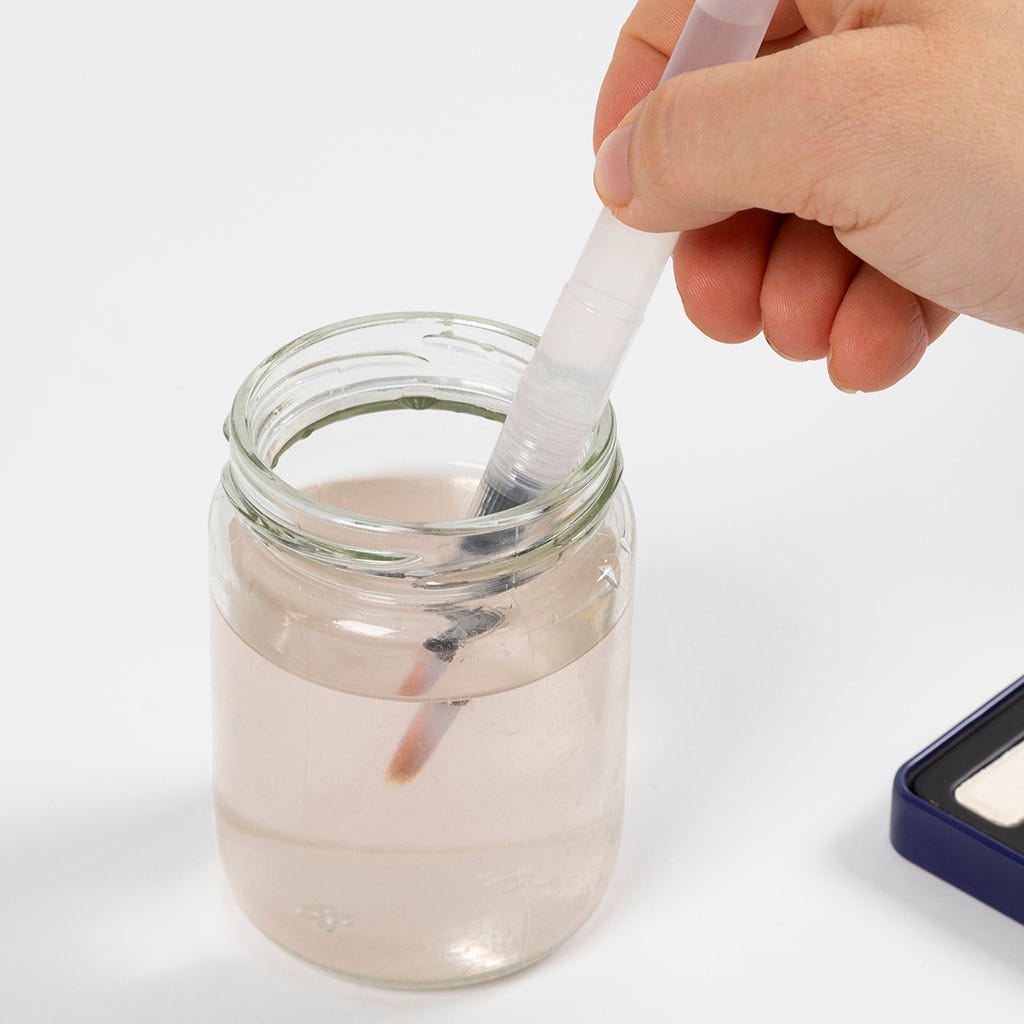 Clean the brush.
Clean the brush.10  Dip the brush in another colour. Light blue is chosen here.
Dip the brush in another colour. Light blue is chosen here.11 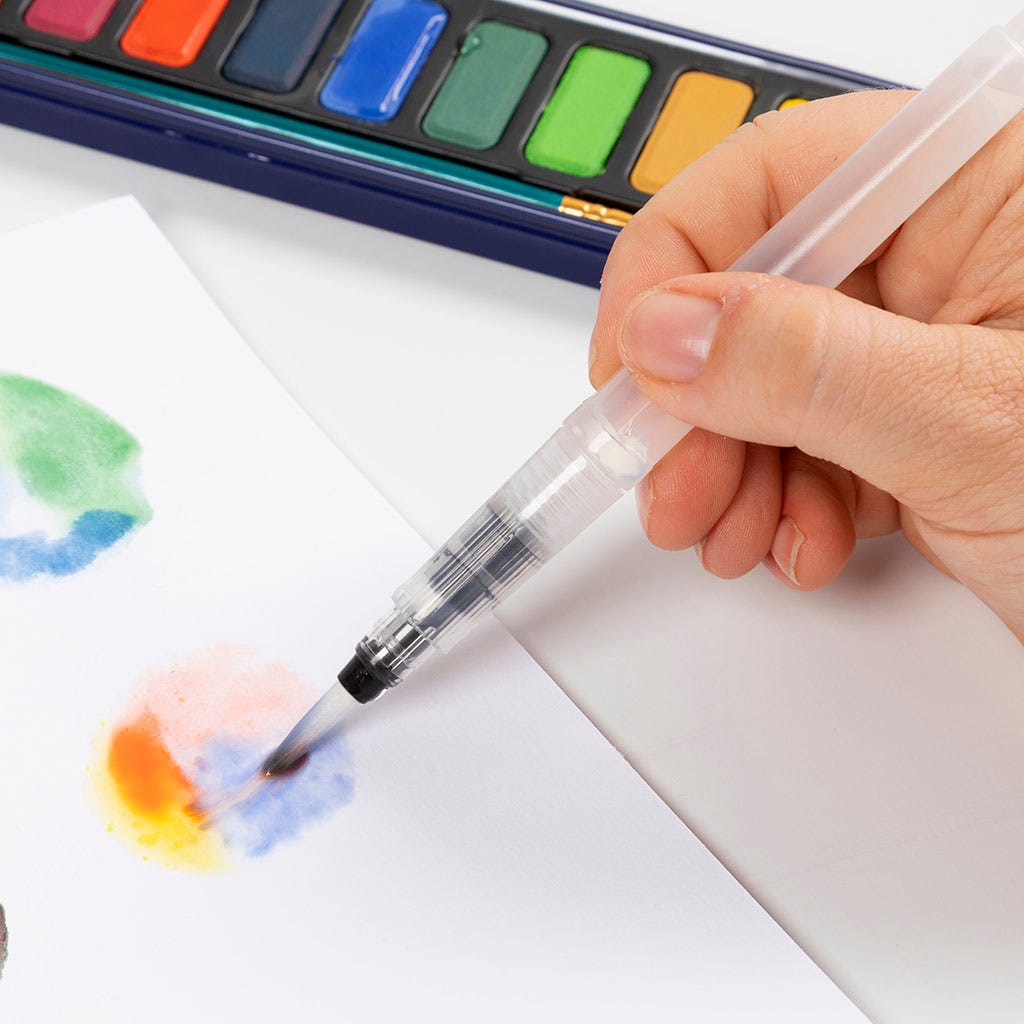 Paint the last 1/3 of the circle and watch the colours flow together. Experiment with different colours on the page. Colour experiments can be used as inspiration for imaginary figures.
Paint the last 1/3 of the circle and watch the colours flow together. Experiment with different colours on the page. Colour experiments can be used as inspiration for imaginary figures.12 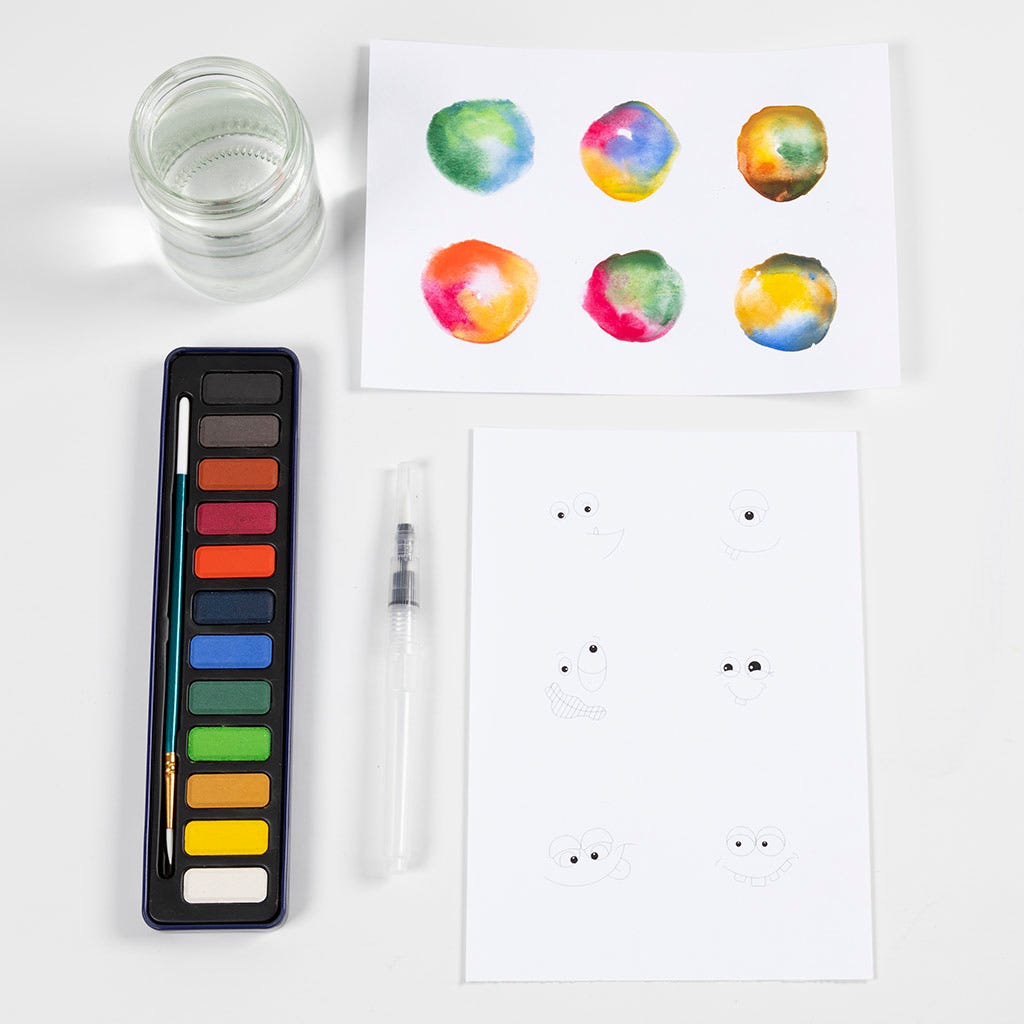 We are now going to make imaginary figures with inspiration from our colour experiments. Prepare everything you will need.
We are now going to make imaginary figures with inspiration from our colour experiments. Prepare everything you will need.13 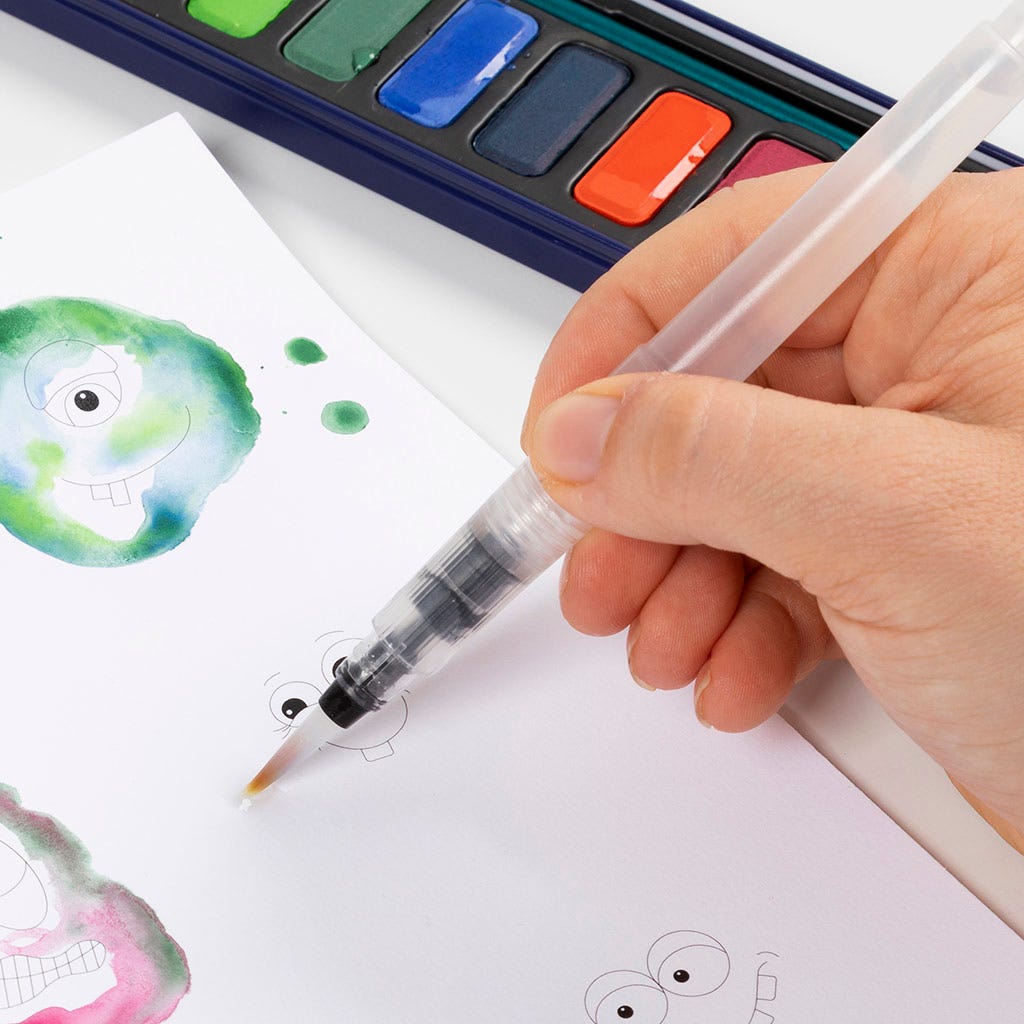 Paint around the face with water.
Paint around the face with water.14 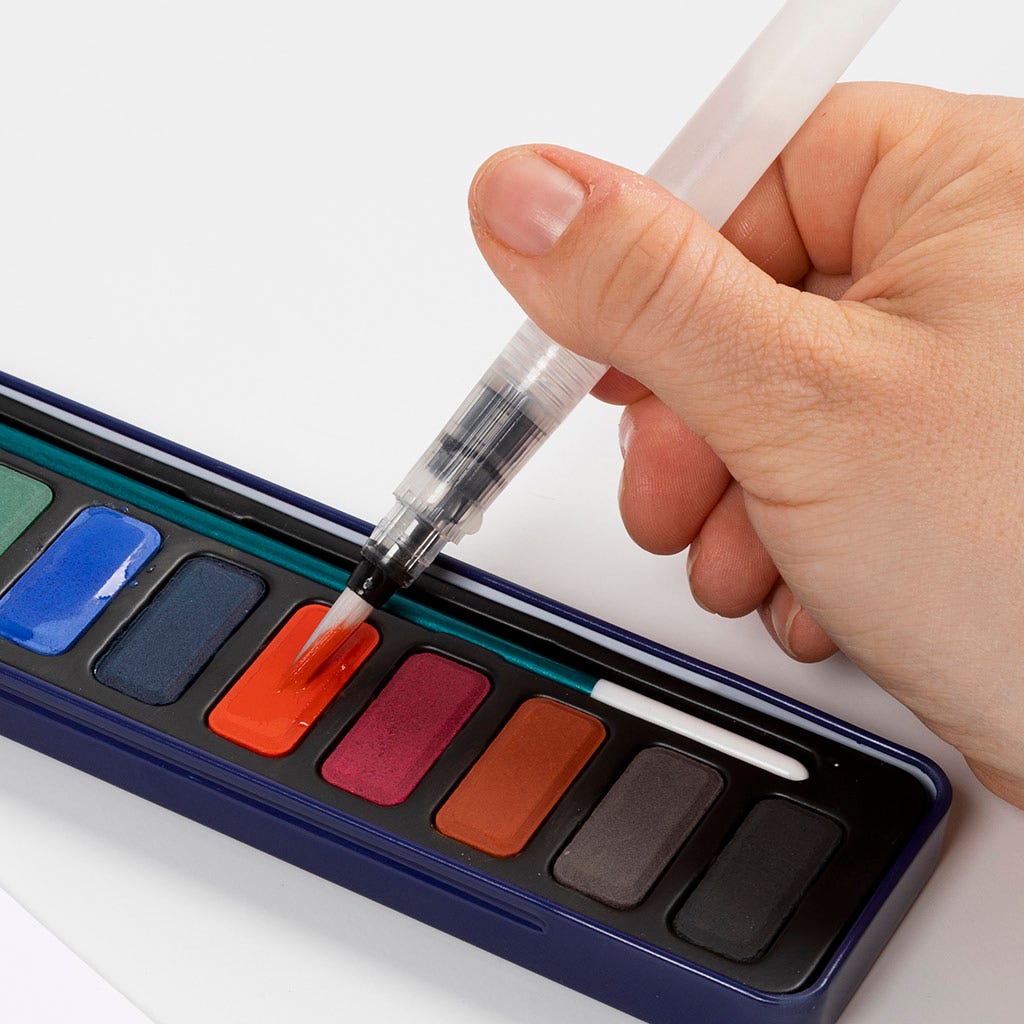 Dip the brush in a colour. Orange is used here.
Dip the brush in a colour. Orange is used here.15 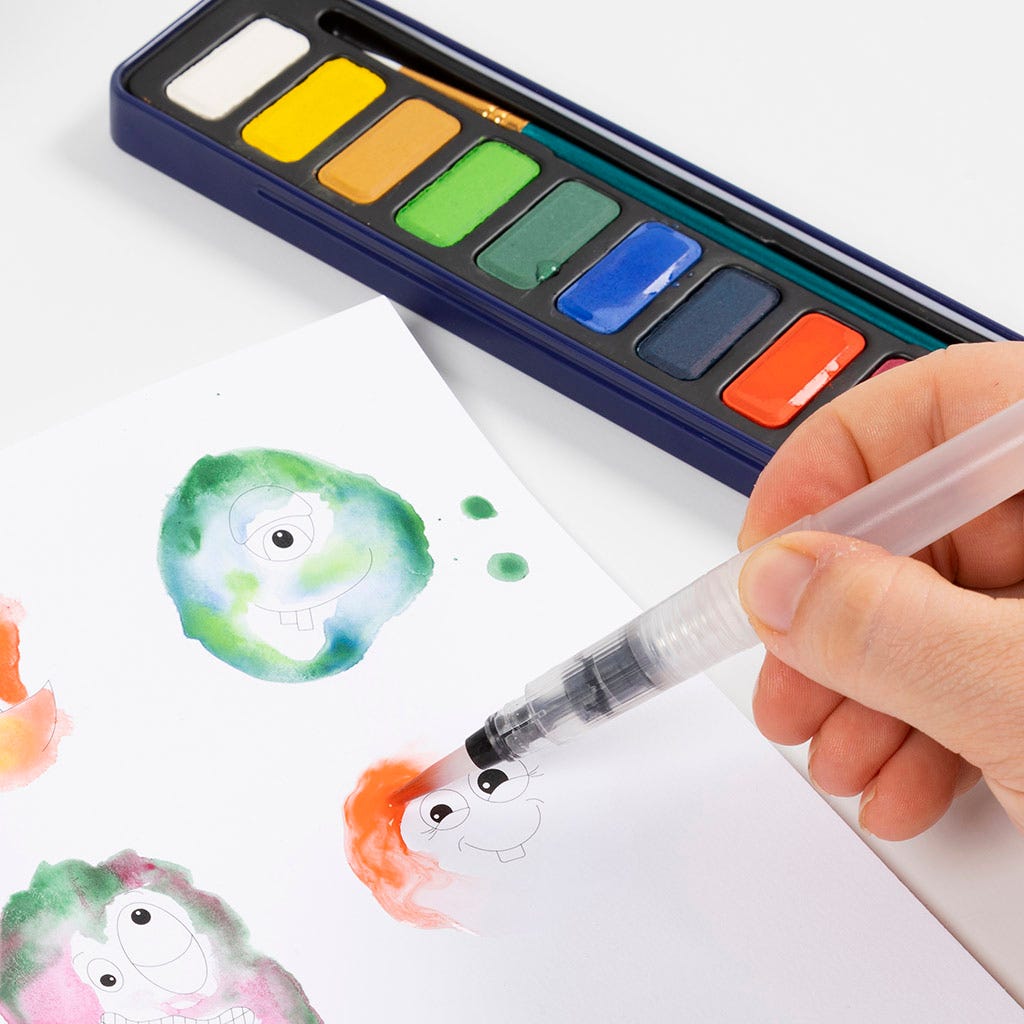 Paint 1/3 of the wet area.
Paint 1/3 of the wet area.16  Clean the brush.
Clean the brush.17 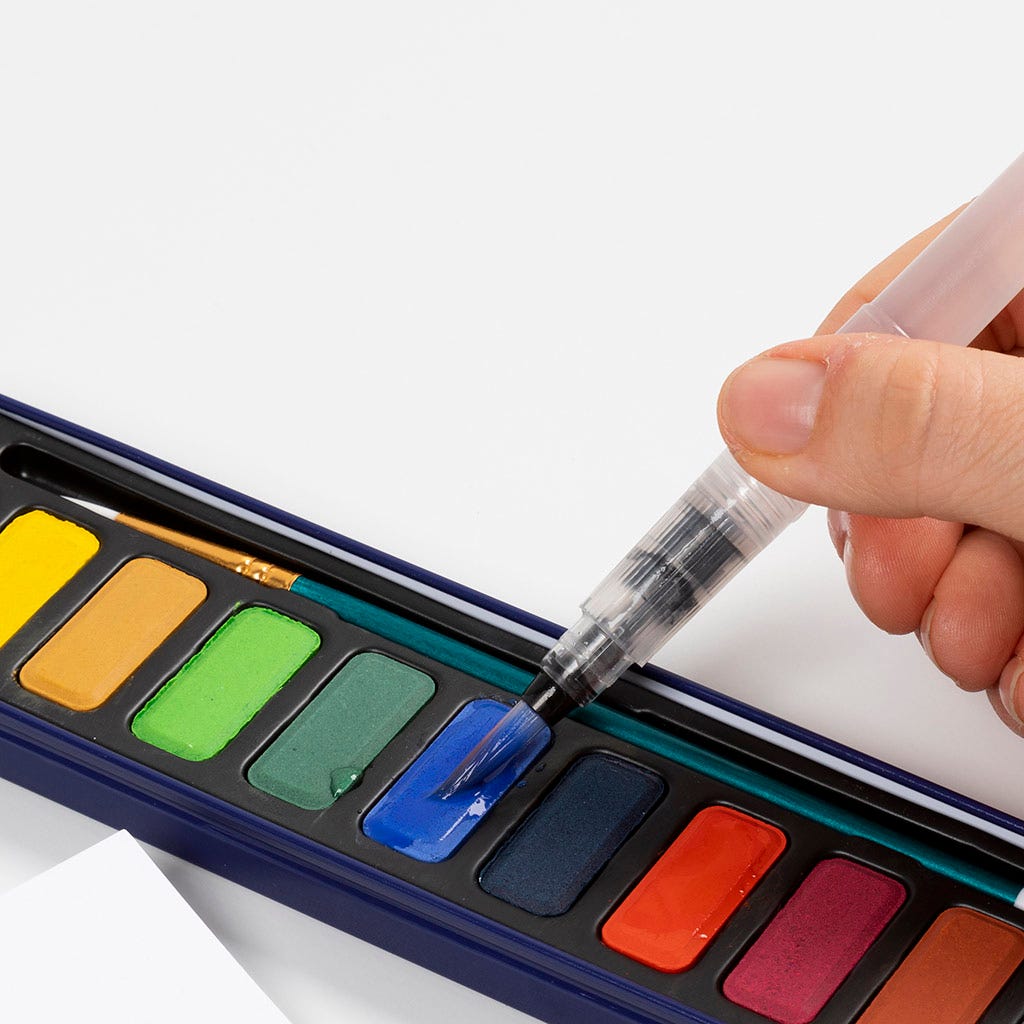 Dip the brush in another colour. Light blue is used here.
Dip the brush in another colour. Light blue is used here.18 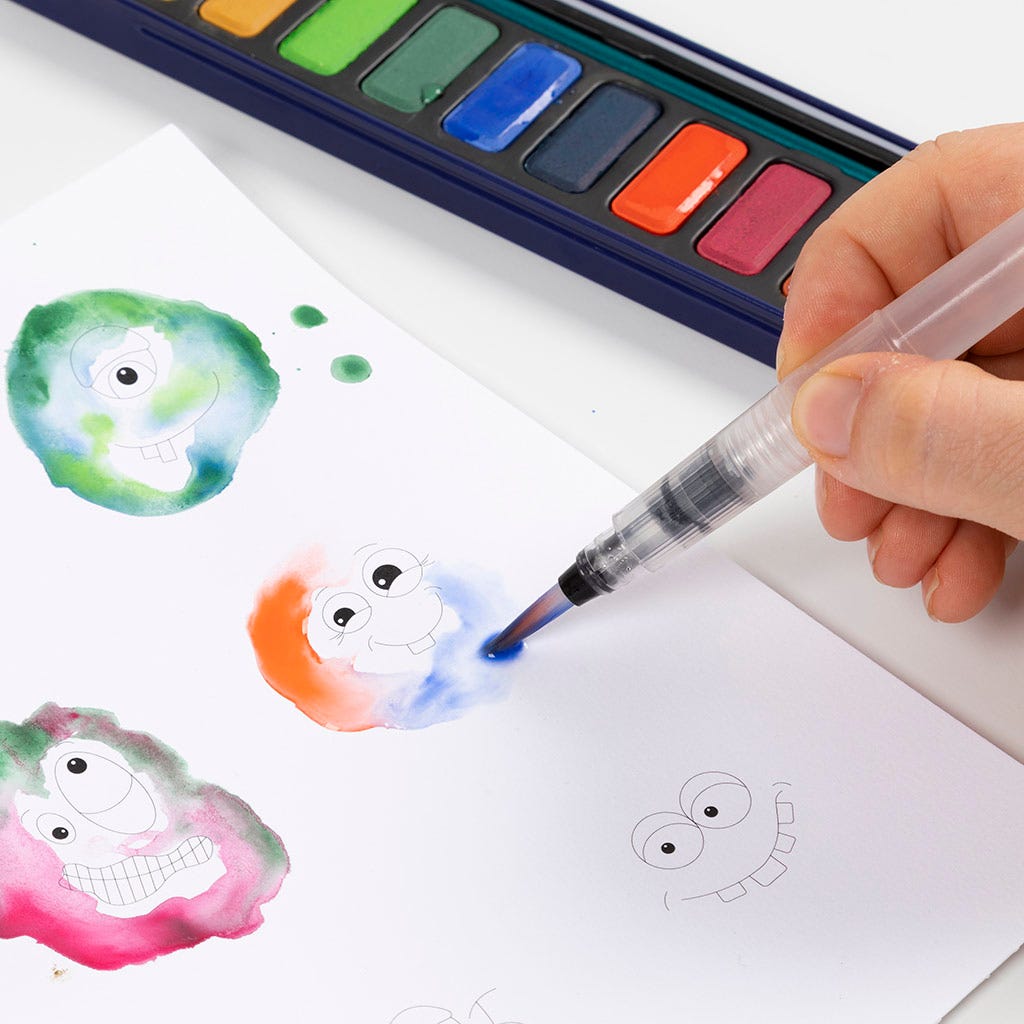 Paint 1/3 of the wet area with the paint.
Paint 1/3 of the wet area with the paint.19 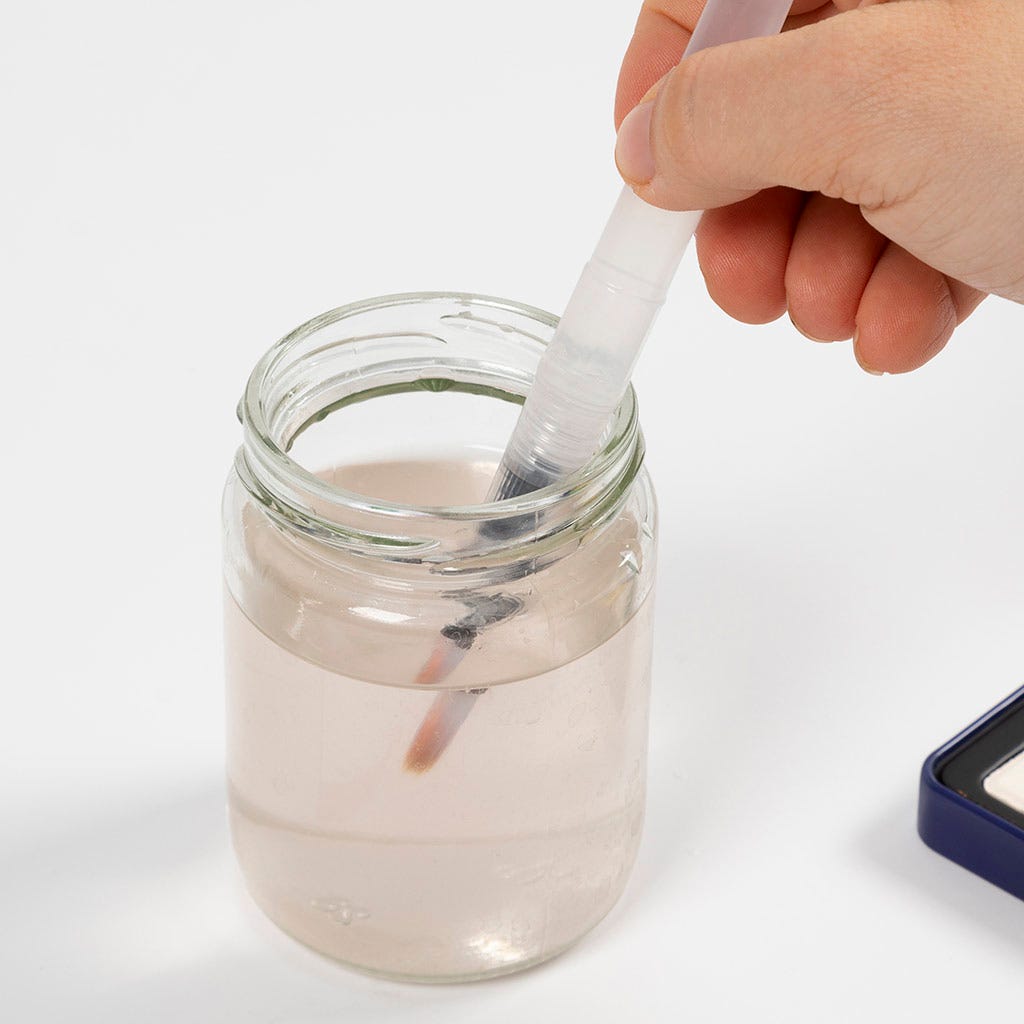 Clean the brush.
Clean the brush.20  Dip the brush in another colour. Yellow is used here.
Dip the brush in another colour. Yellow is used here.21 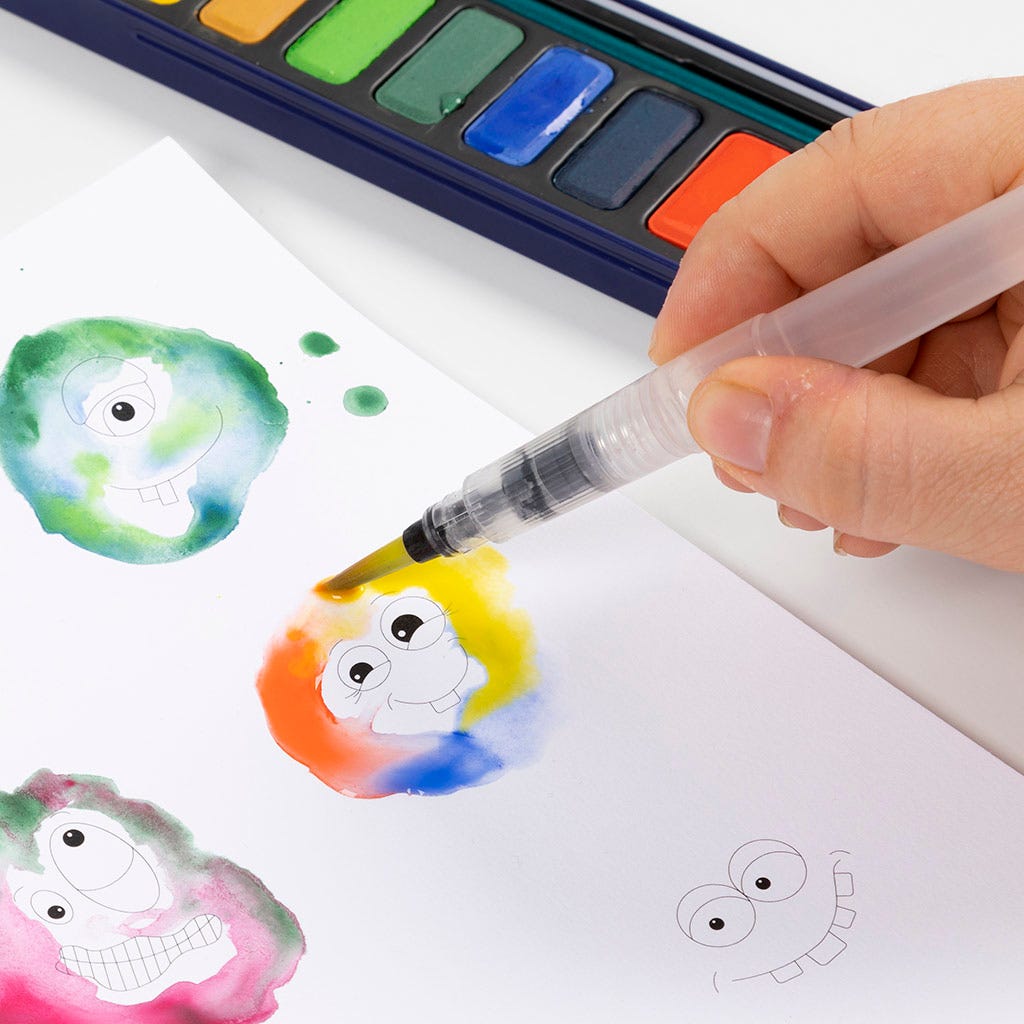 Paint the last 1/3 of the wet area with the colour. Continue until you have filled the entire page. Use whichever colours you want – there is no right or wrong.
Paint the last 1/3 of the wet area with the colour. Continue until you have filled the entire page. Use whichever colours you want – there is no right or wrong.22  Prepare what you will need as shown in the picture.
Prepare what you will need as shown in the picture.23 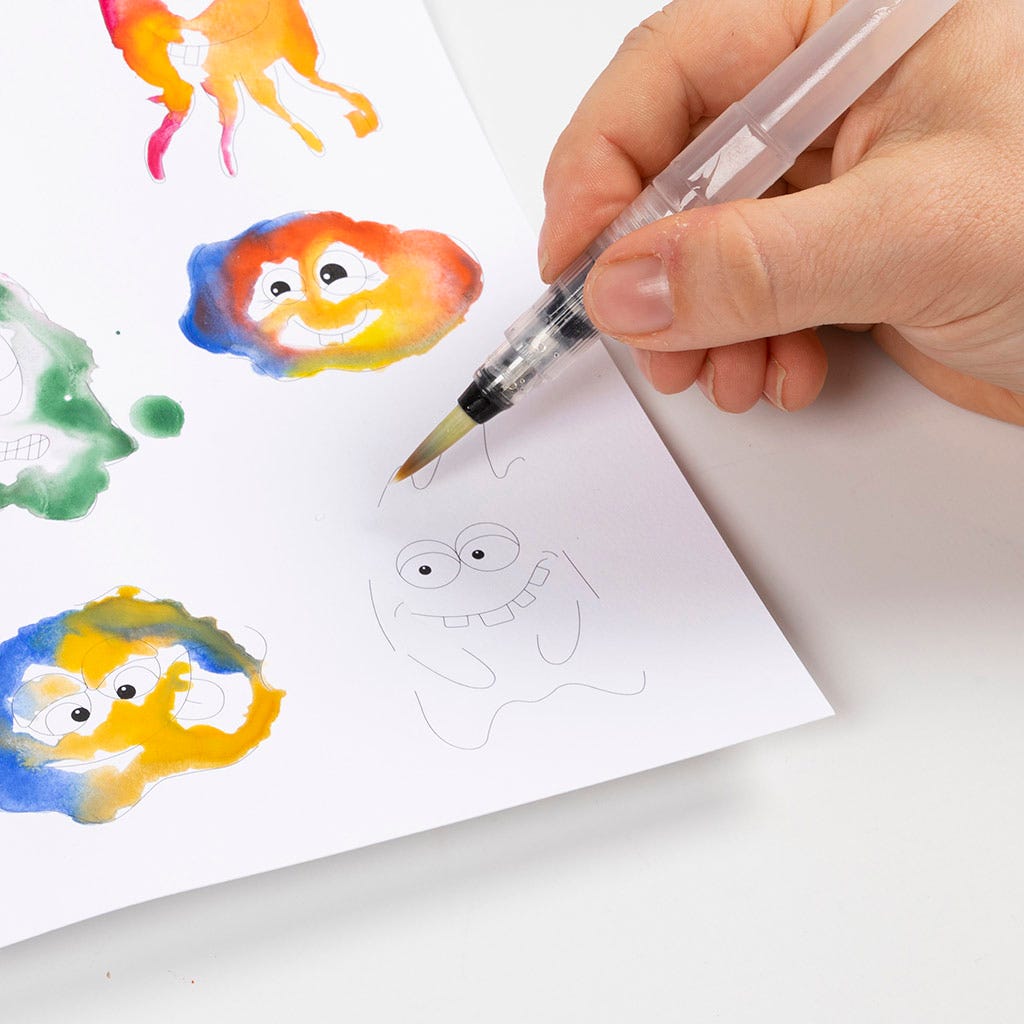 Paint the imaginary animal with water.
Paint the imaginary animal with water.24 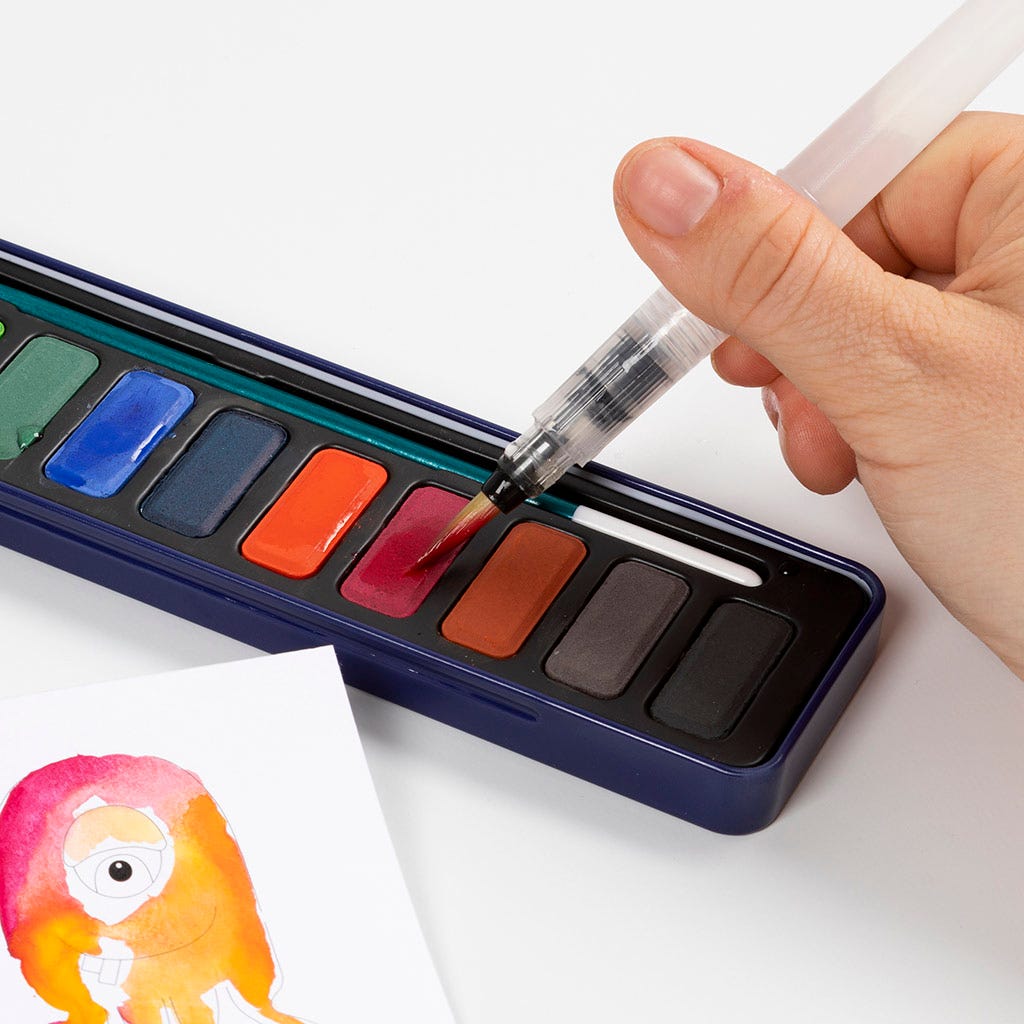 Dip the brush in a colour. Red is used here.
Dip the brush in a colour. Red is used here.25 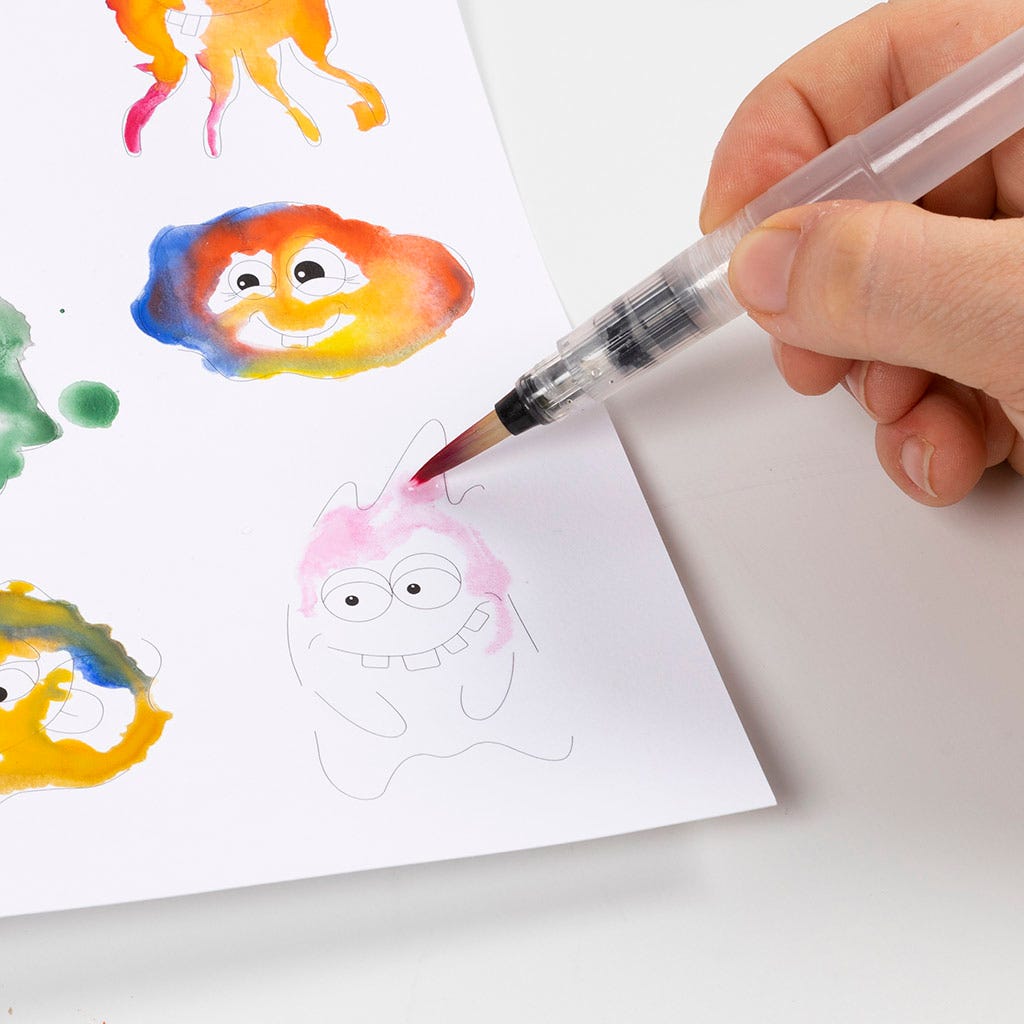 Paint 1/3 of the wet area with the paint.
Paint 1/3 of the wet area with the paint.26 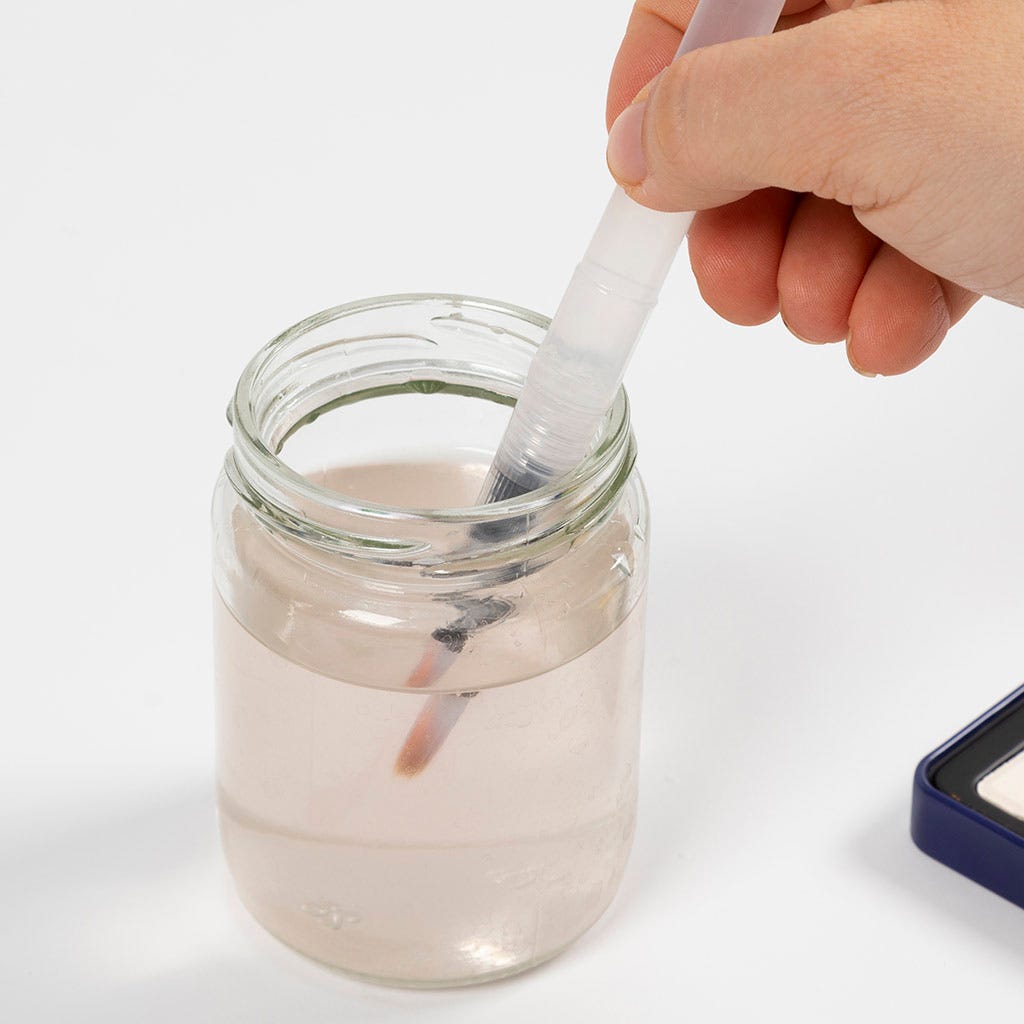 Clean the brush.
Clean the brush.27 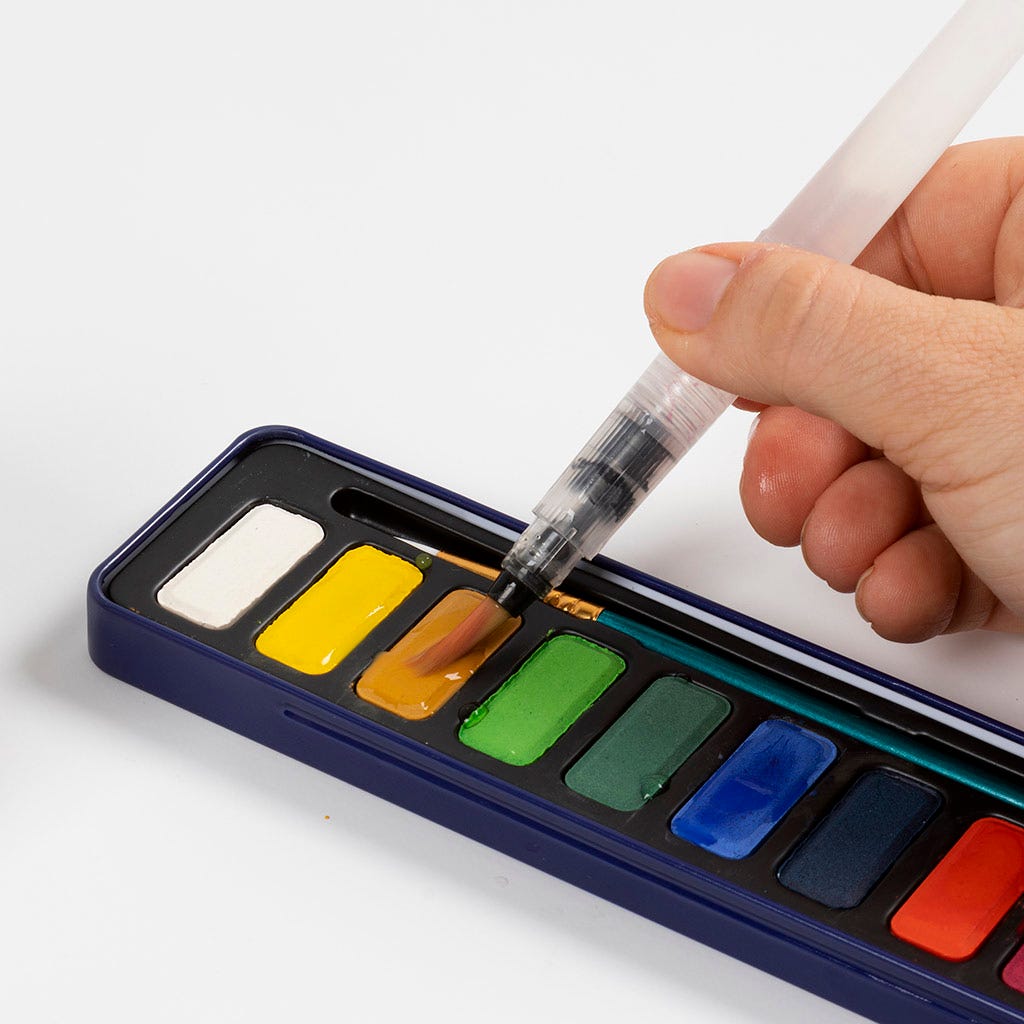 Dip the brush in a colour. Dark yellow is used here.
Dip the brush in a colour. Dark yellow is used here.28 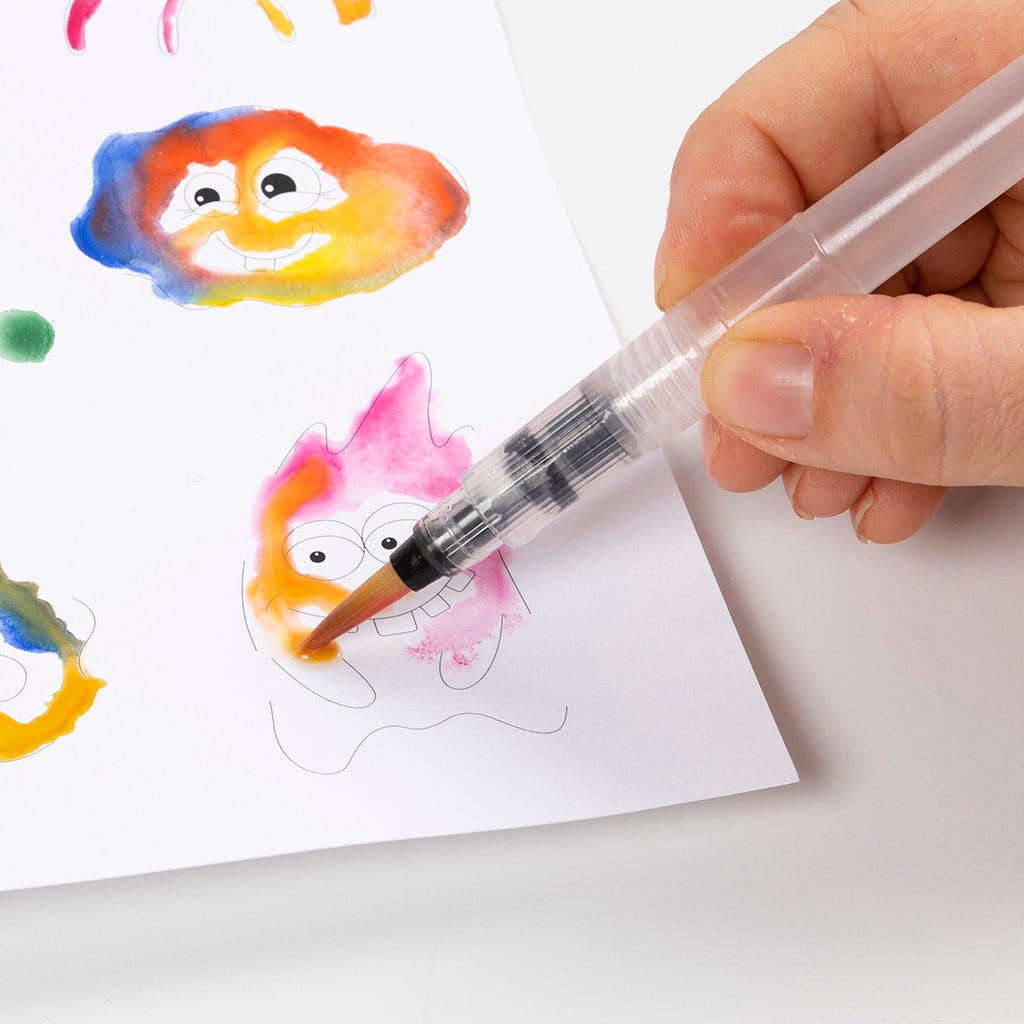 Paint 1/3 of the wet area with the paint.
Paint 1/3 of the wet area with the paint.29  Clean the brush.
Clean the brush.30 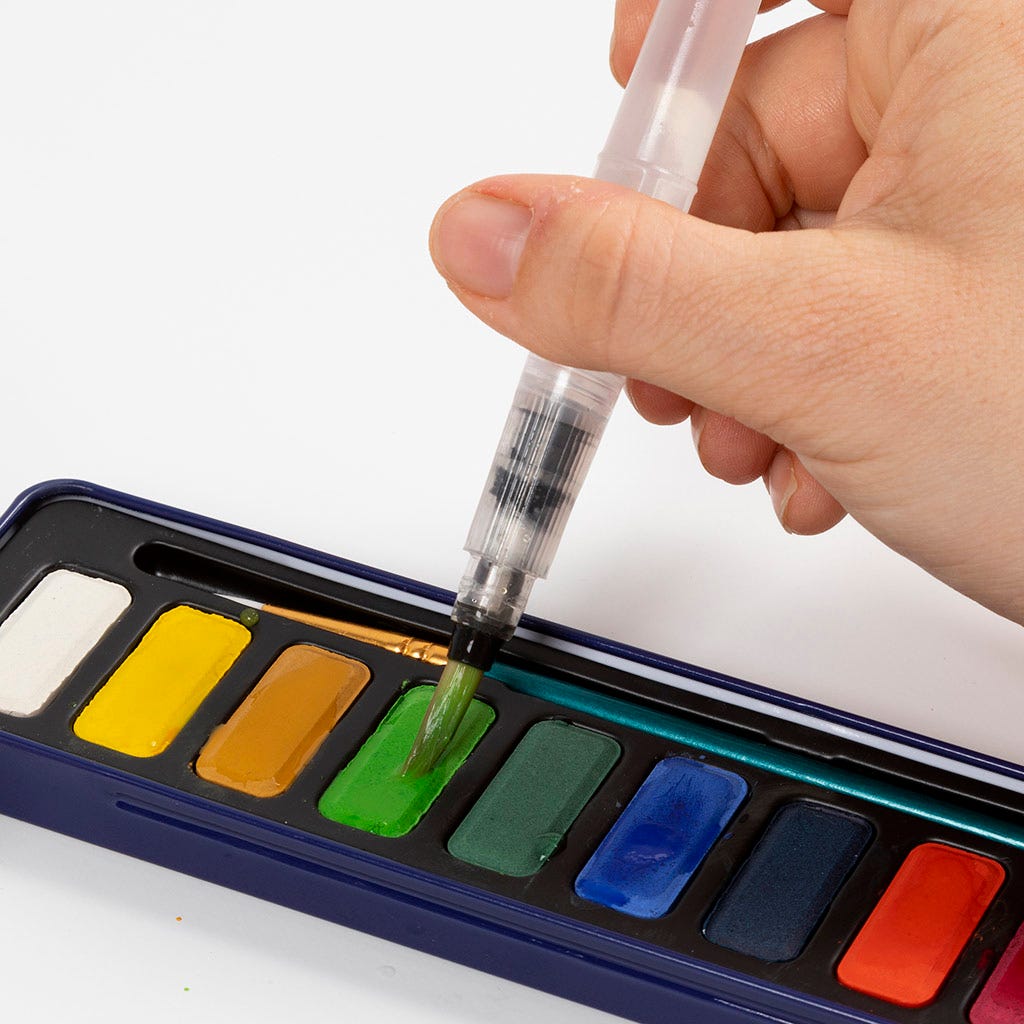 Dip the brush in another colour. Light green is used here.
Dip the brush in another colour. Light green is used here.31 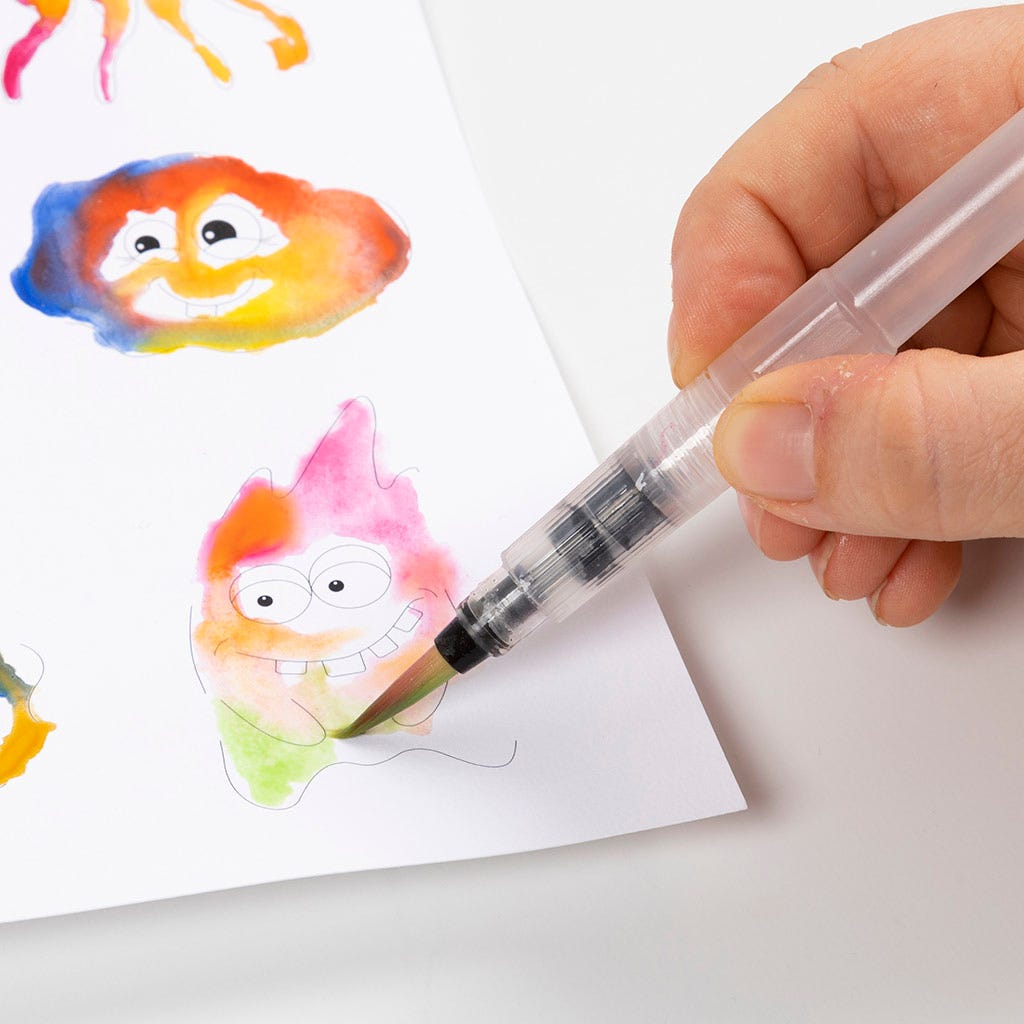 Paint the last part of the wet area and watch the colours flow together.
Paint the last part of the wet area and watch the colours flow together.32 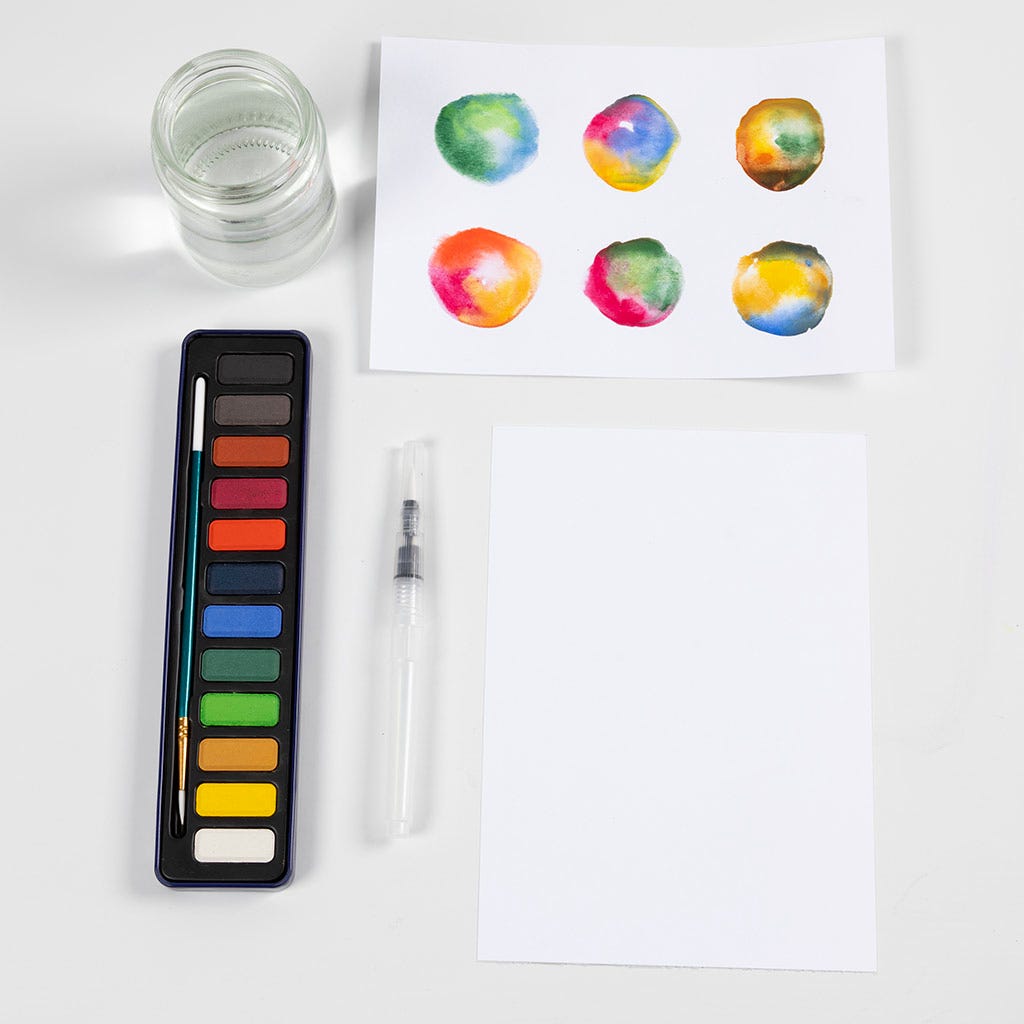 Now we’re going to make imaginary figures without a template. Find everything you will need, including the colour experiments if you want to use them as inspiration.
Now we’re going to make imaginary figures without a template. Find everything you will need, including the colour experiments if you want to use them as inspiration.33 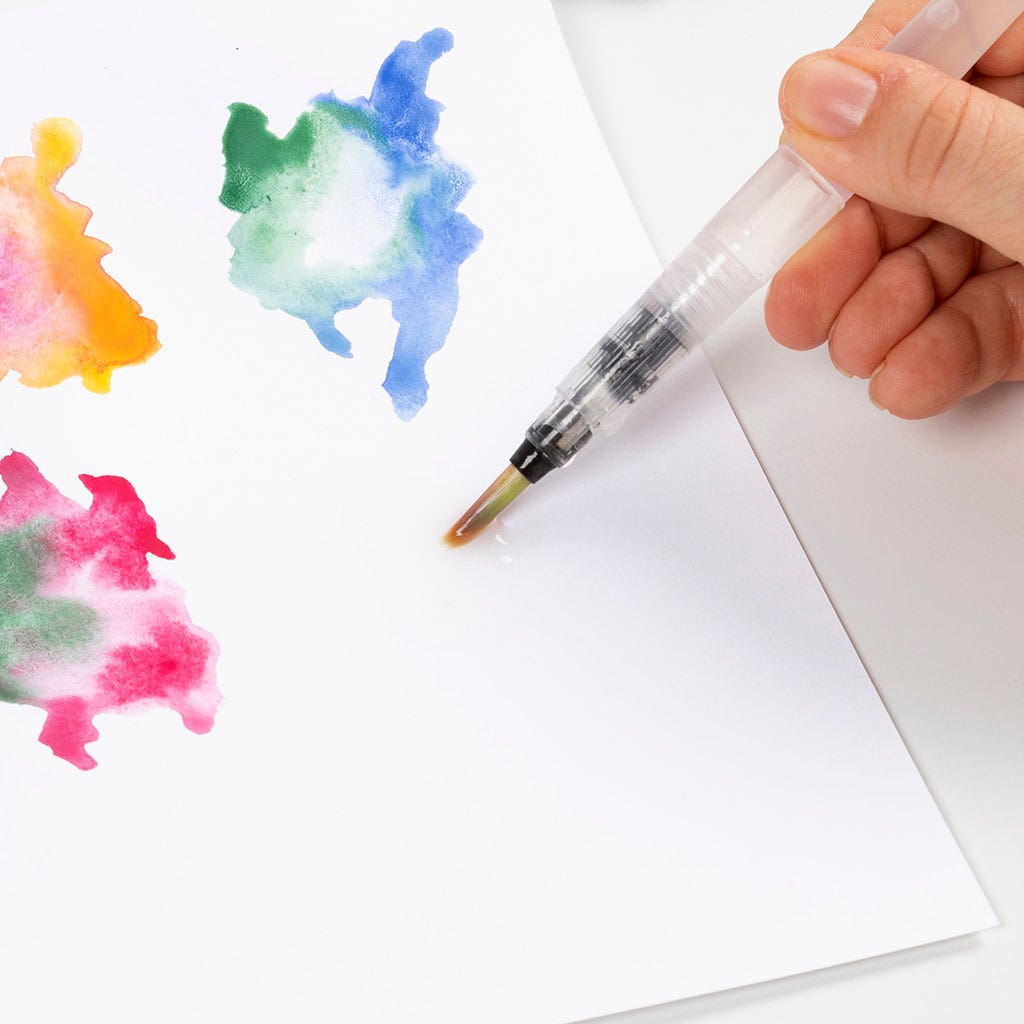 Paint with water in the shape of your imaginary animal.
Paint with water in the shape of your imaginary animal.34 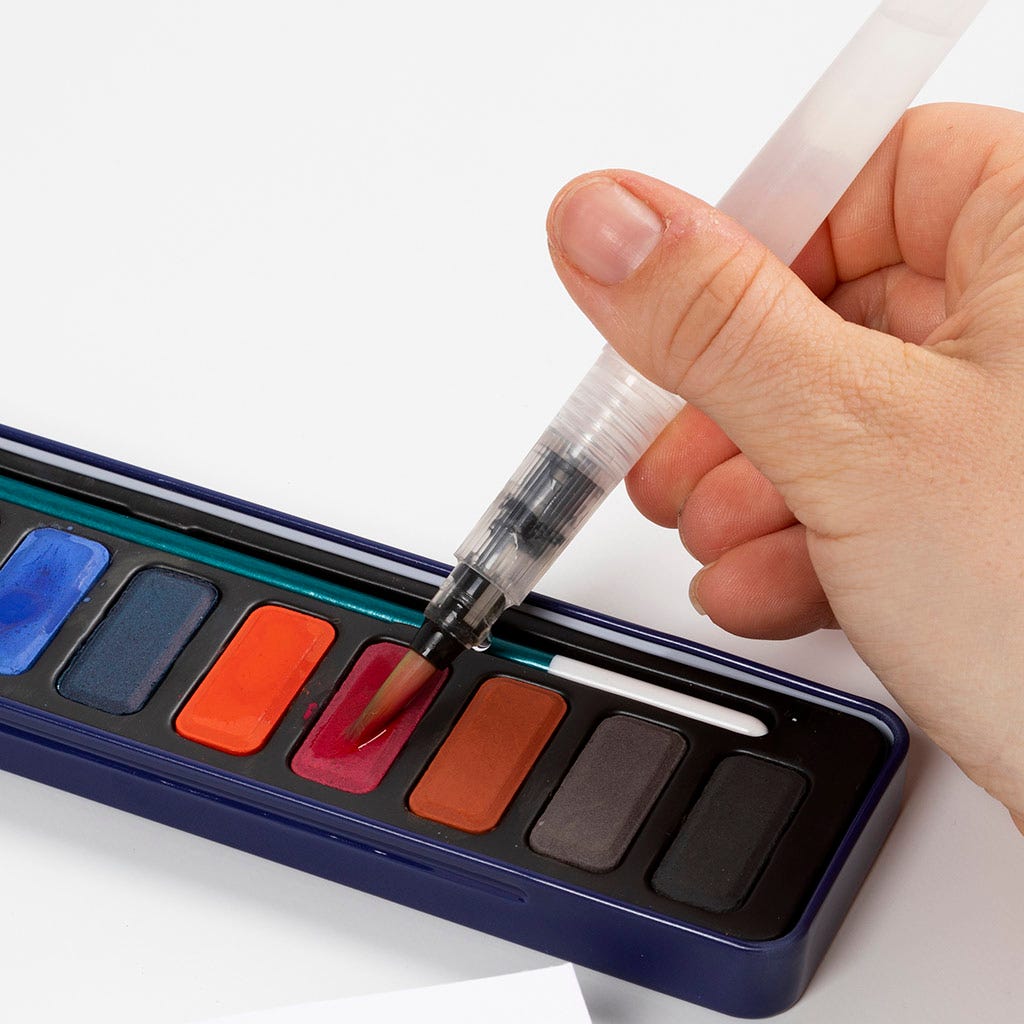 Dip the brush in a colour. Red is used here.
Dip the brush in a colour. Red is used here.35 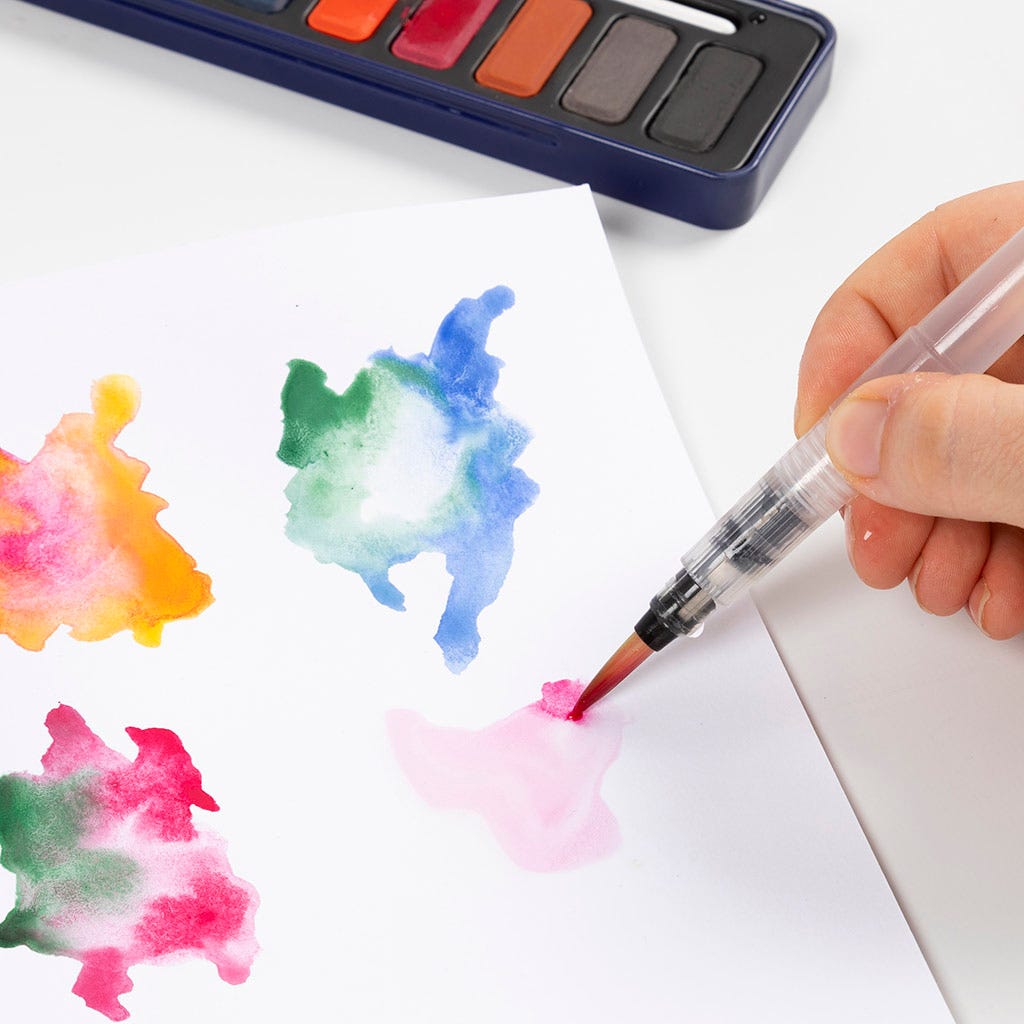 Paint 1/3 with the paint.
Paint 1/3 with the paint.36  Clean the brush.
Clean the brush.37 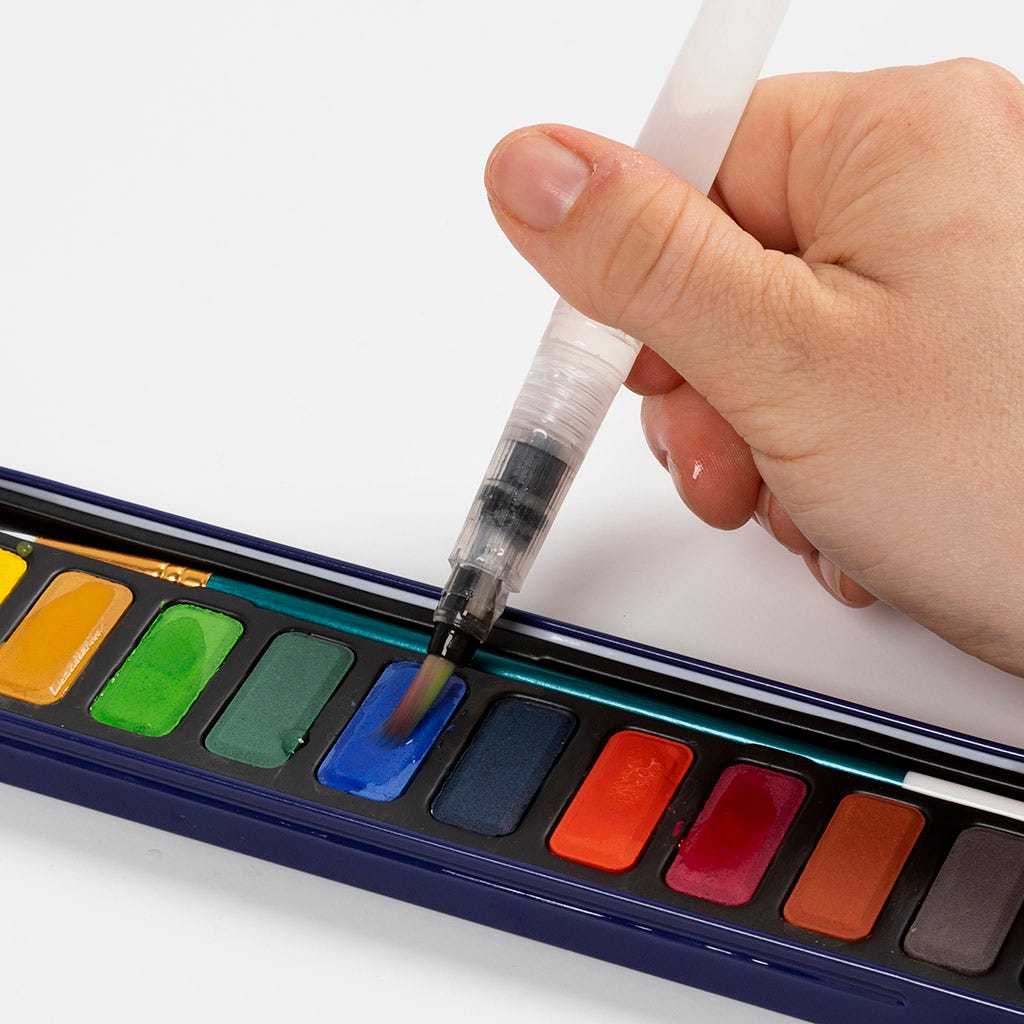 Dip the brush in a colour. Light blue is used here.
Dip the brush in a colour. Light blue is used here.38  Paint 1/3 of the wet area with the paint.
Paint 1/3 of the wet area with the paint.39  Clean the brush.
Clean the brush.40 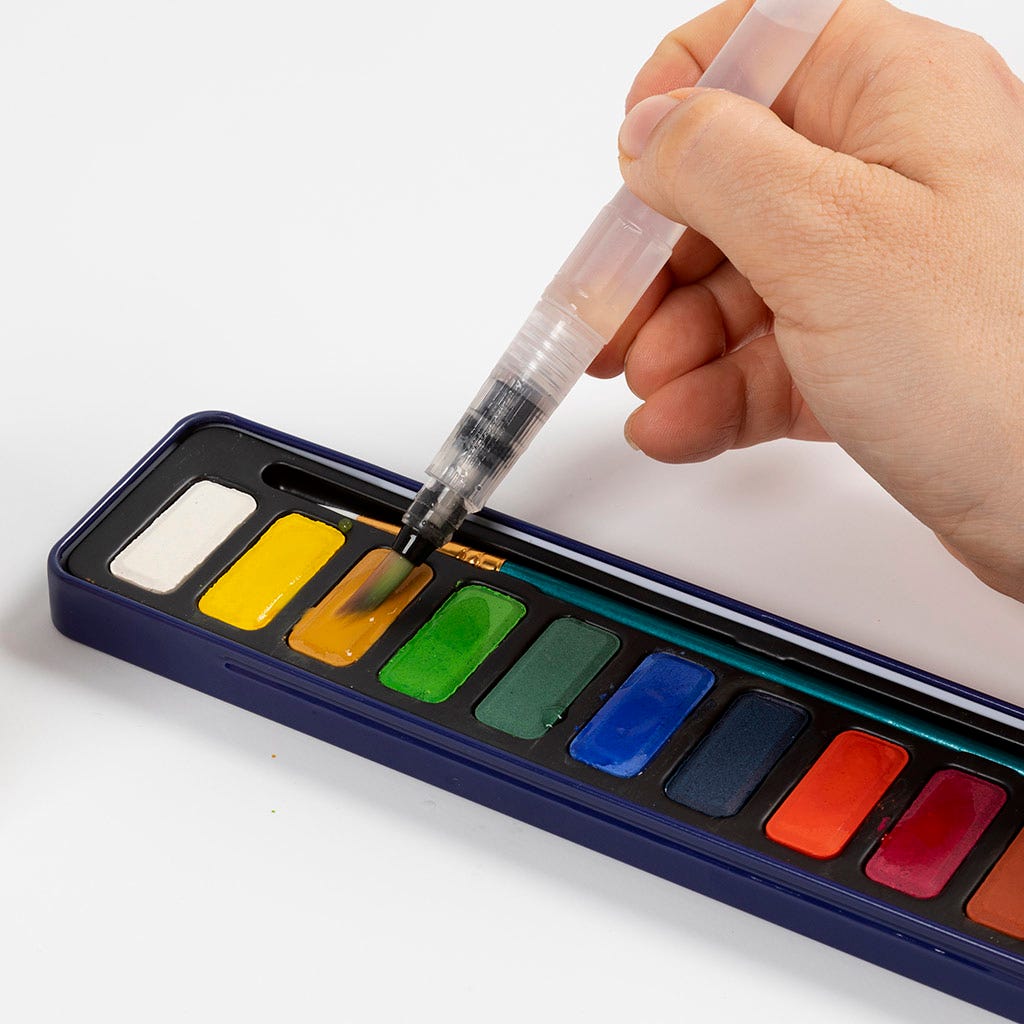 Dip the brush in another colour. Dark yellow is used here.
Dip the brush in another colour. Dark yellow is used here.41 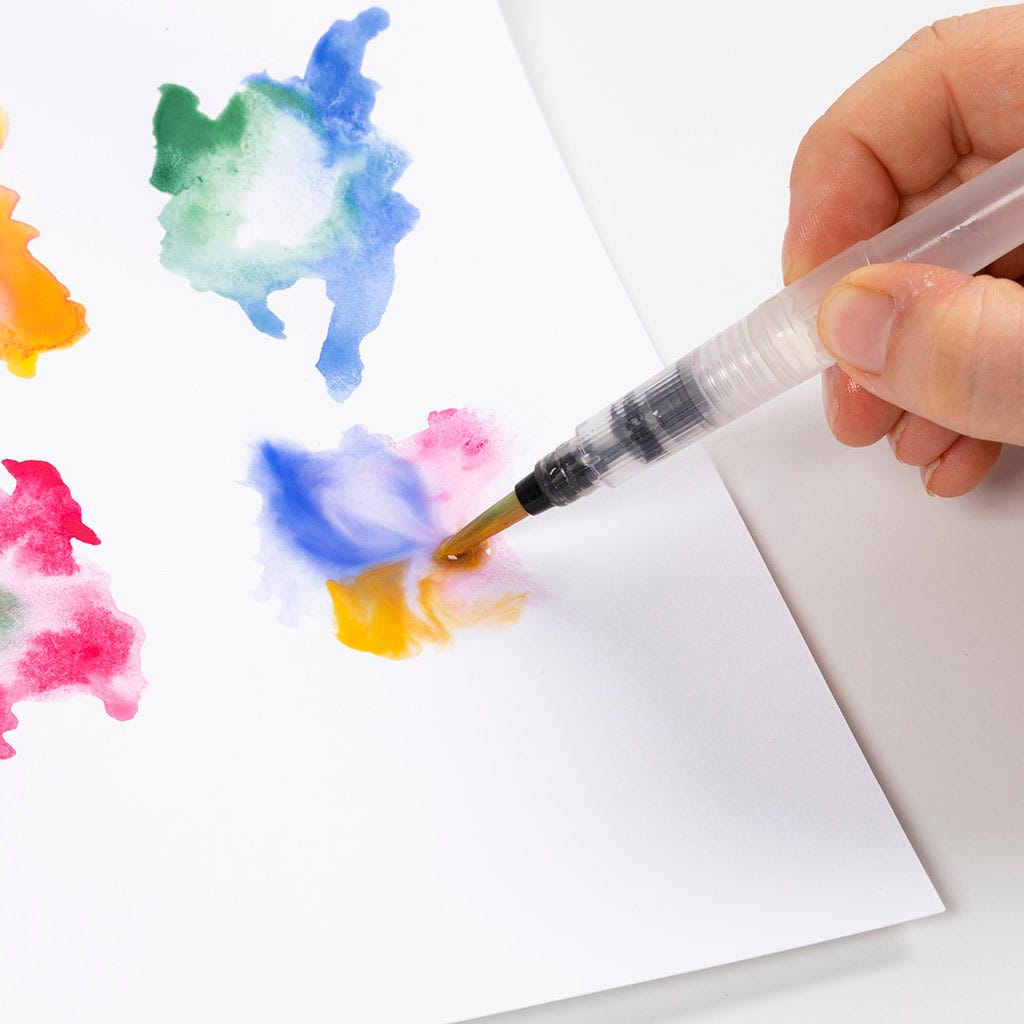 Paint the last 1/3 with that colour. Repeat until the page is filled with imaginary animals and allow to dry.
Paint the last 1/3 with that colour. Repeat until the page is filled with imaginary animals and allow to dry.42 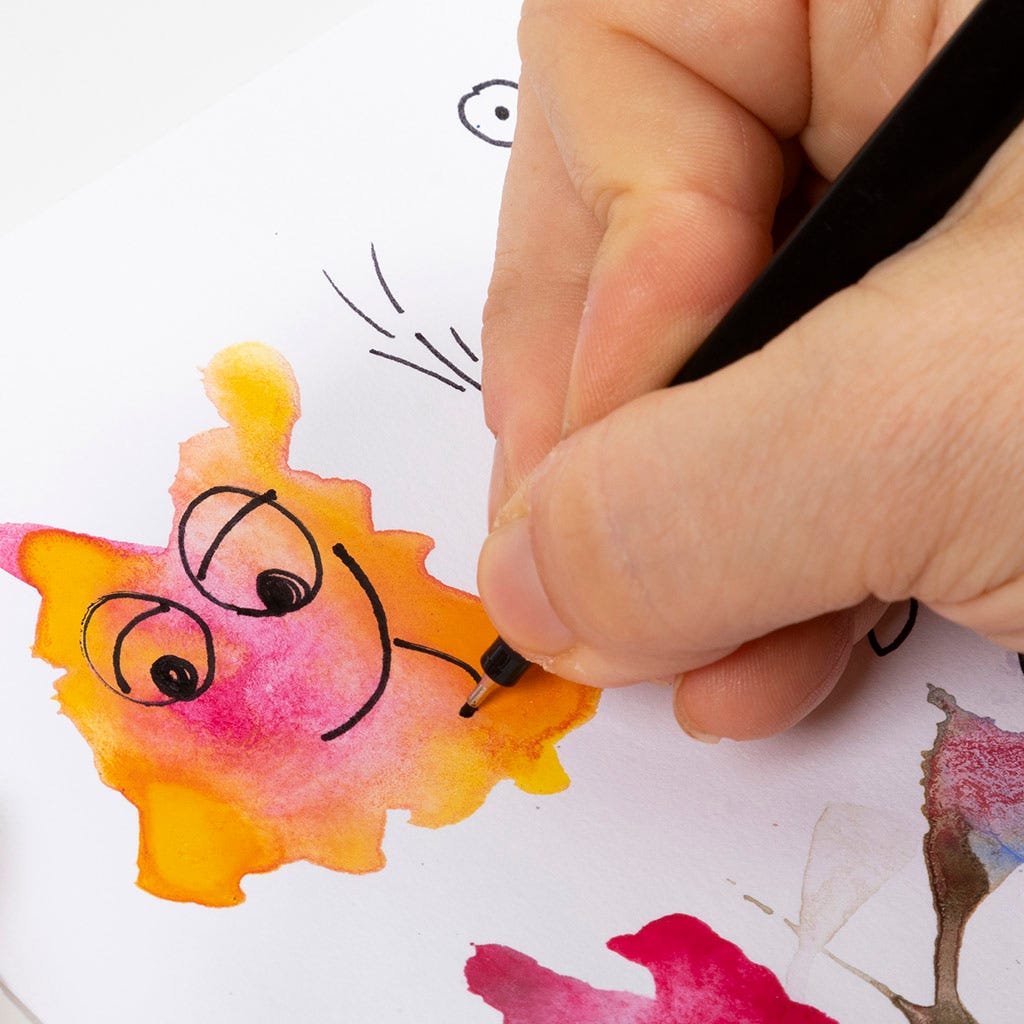 Finish by drawing faces from your imagination.
Finish by drawing faces from your imagination.43 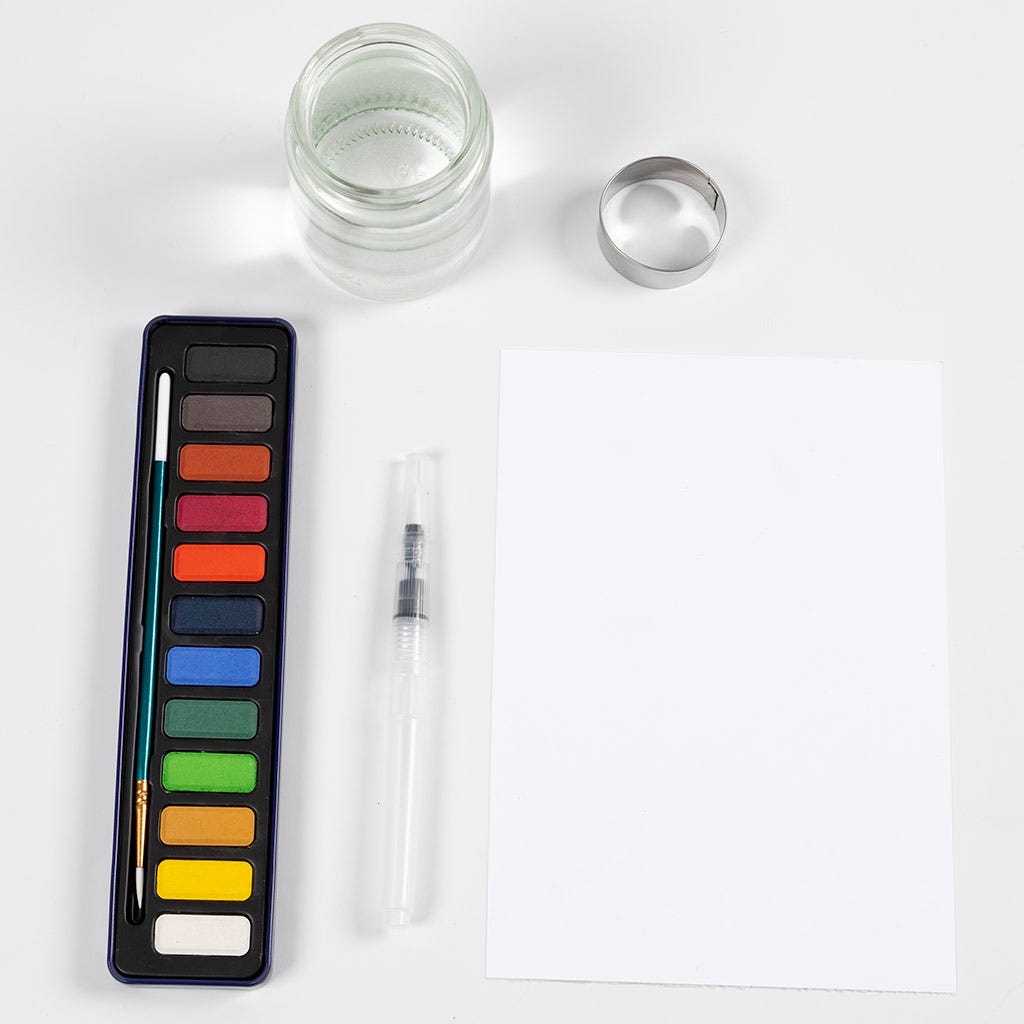 Now we’re going to make bubbles. Find everything you will need as shown in the picture.
Now we’re going to make bubbles. Find everything you will need as shown in the picture.44 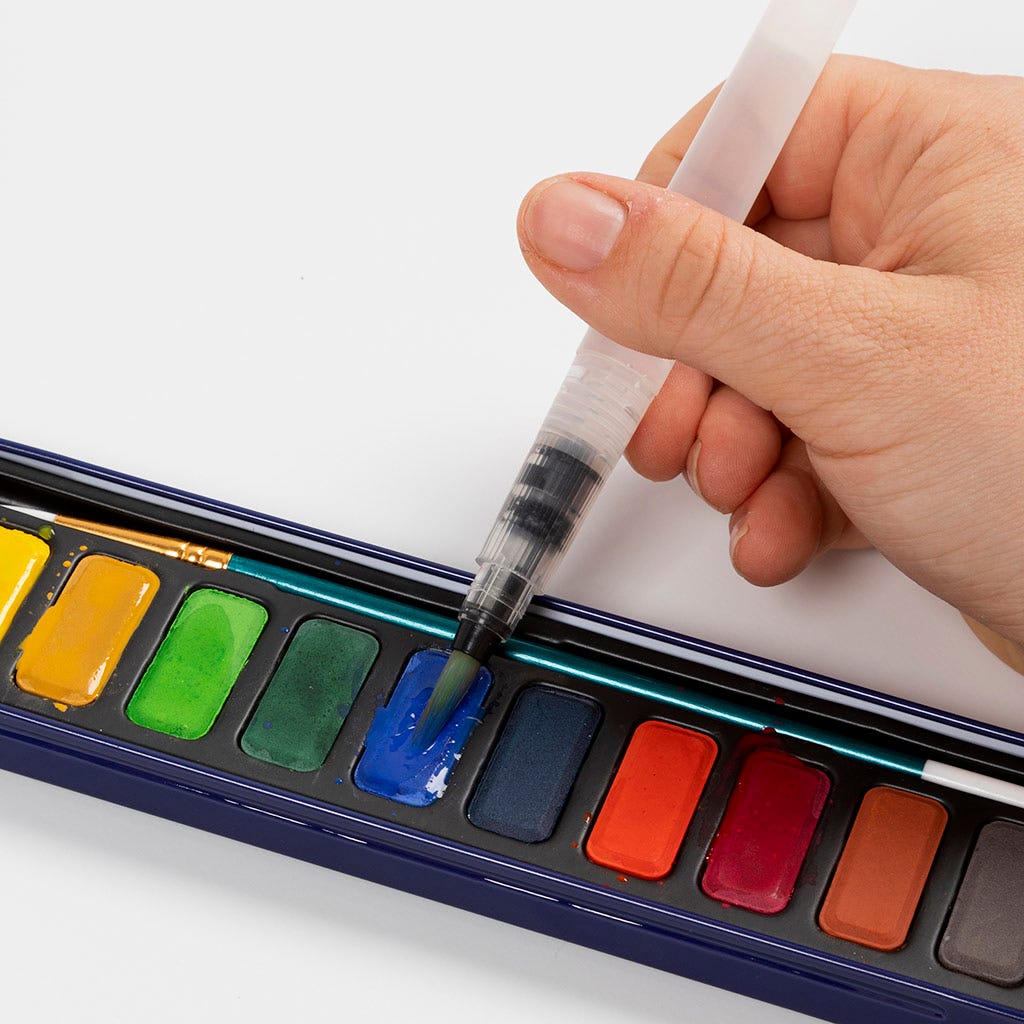 Dip the brush in a colour. Light blue is used here.
Dip the brush in a colour. Light blue is used here.45 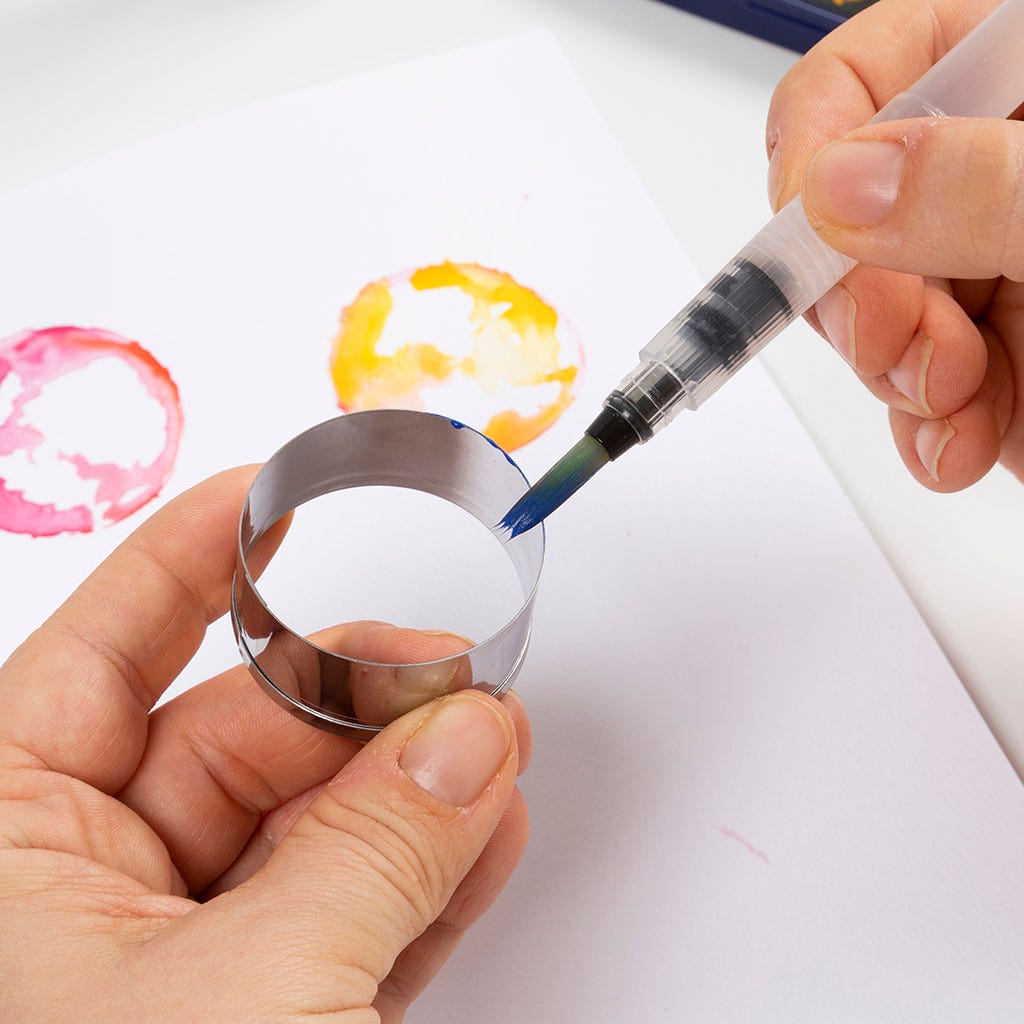 Now paint half of the round cutter with the chosen colour.
Now paint half of the round cutter with the chosen colour.46  Clean the brush.
Clean the brush.47 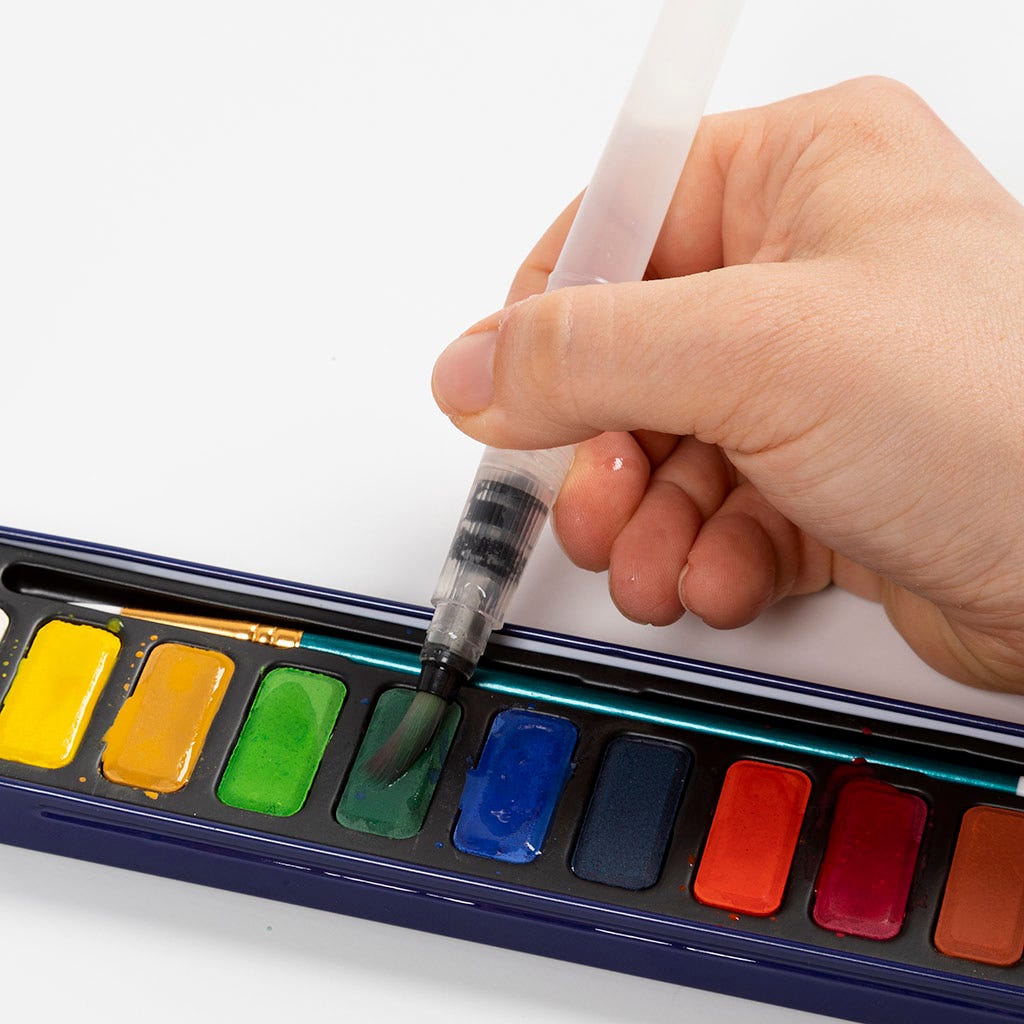 Dip the brush in another colour. Dark green is used here.
Dip the brush in another colour. Dark green is used here.48 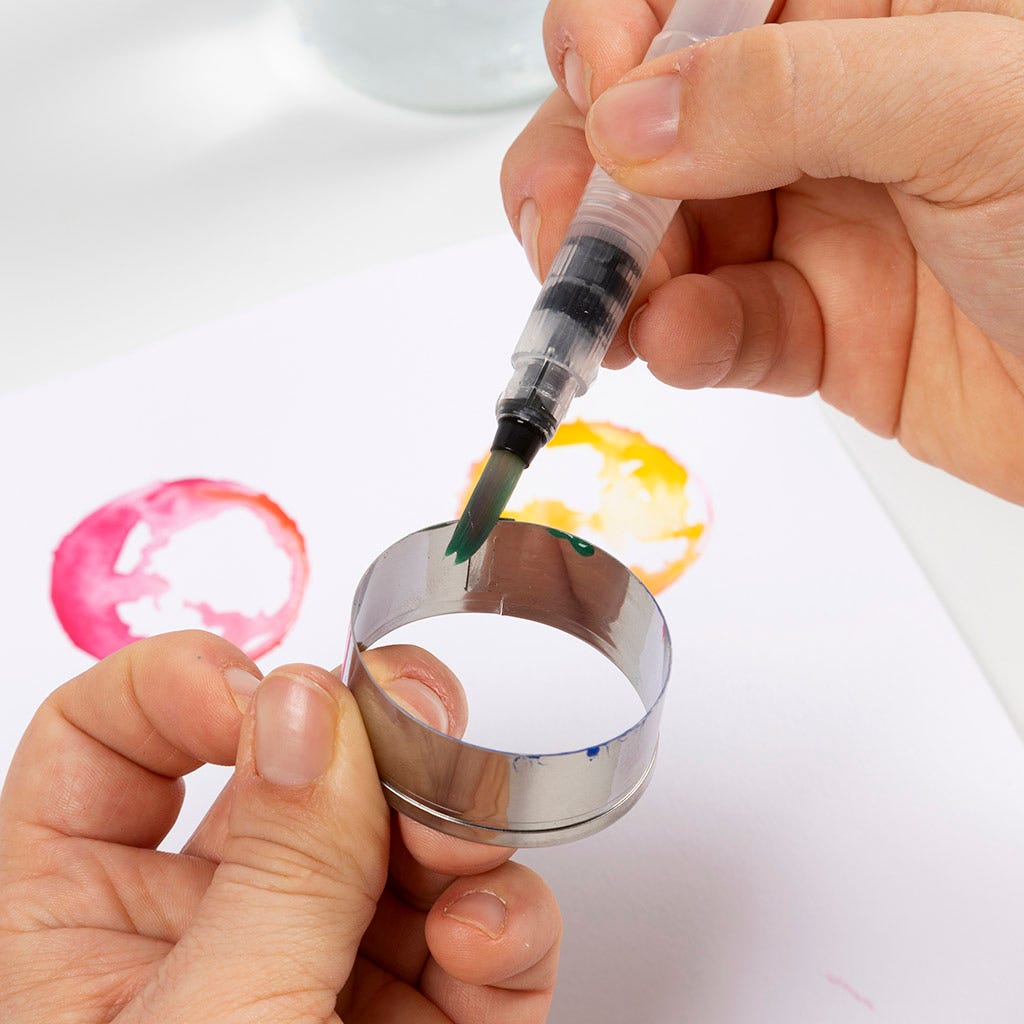 Paint the rest of the circle with this colour.
Paint the rest of the circle with this colour.49 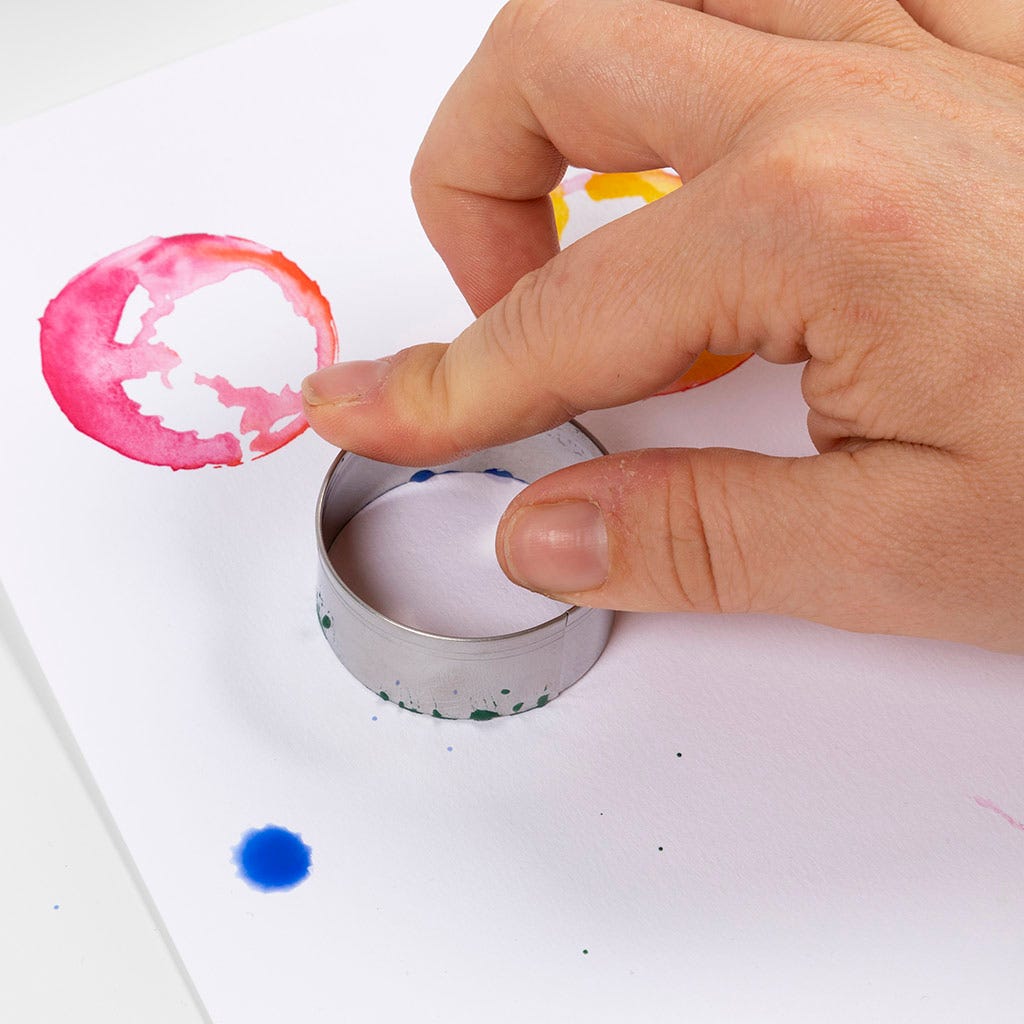 Now press the circle onto the paper.
Now press the circle onto the paper.50 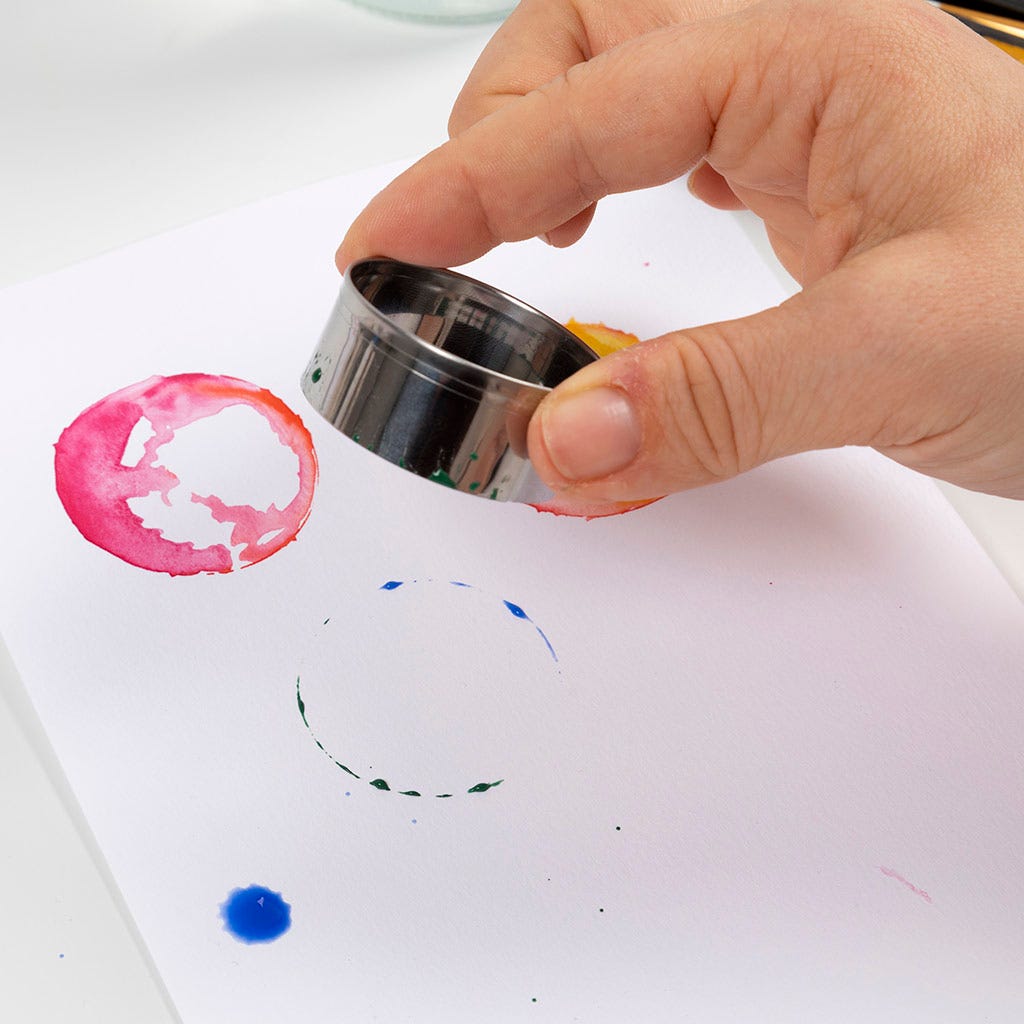 Lift it off again.
Lift it off again.51 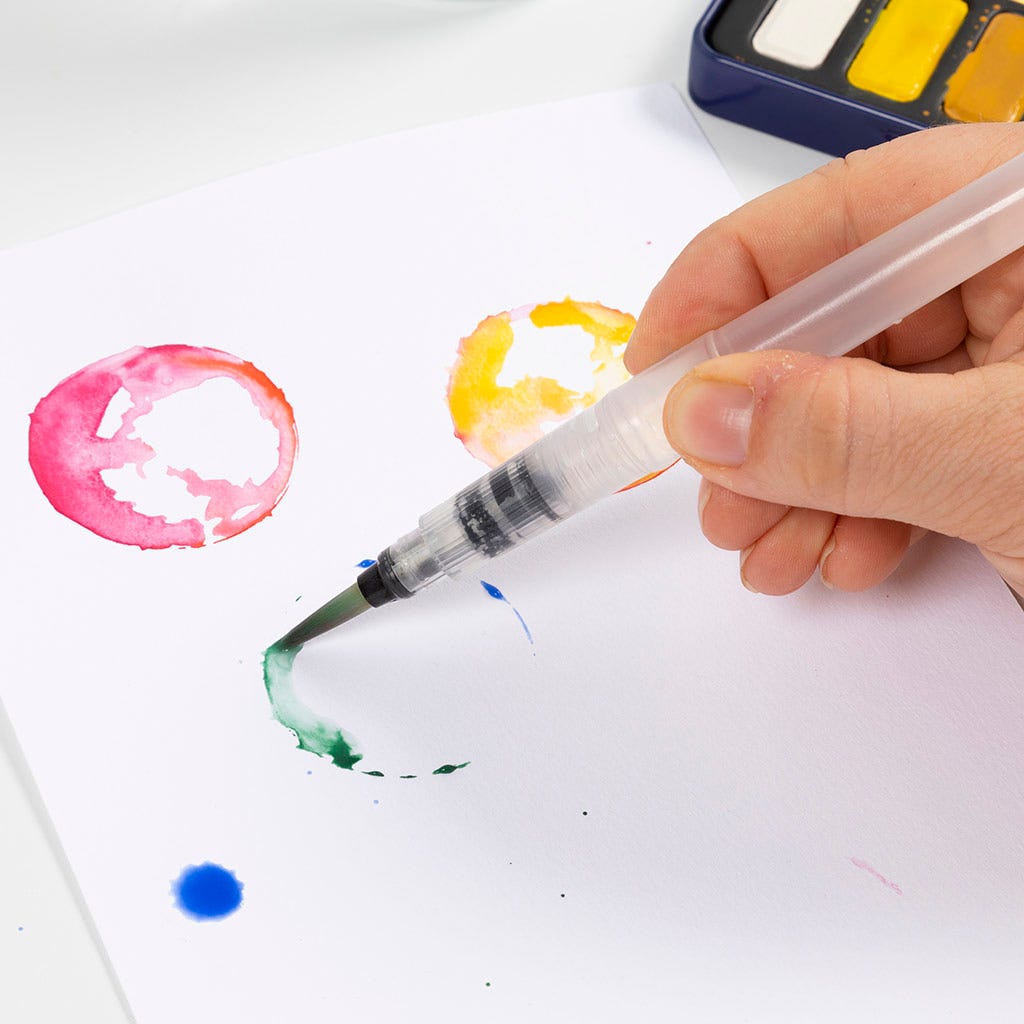 Paint around the circle with a clean brush.
Paint around the circle with a clean brush.52 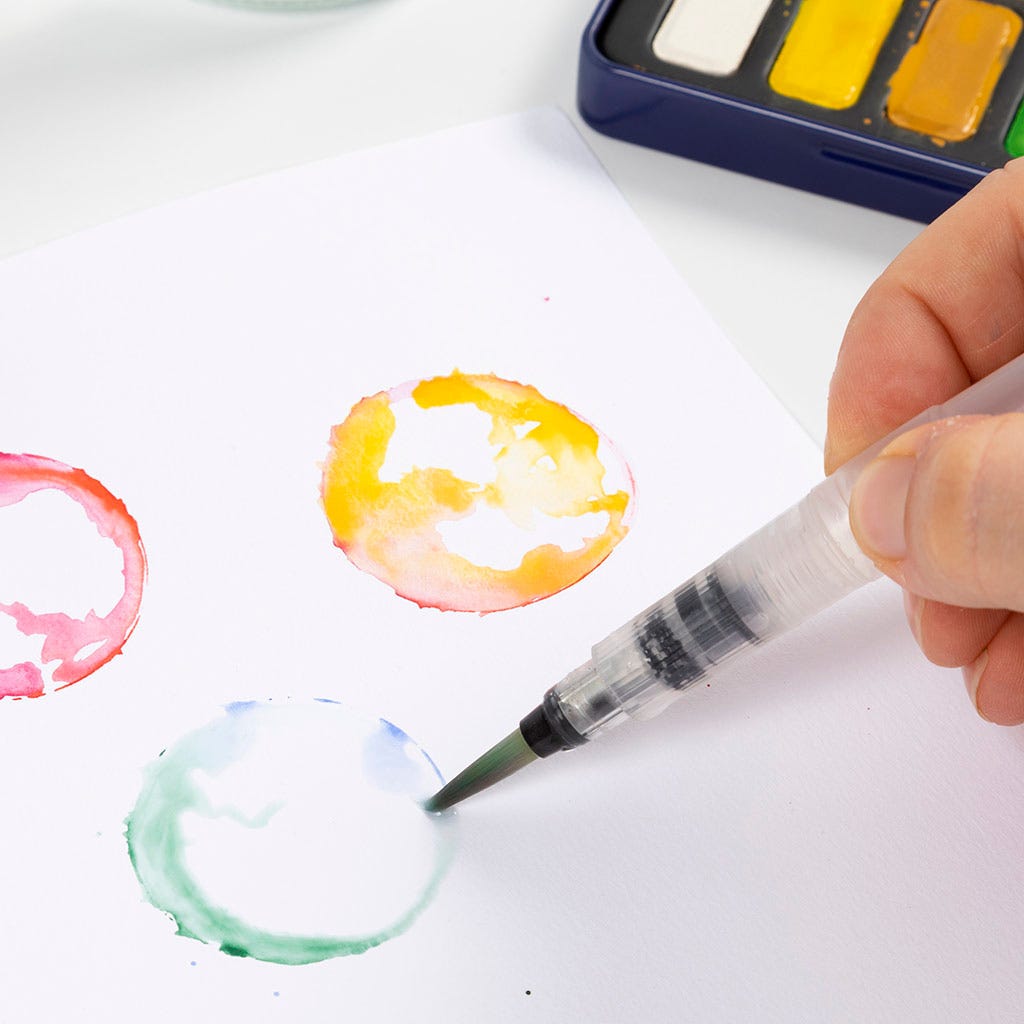 Let the colours flow towards the middle as shown in the picture. Repeat the process with other colours.
Let the colours flow towards the middle as shown in the picture. Repeat the process with other colours.53 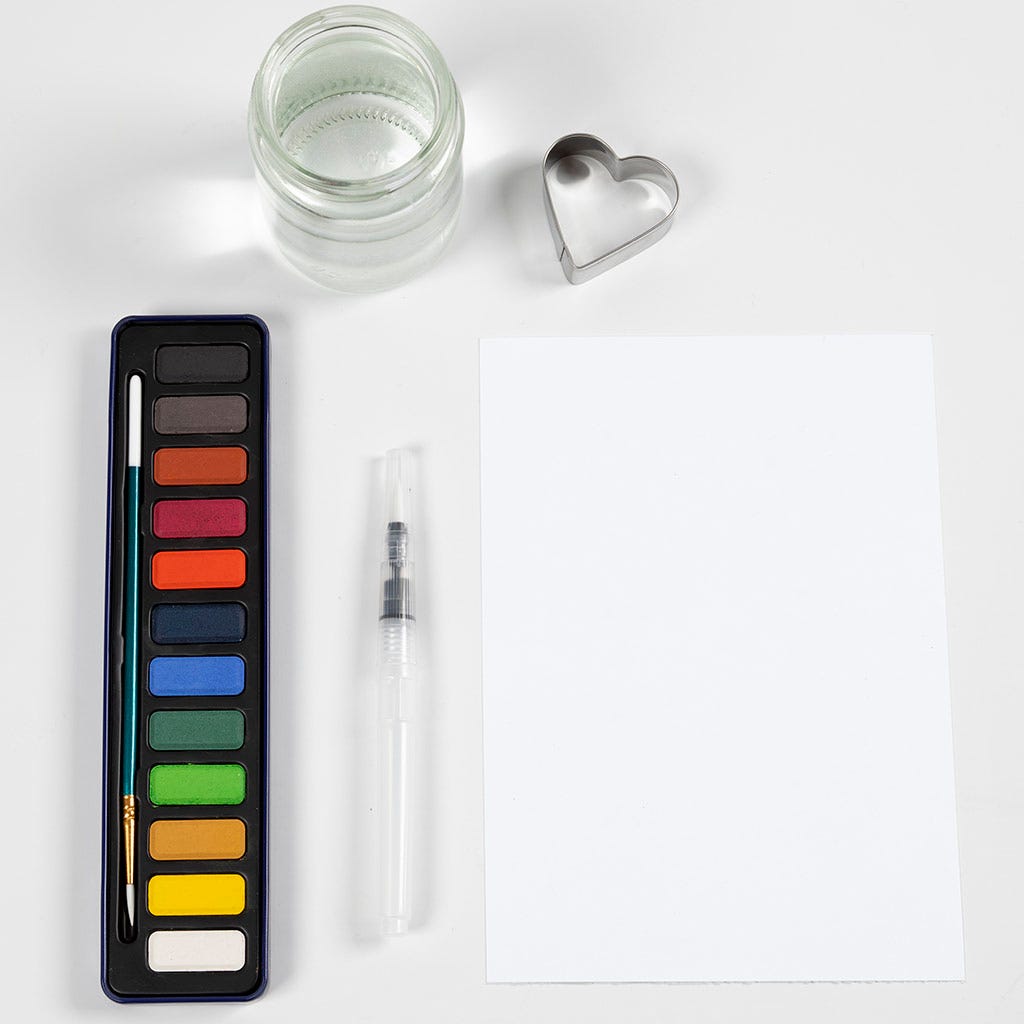 Now let’s make hearts using our heart-shaped cookie cutter. Find everything you will need as shown in the picture.
Now let’s make hearts using our heart-shaped cookie cutter. Find everything you will need as shown in the picture.54 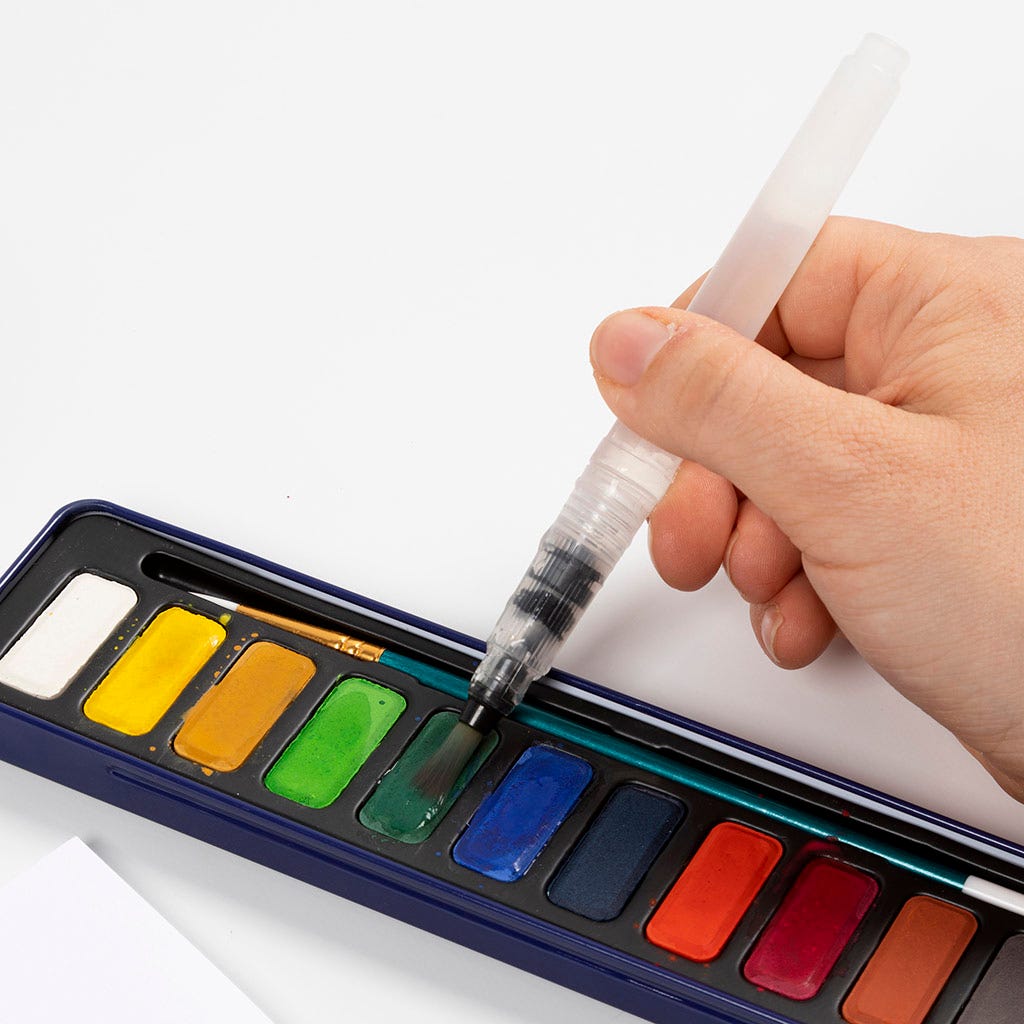 Dip the brush in a colour. Dark green is used here.
Dip the brush in a colour. Dark green is used here.55 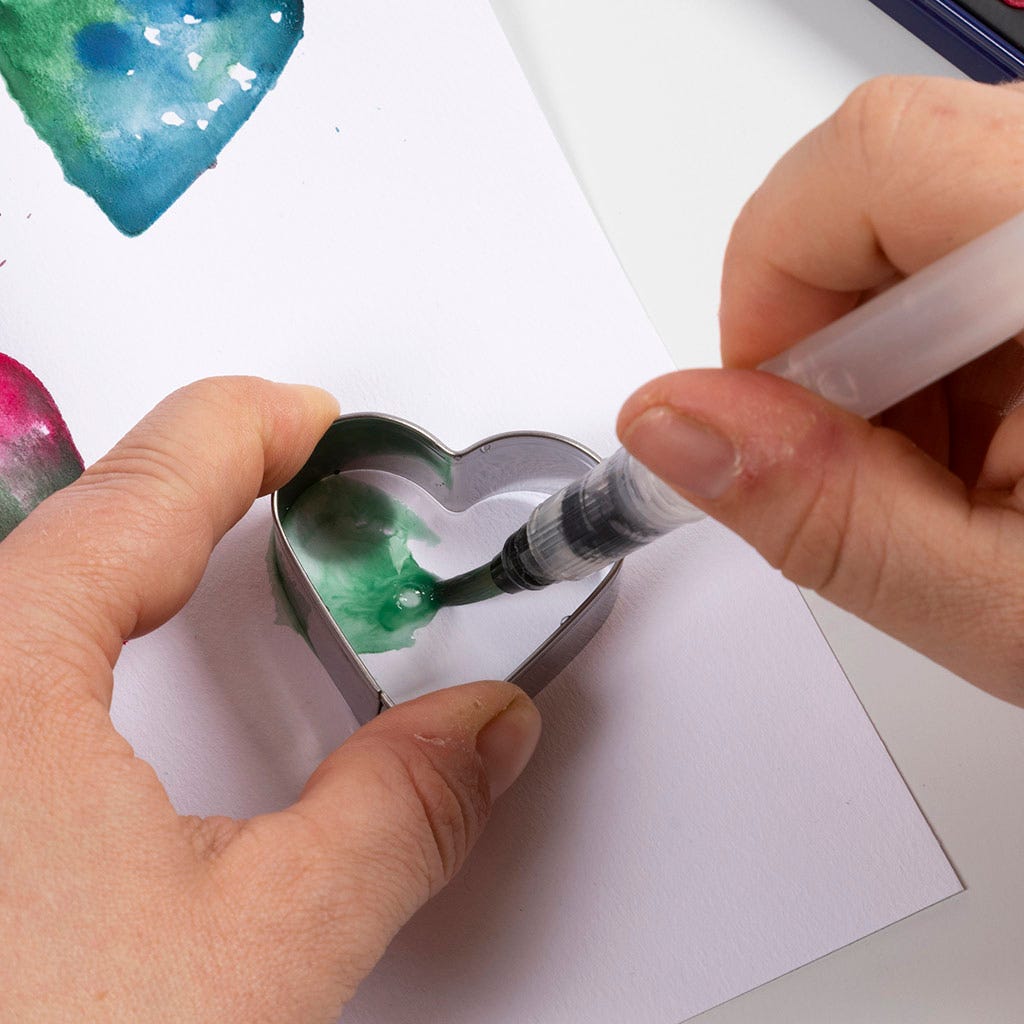 Hold the heart down against the paper. Paint half the heart and remember to keep the heart against the paper throughout the process.
Hold the heart down against the paper. Paint half the heart and remember to keep the heart against the paper throughout the process.56  Clean the brush.
Clean the brush.57 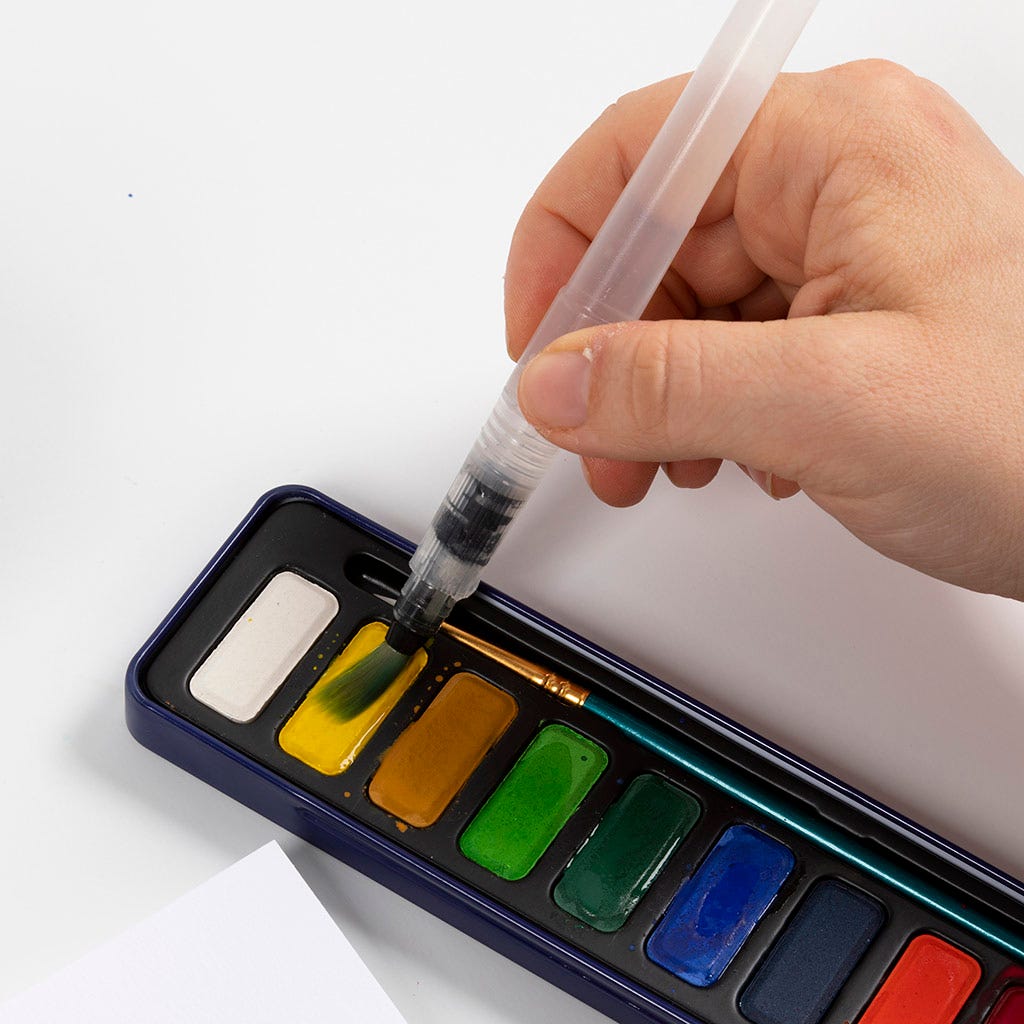 Dip the brush in another colour. Light yellow is used here.
Dip the brush in another colour. Light yellow is used here.58 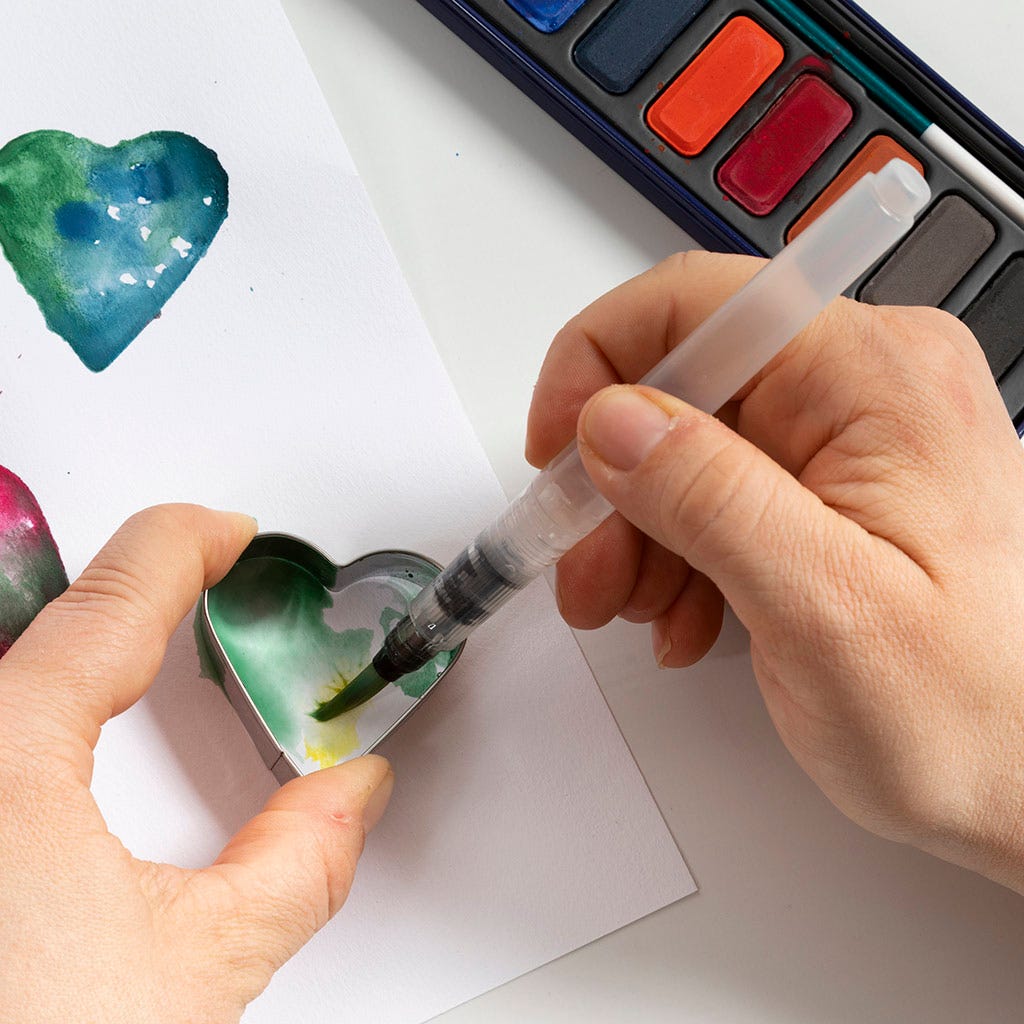 Paint the rest of the heart with this colour.
Paint the rest of the heart with this colour.59  Lift the heart cutter and allow to dry.
Lift the heart cutter and allow to dry.60  Now we’re going to make butterflies. Find everything you will need as shown in the picture.
Now we’re going to make butterflies. Find everything you will need as shown in the picture.61 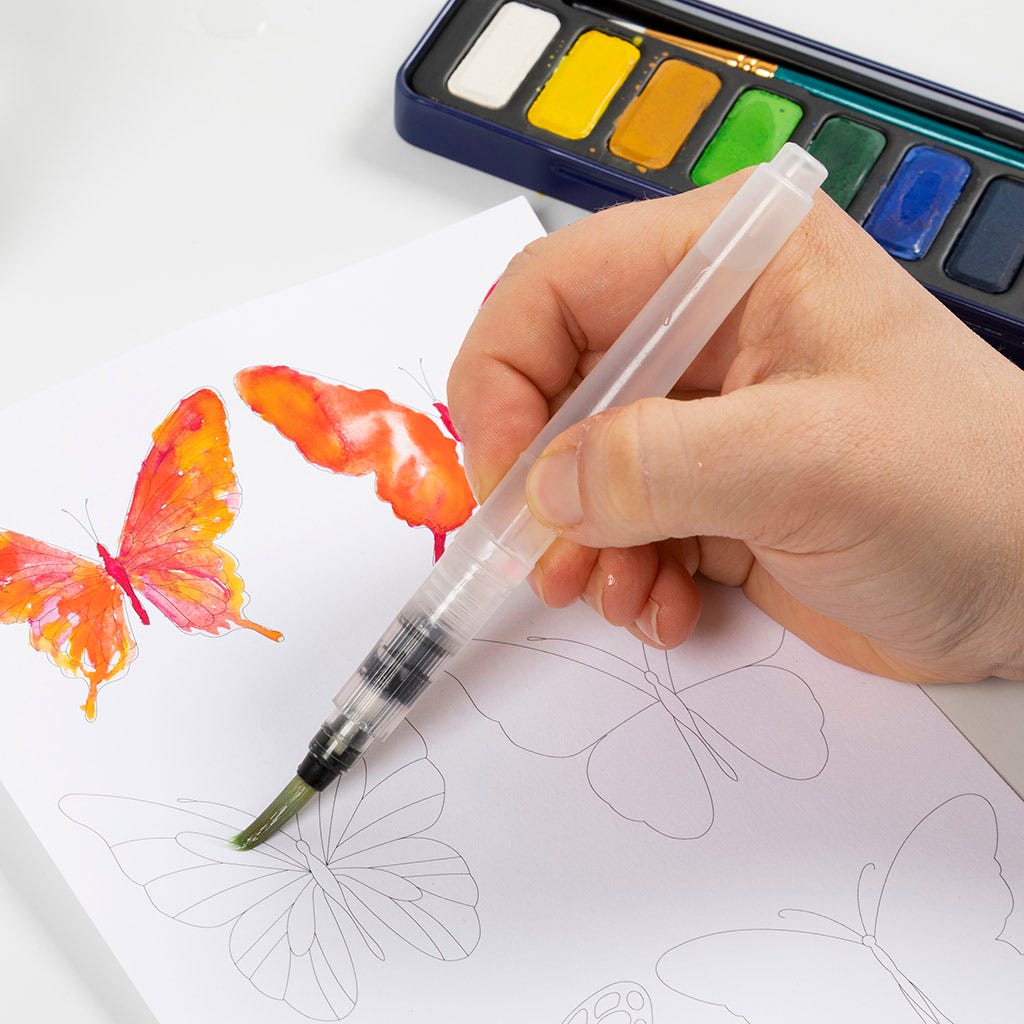 Paint the butterfly wings with water.
Paint the butterfly wings with water.62 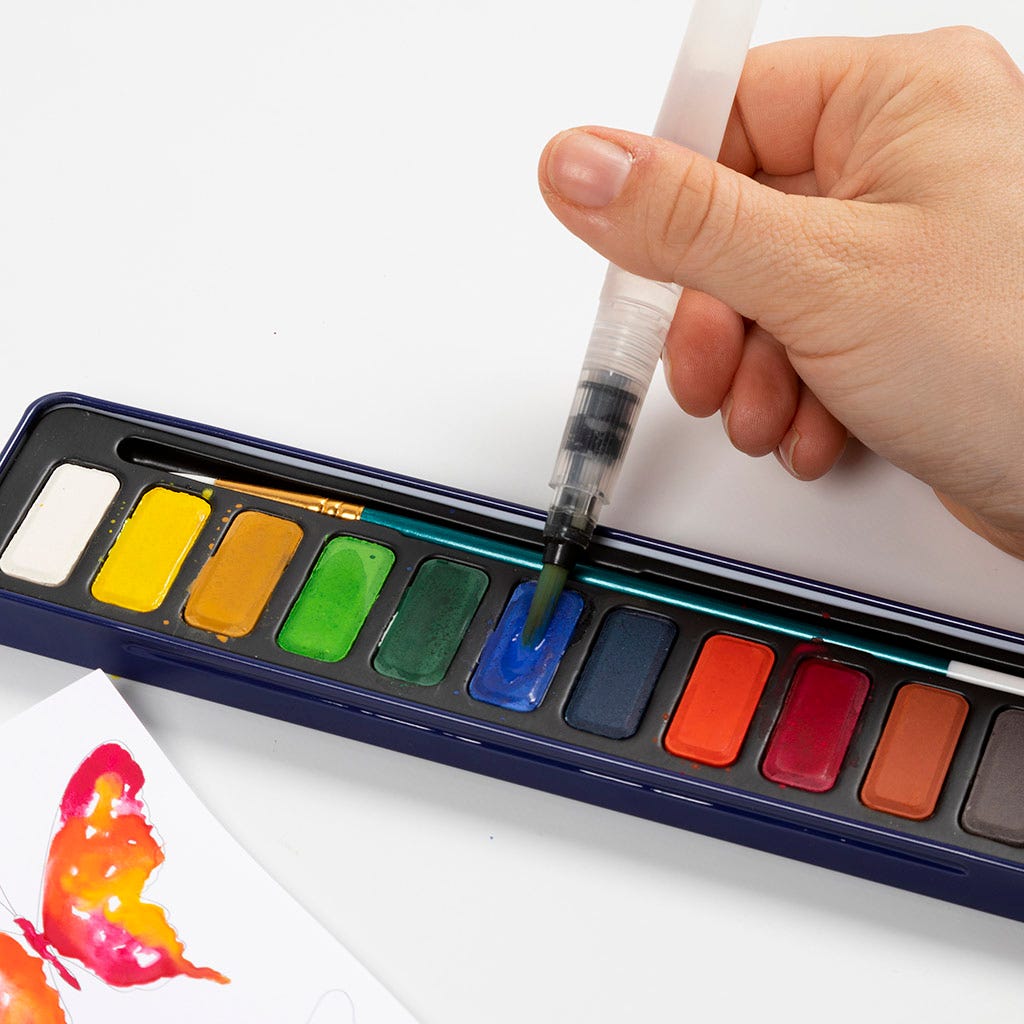 Dip the brush in a colour. Light blue is used here.
Dip the brush in a colour. Light blue is used here.63  Paint around the wings as shown in the picture.
Paint around the wings as shown in the picture.64  Clean the brush.
Clean the brush.65 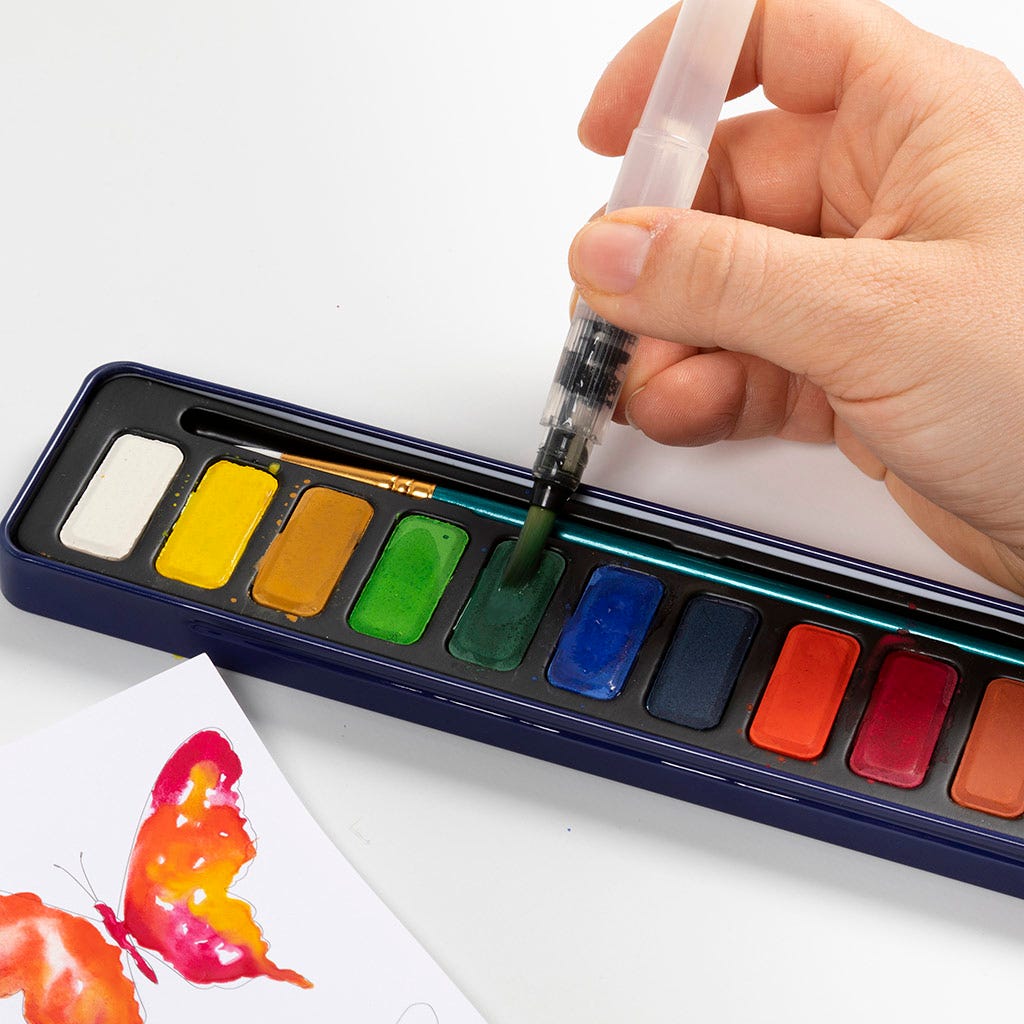 Dip the brush in another colour. Dark green is used here.
Dip the brush in another colour. Dark green is used here.66  Paint the wings as shown in the picture.
Paint the wings as shown in the picture.67  Clean the brush.
Clean the brush.68  Dip the brush in another colour. Dark yellow is used here.
Dip the brush in another colour. Dark yellow is used here.69 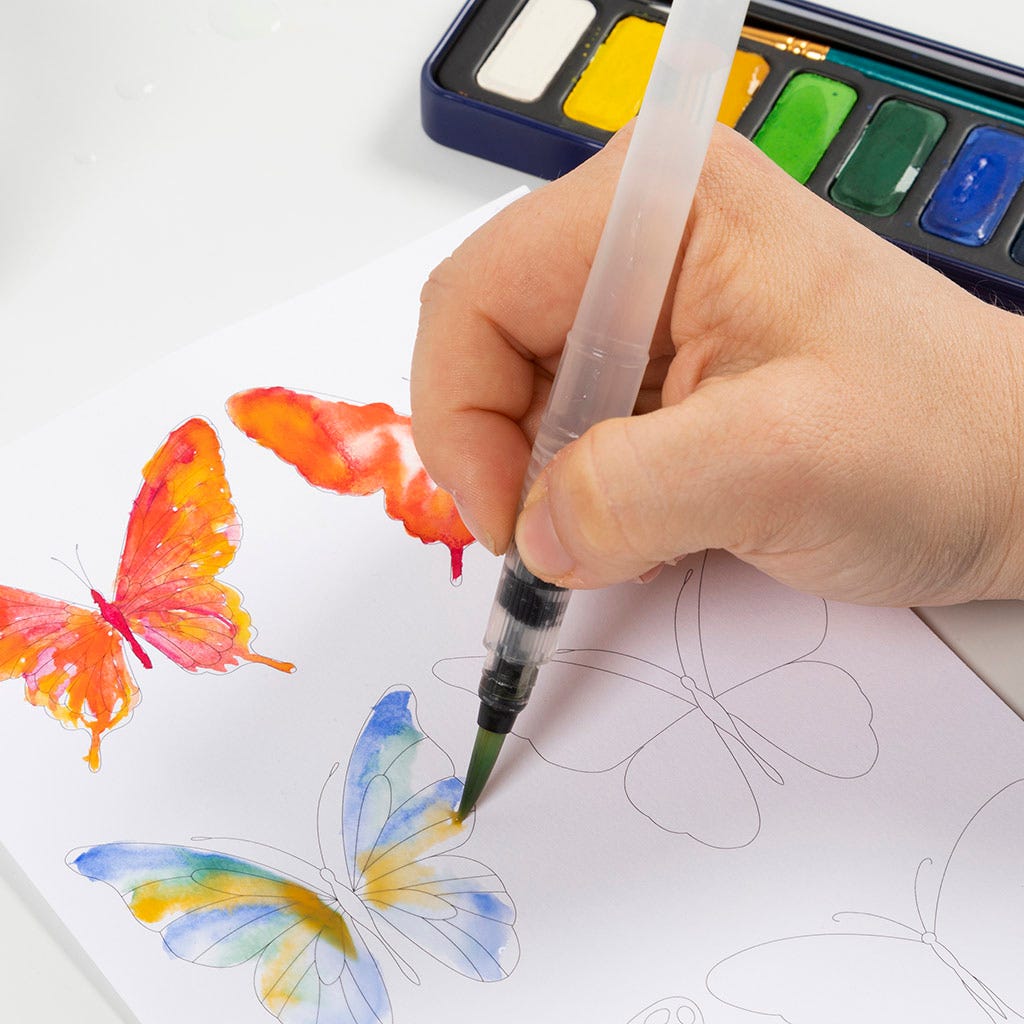 Fill in the rest of the butterfly wings.
Fill in the rest of the butterfly wings.70 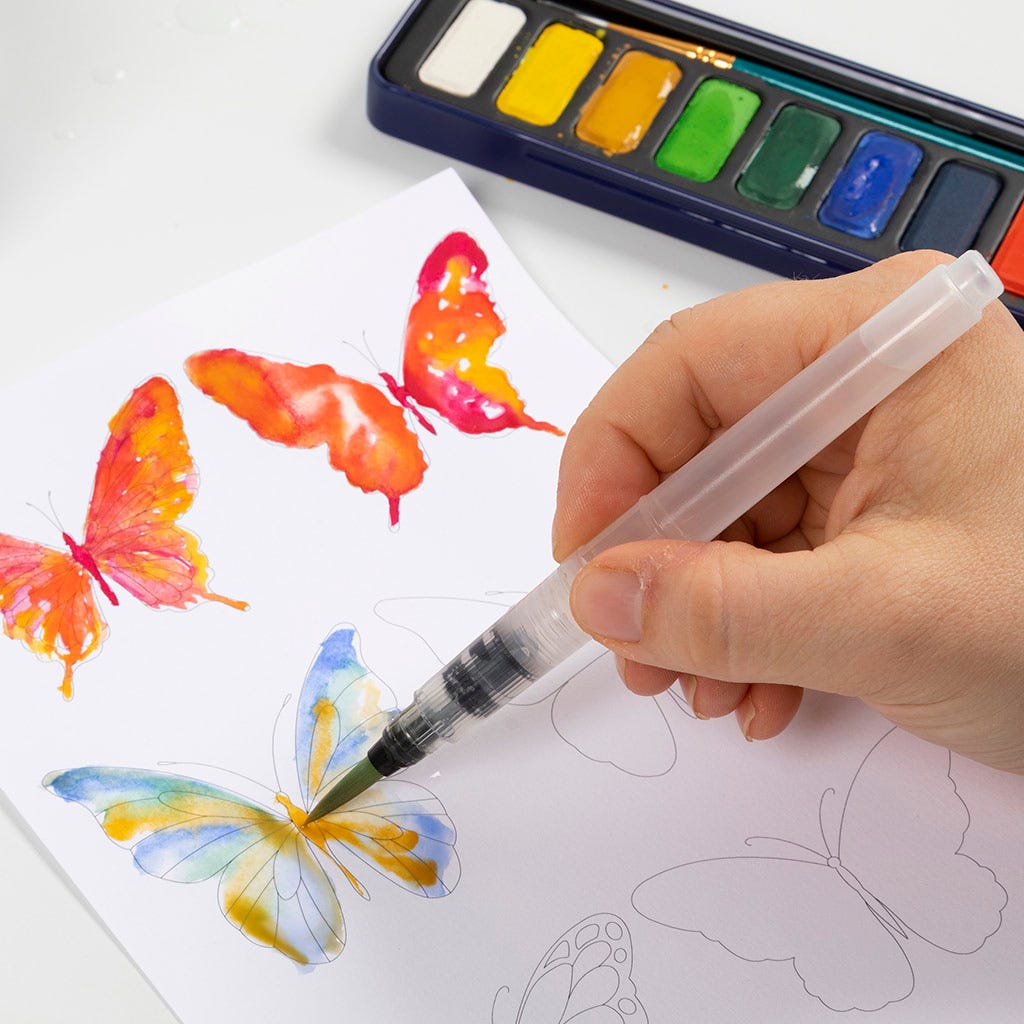 Paint the body of the butterfly.
Paint the body of the butterfly.71  Clean the brush.
Clean the brush.72  Paint the butterfly wings with water.
Paint the butterfly wings with water.73 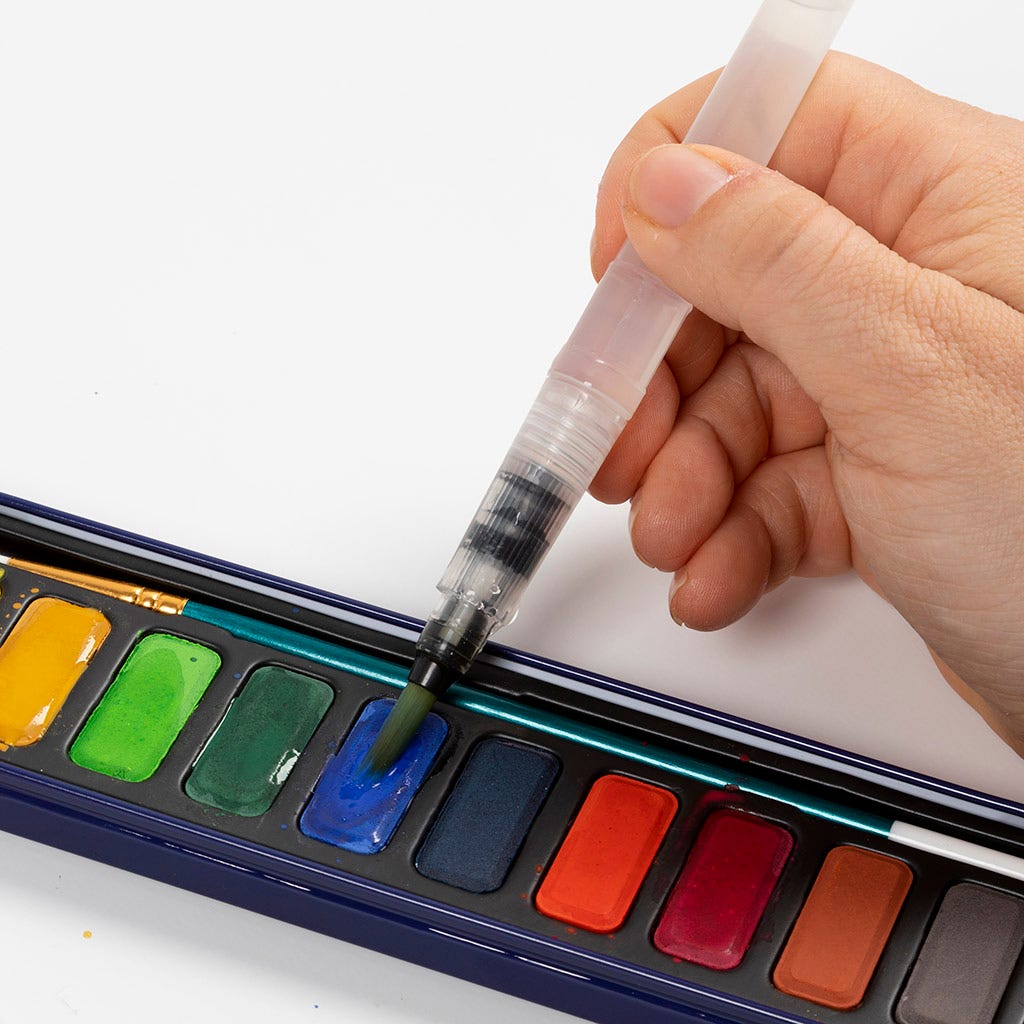 Now dip the brush in the desired colour. Light blue is used here.
Now dip the brush in the desired colour. Light blue is used here.74 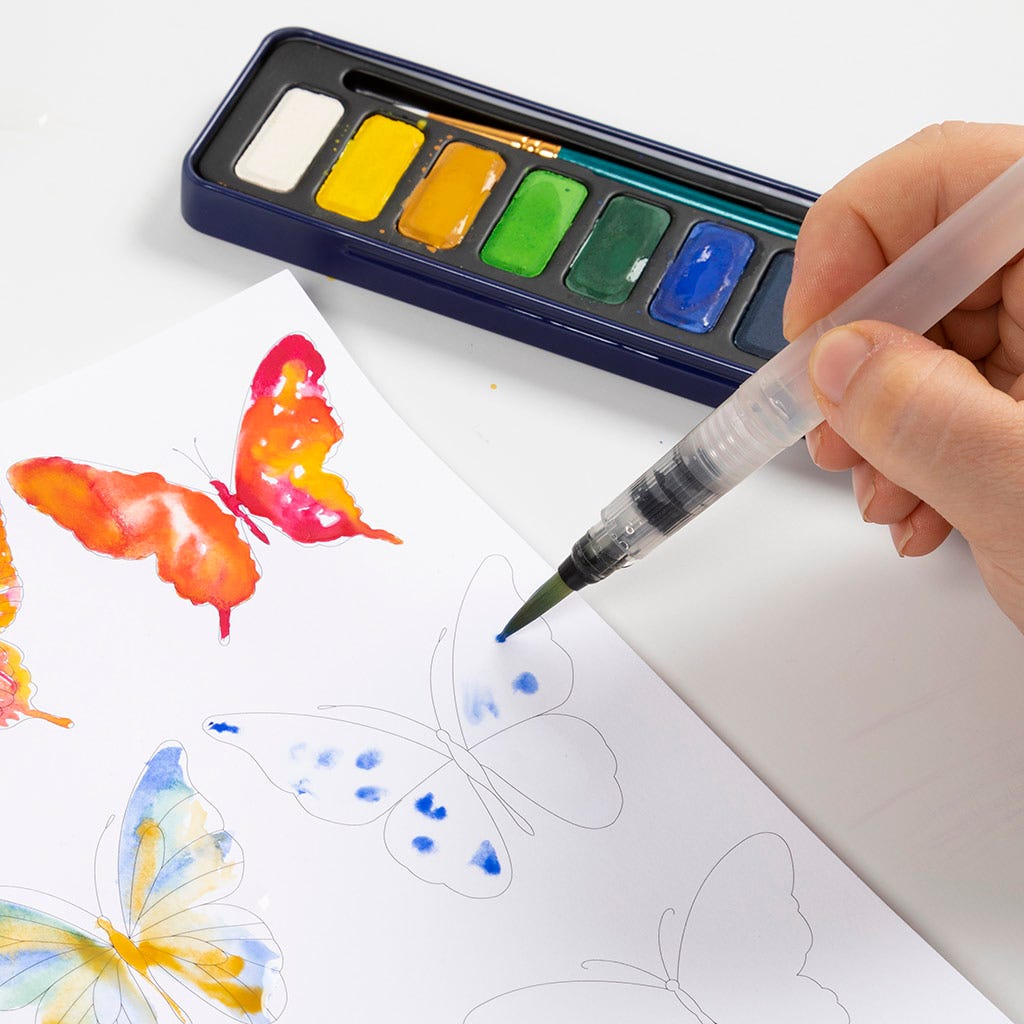 Make dots with the paint in the wings of the butterfly.
Make dots with the paint in the wings of the butterfly.75  Clean the brush.
Clean the brush.76 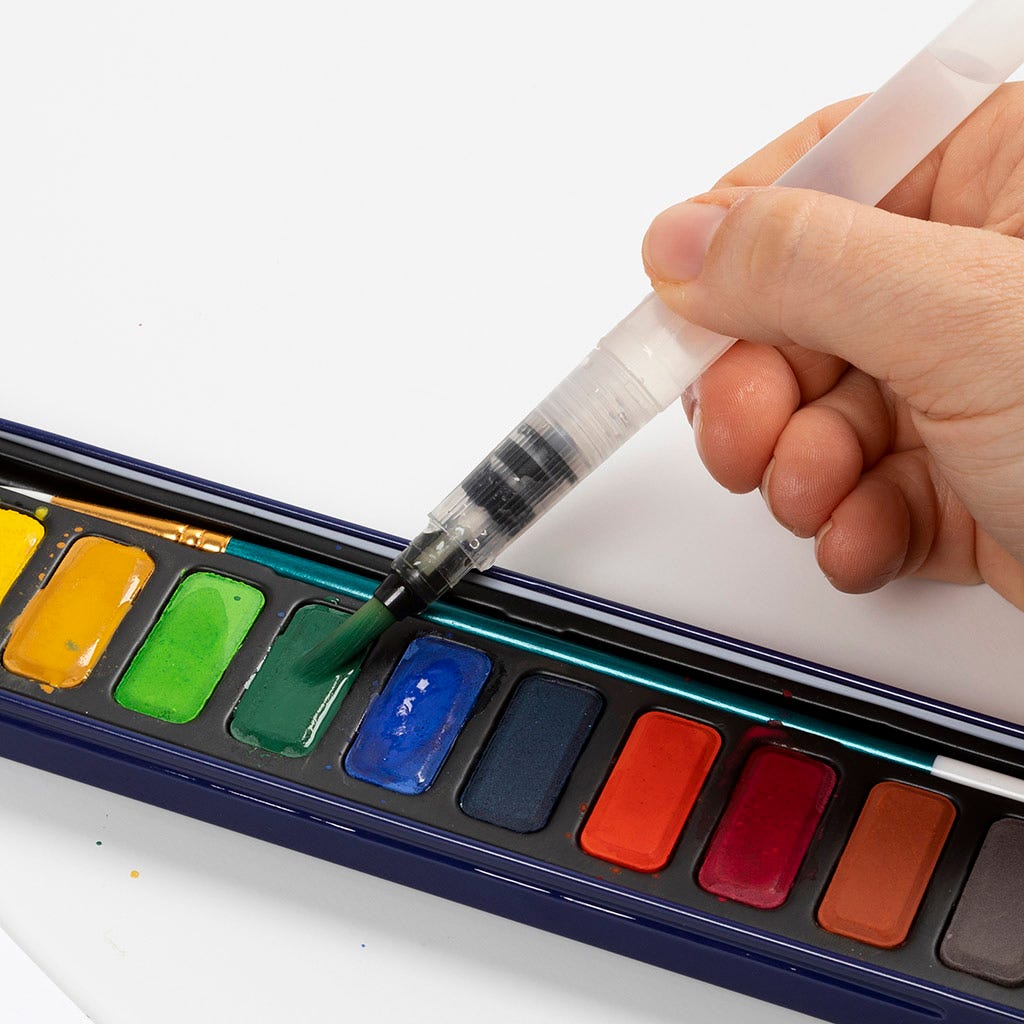 Dip the brush in another colour. Dark green is used here.
Dip the brush in another colour. Dark green is used here.77 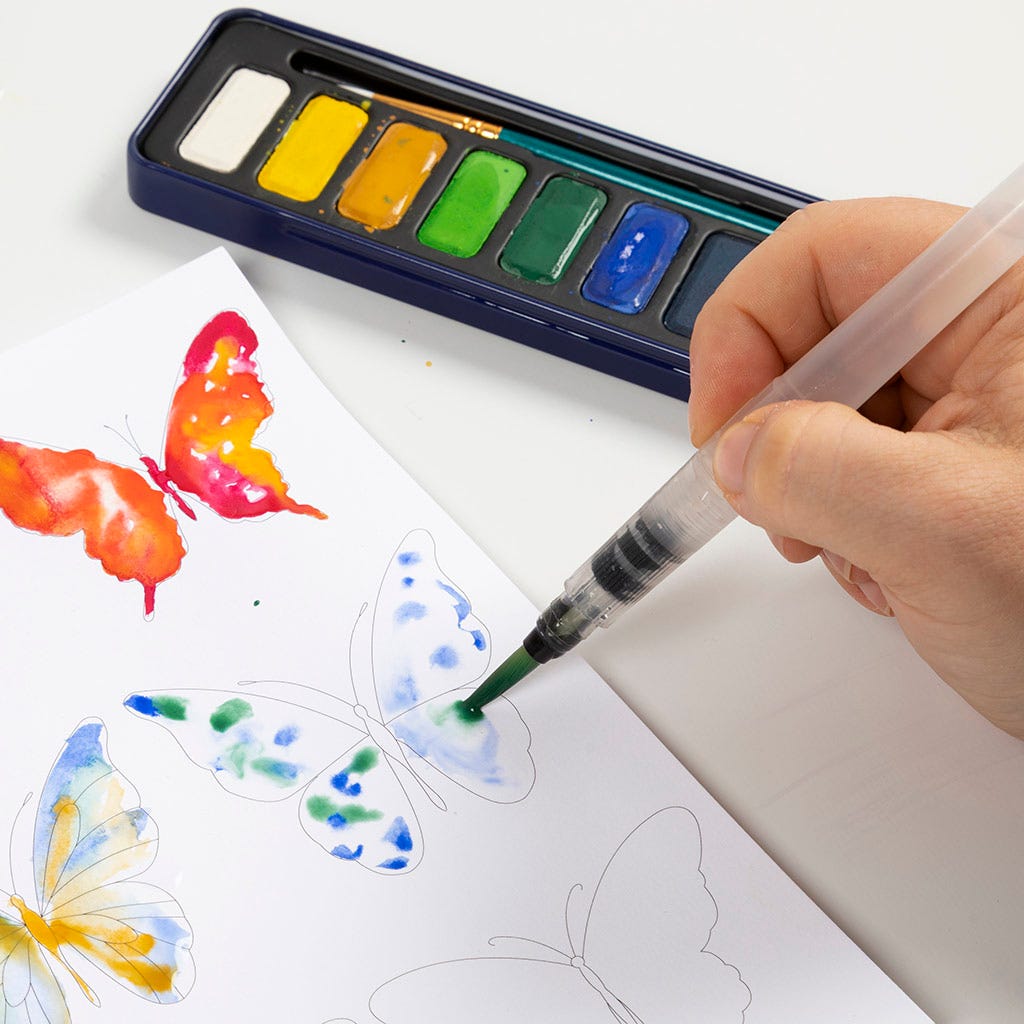 Make dots with the paint inside the butterfly wings and watch the colours flow together.
Make dots with the paint inside the butterfly wings and watch the colours flow together.78  Clean the brush.
Clean the brush.79  Dip the brush in another colour. Dark yellow is used here.
Dip the brush in another colour. Dark yellow is used here.80 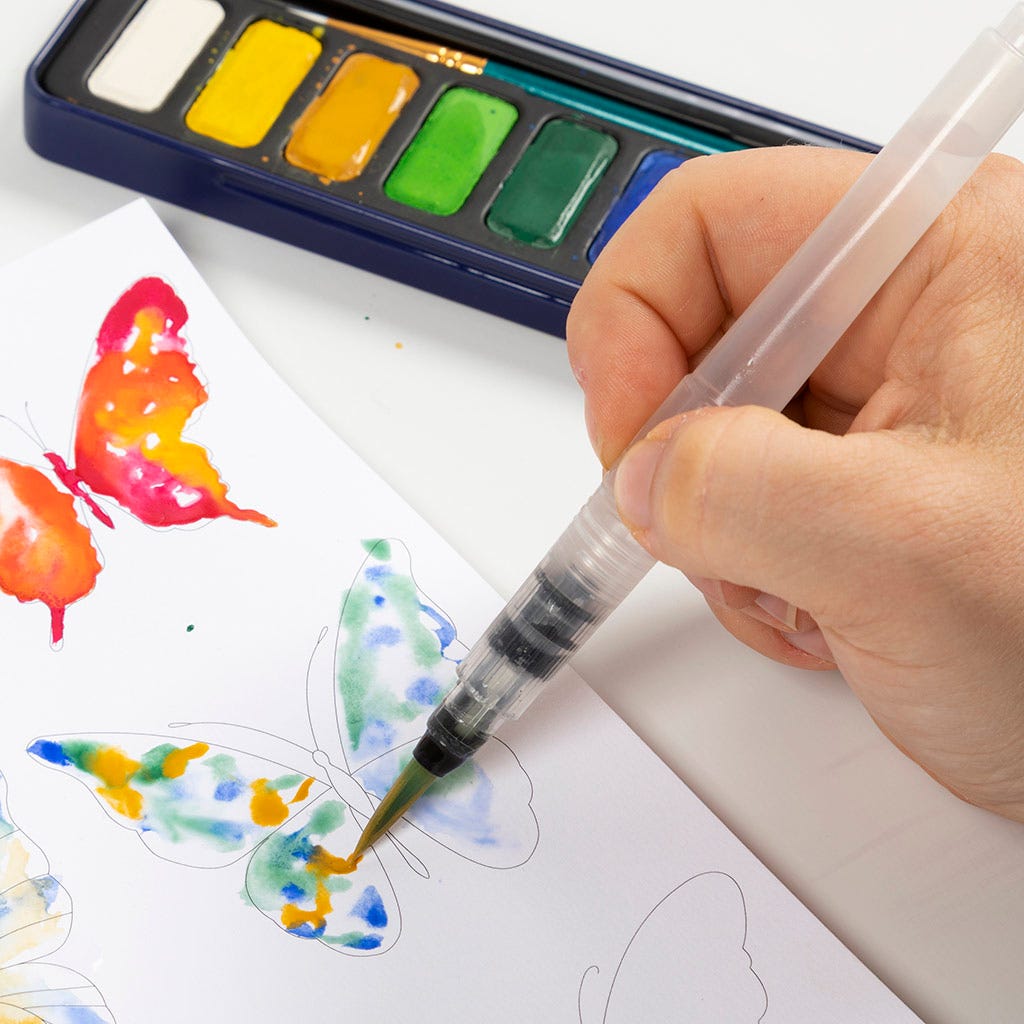 Make dots around the butterfly wings and watch the colours flow together.
Make dots around the butterfly wings and watch the colours flow together.81 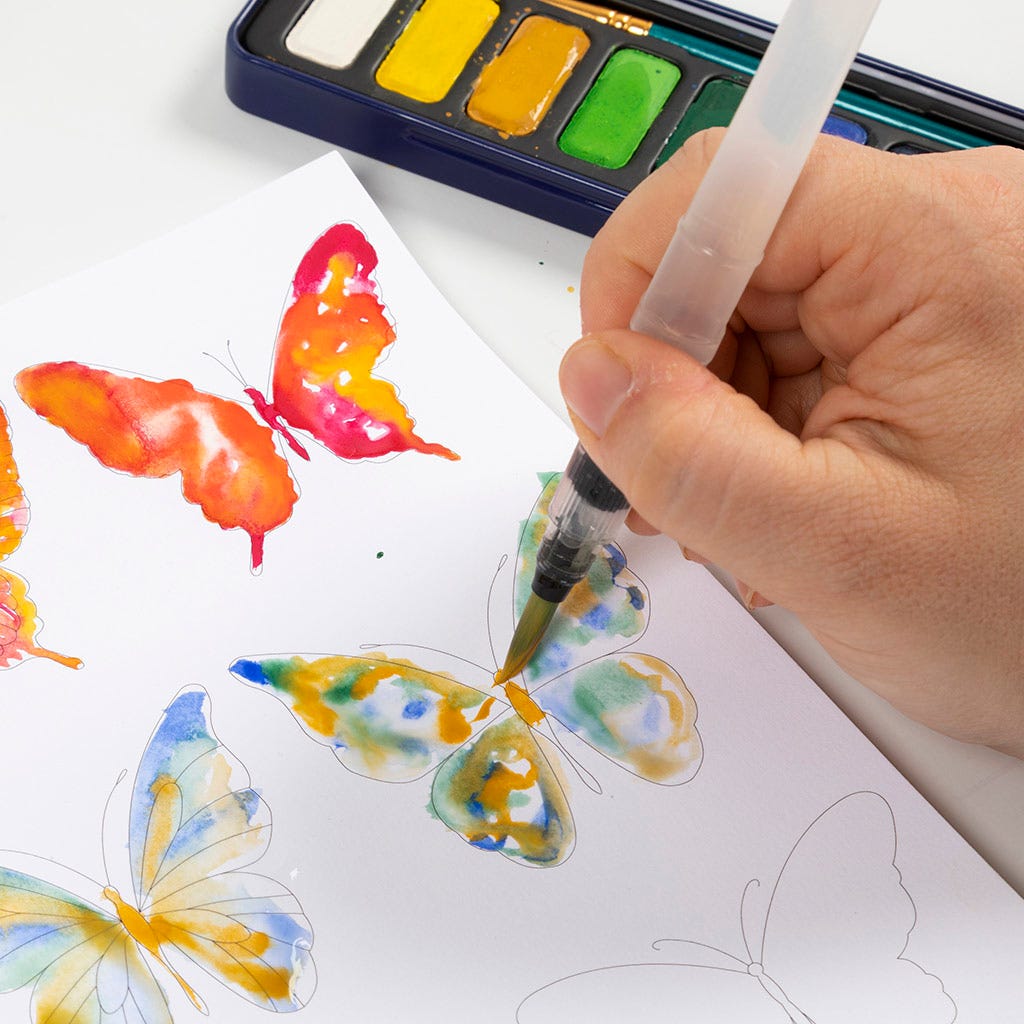 Paint the body of the butterfly.
Paint the body of the butterfly.82 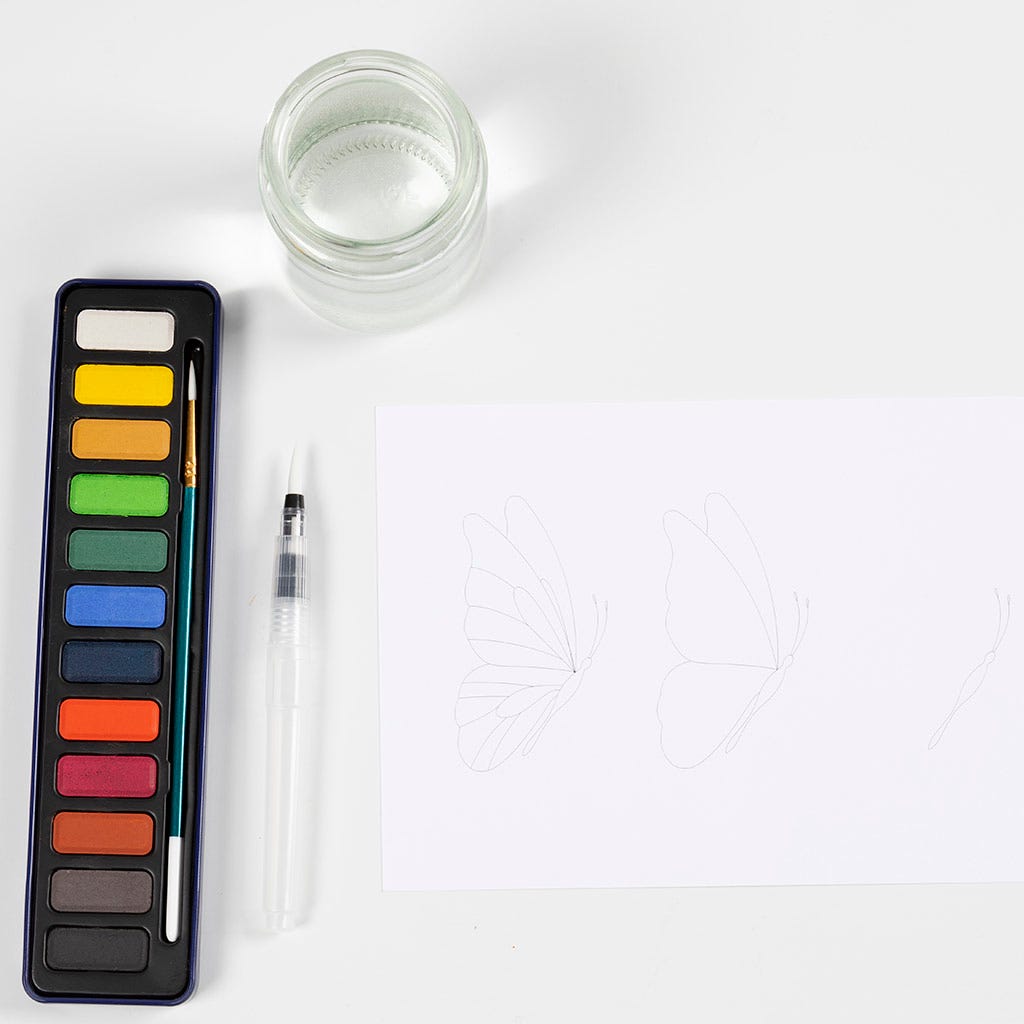 Now we’re going to paint butterflies in a side view. Prepare everything you will need as shown in the picture.
Now we’re going to paint butterflies in a side view. Prepare everything you will need as shown in the picture.83 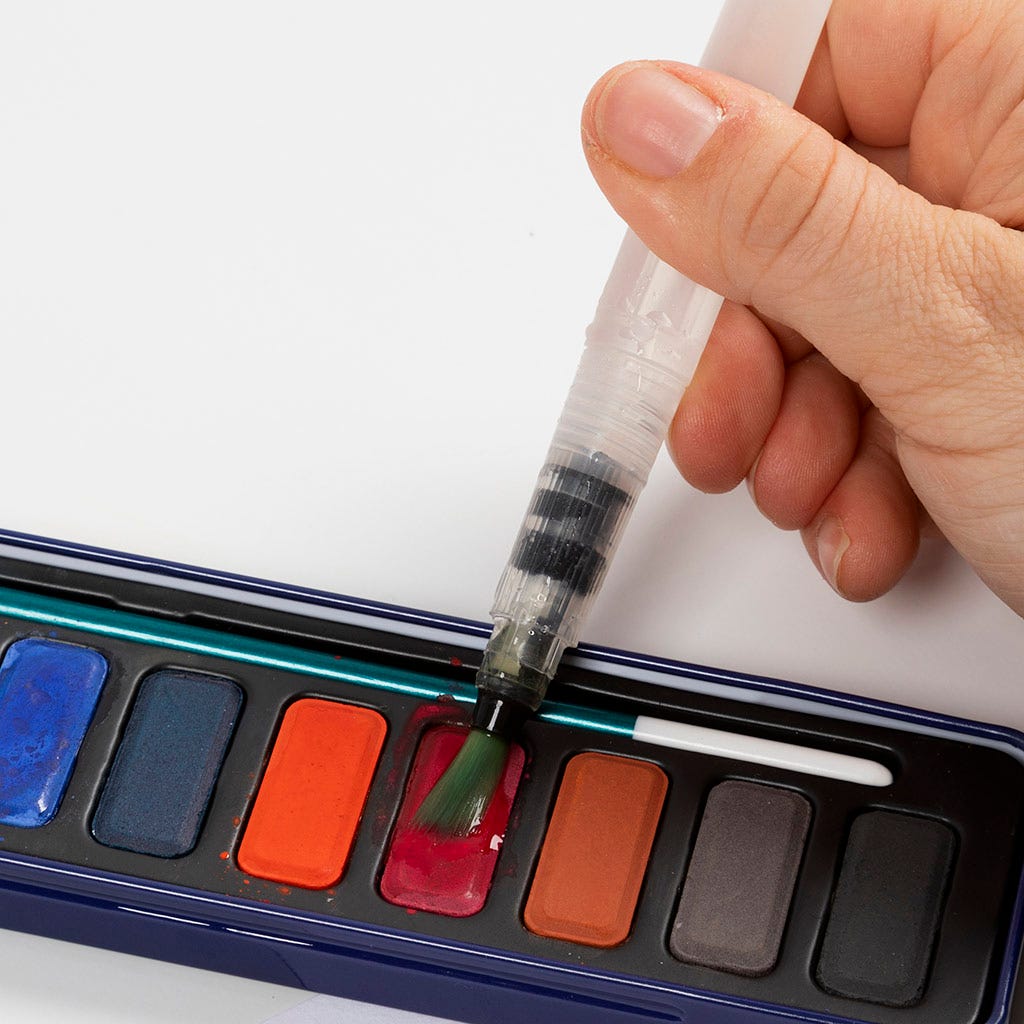 Dip the brush in one of the colours. Red is used here.
Dip the brush in one of the colours. Red is used here.84  Paint lines from the butterfly's body outwards.
Paint lines from the butterfly's body outwards.85 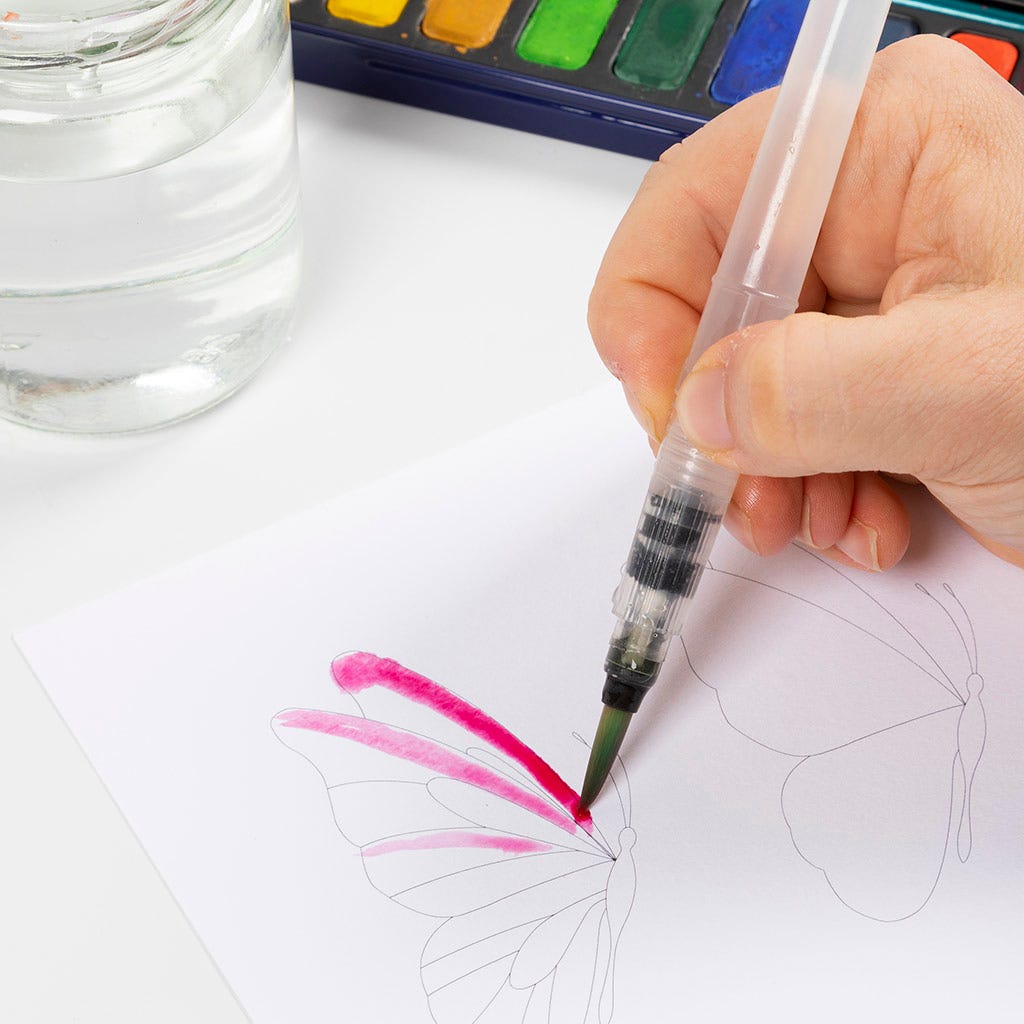 Do this for the entire butterfly, as shown in the picture.
Do this for the entire butterfly, as shown in the picture.86  Clean the brush.
Clean the brush.87 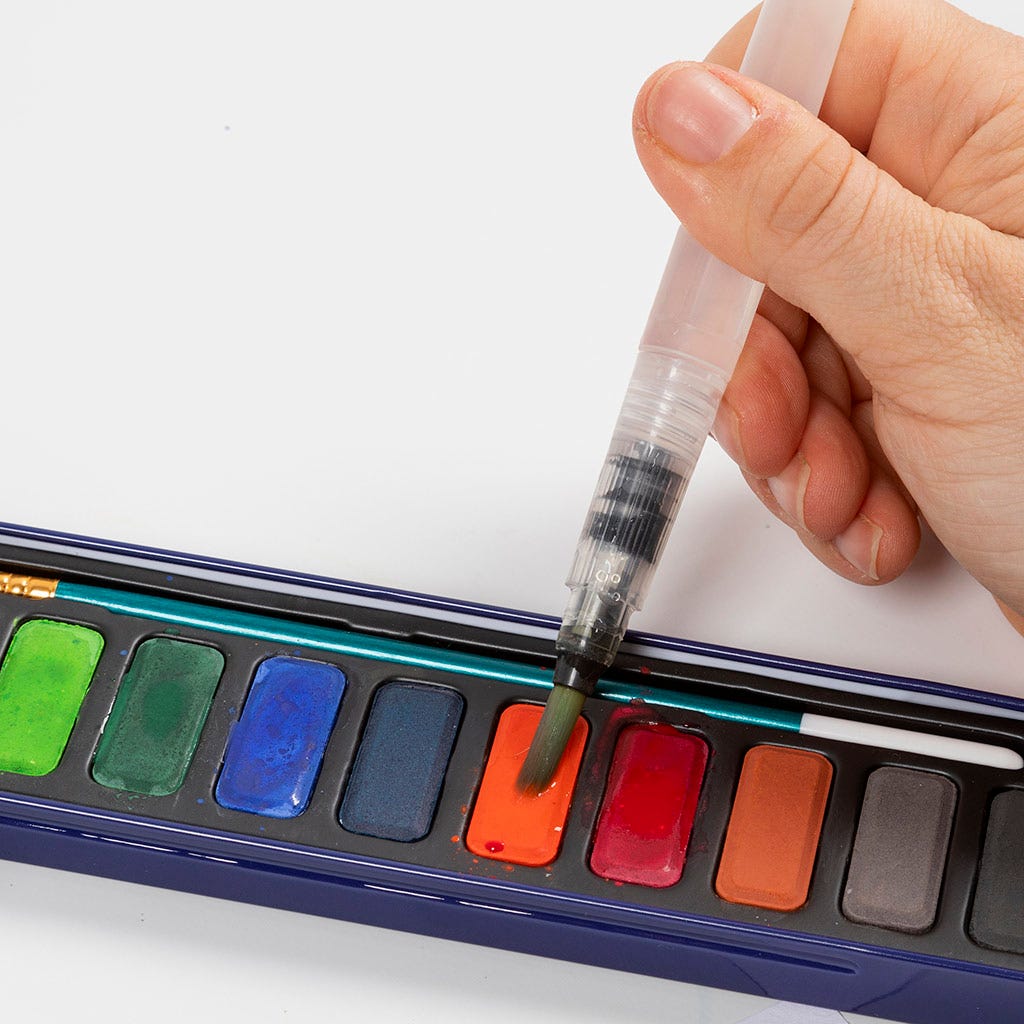 Dip the brush in one of the colours. Orange is used here.
Dip the brush in one of the colours. Orange is used here.88 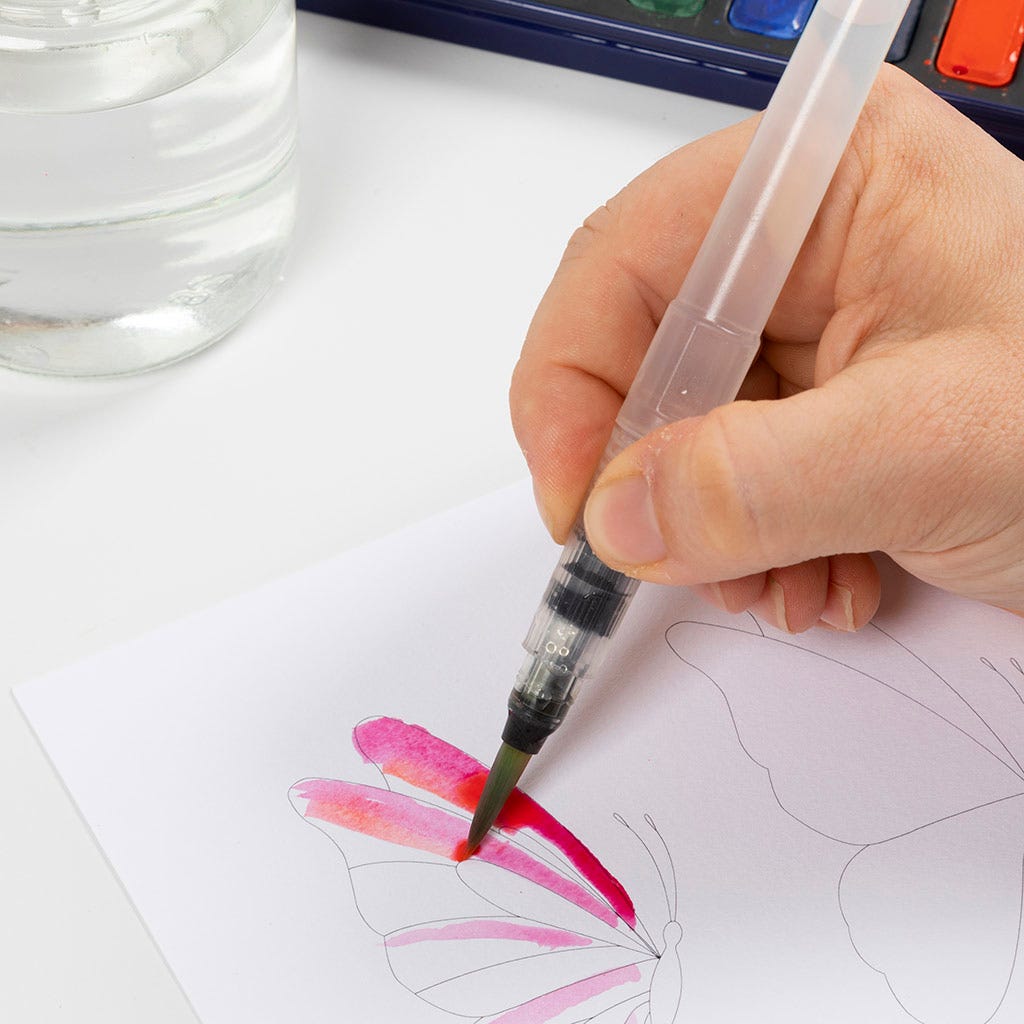 Paint along the lines you just painted.
Paint along the lines you just painted.89 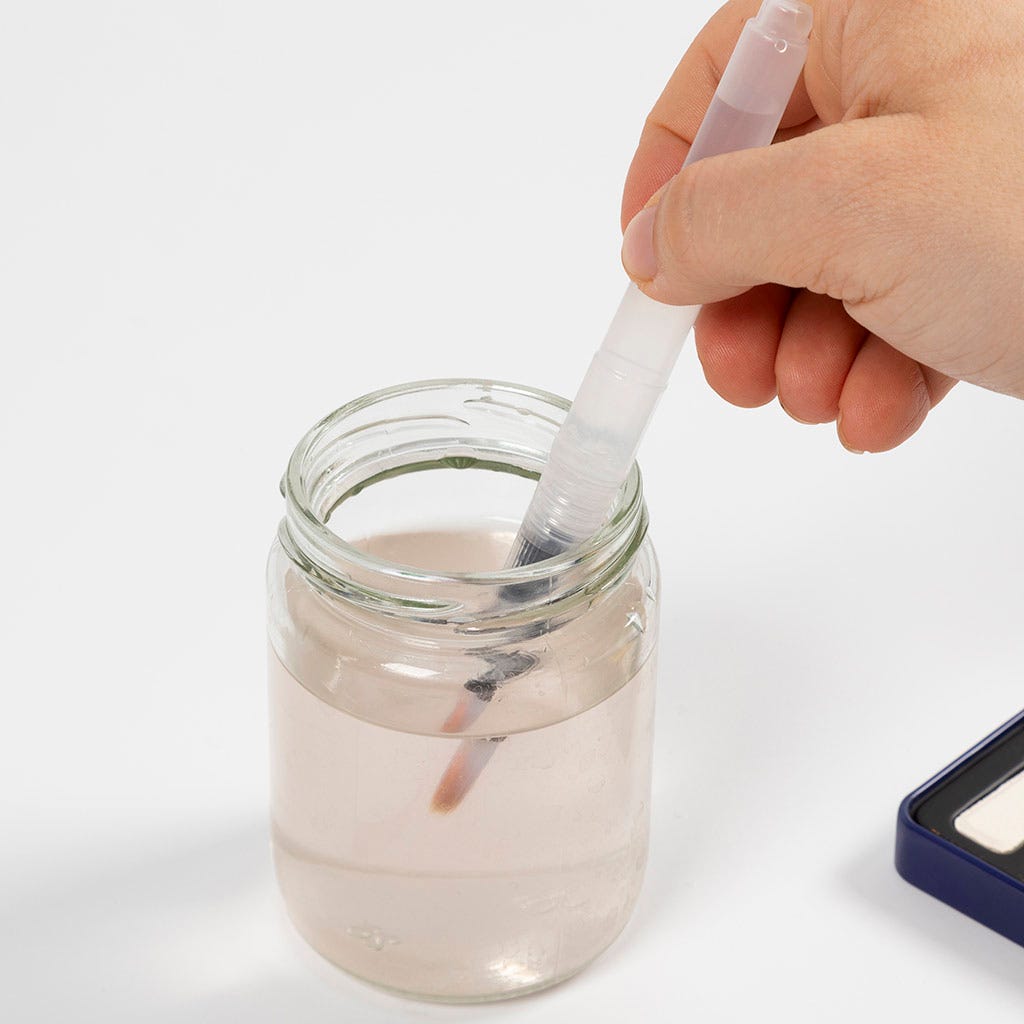 Clean the brush.
Clean the brush.90 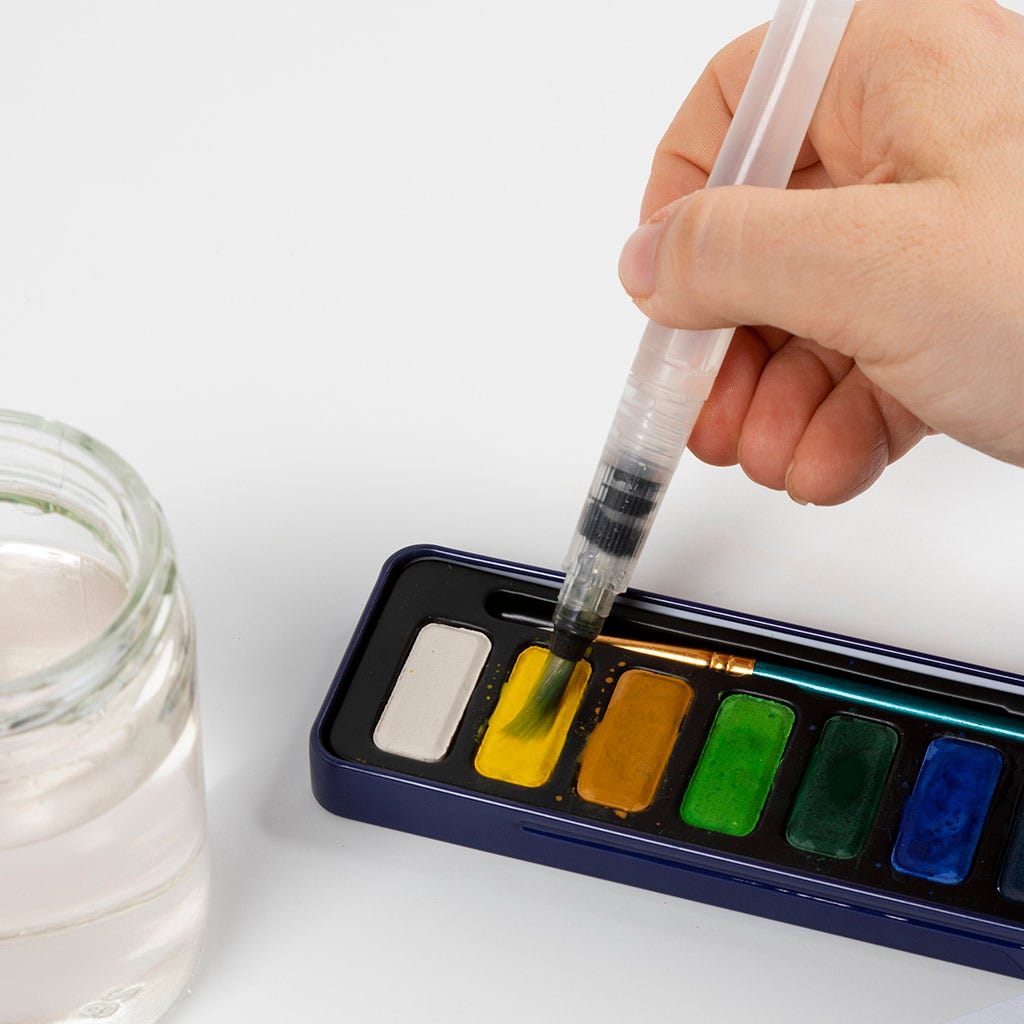 Dip the brush in one of the colours. Light yellow is used here.
Dip the brush in one of the colours. Light yellow is used here.91 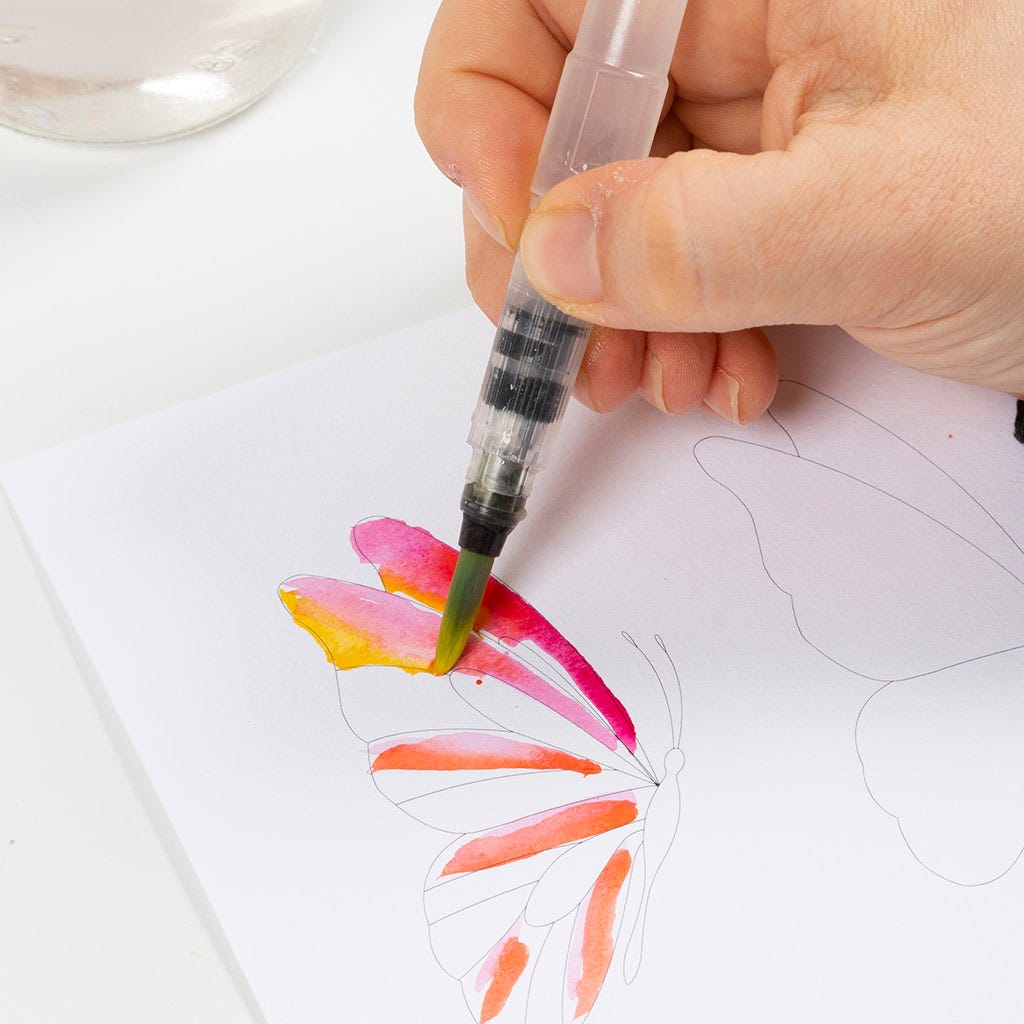 Paint along the lines you just painted.
Paint along the lines you just painted.92 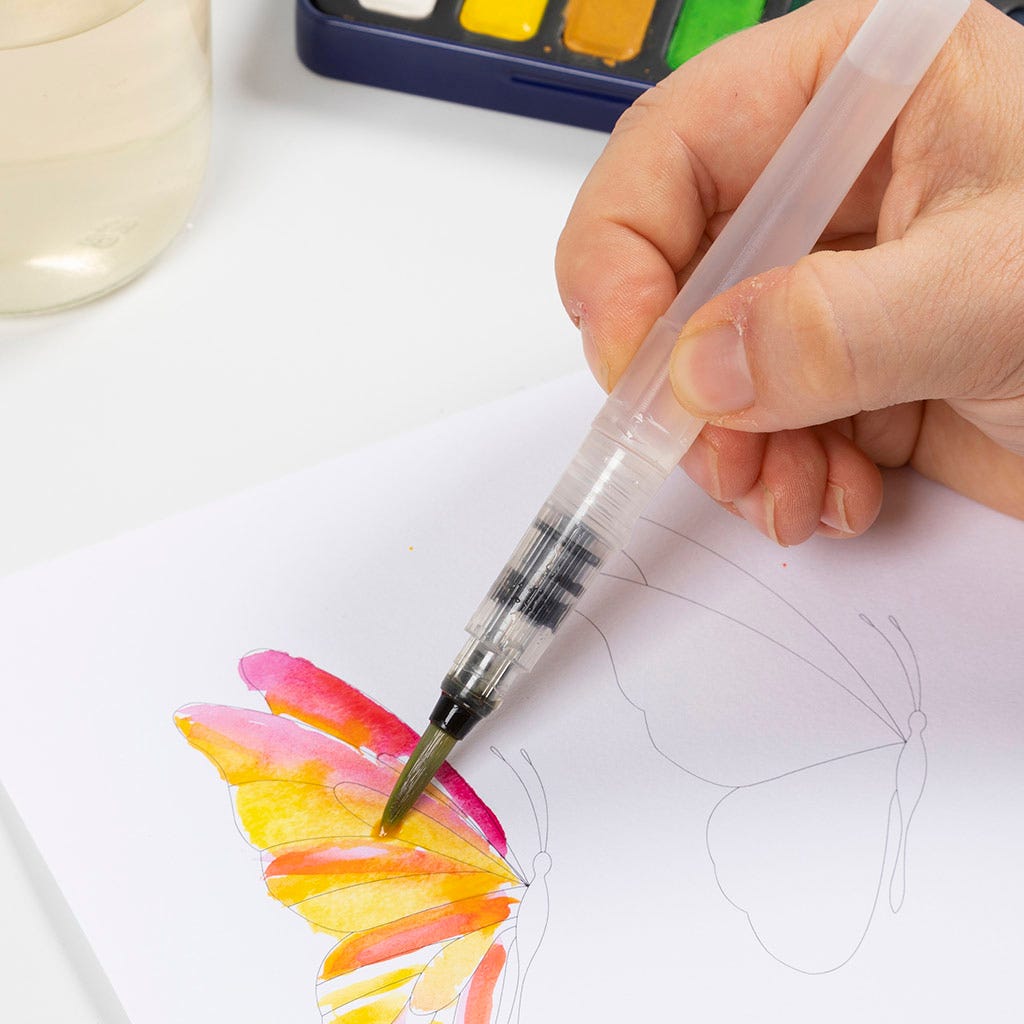 Fill in the rest of the butterfly wings with paint.
Fill in the rest of the butterfly wings with paint.93  Clean the brush.
Clean the brush.94 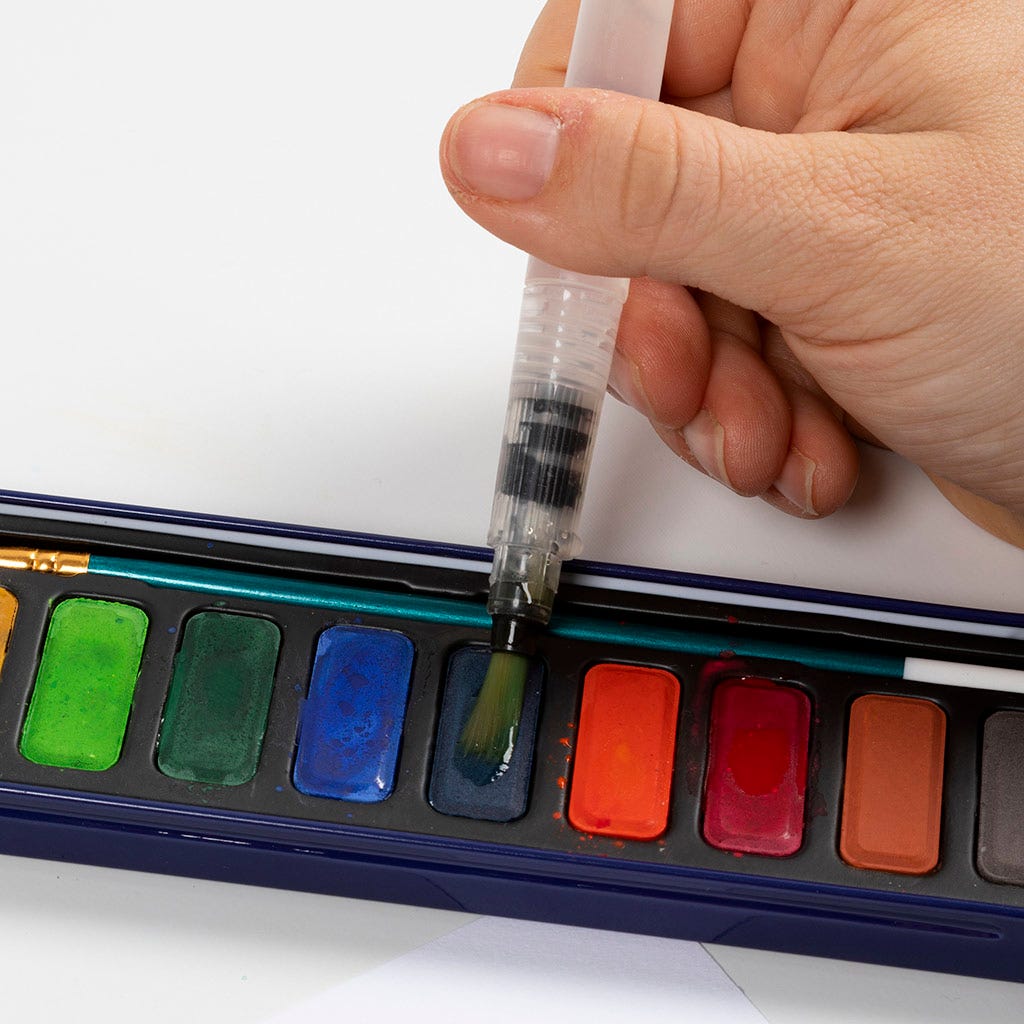 Dip the brush in another colour. Dark blue is used here.
Dip the brush in another colour. Dark blue is used here.95  Paint the butterfly’s body.
Paint the butterfly’s body.96  Clean the brush because we are now going to paint the next butterfly.
Clean the brush because we are now going to paint the next butterfly.97 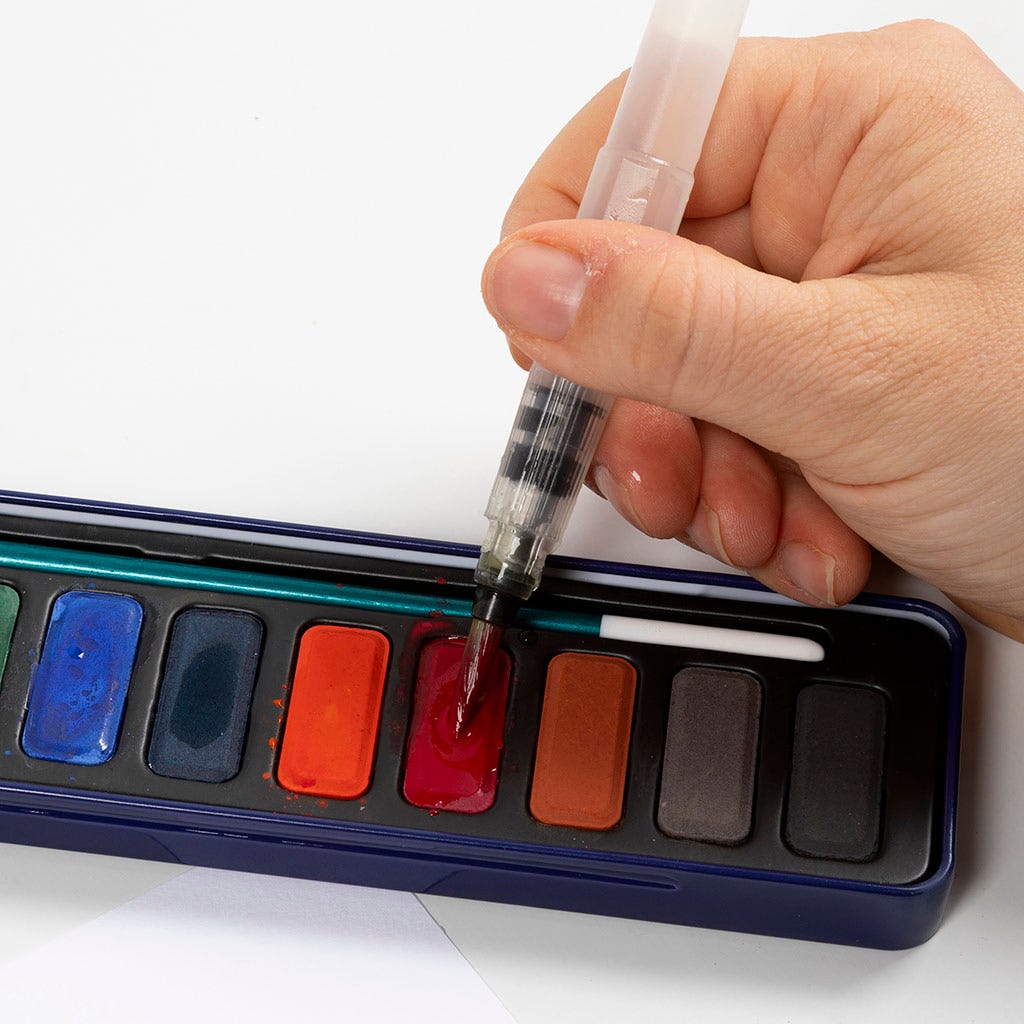 Dip the brush in one of the colours. Red is used here.
Dip the brush in one of the colours. Red is used here.98 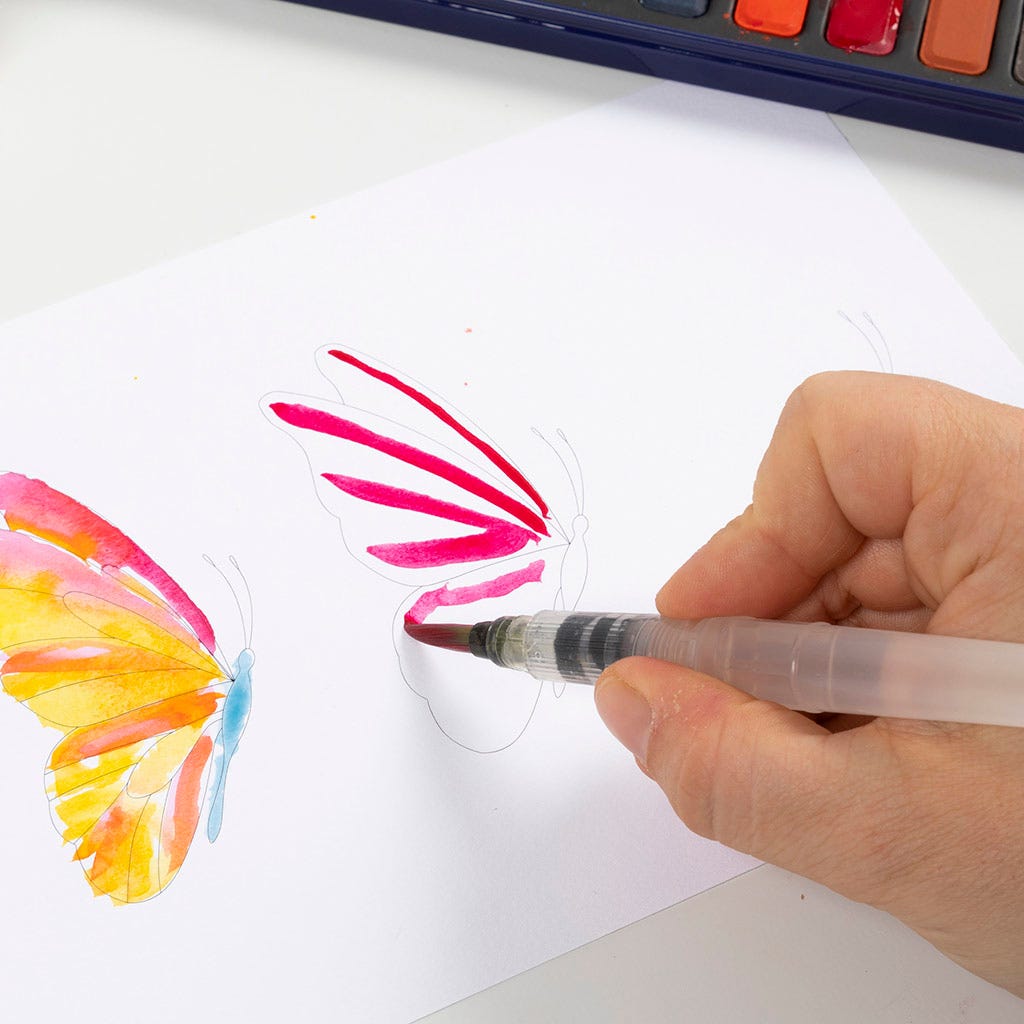 Paint lines from the butterfly's body outwards.
Paint lines from the butterfly's body outwards.99  Clean the brush.
Clean the brush.100  Dip the brush in another colour. Orange is used here.
Dip the brush in another colour. Orange is used here.101 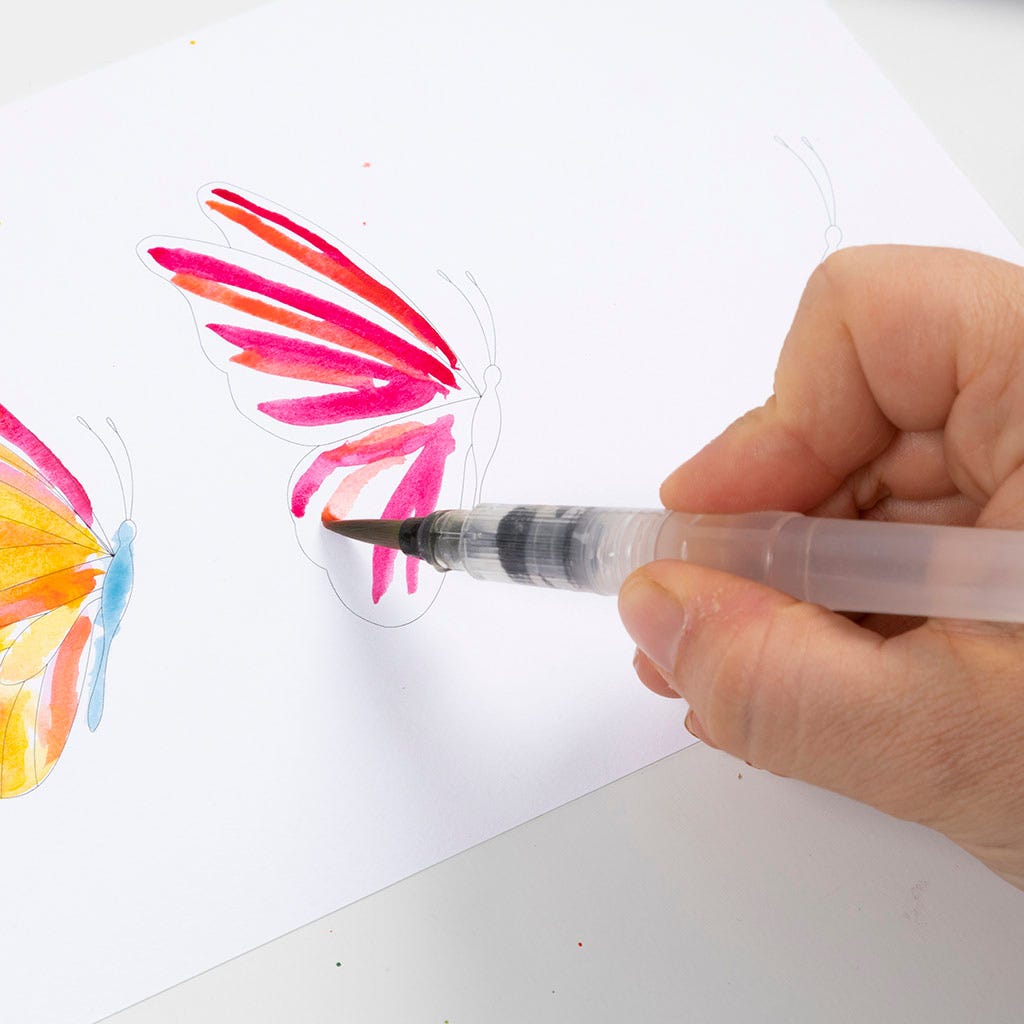 Paint lines again from the butterfly's body outwards.
Paint lines again from the butterfly's body outwards.102  Clean the brush.
Clean the brush.103  Dip the brush in another colour. Light yellow is used here.
Dip the brush in another colour. Light yellow is used here.104  Fill in the rest of the butterfly wings with paint.
Fill in the rest of the butterfly wings with paint.105  Clean the brush.
Clean the brush.106 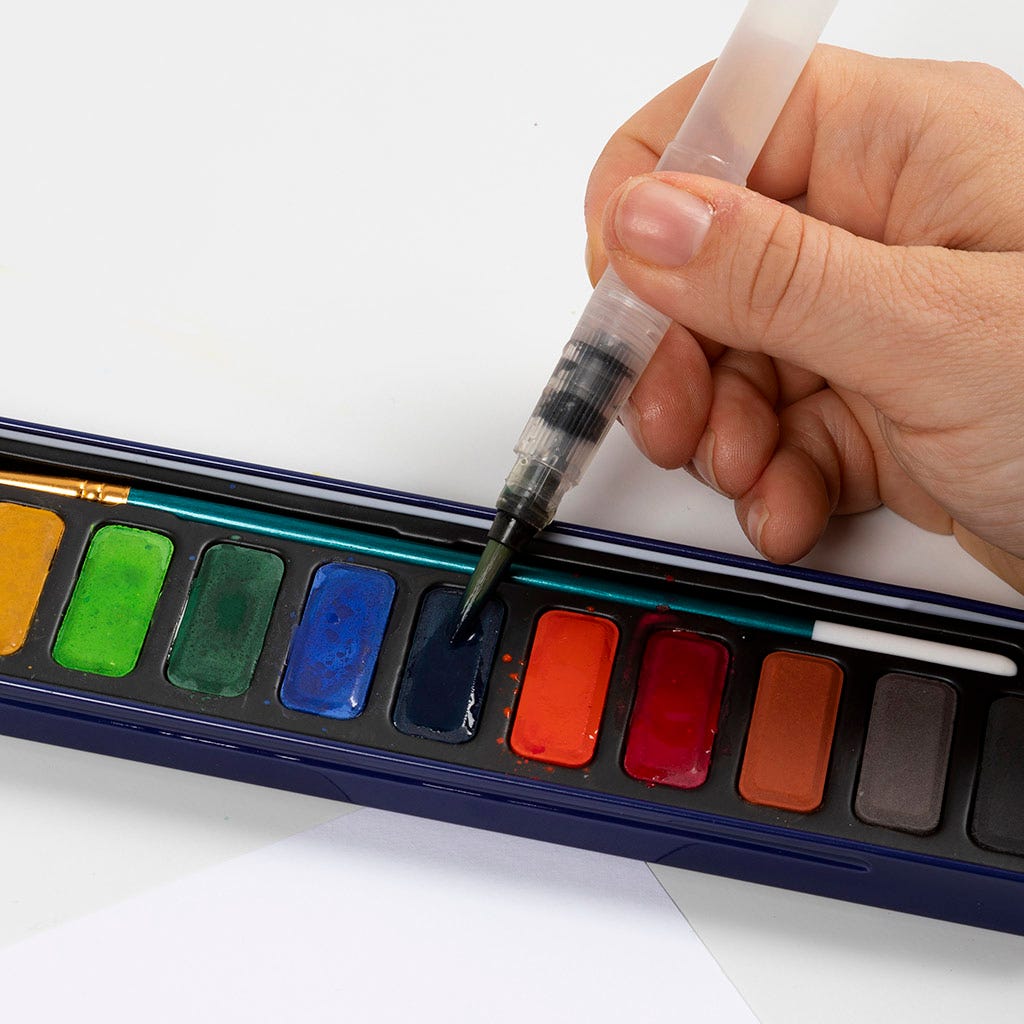 Dip the brush in another colour. Dark blue is used here.
Dip the brush in another colour. Dark blue is used here.107 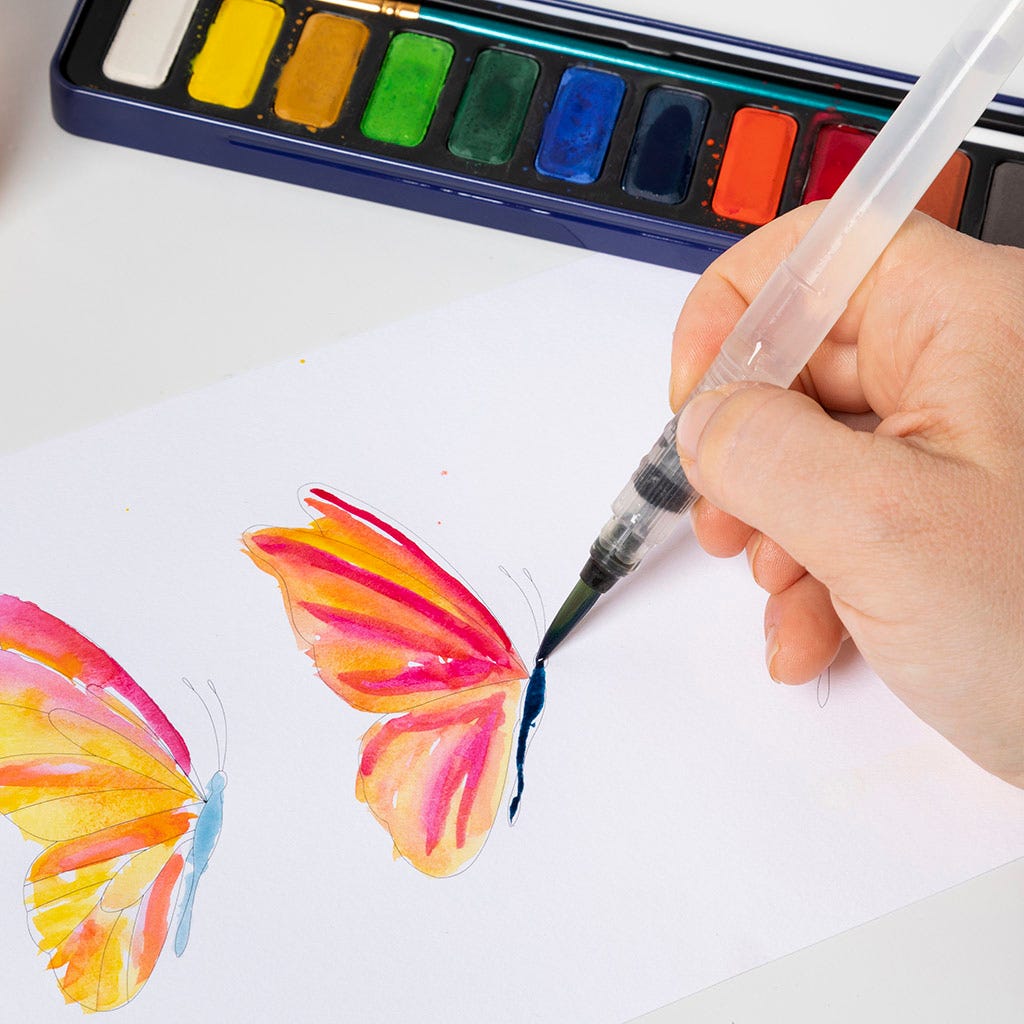 Paint the body of the butterfly. Use one of the different techniques to paint the last butterfly.
Paint the body of the butterfly. Use one of the different techniques to paint the last butterfly.108 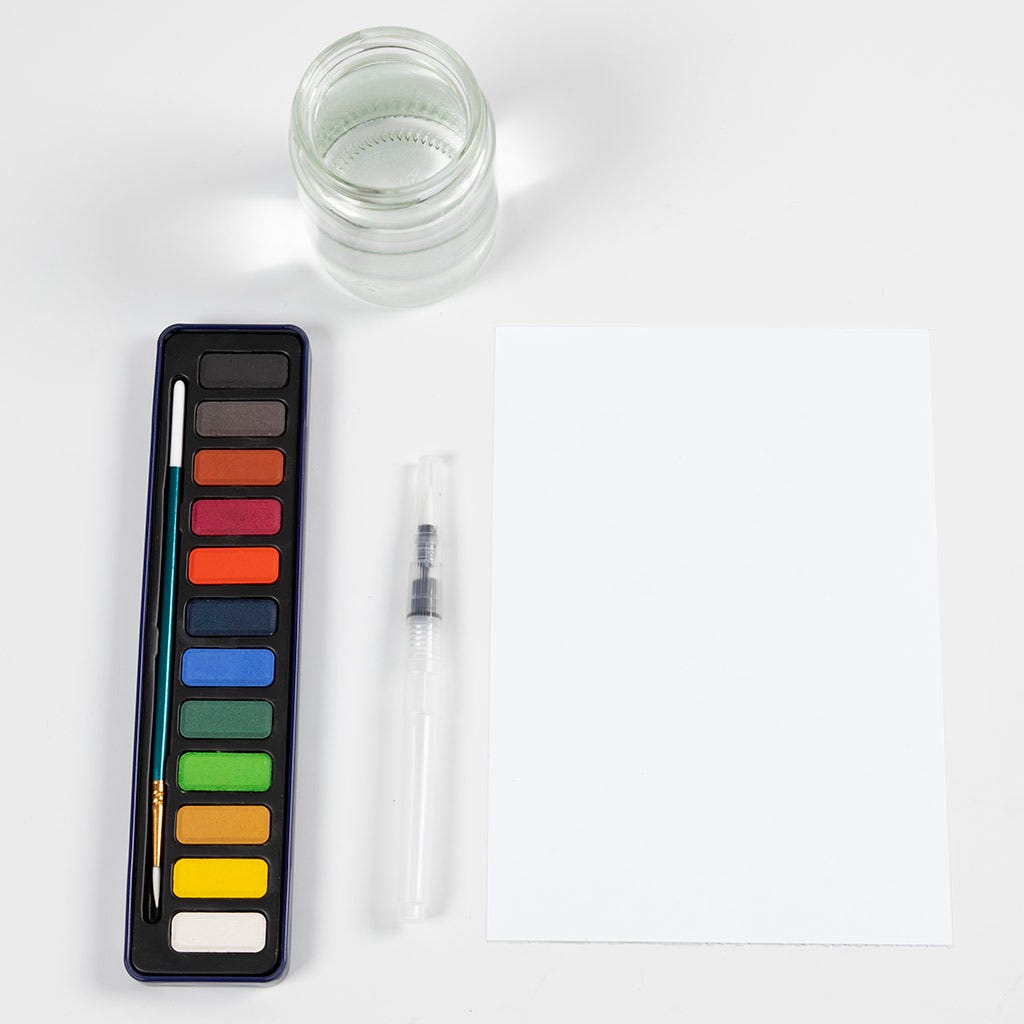 Now we’re going to paint butterflies using our imagination. Remember, there is no right or wrong way – have fun and experiment. Prepare everything you will need, as shown in the picture.
Now we’re going to paint butterflies using our imagination. Remember, there is no right or wrong way – have fun and experiment. Prepare everything you will need, as shown in the picture.109 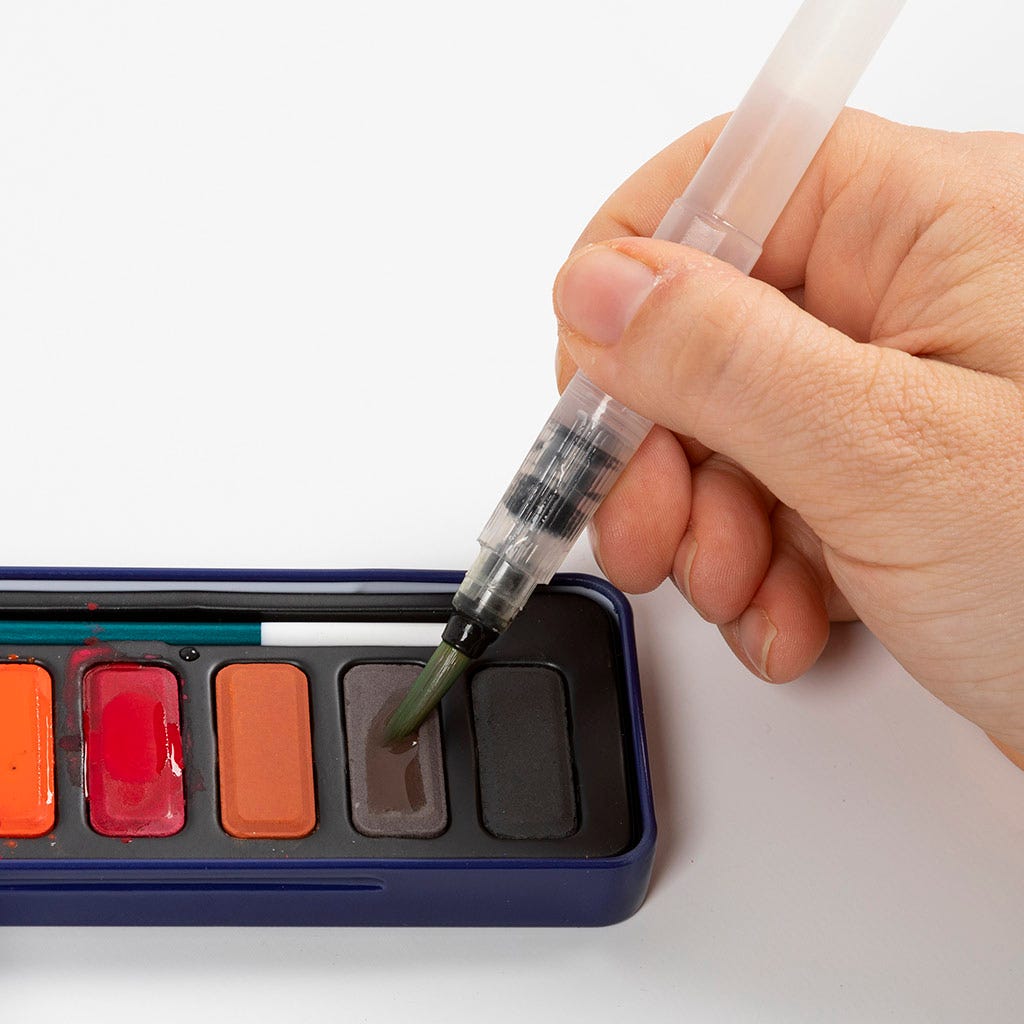 Dip the brush in the colour of your choice. Brown is used here.
Dip the brush in the colour of your choice. Brown is used here.110 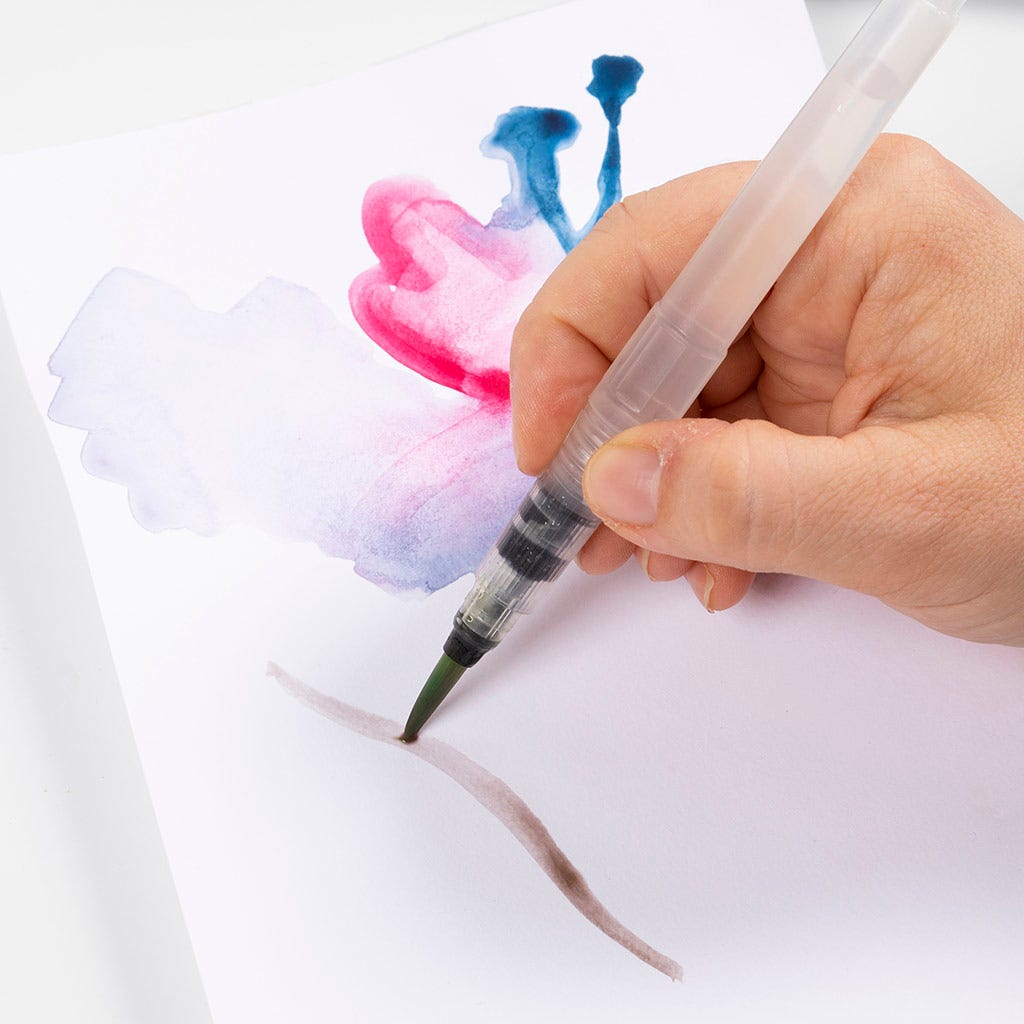 Paint a line for the butterfly's body.
Paint a line for the butterfly's body.111  Clean the brush.
Clean the brush.112 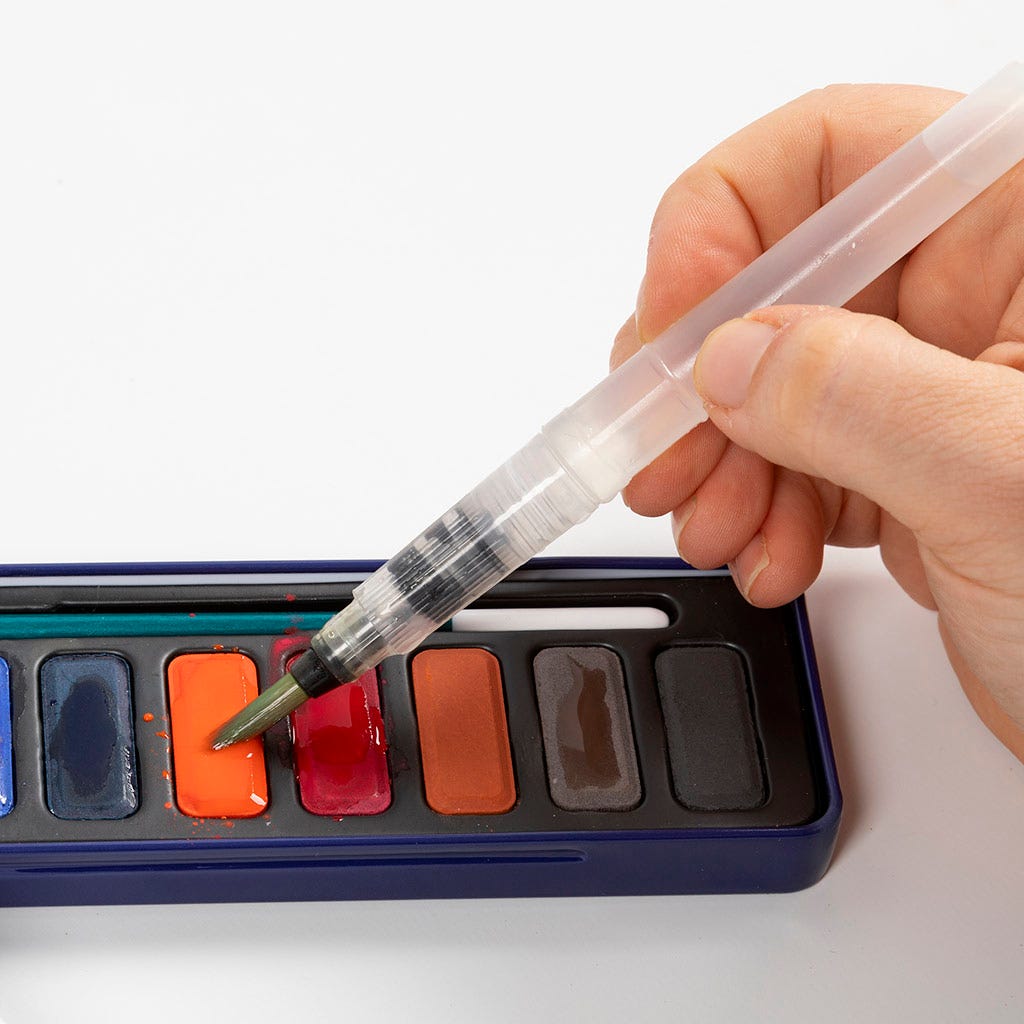 Dip the brush into another colour. Orange is used here.
Dip the brush into another colour. Orange is used here.113 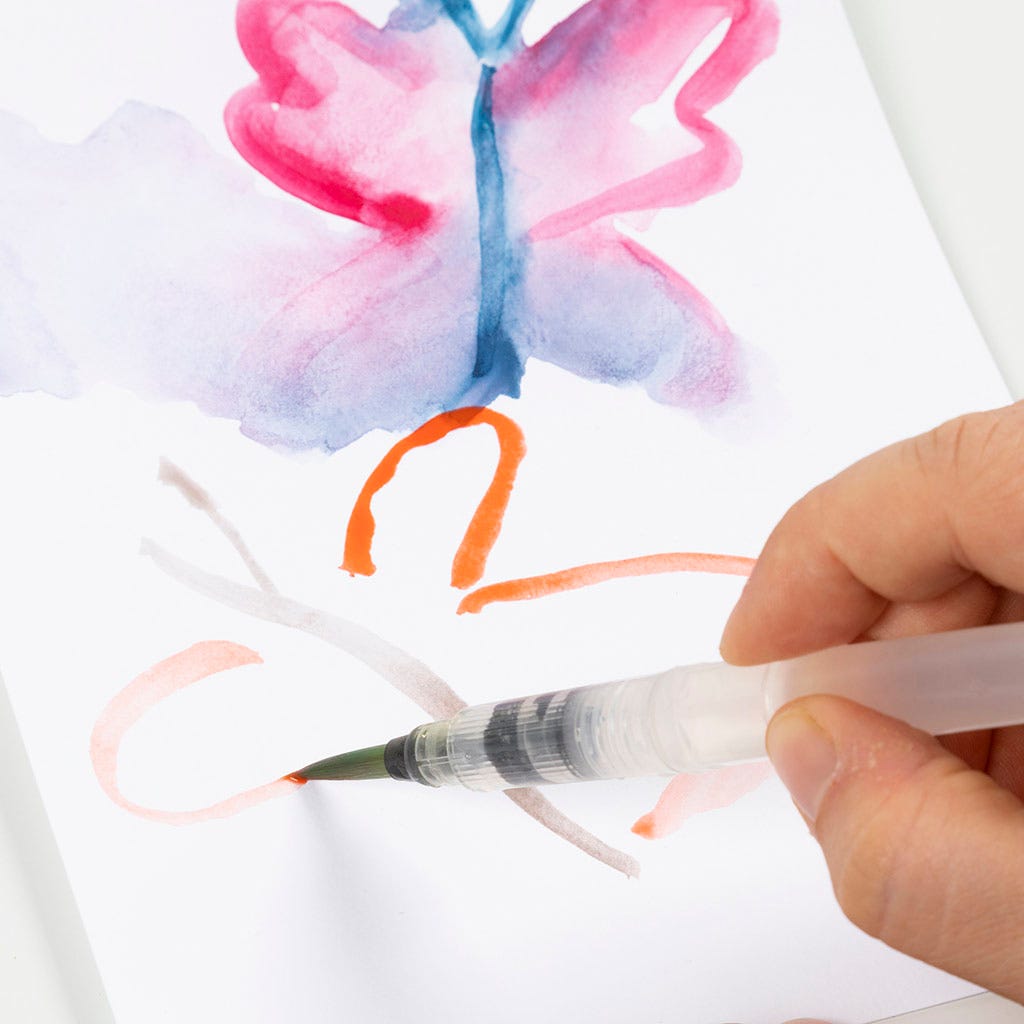 Paint wings from the butterfly's body.
Paint wings from the butterfly's body.114  Clean the brush.
Clean the brush.115 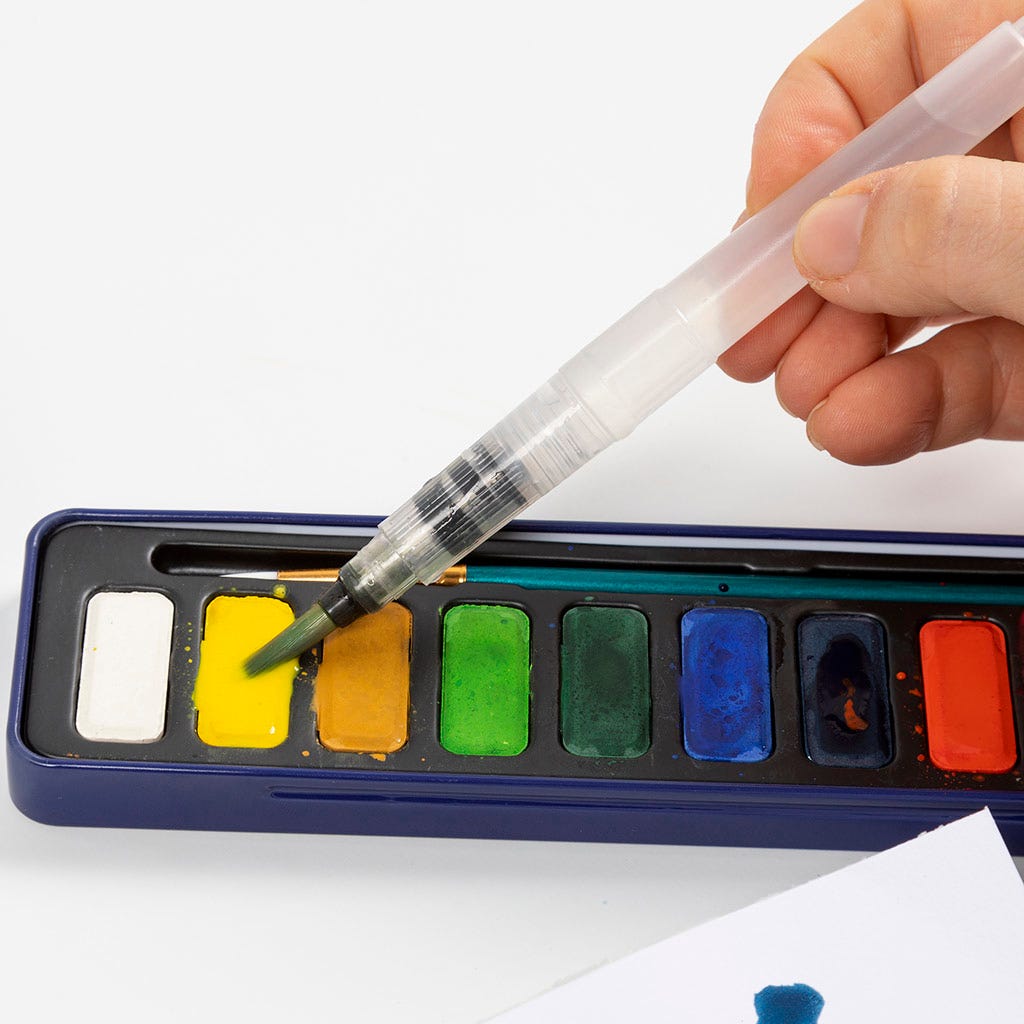 Dip the brush in another colour. Light yellow is used here.
Dip the brush in another colour. Light yellow is used here.116  Paint the inside of the wings.
Paint the inside of the wings.117  Clean the brush.
Clean the brush.118 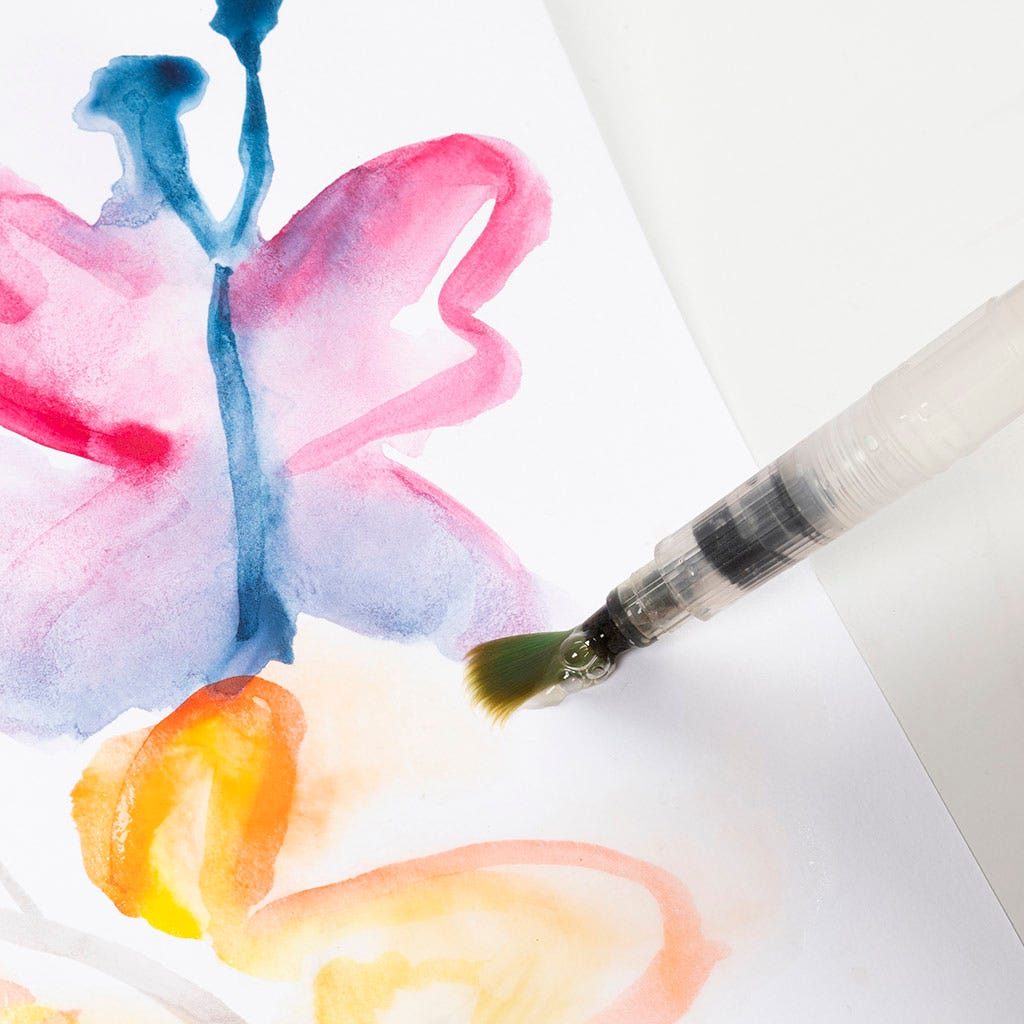 Paint with water so that the colours flow together.
Paint with water so that the colours flow together.119 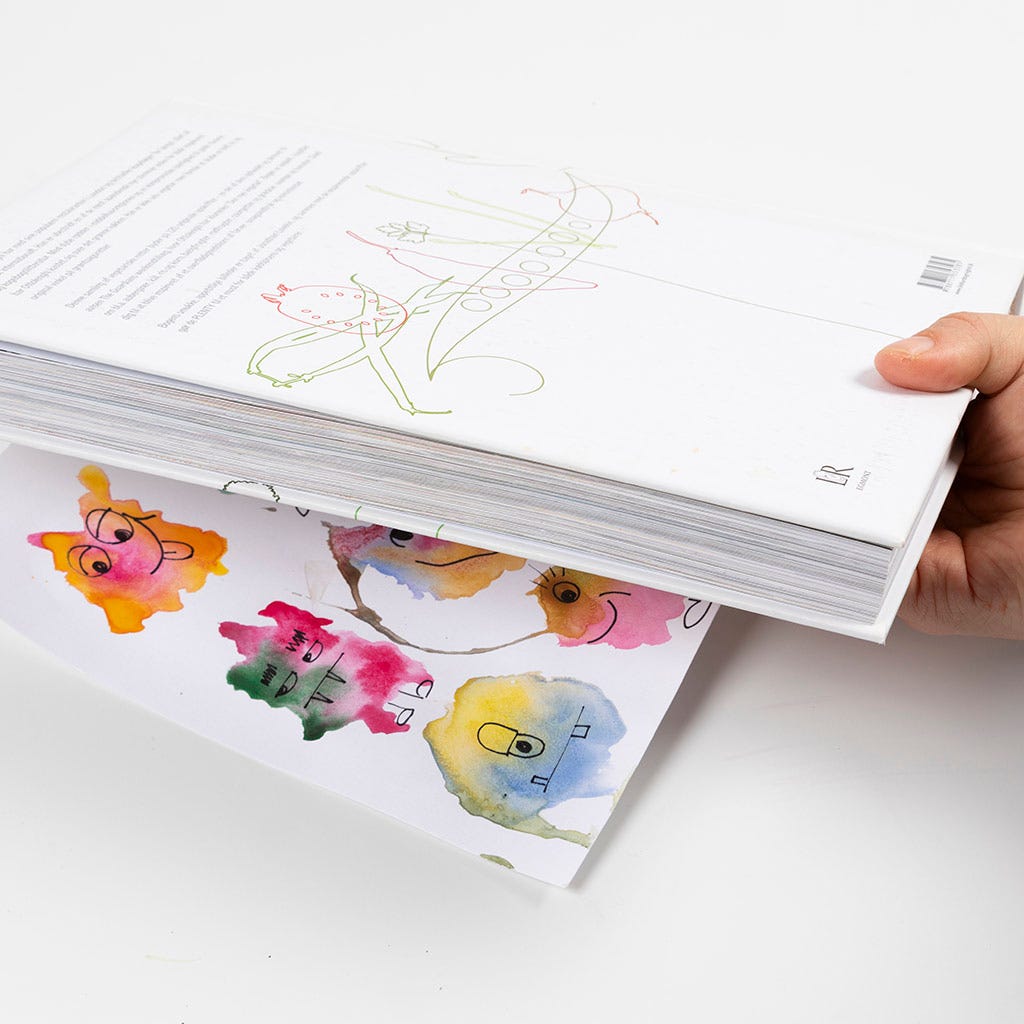 When the paintings have dried, it is a good idea to place them under a book or something else heavy for 24 hours.
When the paintings have dried, it is a good idea to place them under a book or something else heavy for 24 hours.Template  Print the template here.
Print the template here.Already signed up? Download the template
Also go exploring in
