
New
Creative idea
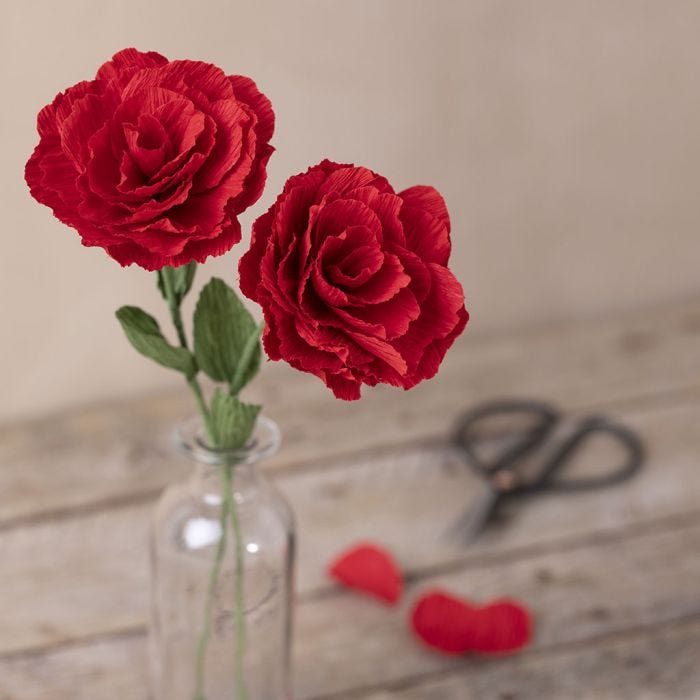
Crêpe paper rose
#v16603
Make your own rose from crêpe paper. Print out the template sheet, then cut out the parts from the crêpe paper. Shape each leaf and build the rose one petal at a time. Use either a glue gun or Multi Glue to stick the pieces together. With Multi Glue the drying time is about ½ - 1 hour per step.
#v16603
How to do it
1 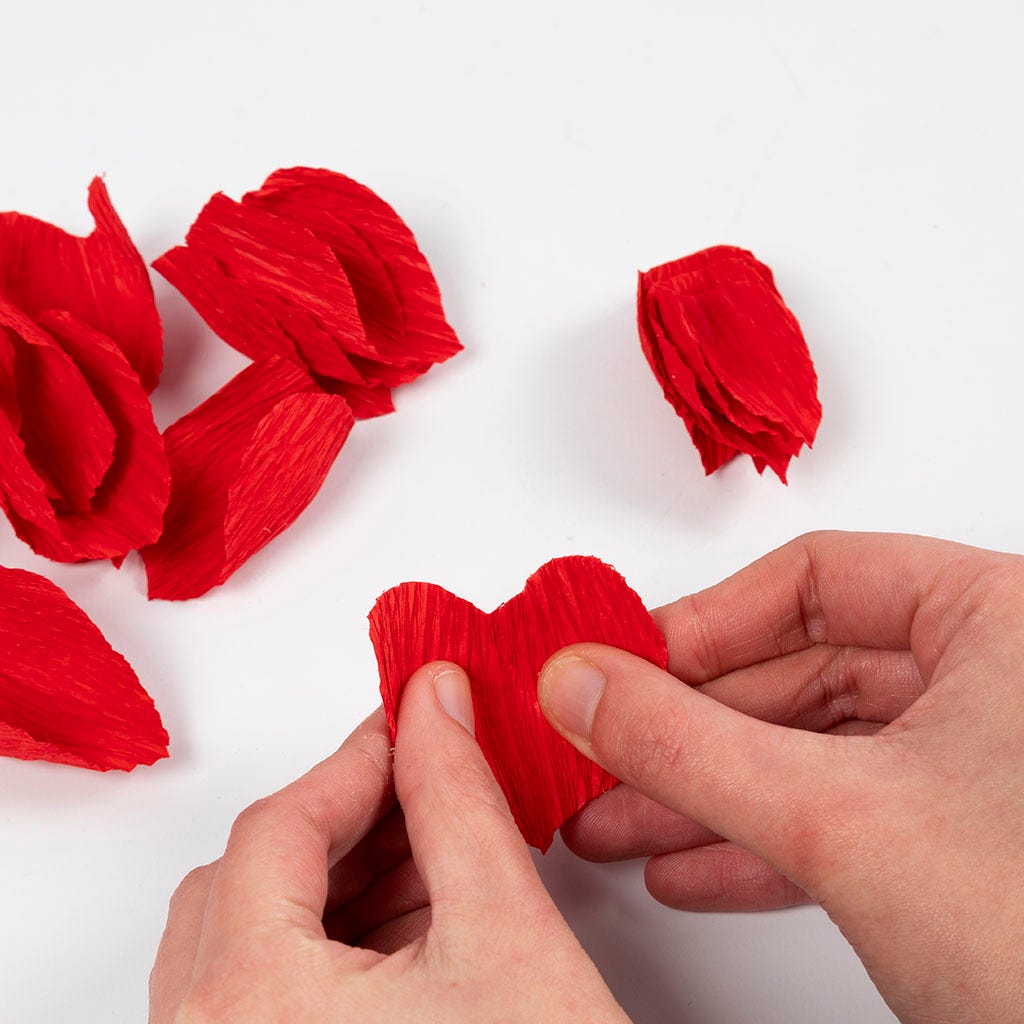 Print out the template sheet, which you can find as a separate PDF on this page – and cut out all the rose parts. The rose features two different petals – 12 large heart-shaped petals and eight teardrop-shaped petals. Now cut two green leaves and one green, serrated piece – these will be used later as subtending leaves. Also cut a long green piece, which is1 cm tall and 30 cm long – this piece will later be used to cover the stem of the rose. Remember to cut according to the direction of the template's stretch. Shape each petal by stretching the paper in the middle between two thumbs to form a curved shape.
Print out the template sheet, which you can find as a separate PDF on this page – and cut out all the rose parts. The rose features two different petals – 12 large heart-shaped petals and eight teardrop-shaped petals. Now cut two green leaves and one green, serrated piece – these will be used later as subtending leaves. Also cut a long green piece, which is1 cm tall and 30 cm long – this piece will later be used to cover the stem of the rose. Remember to cut according to the direction of the template's stretch. Shape each petal by stretching the paper in the middle between two thumbs to form a curved shape.2  Glue the teardrop-shaped leaves around the end of a flower stem and glue the first leaf all the way around the stem so that it overlaps itself (see picture).
Glue the teardrop-shaped leaves around the end of a flower stem and glue the first leaf all the way around the stem so that it overlaps itself (see picture).3 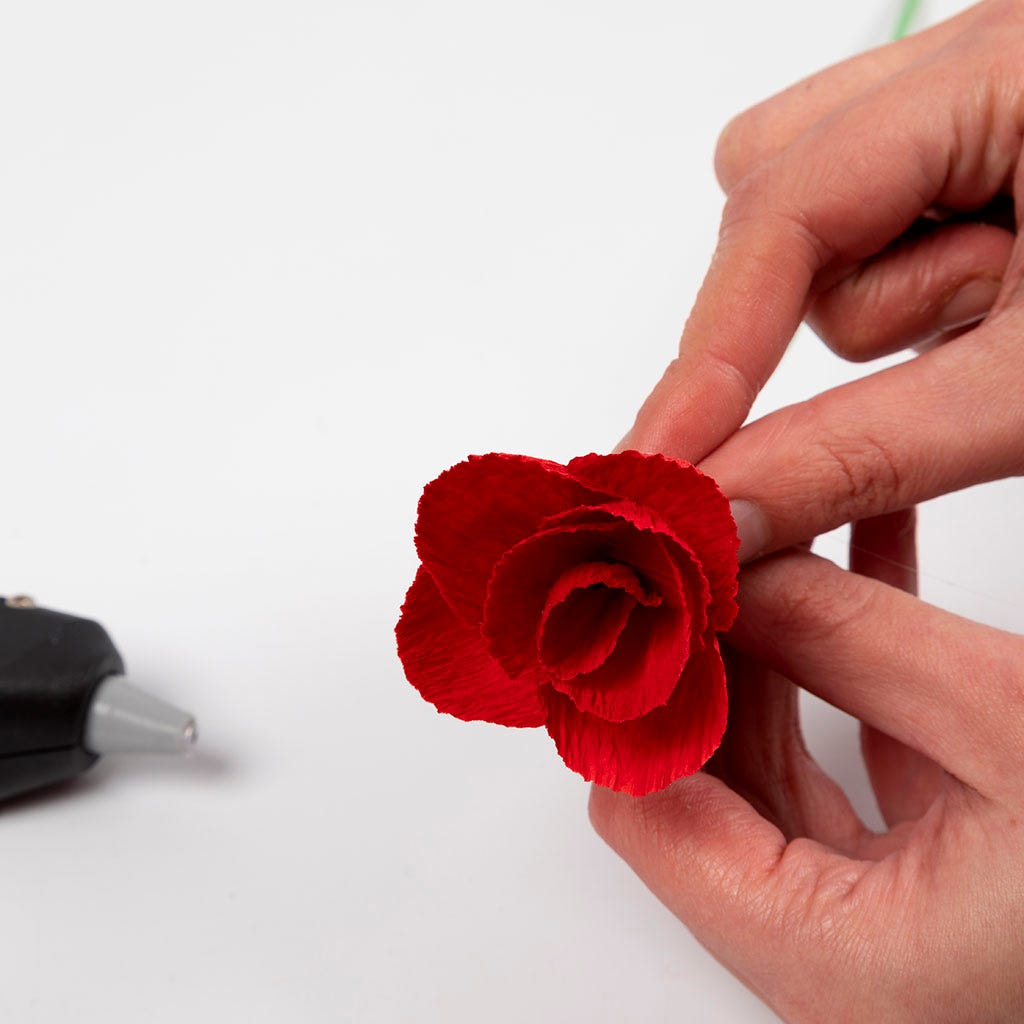 Continue glueing the teardrop-shaped leaves in place and stagger them on each side so that the centre of the flower looks like this (see picture).
Continue glueing the teardrop-shaped leaves in place and stagger them on each side so that the centre of the flower looks like this (see picture).4 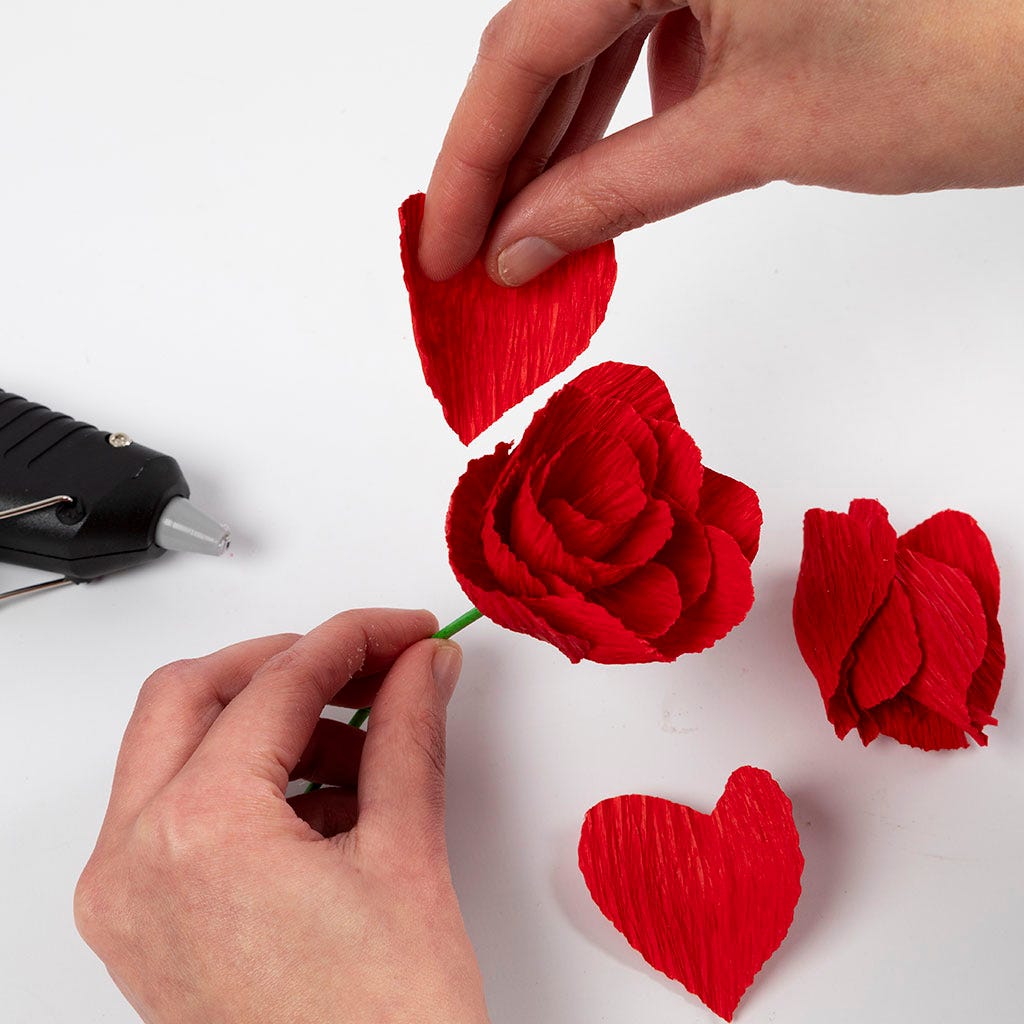 Now continue with the heart-shaped leaves, staggering them all the time between the two on the previous layer.
Now continue with the heart-shaped leaves, staggering them all the time between the two on the previous layer.5 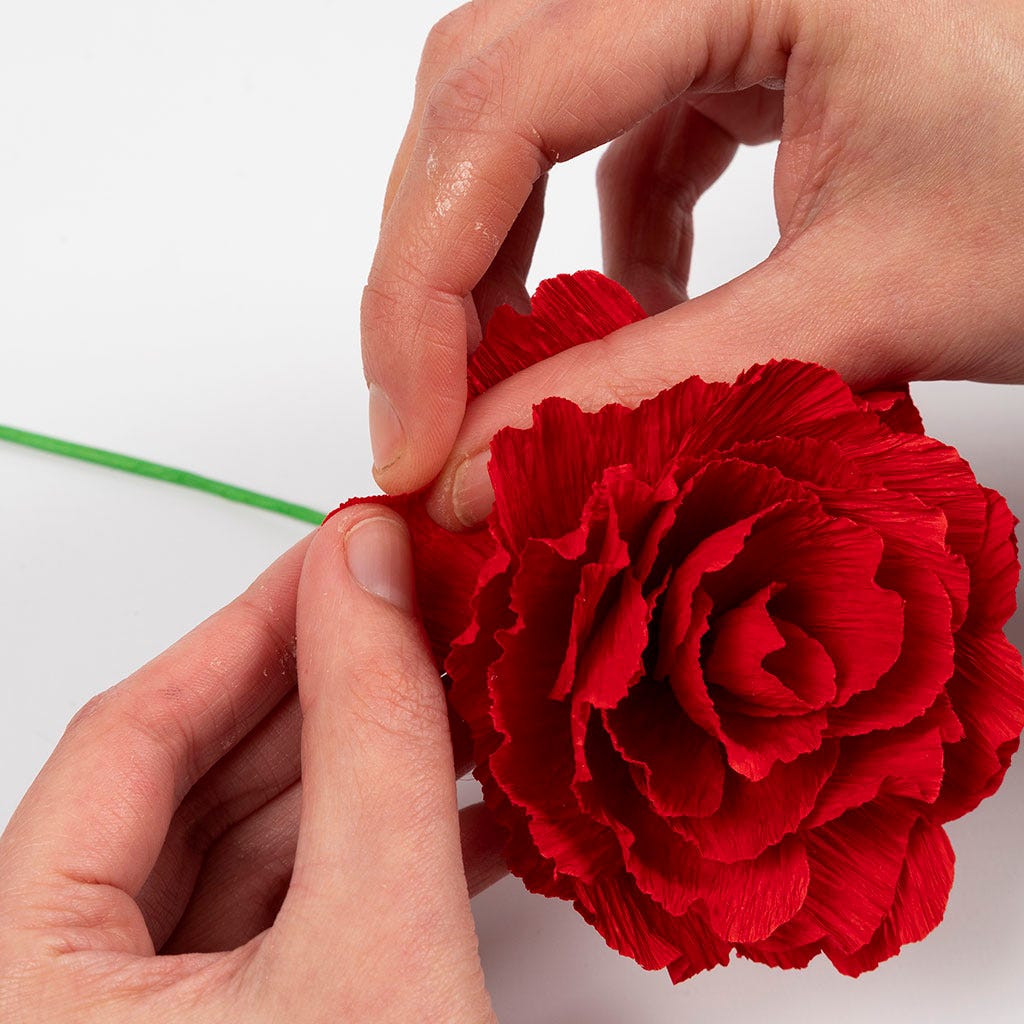 Shape a wavy edge on each petal to give the petals a more lifelike expression. Do this by pulling lightly on the edge of the paper in opposite directions.
Shape a wavy edge on each petal to give the petals a more lifelike expression. Do this by pulling lightly on the edge of the paper in opposite directions.6 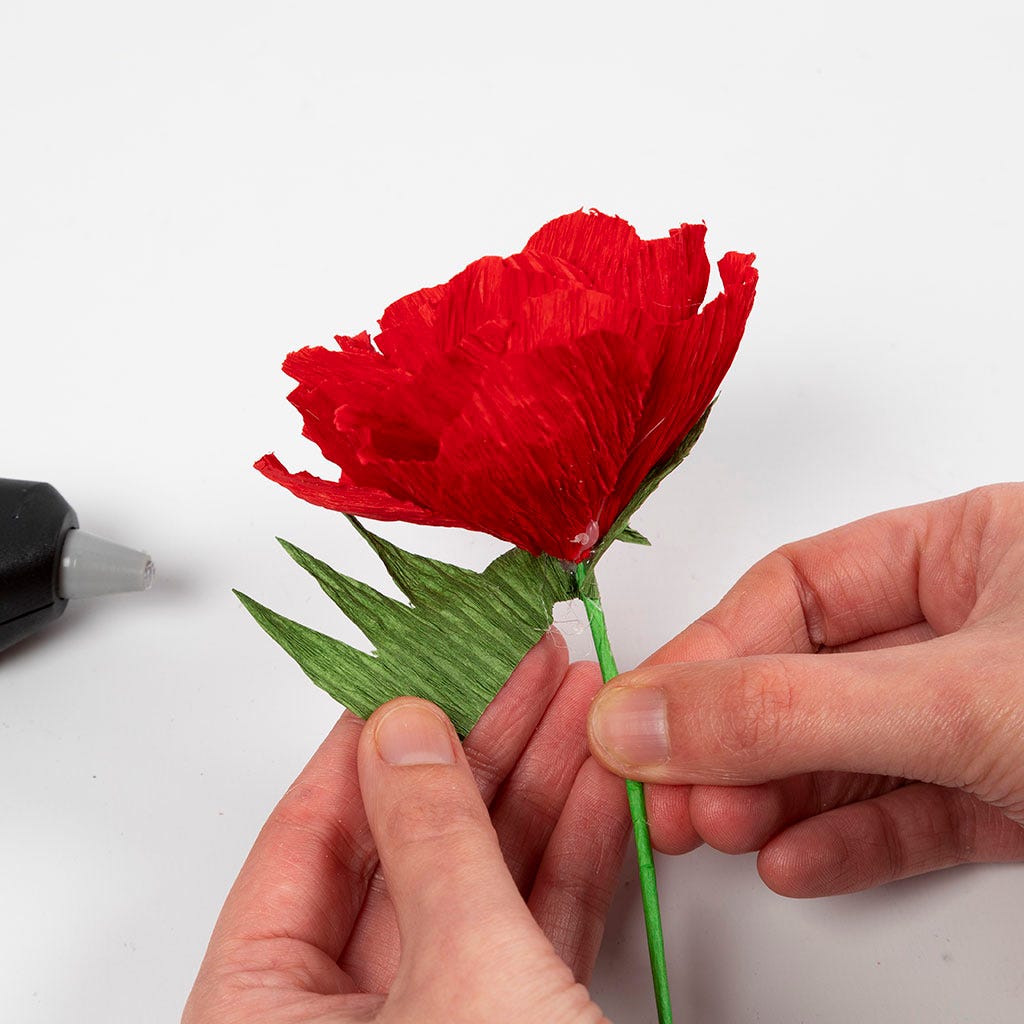 Stretch out the piece for the subtending leaves and glue it around the stem under the head of the flower, covering the area where the leaves are glued.
Stretch out the piece for the subtending leaves and glue it around the stem under the head of the flower, covering the area where the leaves are glued.7 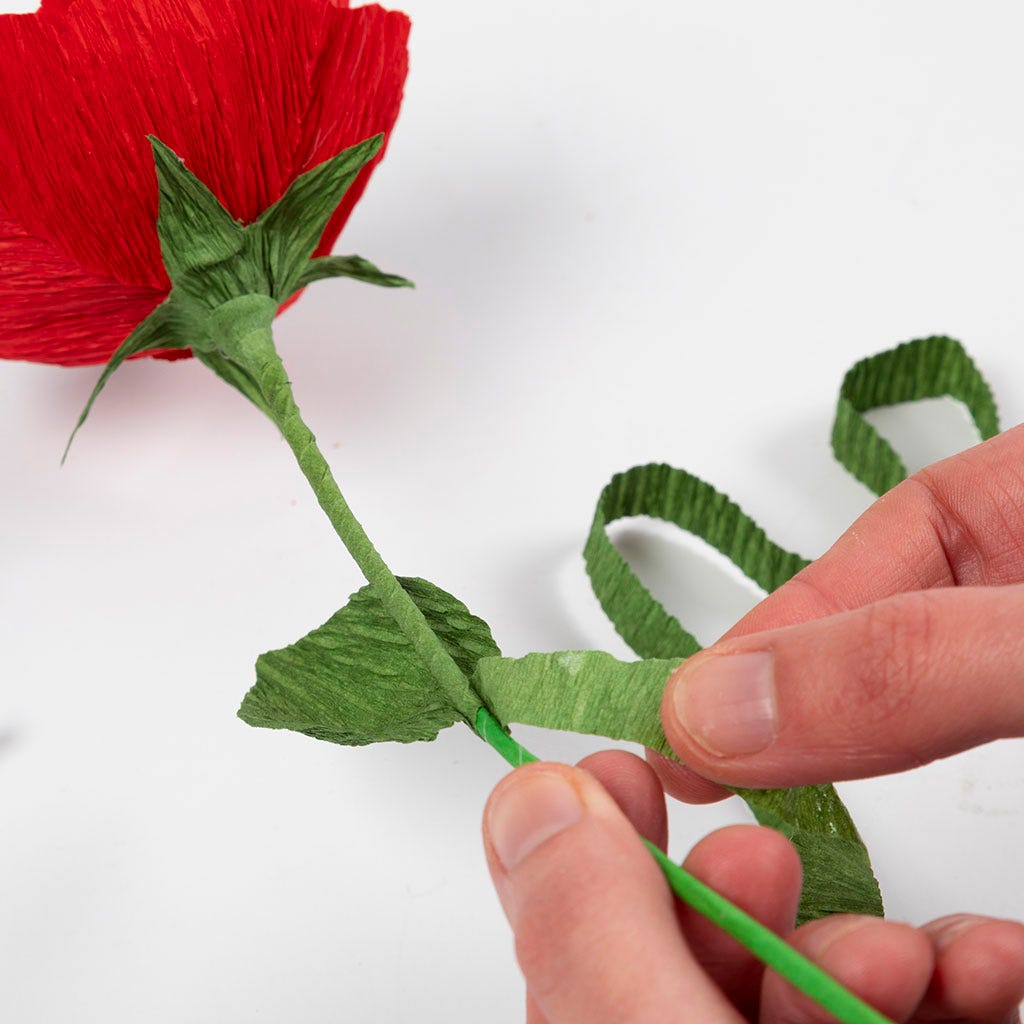 Now the stem needs to be covered. Fully stretch out the piece to cover the stem and apply a dab of glue to the end of it. Glue it on top of the subtending leaves and twist it diagonally down over the stem while glueing. Alternatively, place the leaves in between the twists – first glue a leaf onto the stem, then twist the covering piece over the end where the leaf is glued. Continue until the stem is covered and the rose is complete.
Now the stem needs to be covered. Fully stretch out the piece to cover the stem and apply a dab of glue to the end of it. Glue it on top of the subtending leaves and twist it diagonally down over the stem while glueing. Alternatively, place the leaves in between the twists – first glue a leaf onto the stem, then twist the covering piece over the end where the leaf is glued. Continue until the stem is covered and the rose is complete.Template  Print the template here.
Print the template here.
Already signed up? Download the template
Also go exploring in
