
Candle Making
#v10729
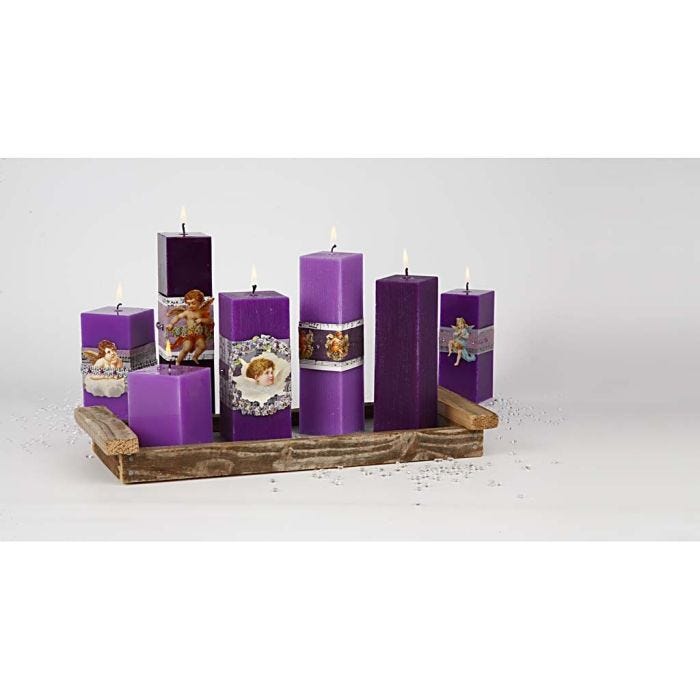
These candles are made in different sized candle moulds with varying amounts of candle dye. They are decorated with vintage die-cuts and paper.
How to do it Download the templates/recipes
.JPG)
1 Melt the paraffin wax at 80°C. You may add 0.5% - 1% Vybar wax additive. This makes the candles more heat resistant and easier to release from the mould.
.JPG)
2 Add candle dye to the paraffin wax when melted.
.JPG)
3 Push the wick through the hole at the bottom of the candle mould. Tie a double knot in the wick protruding through the hole for holding the wick steadily in place.
.JPG)
4 Place a wick holder across the top opening of the mould. Tie the wick around the middle of the wick holder and tighten. Make sure that the wick is placed in the centre of the candle mould.
.JPG)
5 Attach a piece of chewing gum or Power Tack Reusable Adhesive on top of the knot at the bottom temporarily to prevent the paraffin wax running out.
.JPG)
6 Pour the melted paraffin wax into the mould. Wait until the paraffin has almost solidified. Poor more paraffin into the hole at the bottom where the paraffin has shrunk.
.JPG)
7 Cut off the knot at the bottom.
.JPG)
8 Remove the candle from the mould. If the candle is stuck inside the mould, put it in the freezer for a short while.
.JPG)
9 For a matt finish, rub the candle with coarse sand paper. Only sand in one direction at any time.
.JPG)
10 Cut a rectangular piece of corrugated board measuring 3.5–4 cm x 25–30 cm (depending on the circumference of the candle).
.JPG)
11 Decorate with self-adhesive rhinestones along both edges.
.JPG)
12 Cut a rectangular piece of marbled green paper measuring 2 x 25–30 cm.
.JPG)
13 Attach double-sided adhesive tape onto the back of the green marbled piece of paper.
.JPG)
14 Attach the green piece of paper onto the middle of the decorated piece of corrugated board.
.JPG)
15 Cut a head pin in half. Attach a self-adhesive rhinestone onto the blunt end of the head pin. Attach a pendant in green colours to the candle with the head pin.
.JPG)
16 Finally, wrap the decorated piece of corrugated board around the candle and gather the ends on the back using double-sided adhesive tape. Finish by pushing the head pin with the pendant into the front of the candle.

Tips! The possibilities for lovely, simple and creative candle decorations are endless. They are limited only by your imagination. Use any material to wrap, glue and tie onto the candle. Use compatible colours like in this example so that the decorations match the colour of the candle and each other. This results in lots of amusing and different candles, but still with an elegant and calming look. Place the candles together on a dish in a group or as creative decorations on the table.

NB! When decorating candles with flammable materials, it is important to supervise the burning candle! When the candle burns down to the decoration, either move the decoration further down on the candle or remove it.
Already signed up? Download the template
Also go exploring in
